|
-
Let's start the lesson.
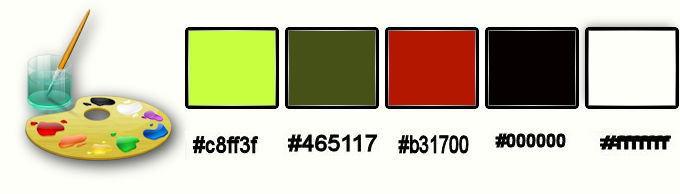
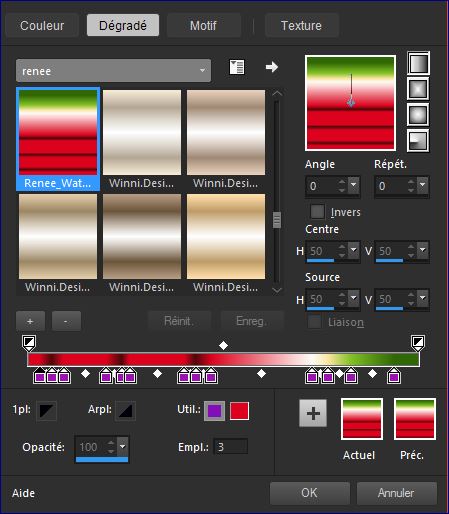
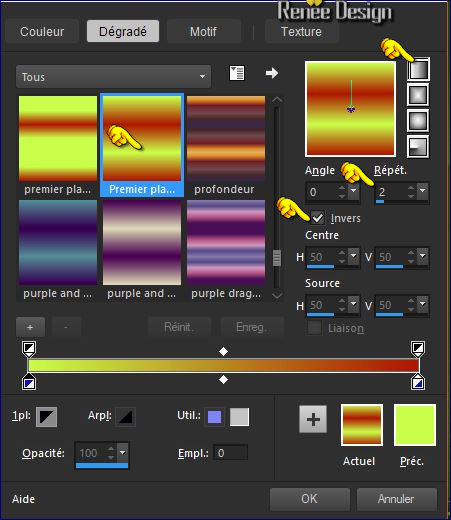
- Color-palette:Set your foreground color to a linear gradient and select my gradient ‘’Renee_watermelon’’
Set your background color to color #465117
1. Open the background image ’’Fond_pensee_verte’’/ -Window - Duplicate (or shift+D) - Close the original and proceed on the copy= Raster 1
2. Layers- New Raster Layer
3. Activate Flood Fill Tool and fill the layer with the gradient
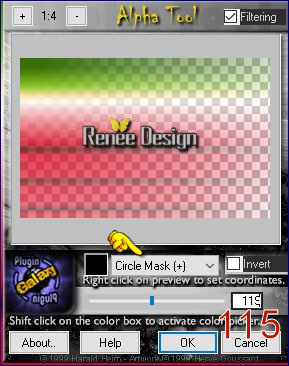
4. Effects- Plugins – Plugin – Galaxy/ Alpha Tools use settings below
5.
Selections –load/save selection –load selection from disc and choose my selection: ‘’ Green_1’
6. Effects- 3 D Effects-Chisel use settings below- color #c8ff3f

Keep Selected
- Activate the bottom of the layer palette
7.
Selections- Promote selection to Layer
8. Layers- Arrange- Bring to Top
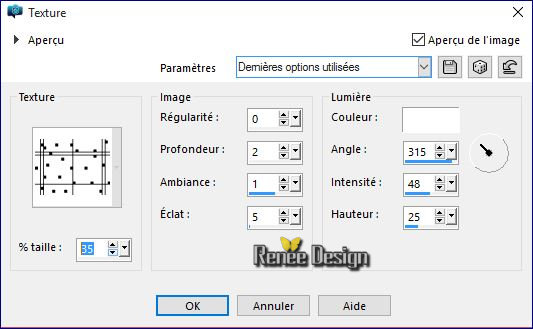
9. Effects –
Texture Effects–
Textures and select texture :@nn_textuur__blokjes_191207_tdstudio use settings below
10. Layers- Merge- Merge Down
11. Effects- 3 D Effects- Drop Shadow with these settings 1/1/50/8 color black
Selections- Deselect All
12. Layers- Duplicate
- Layer Palette -Make Raster 2 active
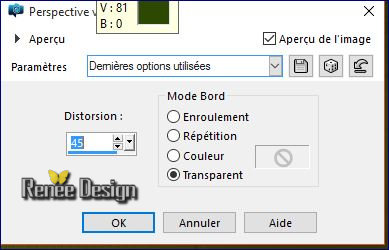
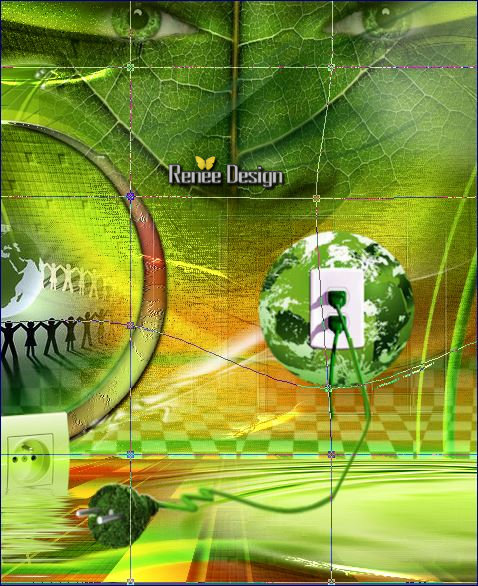
13. Effects- Geometric Effects – Perspective vertical use settings below
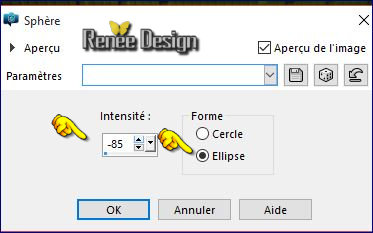
14. Effects- geometric Effects- Spherize use settings below
Layer Palette -Make Copy of Raster 2 active
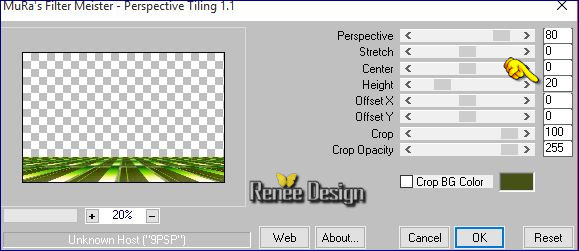
15. Effects
–Plugins - Mura’s Meister –Perspective Tilling use settings below
16.Layer Palette - Double click on this Layer and set the Blend Mode to "Overlay "
- Properties Foreground : set your Foregroundcolor to color white (#ffffff)
17. Layers- New Raster Layer
18. Activate Flood Fill Tool and fill the layer with the foreground color #ffffff
- Open and minimize your mask ‘’Renee_Masque_green’’ in PSP
19. Layers- New Mask layer from Image and choose Mask:‘’
Renee_Masque_green’’

-Layers- Merge- Merge Group
20. Effects- Edge Effects- Enhance More
21. Layer Palette - Double click on this Layer and set the Blend Mode to "Soft Light "
22. Effects- 3 D Effects- Drop Shadow with these settings 21/14/26/11 color black
23. Layers- Duplicate – Image - Mirror - Mirror Horizontal ( Image - Mirror in previous PSP Versions)
24. Effects
–Plugins - Unlimited– Tramages - Wee Scratches a 255
- Color Palette: Change the Foreground color to color #c8ff3f- Set your background color to color #b31700
- Properties Foreground: Set your Foregroundcolor to Foreground/Background linear Gradient configured like this.
25. Layers- New Raster Layer
26.
Selections –load/save selection –load selection from disc and choose my selection:’’Green_2’’
27. Activate Flood Fill Tool and fill the selection with the gradient
28. Adjust-Blur- Gaussian Blur: Radius 15
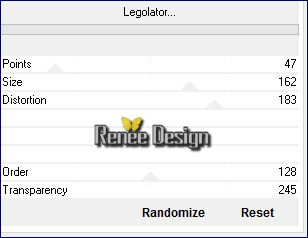
29.
Effects –Plugins - Unlimited – Tramages -
Legolator..use settings below
Selections- Deselect All
30. Effects- Distortion Effects- Punch -Strength 65
31. Layer Palette - Double click on this Layer and set the Blend Mode to "Hard Light "
32. Open the tube ‘’ renee_green_cercle’’
- Edit/ Copy-Edit - Paste as new layer on your working image
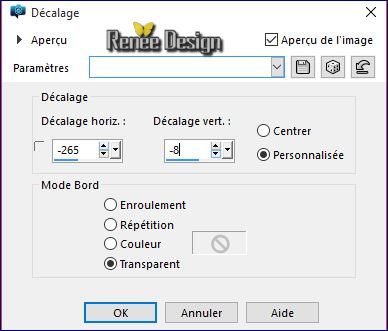
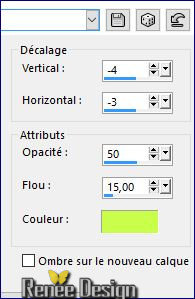
33. Effects-Image Effects- Offset with these settings
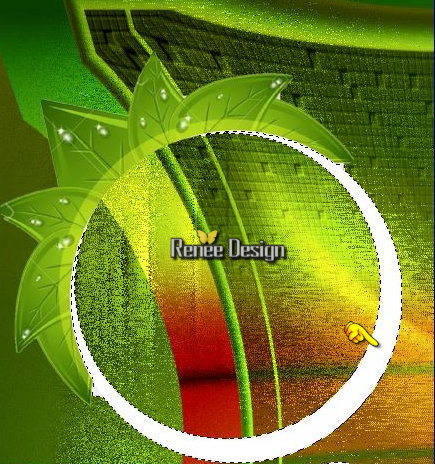
34. Activate Magic Wand and select the white part as shown in the example below
35. Layers- New Raster Layer
36. Activate Flood Fill Tool and fill the selection with the gradient
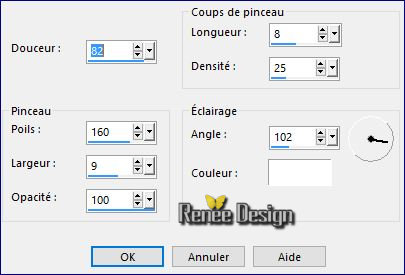
37. Effects- Art Media Effects -Brush Strokes use settings below
38.
Effects- Plugins – Eyecandy 5 Impact – Glass-tab Settings/User settings choose my -
‘’Preset” Renee_Glass_green
Selections- Deselect All
39. Layers- Duplicate
40. Layers- Merge- Merge- Down
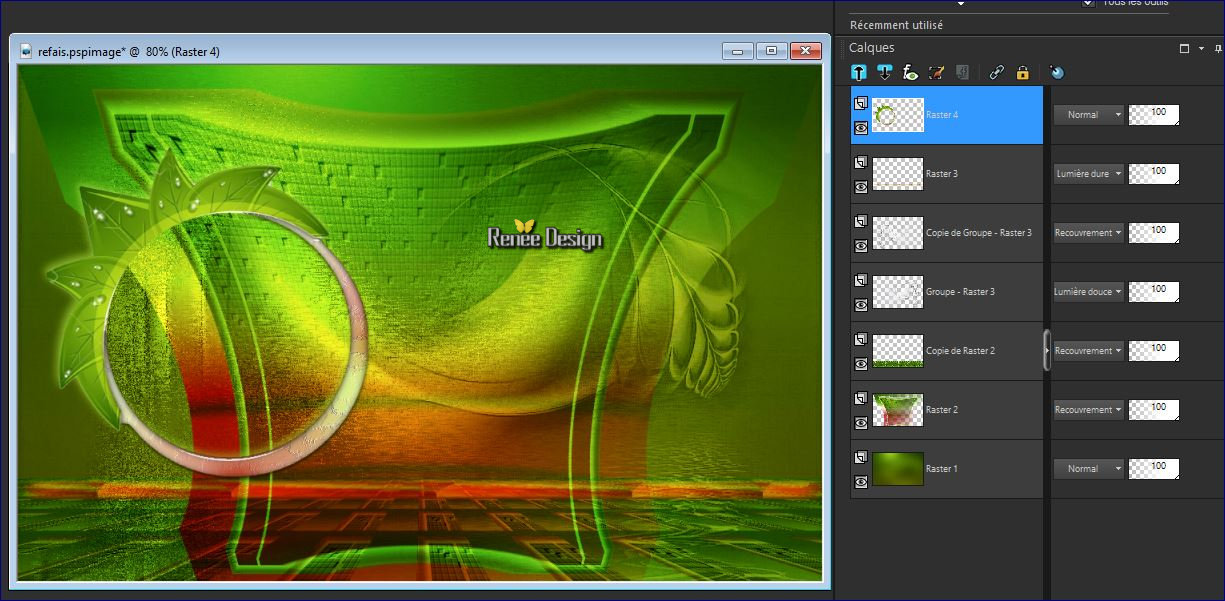
- You should have this result/Check the blend mode of the layers in the Layer -Palette
41. Effects- 3 D Effects- Drop Shadow use settings below- Color #c8ff3f
42.Open the tube ‘’ renee_green_monde’’
- Edit/ Copy-Edit - Paste as new layer on your working image
- Activate Move Tool (M) move it in the circle
43. Open the tube ‘’ renee_green_image1’’
- Edit/ Copy-Edit - Paste as new layer on your working image
44. Effects-Image Effects- Offset with these settings: H= - 18 and V = -
106 transparent
44.
Selections- Select All
-
Selections Float
-
Selections- Defloat
45. Layers- New Raster Layer
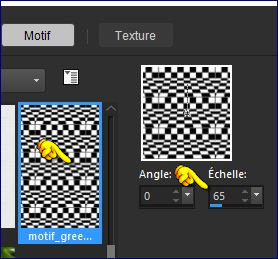
46.Color-Palette: Change the foreground color into texture and select my texture: ‘’ motif_green.jpg’’ use settings below
47. Pot of Paint: Change the opacity of the color at 35%- Activate Flood Fill Tool and fill the selection with the foreground texture
Selections- Deselect All
48. Layer Palette - Double click on this Layer and set the Blend Mode to "Screen"
49. Layers- Merge- Merge Down
- Layer Palette - Double click on this Layer and set the Blend Mode to "Screen"
50. Open the tube ‘’ renee_green_3lunes »
Edit/ Copy-Edit - Paste as new layer on your working image
- With the Move Tool -(M) move it on the upper left corner
51. Open the tube ‘’Renee_tubes_Green_visages »
-Take either a face / me I opted for '' green1 ''
- Edit/ Copy-Edit - Paste as new layer on your working image
- Move your tube in the middle at the top (see completed)
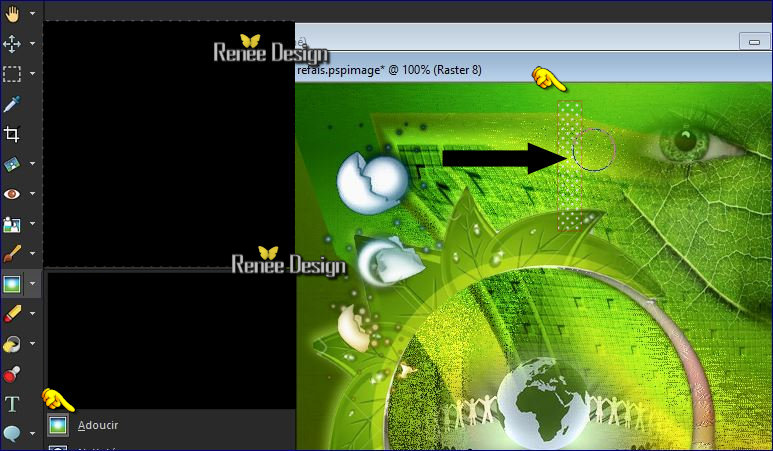
52. Activate Soften Tool / Default and go up and down the line to soften the vertical line
- Properties Fore ground : set your Foregroundcolor to #ffffff
53. Layers- New Raster Layer
54.
Selections –load/save selection –load selection from disc and choose my selection:’’Green_3’’
55. Pot of Paint: Change the opacity of the color at 100% -Activate Flood Fill Tool and fill the selection with the foreground color white
Selections- Deselect All
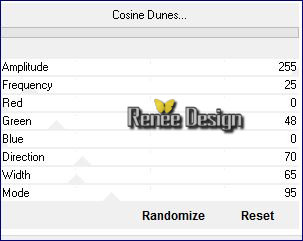
56.
Effects –Plugins- Unlimited - Alf's Power Sines- Cosine
Dunes..use settings below
57.
Set the layer opacity of this layer to 61%
- Material Properties: Foreground color to color #c8ff3f -Set your background color to color #465117
Properties Foreground: Set your Foregroundcolor to Foreground/Background linear Gradient configured like this.
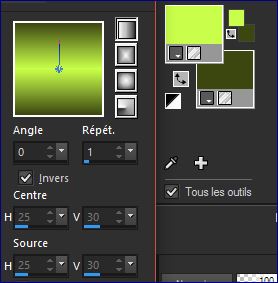
58. Layers- New Raster Layer
59. Activate Flood Fill Tool and fill the layer with the gradient
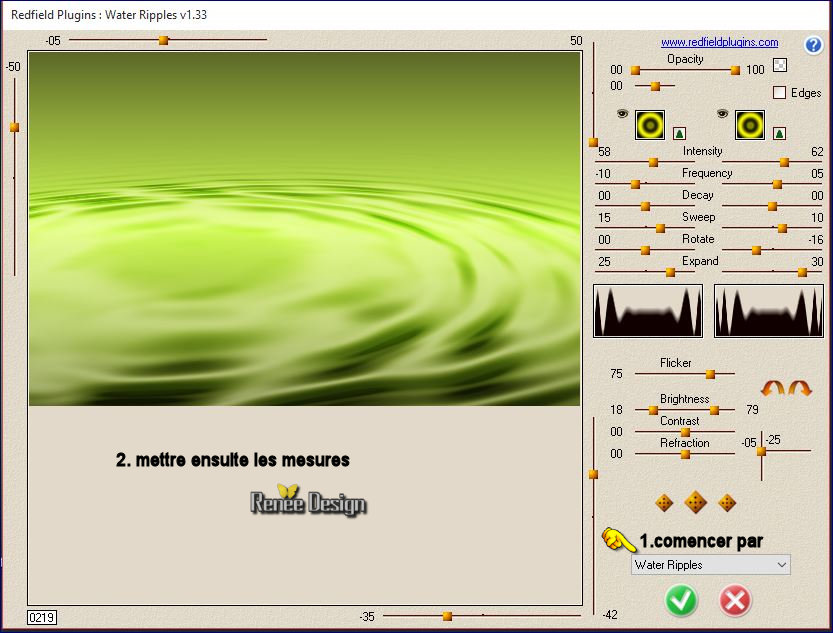
60.
Effects –Plugins–Redfield-Water
Ripples use settings below
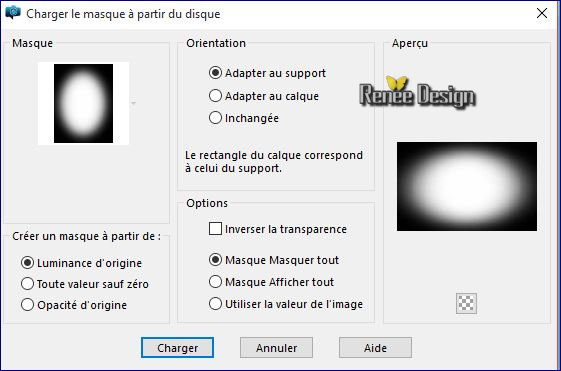
61. Layers-Load/Save Mask-Load mask from Disk and select (20/20)
- Layers- Duplicate
- Layers- Merge- Merge Group
62. Activate Pick Tool (K) - Select my file ‘’ Preset
_Green_Deformation’’(preset is located in the default settings)
-click ok (the movement will be performed)
63. Effects- Edge Effects- Enhance
64. Layers- Duplicate
65. Image - Mirror - Mirror Horizontal ( Image - Mirror in previous PSP Versions)
66. Effects- Image Effects- Offset with these settings : H = 455 and V
=0
67. Layers- Merge- Merge Down
68.
Activate Selection Tool -Custom Selection (S) with these settings
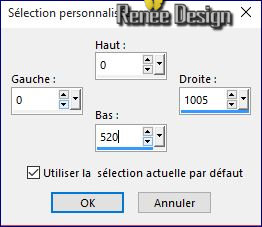
Press the Delete key on your keyboard 
Selections- Deselect All
-.Open the tube “ Renee_tube_Green_DECOS”(Do not close we need it later for the rest of the work)
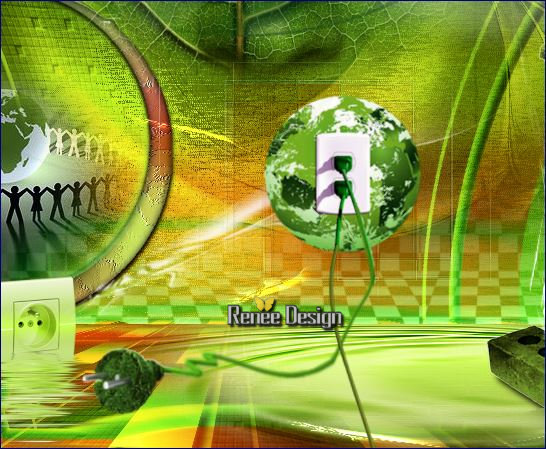
69. Activate the layer ‘’green_robinet’’of the tube
- Edit/ Copy-Edit - Paste as new layer on your working image
- With the Move Tool -(M) move it to the right side
70.
Activate the layer ’’green_brique’’of the tube
- Edit/ Copy-Edit - Paste as new layer on your working image
- With the Move Tool -(M) move it to the bottom right side
71. Activate Selection Tool (S)-Selection Type Ellipse
Draw a selection as shown below
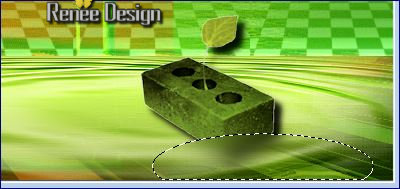
72. Adjust- Blur- Gaussian Blur : Radius 8
Selections- Deselect All
- Properties Foreground : set your Foregroundcolor to color #ffffff
73. Layers- New Raster Layer
74.
Selections –load/save selection –load selection from disc and choose my selection:’’Green_5 »
75. Activate Flood Fill Tool and fill the selection with the foreground color #ffffff
Selections- Deselect All
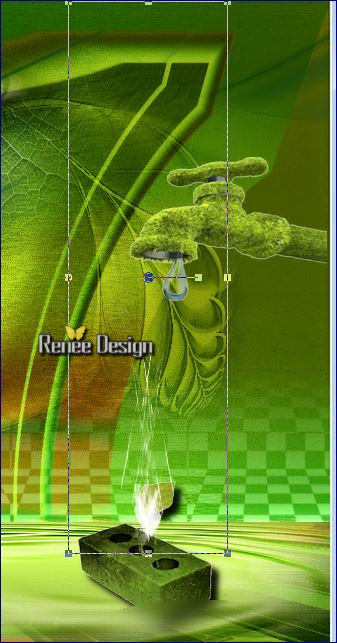
76. Activate Pick Tool- Mode Scale
Stretch like this
(Possibly replace the tube brick-see screenshot below)
77. Layers- Duplicate
78. Effects- Plugins - EyeCandy 5 Impact Glass-tab Settings/User settings choose my Preset
« Renee_green_glass »
-.Back on the tube "Deco "
79. Activate the layer ‘’green_prise’’ of the tube
- Edit/ Copy-Edit - Paste as new layer on your working image
80. Effects-Image Effects- Offset with these settings H = -203 and V = -200
transparent
81.
Effects –Plugins –Flaming Pear Flood
click on the red arrow>>select my file- Preset ‘’
Renee_Green_Flood settings’’ (can be used in any folder of your choice by clicking it. -3 Open it will be ok in your filter
82. Layers- New Raster Layer
83.
Selections –load/save selection –load selection from disc and choose my selection:’’Green_6 »
84. Activate Flood Fill Tool and fill the selection with the foreground color #ffffff
Selections- Deselect All
85. Layers- Duplicate
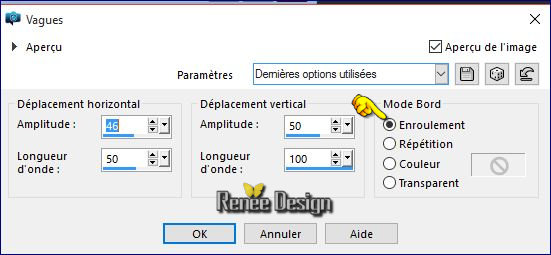
86. Effects- Distortion Effects- Wave use settings below
87. Layer Palette - Double click on this Layer and set the Blend Mode to "Dodge"
Color Palette: Change the Foreground color to color #b31700
88. Layers- New Raster Layer
89.
Selections –load/save selection –load selection from disc and choose my selection:’’Green_4 »
90. Activate Flood Fill Tool and fill the selection with the foreground color #b31700
Selections- Deselect All
91.
Effects- Plugins –Toadies - What are you 19/9
92. Effects- Edge Effects- Enhance More
- Back on the tube "DECO"
93. Activate the layer ’’green_terre’’of the tube
- Edit/ Copy-Edit - Paste as new layer on your working image
94. Activate the layer ’’green_allonge’’of the tube
- Edit/ Copy-Edit - Paste as new layer on your working image
95.
Activate Mesh Warp Tool and position by changing the curve like this
96. Open the ’’green_cable’’
- Edit/ Copy-Edit - Paste as new layer on your working image and move
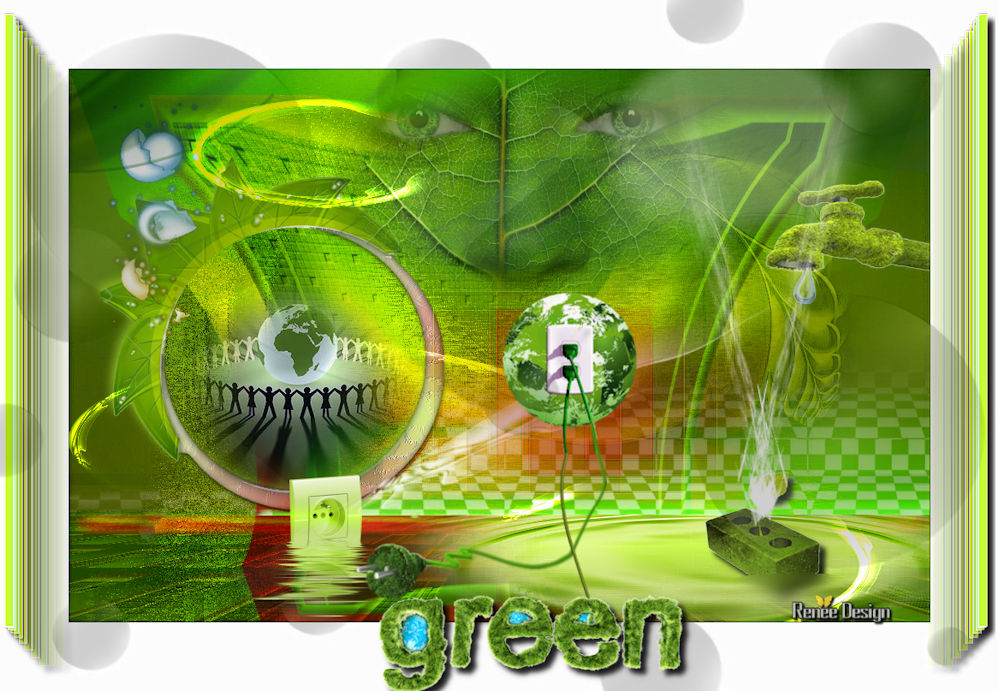
Your work look like this now
97. Image - Add borders-Symmetric checked: 1 pixel color black
98. Image - Add borders-Symmetric checked: 80 pixels color white
99. Open the tube ‘’ Renee_green_barres’’
- Edit/ Copy-Edit - Paste as new layer on your working image (do not move it is in the right place)
100.
Open the tube ‘’ Renee_green_bulles’’
- Edit/ Copy-Edit - Paste as new layer on your working image (do not move it is in the right place)
- In the Layer- Palette- Double click and set the Blend Mode to "Luminance-Legacy " -Set the layer opacity of this layer to 51%
101.
Open the tube ‘’ Renee_green_titre’’
- Edit/ Copy-Edit - Paste as new layer on your working image and move
102. Image - Add borders-Symmetric checked: 1 pixel color black
103. Image
Resize 999 pixels width
Save as JPEG
I hope you enjoyed this lesson
Renée
This lesson was written by Renée 04/02/2016
Edited and Update
2016
*
Any resemblance with an existing lesson is a coincidence
* Do not forget to thank the people who work with us and for us I have appointed the tubeurs and translators
Thanks Renée
*
| 
 Translations


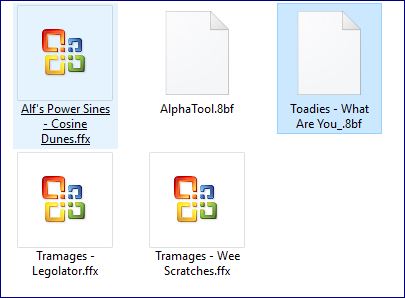

 When you see this logo the filter is imported in Unlimited

 All rights reserved