|
Let's start the lesson.
1. Open a new transparent image of : 995 x
565 pixels
2. Material of the foreground: foregroundcolor to color black Material of the background:backgroundcolor to color white
3. Prepare a Rectangular Gradient as configured like this.
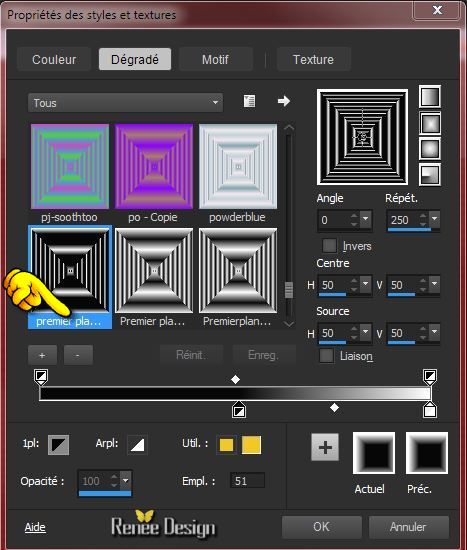
- Activate Flood Fill Tool and fill the layer with the gradient
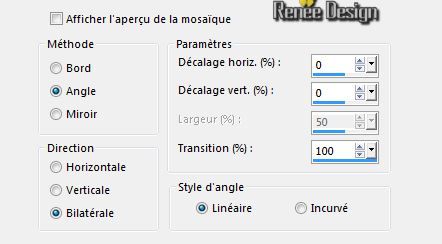
4.Effects-Image Effects-Seamless Tiling use the settings below
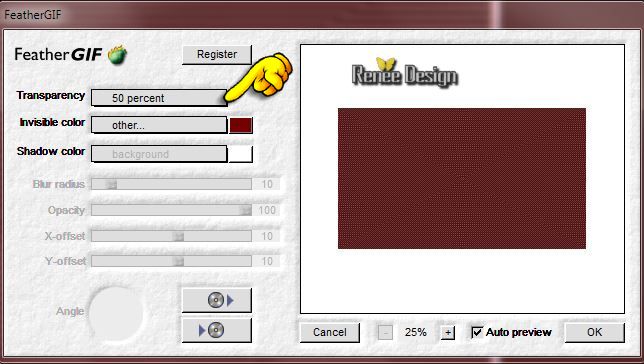
5. Effects- Plug-in - Flaming Pear / Feather Gif - color#740002
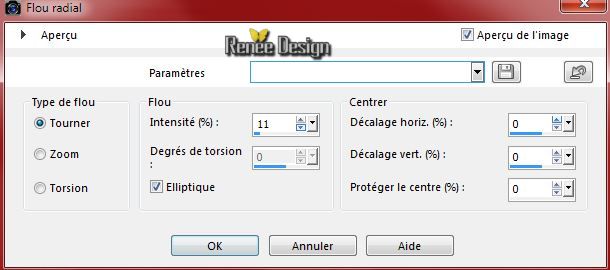
6. Adjust-Blur-Radial Blur with these settings
7. Effects- User Defined Filter -Emboss3 using the default settings
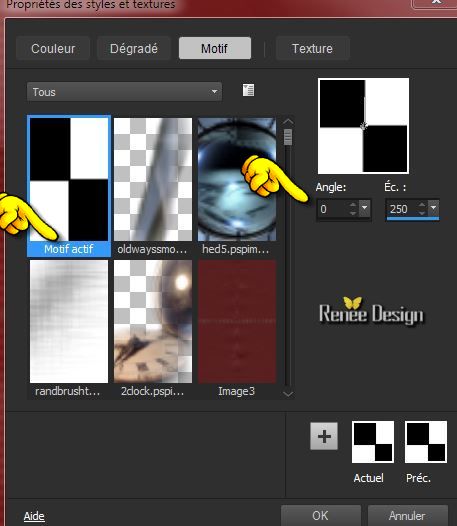
- Open the motif
''carre'' in PSP
8. Material of the foreground: Change the foreground color into Pattern and select "motif_damier" -
with these settings
9.
Layers - new raster layer
10.
Activate Flood Fill Tool and fill the layer with the foreground pattern "motif_
damier"
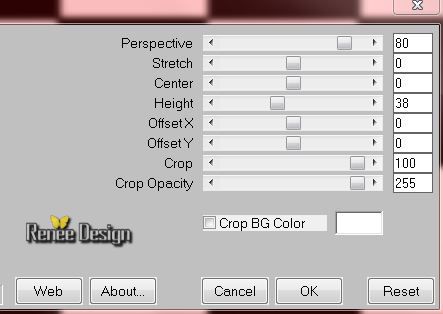
11.
Effects- Plug-in -Mura's Meister - Perspective
Shadow with these settings
12.
Layers - new raster layer
13.
Selections - load/save selection - load selection from disk and choose my selection: "Gothique_9_1"
14.
Effects- Plug-in - Mura's Meister - Clouds with these settings

15.
Effects - 3D Effects - Drop shadow with these settings :2/2/100/8 color black
Selections-Deselect All
16.Layers- Duplicate-Image-Flip
17.
Effects- Edge Effects- Enhance More
- In the Layerpalette, activate rasterlayer 3
17.
Effects- Distortions Effects-Polar Coordinates-Polar to Rectangular
18. Effects- Plug-in - EyeCandy 5 Nature -Water Drop -tab Settings/User Settings and choose my preset
''renee_gothique9_water drops''
19.
Layers- Layers-load/save Maske Load Mask from Disk and select Mask''!!!!.mask.ket01''
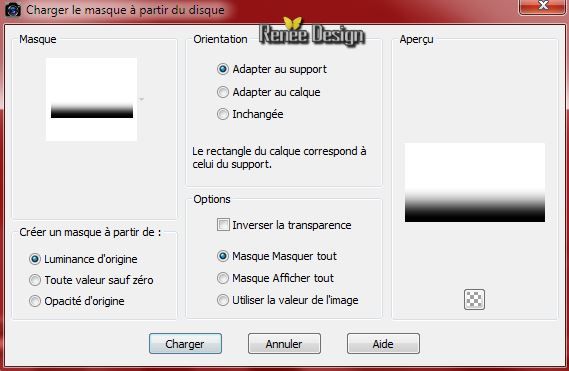
-
Layers- Merge-Merge Group
20.
Layers- Duplicate
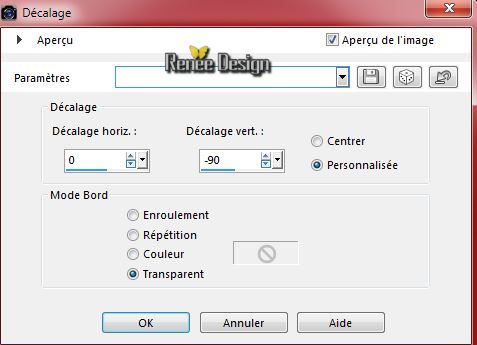
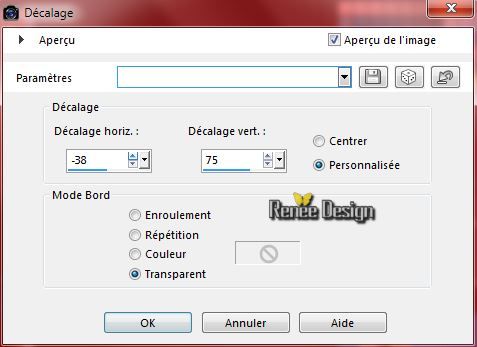
21.
Effects- Image Effects-Offset with these settings
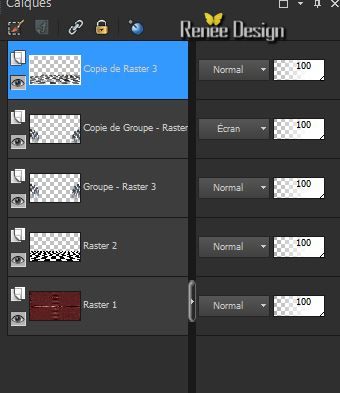
22.
In the Layerpalette, set Blend Mode to Screen
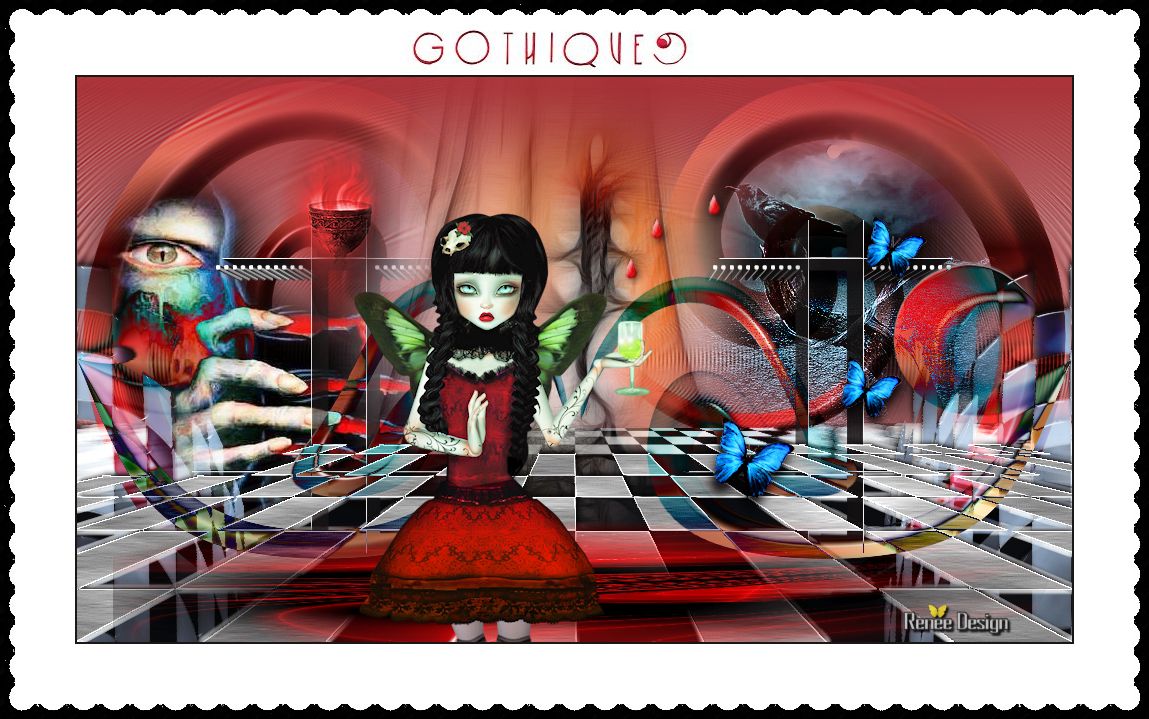
Your work look like this now
- Activate the top of the layer-palette
23.
Layers - new raster layer
24.
Selections - load/save selection - load selection from disk and choose my selection: ''gothique_9_2''-
25.
Material of the foreground - select my file in the list : "@nn_170810_GR_aleandra_tdstudio" Prepare a Linear Gradient as configured like this.
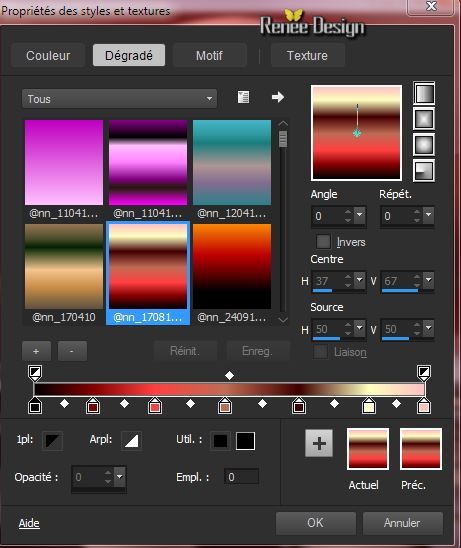
26.
Activate Flood fill tool and fill the selection with the gradient
Selections-Deselect All
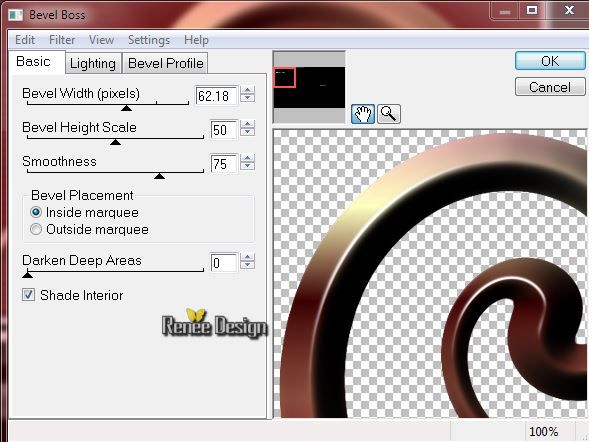
27.Effects- Plug-in - EyeCandy 4000. Bevel boss with these settings
28.
Layers-Arrange-Move 2x down (In the Layerpalette: underneath copy of group-
rasterlayer 3)
29.
In the Layerpalette, set Blend Mode to Overlay and and set the layer opacity of this layer to 95%
30.Layers - new raster layer
31.
Selections - load/save selection - load selection from disk and choose my selection: ''Gothique_9_3''- 32.
Activate Flood fill tool and fill the selection with the backgroundcolor white (zoom-in)
Selections-Deselect All
33.Effects-Pug-in -Eyecandy5 Impact Extrude-tab Settings/User Settings and choose my preset- ''gothique_9_extrude''
34.
Open your tube chrismist_111904_86.pspimage- Edit/copy-Edit paste as a new layer on your working area
35.
Effects- Image Effects-Offset with these settings
36.Effects- Plug-in - Graphic plus - Cross
Shadow using the default settings
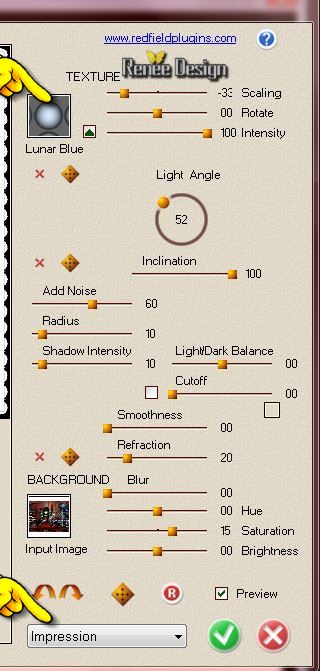
37.
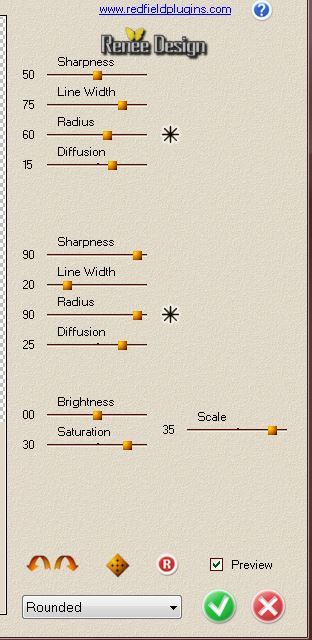
Effects- Plug-in - Redfield Fractalius -V1.3 with these settings
38.
Open your tube ''sassyillusions_residentevil.psp''-
Edit/copy-Edit paste as a new layer on your working area
39.
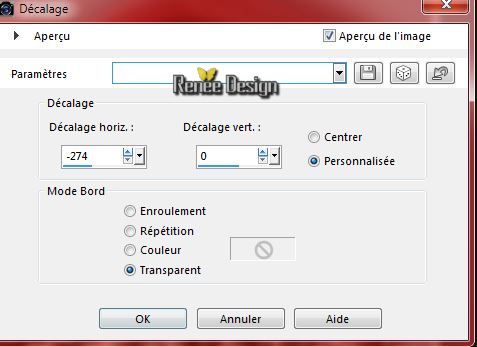
Effects- Image Effects-Offset with these settings
40.
Layers- Arrange- Move 2x down (In the layerpalette-underneath rasterlayer 4)
-Activate the top of the layer-Palette
41.
Open your tube "Halloween_0052.psp''/ Edit/copy-Edit paste as a new layer on your working area
42.
Layers- Arrange-Move Down (In the Layerpalette-underneath rasterlayer 3)
-
In the Layerpalette-activate rasterlayer 3 ( the forme)
43.
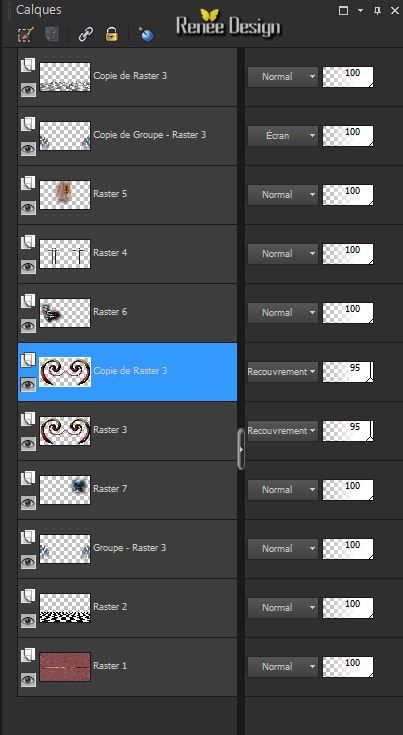
Layers- Duplicate
Your work look like this now
44.
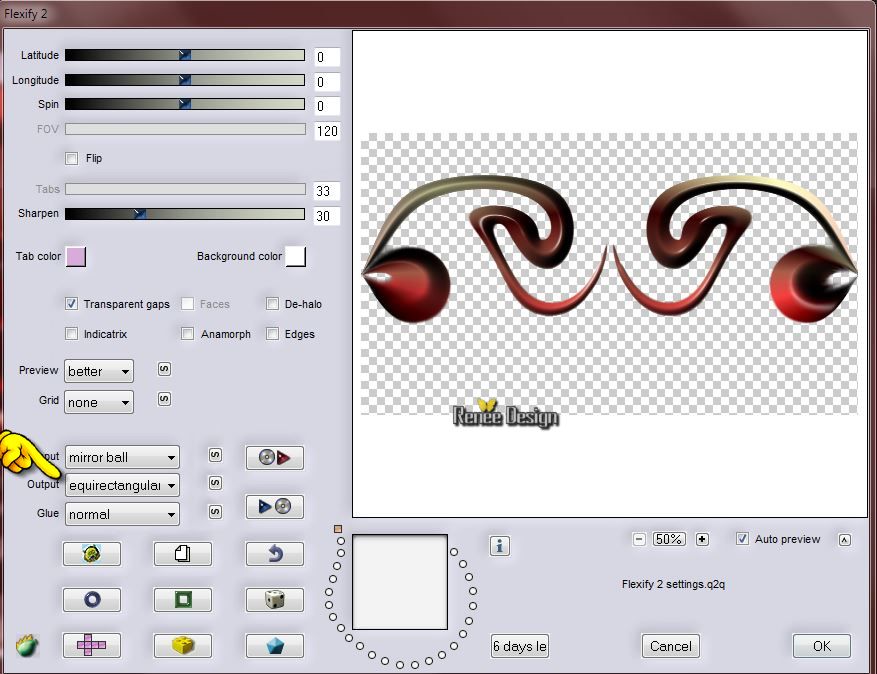
Effects- Plug-in - Flaming Pear -Flexify 2 with these settings
45.
Layers-Arrange-Bring to Top
46.
Image Flip
47.
In the Layerpalette, set Blend Mode to Difference- and set the layer opacity of this layer to 100%
-
In the Layerpalette, activate rasterlayer 2
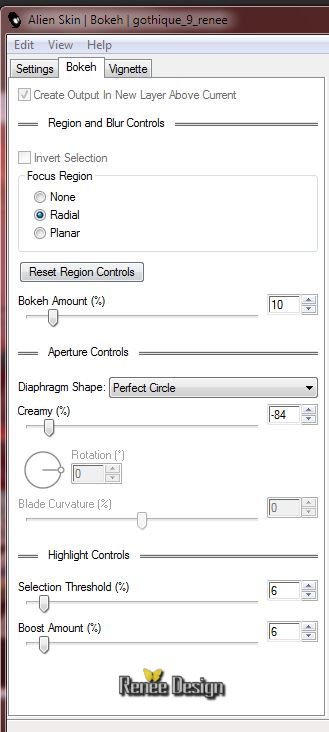
48.
Effects- Plug-in - Alien skin Bohek-tab Settings/User Settings and choose my preset- ''gothique_9_renee''
In case of difficulty, the manual settings here - color #557b95
49.
Layers-Merge-Merge Visible
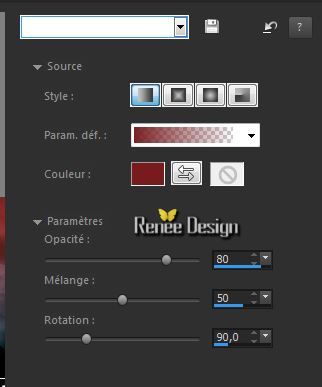
50.
Effects- Photo Effects- Graduated Filter with these settings
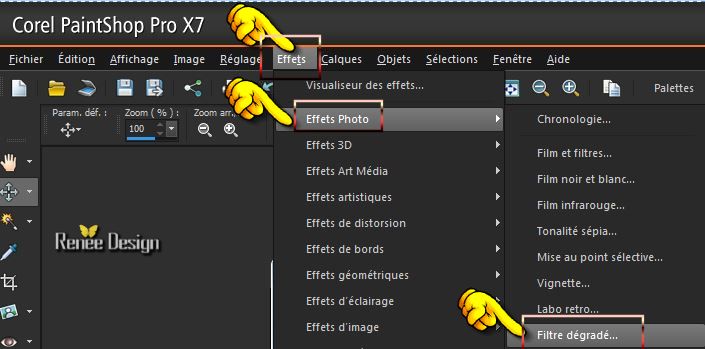
color #791b1f
51.
Open your tube papillons
-
Edit/copy-Edit paste as a new layer. With your move tool move to the right side
52.
Open your tube''gothique_9_image1''- Edit/copy-Edit paste as a new layer.
-
With your move tool move at the bottom of your work, see the finished image
53. Open your tube
''Drink - tubed by A PSP Devil.pspimage''
-Image Resize 75% -Edit/copy-Edit paste as a new layer.With your move tool place it in the right place
54.
Open your tube''couteau_sang''
Edit/copy the selected part- Edit paste as a new layer
-
With your move tool move to the top right corner /Layer Duplicate twice and place
55.
Open your tube ''Coupe_flamme''-Edit/copy-Edit paste as a new layer. With your move tool move to the left
Is everything in the right place?
56.
Layers-Merge-Merge Visible
57.
Image - Add borders-Symmetric checked: 2 pixels color black
58.
Image - Add borders-Symmetric checked: 60 color white
59.
Image - Add borders-Symmetric checked: 15 color black
60.
Magic Wand / click with your magic wand in the border of 15 pixels
61.Effects-Pug-in- Redfield - iEmboss with these settings
-
Selections-Deselect All
62.
Adjust-One Step Photo Fix
63.
Activate Text Tool-Font Cafenfill-write your text
Save as JPG
I hope you enjoyed this lesson
Renée
*
This lesson was written by Renée 02/10/2014
Placing 15/10/2014
*
Any resemblance with an existing lesson is merely a coincidence *
* Don't forget to thank the people who work for us and with us. I named the tubeurs - Testers and the translators.
Thanks Renée.
*
|
 Translations


 All rights reserved