|
Let's start the lesson

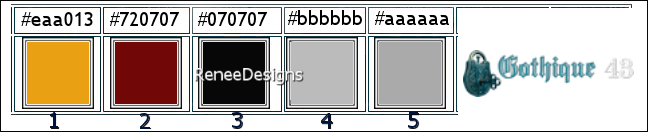
- Material Properties: Set the foreground color to color number 1-Set the background color to color number 2
1. File-Open a new transparent image in this size :985
x 725 Pixels
2. Flood Fill Tool
 –
Flood fill the layer with the background color (2) –
Flood fill the layer with the background color (2)
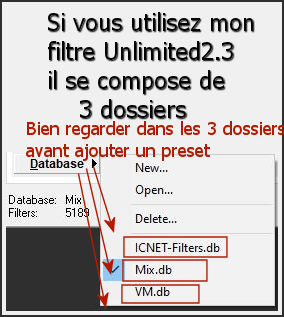
3. Effects - Plugins - Filters in Unlimited 2.0 - ICNET-Filters -
Render - Clouds (fore-/background color) : 65/128
4. Layers - New Raster Layer
5. Flood Fill Tool
–
Flood fill the layer with the foreground color (1)
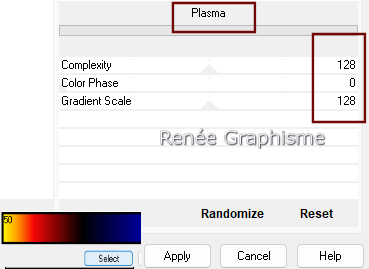
6. Effects - Plugins - Filters in Unlimited 2.0 - ICNET- Filters –Render
– Plasma with these settings
7. Layers-Properties-Change the Blend Mode of this layer to Hard Light
8. Layers - Merge - Merge Down
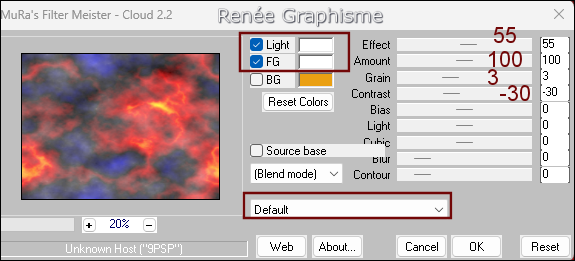
9. Effects – Plugins – Mura’s Meister – Cloud use the settings below
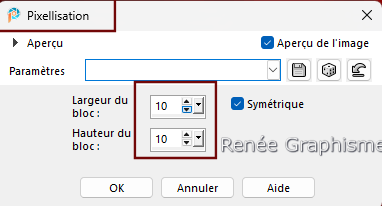
10. Effects – Distortion Effects – Pixelate with these settings
11. Effects - Plugins – I- Decay – X-Y Diffuse setting at 24/2/4
12. Adjust - Sharpness - Sharpen More
13. Layers – Duplicate
14. Image - Resize by 85%, Resize all layers not checked
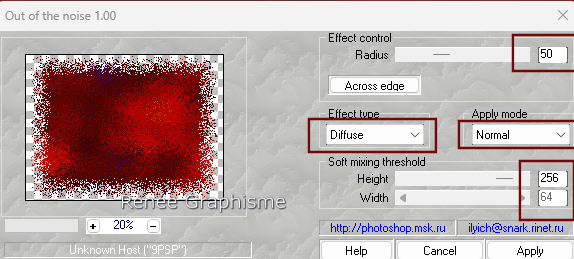
15. Effects - Plugins – Amphisoft - Out of Noise use the settings below
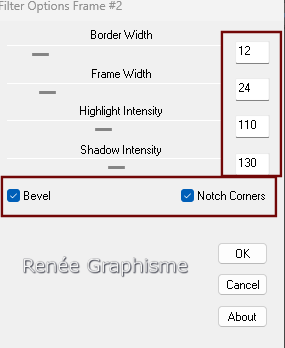
16. Effects – Plugins – Border Mania – Frame 2 with these settings
- Do you receive this message?
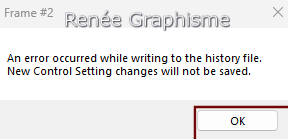 Click
OK Click
OK
17. Effects - Plugins - Filters in Unlimited 2.0 - Filter Factory
Gallery D - Dynamic Contrast settings at: 144/201/97
- Material Properties: Set the foreground color to color number 5
18. Layers - New Raster Layer
19. Selections –load/save selection –load selection from disc and select my selection: ‘’Gothique-43-1’’
20. Flood Fill Tool
–
Flood fill the selection with the foreground color (5)
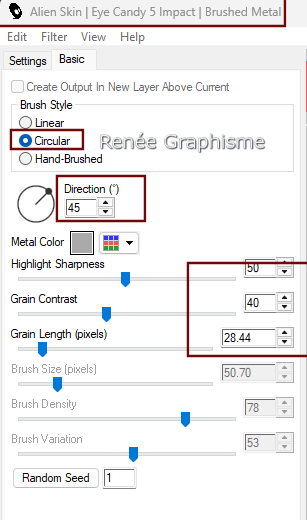
21. Effects - Plugins - Alien Skin EyeCandy 5 – Impact – Brushed
Metal with these settings
22. Effects - Plugins - Alien Skin EyeCandy 5 – Impact – Extrude use the settings below
Highlight - Brightness -Color- Black
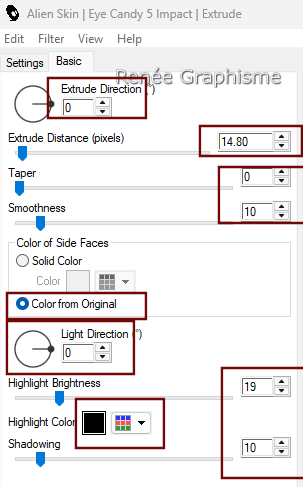
**Extrude Highlight Brightness-Color black
23. Effects- 3D- Effects- Drop Shadow with these settings: 12/
-19
/60/ 60 Color black
24. Selections –load/save selection –load selection from disc and select my selection: ‘’Gothique-43-2’’
 2 a 3 fois

25. Layers - Properties-Change the Blend Mode of this layer to Hard Light
26. Activate the tube ’’Gothique-43-Image1’’ -Edit - Copy- Activate your work -Edit - Paste as new layer
27.Pick Tool: (K) on your keyboard -Enter these parameters on the toolbar
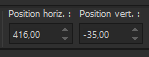 416
/
- 35 416
/
- 35
- Press the ( M ) button to close the tool.
28. Effects - Plugins – FM Tile Tools – Blend Emboss ( repeat once more)
29. Activate the tube ’’Gothique-43-Image2’’ - Edit - Copy- Activate your work -Edit - Paste as new layer
30. Pick Tool: (K) on your keyboard -Enter these parameters on the toolbar
 596
/ 95 596
/ 95
- Press the ( M ) button to close the tool.
31. Layers-Properties-Change the blend mode of this layer to Luminance
32. Layers - Arrange - Move Down
- Activate the top of the layers palette
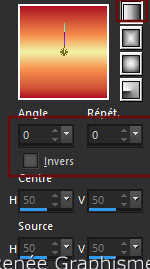
- Color Palette: Set your foreground color to Gradient and select : ‘’ bhw2_7’’
– Prepare a linear gradient configured like this
33. Layers-New Raster Layer
34. Flood Fill Tool
–
Flood fill the layer with the Gradient
35. Effects - Plugins - Filters in Unlimited 2.0 - Neology -Vasarely
Mosaics at 77
Attention
For the next step (point 36), save your work first.
This filter may close Frischluft psp
If you do not have this filter or are unable to use it,
there is an image included with the material named “effet - Frischluft complet” (has been prepared)
Paste it as a new layer on top of your work and continue with point 39
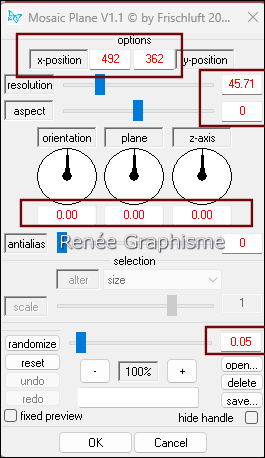
36. Effects – Plugins – Frischluft – Mosaic plane use the settings below
37. Effects - Edge Effects - Enhance More
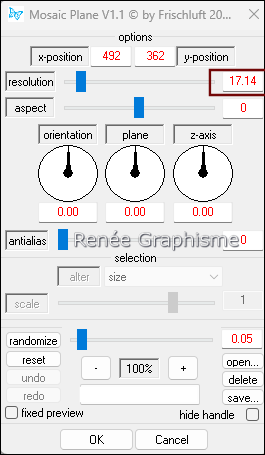
38. Effects – Plugins – Frischluft – Mosaic plane with these settings
39. Effects - Edge Effects - Enhance More
Layers-Properties-Set Blend Mode to Hard Light -Reduce Opacity of this layer to 46 %
40. Layers-New Raster Layer
41. Selections –load/save selection –load selection from disc and select my selection: ‘’Gothique-43-3’’
41. Activate the tube’’Gothique-43-Image3’’ - Edit - Copy- Activate your work -Edit - Paste into Selection
43. Layers-Properties-Change the blend mode of this layer to Overlay
44. Effects – Plugins – Medhi 2 – Flat Median with these settings
45. Activate the tube ’’ Renee-TUBES-
Gothique-2023-11.’’ - Edit - Copy- Activate your work -Edit - Paste as new layer
46. Image - Resize by 72% -Resize all layers not checked
47. Pick Tool: (K) on your keyboard -Enter these parameters on the toolbar
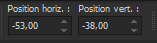 -53
/ - 38 -53
/ - 38
48. Effets - Plugins - Filters in Unlimited 2.0 - &<Background
Designers IV> - @Night Shadow Pool - Using the default settings
49. Activate the tube ‘’ Gothique-43-Image4 ‘’ - Edit - Copy- Activate your work -Edit - Paste as new layer
50.Pick Tool: (K) on your keyboard -Enter these parameters on the toolbar
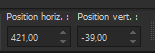 421 /
- 39
421 /
- 39
- Press the ( M ) button to close the tool.
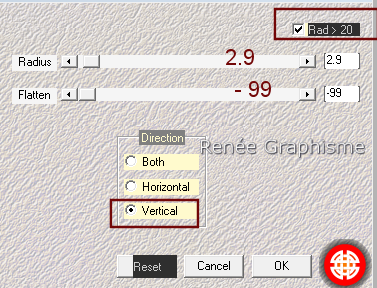
51. Effects– Distortion Effects – Warp use the settings below

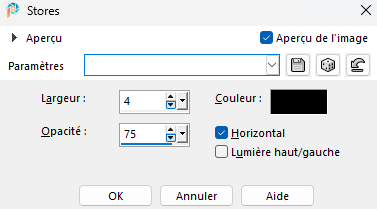
52. Effects - Texture Effects - Blinds with these settings - Color black
53. Effects – Plugins – FM Tile Tools – Saturation Emboss Using the default settings
54. Layers-Properties-Set the Blend Mode to Luminance - Reduce the Opacity of this layer to 97%
55. Layers - Duplicate
56. Image - Mirror - Mirror Horizontal (Image - Mirror in older versions of PSP)
- Activate Raster 1 in the layers palette
57. Selections – load/save selection – load selection from disc and select my selection: ‘’Gothique-43-4’’
58. Selections - Promote selection to layer
59. Layers - Arrange - Move Up (above Copy of Raster 1)
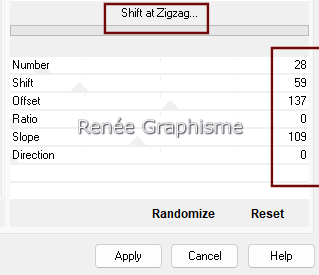
60. Effects - Plugins - Filters in Unlimited 2.0 - MuRa's Seamless -
Shift at Zigzag..use the settings below.
61. Reduce the Opacity of this layer to 75%
62. Layers - Duplicate
63. Selections –load/save selection –load selection from disc and select my selection: ‘’Gothique-43-5’’
64. Effects - Plugins -
Slosh.net – Sloshifiers – Space chalk (this filter must be patched.)
65.
Layers-Properties-Set the Blend Mode to Hard Light - Reduce the opacity of this layer to 61%
66.
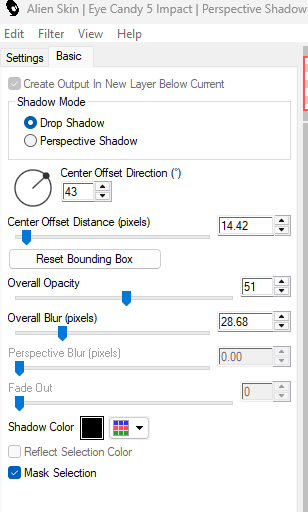
Effects - Plugins - Alien Skin EyeCandy 5 – Impact
– Perspective Shadow use the settings below
67. Repeat this filter effect on the layer below (Promoted Selection )
-
Activate the top of the layer palette
68. Activate the tube ‘’Gothique-43-Image5’’ - Edit - Copy- Activate your work -Edit - Paste as new layer
-
Move the tube in place
For Renée – Pick Tool: (K) on your keyboard -Enter these parameters on the toolbar
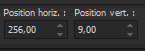 256
/ 9 256
/ 9
69. Layers-Properties-Set the Blend Mode to Luminance -Reduce the Opacity of this layer to 77%
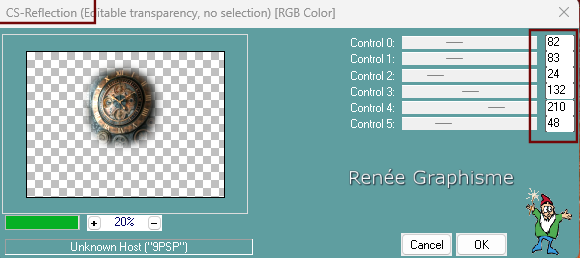
70. Effects – Plugins – Carolaine & Sensibility
– CS-Reflection use the settings below
71. Layers - New Raster Layer
72.
Selections –load/save selection –load selection from disc and select my selection: ‘’Gothique-43-6’’
73. Material Properties: Set the foreground color to color number 4
Flood Fill Tool
–
Flood fill the selection with the foreground color (4)
74. Effects - Plugins - Alien Skin EyeCandy 5 - Impact – Gradient
Glow –Tab-Settings-User Settings, select my file- Preset : ‘’Gothique-43-Glow’’
75. Image - Add Borders-Symmetric checked: 1 Pixel -Color black
Edit - Copy
76. Activate the tube
‘’Gothique-43- Cadre’’
77. Edit - Copy- Activate your work -Edit - Paste as new layer (Image is still in the memory)
78. Choose two tubes that you like.
-
Renée chose these two- Tube ‘’Gothique-43 -Image6’’ and Tube ‘’Gothique-43-Image7 ‘’
-
Edit - Copy- Activate your work -Edit - Paste as new layer and move the tube in place
-
Open the tube ''texte'' -Paste as a new layer and put the text in place (see finished image)
Add the author's watermark and your own watermark
79. Layers - Merge - Merge All ( flatten)
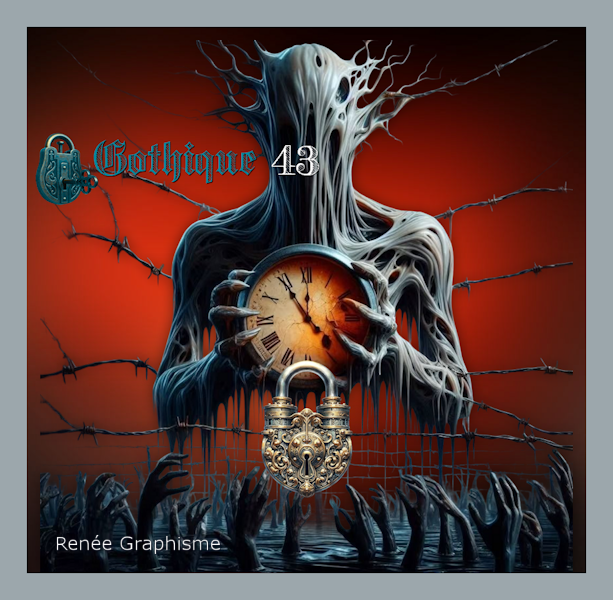
80. Image - Resize - to 80% - Resize all layers checked
Save as JPG
****************
I hope you enjoyed this lesson
Renée
This lesson was written by Renée 22/03/ 2025
Edited and Update
in 2025
***
Any resemblance with an existing lesson is a coincidence
* Do not forget to thank the people who work with us and for us
-I have appointed the tubeurs and translators
Thanks
*
|
 Translations