|
Let's start the lesson
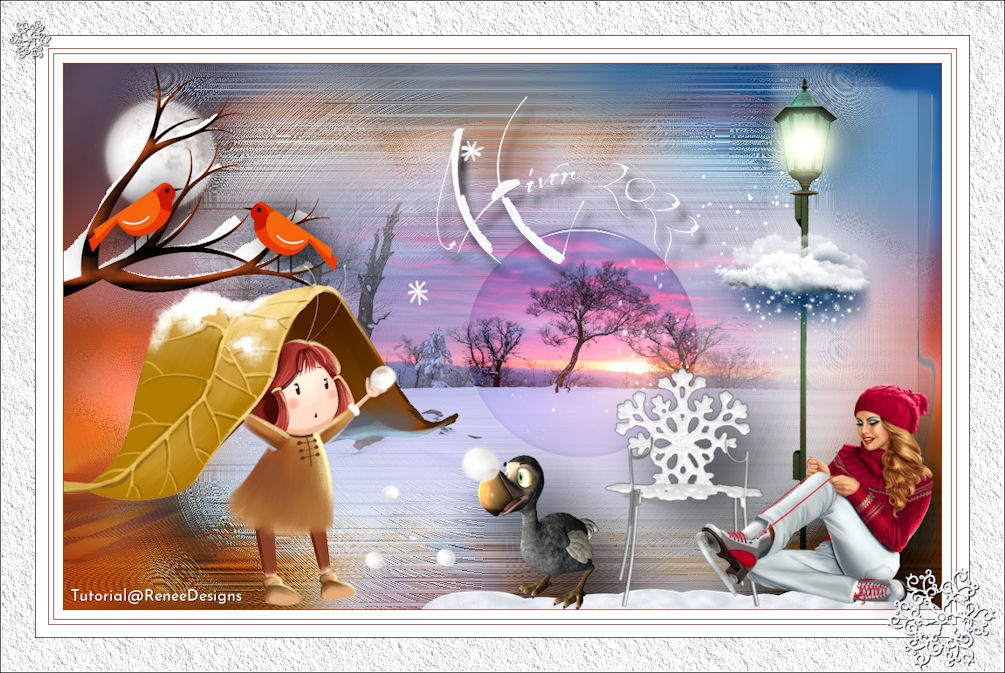
Froid- Hiver 2022
Cold-Winter 2022
- Preparation
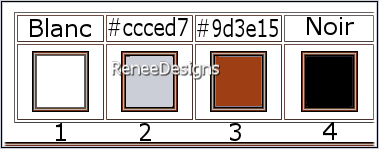
-Material Properties: Set your foreground color to color #ffffff=color 1 – Set your background color to color #ccced7= 2
1. Open the Background Image
‘’Fond-Hiver-2022’’- Promote Background Layer =Raster 1
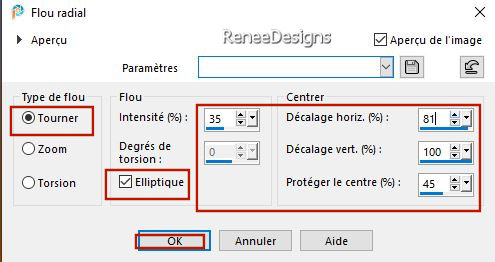
2. Adjust- Blur- Radial Blur use the settings below
3. Layers- New Raster Layer
4. Selections –
Select All
5. Open the Tube ‘’women-hiver.png’’ -Edit - Copy- Activate your work -Edit - Paste into Selection

6. Adjust- Blur-Gaussian Blur-Radius 40 %
7. Effects - Plugins - Filters in Unlimited 2.0 - &<Bkg Designer sf10 I>
- Circus Maximus with these setting: 98
8. Effects – Edge Effects
– Enhance
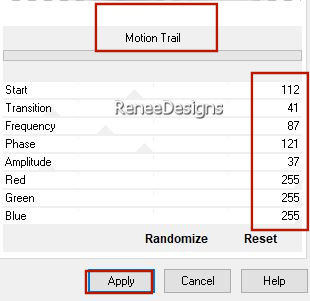
9. Effects - Plugins - Filters in Unlimited 2.0 - VM Stylize -Motion
Trail use the settings below
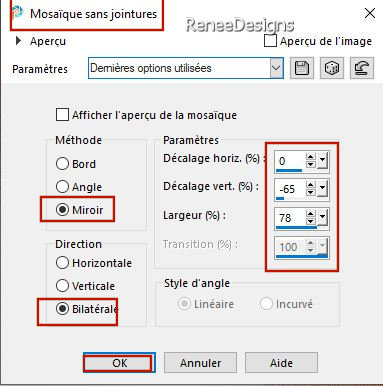
10. Effects- Image Effects- Seamless Tiling use the settings below
11. Layers- Duplicate
12. Effects - Plugins- Filters in Unlimited 2.0 – VM Toolbox- Instant
Tile using the default settings ( 77/31)
13.Layers-Properties-Set the Blend Mode to "Hard Light " – Reduce the Opacity of this layer to 79%
- Activate Raster 1 in the Layers palette
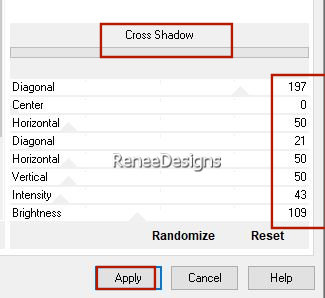
14. Effects - Plugins - Filters in Unlimited 2.0- Graphic Plus – Cross
Shadow use the settings below
- To replace the top of the layer-palette
15. Open the Tube ’’ Renee-Hiver-2022-Paysage’’ -Edit - Copy- Activate your work -Edit - Paste as a new layer
Do not move, it is in the right place ( if you use another image be careful with the dimensions and not too dark)
16. Layers-Properties -Reduce the Opacity of this layer to 75%
17. Selections –load/save selection –load selection from disc and select my selection:‘’Hiver-2022-1’’
18. Selections – Promoted selection to layer
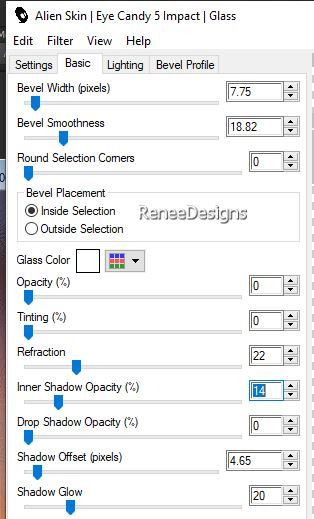
19. Effects - Plugins - Alien Skin EyeCandy 5 - Impact – Glass use the settings below
20. Picture Tube Tool - select my file ‘’kmoon4’’ (
Copy Picture tube to your psp folder Picture tubes)
-Configured as follows

- Apply in the upper left corner
21. Layers- New Raster Layer
22. Selections –load/save selection –load selection from disc and select my selection:‘’Hiver-2022-2’’
23. Activate Flood Fill Tool
 –
Fill the selection with the background color #ccced7=2 (Zoom in if necessary) –
Fill the selection with the background color #ccced7=2 (Zoom in if necessary)
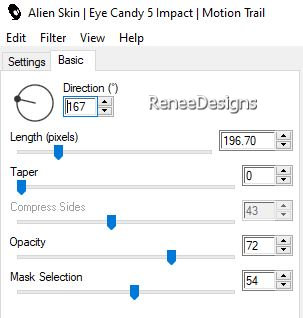
24. Effects - Plugins - Alien Skin EyeCandy 5 - Impact – Motion Trail use the settings below
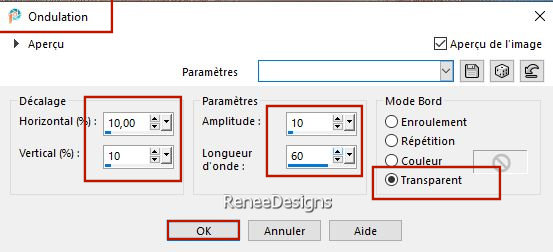
25. Effects– Distortion Effects -Ripple use the settings below
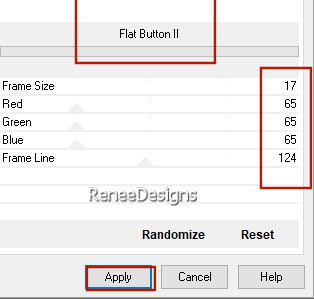
26. Effects - Plugins - Filters in Unlimited 2.0 - Harry's Button Tools
- Flat Button II use the settings below
27.Effects – 3D-Effects- Drop Shadow with these settings: 3/3/58/16 Color white
- Activate Raster 1 in the Layers palette
28. Layers- Duplicate
29. Layers- Arrange- Bring to Top
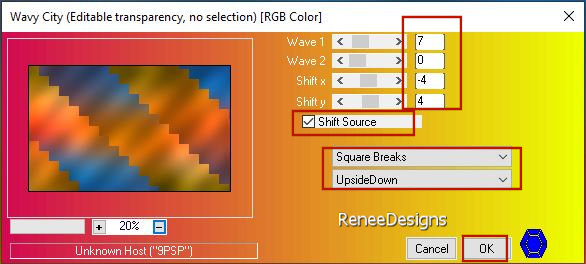
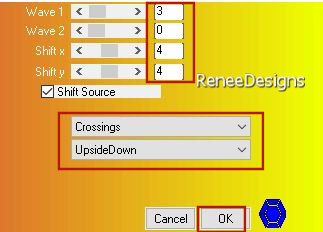
30. Effects – Plugins – Innovations 1.5 – Wave City use the settings below
31.
Effects - Plugins- Filters in Unlimited 2.0 -
Jeux de lignes
– Entrelacement using the default settings
32. Effects –Plugins – Innovations 1.5 – Wave City use the settings below
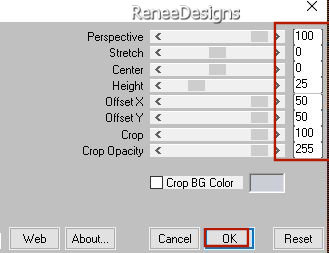
33. Effects – Plugins – Mura ‘s Meister – Perspective Tiling use the settings below
34. Selections –load/save selection –load selection from disc and select my selection:‘’Hiver-2022-3’’
35. Adjust- Blur- Gaussian Blur-Radius 30%
- Layers-Properties-Change the Blend Mode to " Overlay " – Reduce the opacity of this layer to 69 %
36. Write the text in a curve ''Hiver 2022''- White in the background - Closed foreground
Here if you have the explanations for the writing in curve
http://violettegraphic.com/01paintshoppro/00PaintShopPro_X5/09.textes/02.textesurchemin/textesurchemin.htm
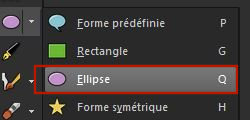 Ellipse Tool(Q) Ellipse Tool(Q)
- Activate the Text Tool-Renée has chosen the font "Before The Rain" or a font of your choice
The capital letter in size 72 and further the text with size 36
- If you have trouble writing it, go to line 37
37. Open the Tube with the text ‘’Renee-Hiver-2022-texte’’- Edit - Copy- Activate your work -Edit - Paste as a new layer
38.Renée posted the tube with the text here- Pick Tool: (K) on your keyboard -Enter these parameters on the toolbar-
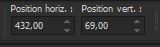
but it's up to you to place it according to your taste and your writing
39. Effects – 3D -Effects –
Drop Shadow with these settings: 14/8/100/13 Color Black
40. Effects - Plugins - Alien Skin EyeCandy 5 – Nature – Snow Drift –Tab-Settings-User Settings and select my file-
Preset ‘’Hiver-Renee-2022’
41. Layers- New Raster Layer
42. Selections –load/save selection –load selection from disc and select my selection:‘’Hiver-2022-4’’
43. Flood Fill Tool
– Fill the selection with the foreground color #ffffff=1 ( click 1 or 2 times)
44. Layers- New Raster Layer
45. Selections –load/save selection –load selection from disc and select my selection:‘’Hiver-2022-5’’
46. Color Palette-Set your foreground color to color # 9d3e15=3
Flood Fill Tool
–
Fill the selection with the foreground color # 9d3e15=3
47. Effects - Plugins - Alien Skin EyeCandy 5 –Textures – Wood –Tab-Settings-User Settings and select my file-
Preset ‘’Hiver-Renee-wood’’
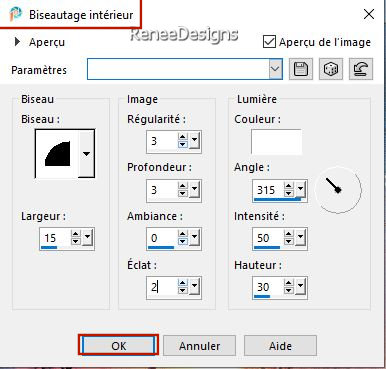
48. Effects – 3D-Effects –
Inner Bevel use the settings below
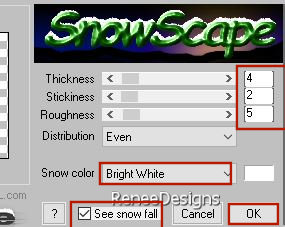
49. Effects –Plugins – VDL – Adrenaline- SnowScape use the settings below
50. Open the Tube ‘’Renee-Hiver-2022- 2
oiseaux’’ -Edit - Copy- Activate your work -Edit - Paste as a new layer - Place the birds to the left in the tree
51. Open the Tube ‘’Renee-Hiver-2022-
fillette’’ -Edit - Copy- Activate your work -Edit - Paste as a new layer
- Place the girl to the bottom left
52. Open the Tube ’’ Renee-Hiver-2022-Reverbere’’ -Edit - Copy- Activate your work -Edit - Paste as a new layer
-Place the lantern to the right
53. Open the Tube ’’ Renee-Hiver-2022-tubes-decos-final’’ - Edit - Copy- Activate your work -Edit - Paste as a new layer
Move the tube to the bottom right (see finished image)
-Renée has a separate folder with decorations that you can use
54. Apply a Drop Shadow of your choice
55. Activate the Tube ‘’Boules de
neige ‘’ Select 2 or more balls -Paste as new layer and place (see finished image)
56.Layers- Merge- Merge Visible
57. Save the script ''Hiver-2022-renee''- in the folder " Scripts- Restricted" of PSP
Activate Toolbar SCRIPT and select this file ''Hiver-2022-renee''-

-Click on the little blue arrow and let go
If problems with the script add manually
-Image - Add borders-Symmetric checked: 1 Pixel -Color #9d3e15 =3
-Image - Add borders-Symmetric checked: 10 Pixels -Color #ffffff=1
-Image - Add borders-Symmetric checked: 1 Pixel -Color #000000=4
-Image - Add borders-Symmetric checked: 5 Pixels -Color #ffffff=1
-Image - Add borders-Symmetric checked: 1 Pixel -Color #9d3e15 =3
-Image - Add borders-Symmetric checked: 55 Pixels -Color #ffffff=1
58. Effects - Plugins - AAA Frame – Texture Frame using the default settings
59.
Paste the author's watermark on your work and your own watermark.
60. Open the Tube - ''Deco - Cadre- Froid-Hiver''-Edit - Copy- Activate your work -Edit - Paste as a new layer
61.
Layers- Merge- Merge All (flatten)
62. Image- Resize to 1005 pixels width
-Save as JPG
I hope you enjoyed this lesson
Renée
This lesson was written by Renée 19/09/2022
Edited and Update
in 2022
*
*
Any resemblance with an existing lesson is a coincidence
* Do not forget to thank the people who work with us and for us
-I have appointed the tubeurs and translators
Thanks
|


 Translations