|
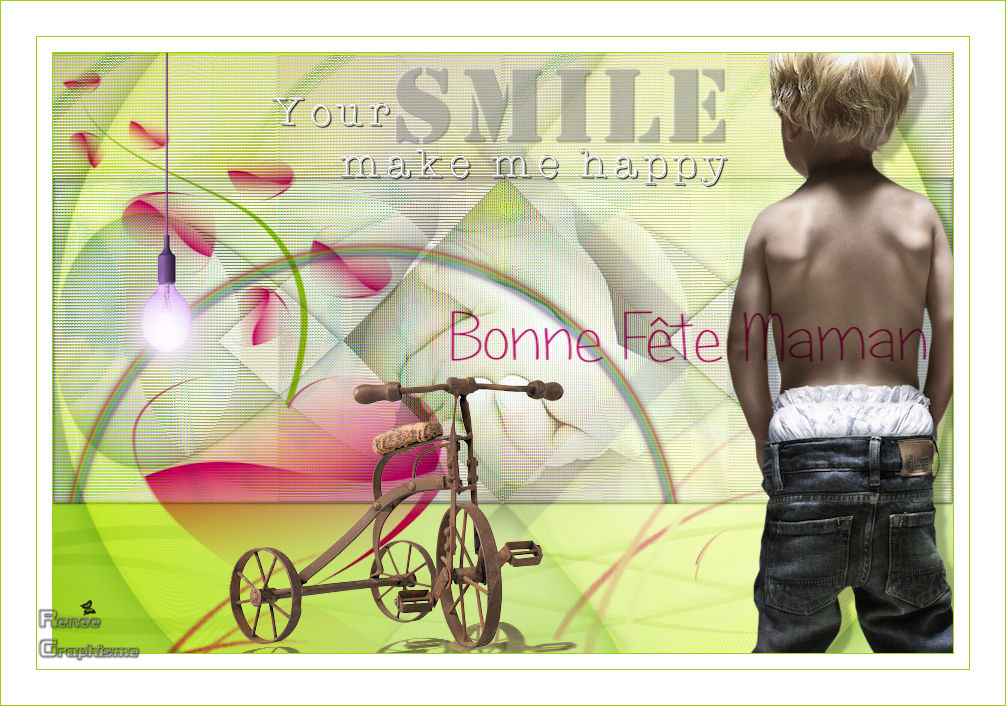
Fête des Mères 2019/Mothers Day 2019
- Preparation
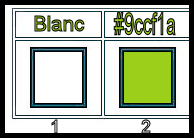
- Color Palette: Set your Foreground color to color #ffffff – Set your Background color to color #9ccf1a
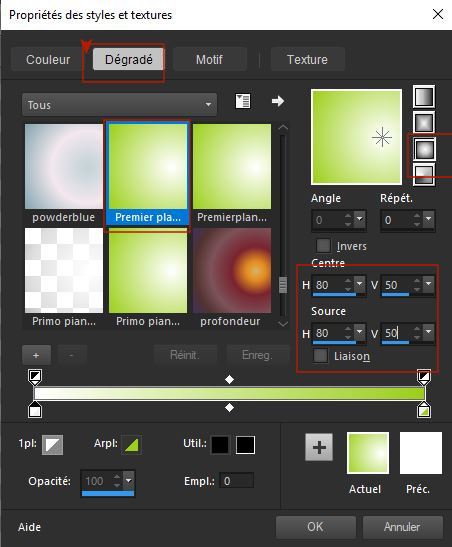
- Prepare a foreground/background sunburst gradient configured like this
1. File- Open a new transparent Image of 900
x 600 pixels
2. Activate Flood Fill Tool
 -
Flood fill the layer with the gradient -
Flood fill the layer with the gradient
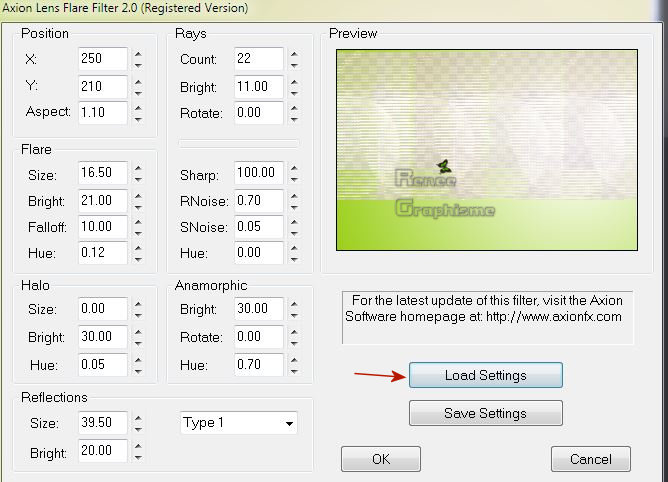
3. Effects-Plugins- Axion -Lens Flare Click on Load Settings >select my file- Preset ''fete_mere_lens_flare' can be used in any folder of your choice by clicking it. -3 Open it will be OK in your filter '
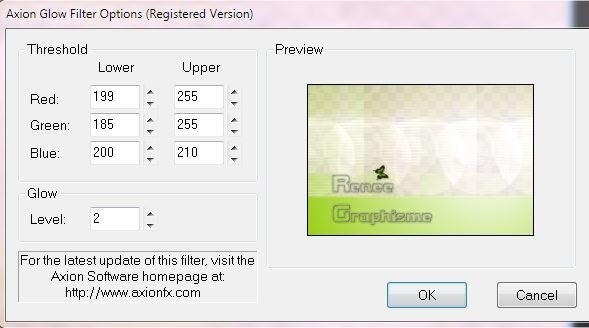
4. Effects -Plugins - Axion Glow use the settings below
5. Layers- Duplicate
6. Effects- Edge Effects- Enhance
7. Layers- Merge- Merge- Visible
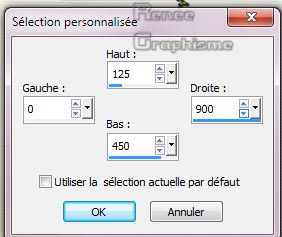
8. Activate Selection Tool -Custom Selection (S) -Rectangle with these settings

9. Selections- Promote Selection to Layer
10. Effects -Plugins -EyeCandy 5 - Glass tab-Settings-User settings and select my file :Preset''fete_mere_glass_renee''
Selections- Select None
11.
Layers- Duplicate
12.
Image -Free Rotate 90° to right
13.
Effects – Geometric Effects- Skew with these settings

14. Effects – Geometric Effects- Circle- Transparent
15.
Effects – 3 D Effects – Drop Shadow with these settings : 1/1/100/45 Color black
16.
Layers-Properties-Set the Blend Mode to " Hard Light "
17.
Effects -Plugins- Simple - 4 Way average
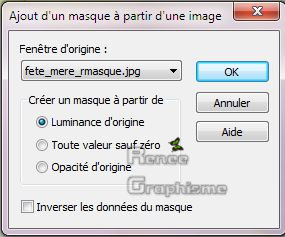
18.Layers- New Mask Layer-From Image and select Maske ‘’ fete_mere_rmasque.jpg’’
19.
Layers- Merge- Merge Group(leave the Blend Mode in Hard Light )
20.
Layers- Duplicate
21.
Layers- Merge- Merge Down
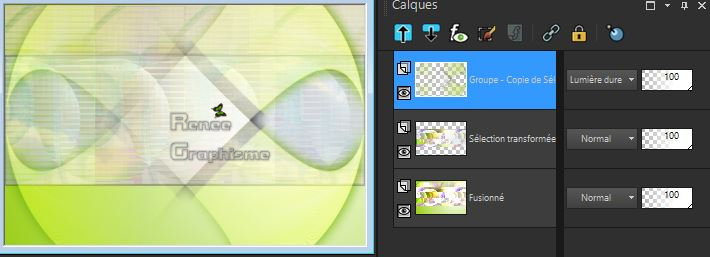
Your work and Layer Palette look like this now-You should have this result
- Activate the bottom of the layer-palette (Merged)
22.
Selections –load/save selection –load selection from disc and select my selection: ''fete_mere''
23.
Selections- Promote Selection to Layer
24.
Layers- Arrange- Bring to Top
25.
Effects - Plugins– AP[ Lines ] Silverlining use the settings below
Selections- Select None
26.
Effects- 3 D Effects- Drop Shadow with these settings: -1/1/52/14 Color black
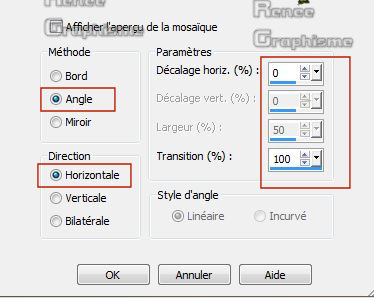
27.
Effects- Image Effects- Seamless Tiling use the settings below
28.
Layers- New Raster Layer
29.
Selections –load/save selection –load selection from disc and select my selection: "fete_mere_1''
30.
Activate Flood Fill Tool
-
Flood fill the selection with the sunburst gradient
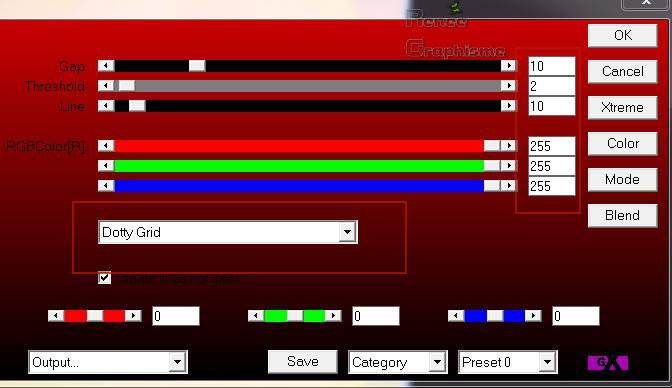
31.
Effects- Texture Effects- Blinds with these settings-Color black

Selections- Select None
32.
Layers-Properties-Set the Blend Mode to " Luminance "
33.
Activate the tube ''fete_mere_coeur_texte''
-Edit - Copy- Activate your work -Edit - Paste as a new layer
- Do not move, it is in the right place
34.
Layers-Properties-Set the Blend Mode to " Multiply "
35.
Activate the tube''fete_mere_mains''
-Edit - Copy- Activate your work -Edit - Paste as a new layer
- Do not move, it is in the right place
36.
Layers- Arrange- Move Down
37.
Layers-Properties-Set the Blend Mode to " Hard Light "
- To replace the top of the Layer-Palette
38.
Activate the tube ''enfant de dos.passion psp''
-
Image -Resize to 80%
-
Edit - Copy- Activate your work -Edit - Paste as a new layer
-
Move tool / place your tube on the right side of your image
39.
Layers- Arrange- Move Down
40.
Effects – 3 D Effects – Drop Shadow with these settings : 9 /11 /25 /5 Color black
- To replace the top of the Layer-Palette
41.
Activate the tube''arc_en_ciel''
-Edit - Copy- Activate your work -Edit - Paste as a new layer
42.
Effects – Image Effects – Offset with these settings: – H = -130 and V = 10
43.
Activate the tube ''manuedesignsharmonyelements''
-Edit - Copy- Activate your work -Edit - Paste as a new layer
-
Place the tube on top of your work
44.
Effects – 3 D Effects – Drop Shadow with these settings : 1/1/100/1 Color black
45.
Image -Negative Image
46.
Effects – 3 D Effects – Drop Shadow with these settings : 1/1/100/1 Color black
47.
Activate the tube ''fete_meres_lampe''
-Edit - Copy- Activate your work -Edit - Paste as a new layer
-
Place to your liking
48.
Activate the tube ''romantic_velo.pspimage''
Edit - Copy- Activate your work -Edit - Paste as a new layer-Move tool / place your tube on the left side of your image
49.
Effects – Plugins– Eyecandy 5 Impact –
perspective shadow-tab-Settings-User settings and select my file : Preset ‘’ fete_mere_ombrevelo’’
50.
Layers- Merge- Merge Visible
51.
Image - Add borders-Symmetric checked: 1 Pixel BG-Color #9ccf1a
52.
Image - Add borders-Symmetric checked: 15 Pixels FG-Color #ffffff
53.
Image - Add borders-Symmetric checked: 1 Pixel BG-Color #9ccf1a
54.
Image - Add borders-Symmetric checked: 35 Pixels FG-Color #ffffff
55.
Image - Add borders-Symmetric checked: 1 Pixel BG-Color #9ccf1a
Save as JPG
I hope you enjoyed this lesson
Renée
This lesson was written by Renée 2019
Edited and Update
2019
*
Any resemblance with an existing lesson is a coincidence
* Do not forget to thank the people who work with us and for us I have appointed the tubeurs and translators
Thanks
*
|


 Translations


 If a plugin supplied appears with this icon it must necessarily be imported into Unlimited *