|
Let's start the lesson.
Divinatoire/Divination/
- Preparation
- Material Properties:
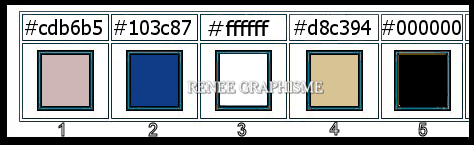
Set your foreground color to color #cdb6b5= 1 – Set your background color to color #103c87=2
1. Open the BG-Image
‘’Fond-Divinatoire ‘’- Promote Background Layer = Raster 1
2. Effects –Plugins
Unlimited 2.0 – ICNET-Filters - Tile & Mirror-Distortion
Mirror (horizontal) setting to: 126
3. Layers- Duplicate
4. Effects –Plugins-
Unlimited 2.0 – ICNET-Filters - Buttons & Frames - 3D
Glass Frame 3 -with these settings: 255/155
5. Effects –Plugins-
Unlimited 2.0 - Mock – Bevel setting to 171
6. Layers-Properties-Change the Blend Mode to " Screen"
7.Layers- Merge- Merge Down
8. Effects –Plugins-
Unlimited 2.0 - It@lian Editors Effect - Effetto
Fantasma with these settings: 0/38
9. Layers- New Raster Layer
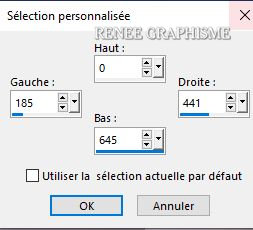
10. Activate Selection Tool -Custom Selection (S) -Rectangle with these settings
11. Activate Flood Fill Tool
 -
Opacity 65%- Fill the selection with the Foreground color =1 -
Opacity 65%- Fill the selection with the Foreground color =1
Selections- Deselect All
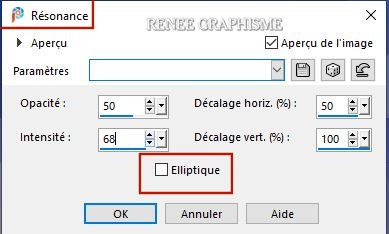
12. Effects – Reflection Effects– Feedback use the settings below
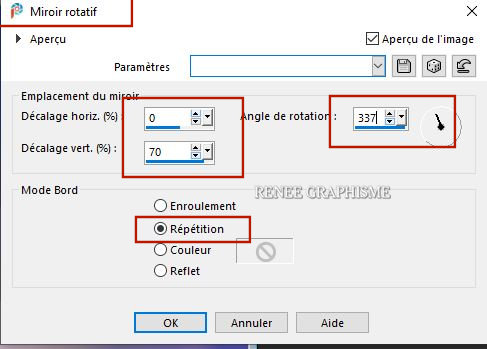
13. Effects- Reflection Effects - Rotating Mirror use the settings below
14.With your Magic Wand with these settings (add shift)

Select the inside of the triangle
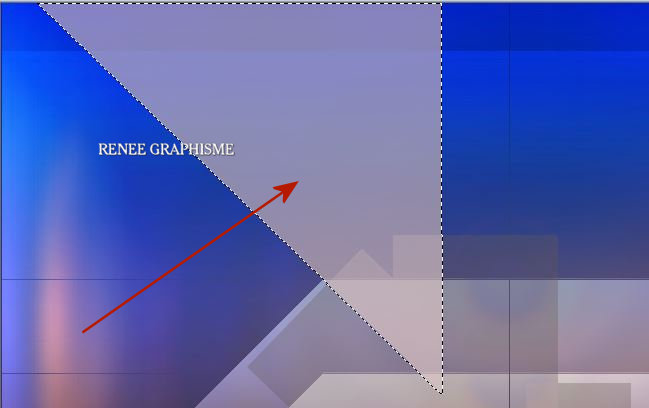
15. Selections- Promote Selection to Layer
In the Layer Palette-Activate the layer underneath ( Raster 2)
DELETE
- In the Layer Palette-Activate the layer above (Promoted Selection)
Selections- Deselect All
16. Image - Mirror - Mirror vertical ( Image - Flip in older versions of PSP)
17. Layers-Properties- Lower the Opacity to 63%
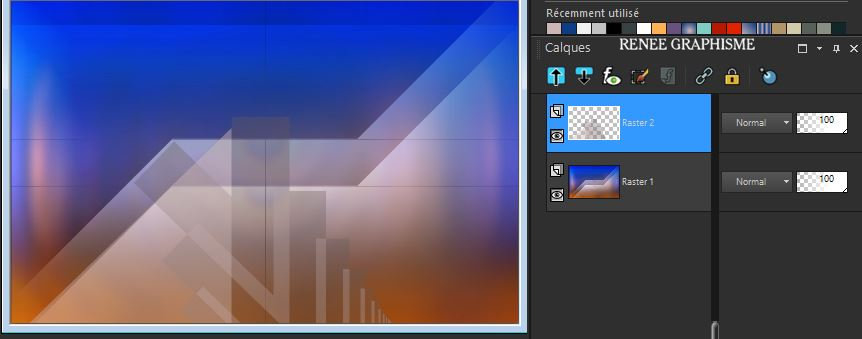
18.Layers- Merge- Merge Down
- Your work and Layer Palette look like this now-You should have this result
19. Effects – Plugins– Toadies – What are you 20/20
20. Effects –Edge Effects - Enhance
21. Layers- New Raster Layer
22. Selections –load/save selection –load selection from disc and select my selection: ‘’Divinatoire-1’’
- Set your Foreground color to color #ffffff=3
23. Activate Flood Fill Tool
-
Opacity 100% – Fill the selection with #ffffff=3
Selections- Deselect All
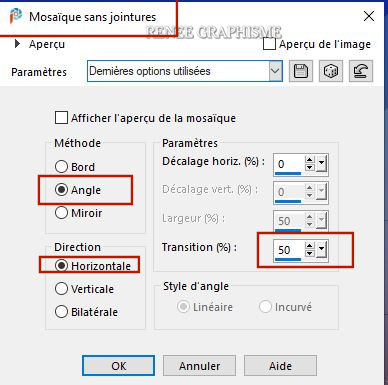
24.Effects- Image Effects- Seamless Tiling use the settings below
25. Selections –load/save selection –load selection from disc and select my selection: ‘’Divinatoire-2’’
26 Effects – Distortion Effects - Wave – Background color (
no deformation just a color change)
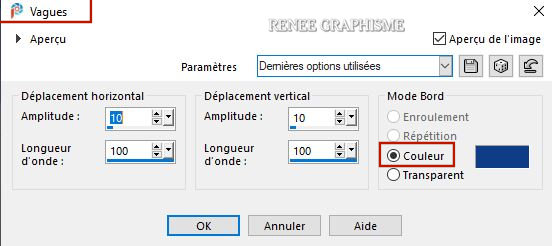
Selections- Deselect All
27.Effects– 3 D Effects – Drop Shadow with these settings: 0/7/38/42 Color Black
- Activate the bottom layer in the Layer Palette=
Raster 1
28. Layers- Duplicate
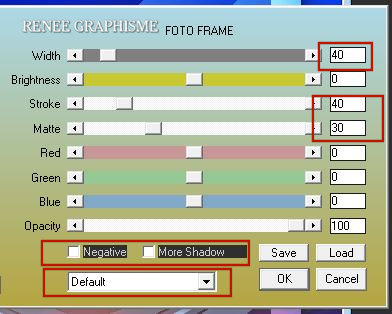
29. Effects –Plugins – AAA Frame – Foto Frame use the settings below
30. Layers-Properties-Change the Blend Mode to " Overlay "
31. Open the tube ‘’Divinatoire-Image-Rayons’’ -Edit - Copy- Activate your work -Edit - Paste as a new layer
32. Objects – Align
– Center in Canvas
33. Objects- Align
– Top
- Material Properties: Set your foreground color to color #d8c394= 4 – Set your background color to color #000000= 5
- To replace the top of the layer-palette
We will be creating the divination logo (I have created the logo in the materials file.). There are other logos that you can colorize to go along with the tubes you choose to use. Please do not modify the logos in the supplies,and please do not distribute these logos.)
34. Layers- New Raster Layer
35. Selections –load/save selection –load selection from disc and select my selection: ‘’Divinatoire-3’’
36. Activate Flood Fill Tool –
Fill the selection with the Foreground color #d8c394=4
Selections- Deselect All
37. Effects– 3 D Effects – Drop Shadow with these settings 2/1/100/4 Color Black
38. Layers- New Raster Layer
39. Selections –load/save selection –load selection from disc and select my selection: ‘’Divinatoire-4’’
40. Activate Flood Fill Tool –
Fill the selection with the Background color #000000=5
Selections- Deselect All
41. Layers- New Raster Layer
42. Selections –load/save selection –load selection from disc and select my selection: ‘’Divinatoire-5’’
43. Activate Flood Fill Tool –
Fill the selection with the Foreground color #d8c394=4
Selections- Deselect All
44. Effects– 3 D Effects – Drop Shadow with the same settings
45. Layers- New Raster Layer
46. Selections –load/save selection –load selection from disc and select my selection: ‘’Divinatoire-6’’
47. Activate Flood Fill Tool –Fill the selection with the Foreground color #d8c394=4
Selections- Deselect All
48. Effects– 3 D Effects – Drop Shadow with the same settings
49. Selections –load/save selection –load selection from disc and select my selection: ‘’Divinatoire-7’’
DELETE
Selections- Deselect All
50. Layers- Merge - Merge Down ( 3 times)
51. Effects – 3 D Effects– Drop Shadow with these settings: 1/1/45/0 Color BLack
52. Open the tube ‘’Divinatoire-Image-rayons 2.png’’ -Edit - Copy- Activate your work -Edit - Paste as a new layer
53. Objects –Align- Center
in Canvas
54. Objects - Align
-Top
In the Layer Palette- Activate the second layer from the bottom =Copy
of Raster 1
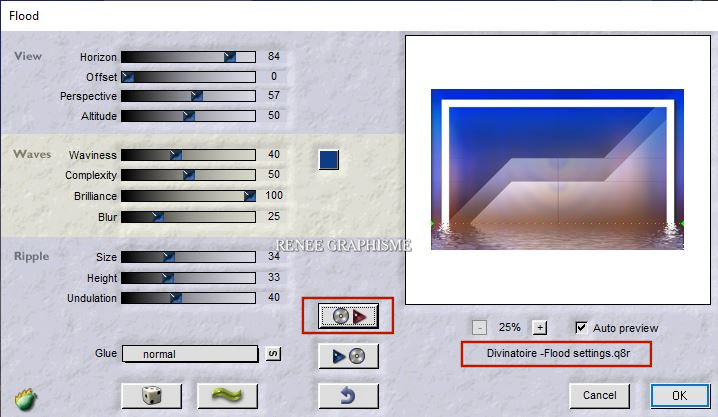
55. Effects – Plugins – Flaming Pear – Flood –Preset : Divinatoire
–Flood’’ clicking on the red arrow
 and search your file- Preset :Divinatoire
–Flood’’ can be used in any folder of your choice
and search your file- Preset :Divinatoire
–Flood’’ can be used in any folder of your choice
Or manual settings as shown in the example below
- To replace the top of the layer-palette
56. Layers- New Raster Layer
57. Set your foreground color to color #ffffff=3
Activate Flood Fill Tool
–
Fill the Layer with #ffffff
58. Layers- New Mask Layer - From Image and select Mask‘’ Narah_mask_0437.pspimage’’

- Layers- Merge Merge Group
59. Image –
Resize 48 % Resize all Layers not checked
60. Effects – 3 D Effects– Drop Shadow with these settings : 1/1/100/0 Color Black
- Pick Tool: (K) on your keyboard -Enter these parameters for the X: 23,00 and Y: 0,00 positions on the Toolbar
 23/0 23/0
61. Open the tube ‘’Divinatoire-Image-Etoiles’’ -Edit - Copy- Activate your work -Edit - Paste as a new layer
- Move it in the right side (see finished image)
62. Open the tube ‘’ Divinatoire –Image
- rayons 3.png’’ - Edit - Copy- Activate your work -Edit - Paste as a new layer
63. Layers-Properties-Change the Blend Mode to " Soft Light "
64. Open the tube ‘’Divinatoire-TEXTE.png’’ -Edit - Copy- Activate your work -Edit - Paste as a new layer
( both or whatever you want)
65. Pick Tool: (K) on your keyboard -Enter these parameters for the X: 78,00 and Y: 351,00 positions on the Toolbar
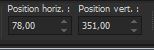 78 /
351
78 /
351
Press ( M ) to close the Pick Tool
66. Image - Add Borders - Symmetric checked: 1 Pixel Color #103c87=2
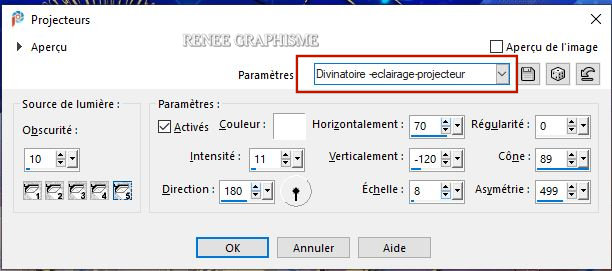
67. Effects – Illumination Effects-Lights-and select my file -Preset : ''Divinatoire -eclairage-projecteur''Or manual settings as shown in the example below
68. Image - Add Borders - Symmetric checked: 20 Pixels Color #ffffff
69. Image - Add Borders - Symmetric checked: 1 Pixel Color #103c87=2
70. Image - Add Borders - Symmetric checked: 45 Pixels Color #ffffff
71. Open the tube
‘’Divinatoire - Tubes-renee 1.pspimage’’ activate the layer "
Divinatoire"
-Edit - Copy- Activate your work -Edit - Paste as a new layer and move to the bottom right side (see finished image)
- Open the tube " watermark of Renée" - Edit - Copy- Activate your work -Edit - Paste as a new layer and move
72. Image - Add Borders - Symmetric checked: 1 Pixel Color #103c87=2
73.-Image-Resize to 1005 Pixels width.
Save as JPG file and you're done!
I hope you enjoyed this lesson
Renée
This lesson was written by Renée 09-05- 2020
Edited and Update
in 2020
*
Any resemblance with an existing lesson is a coincidence * Do not forget to thank the people who work with us and for us
I have appointed the tubeurs and translators
Thanks
*
|
 Translations