|
Let's start the lesson.

-
Preparation
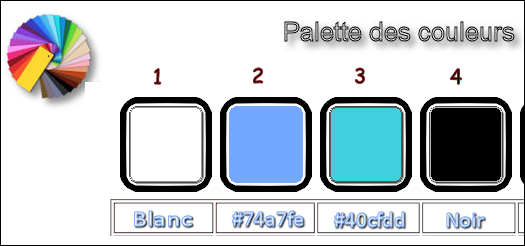
- Material Properties: Set your foreground color to color #74a7fe = No2 – Set your background color to color #ffffff

1.
Open BG-Image’’fond_Carnaval_2019’’- Window - Duplicate (or shift+D) - Close the original and proceed on the copy -Promote Background Layer =
Raster 1
2.
Adjust- Blur- Radial Blur use the settings below
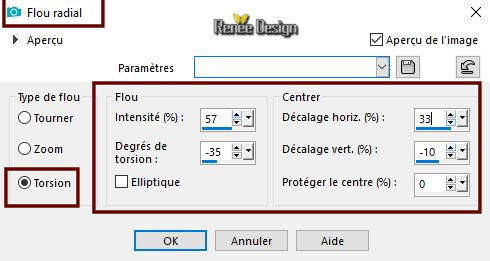
3.
Effects- Reflection Effects- Rotating Mirror use the settings below
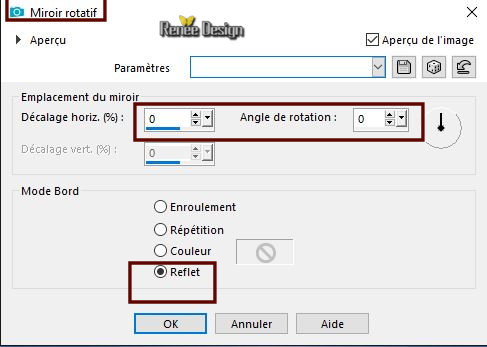
4.
Effects – Plugins – Medhi – Weaver
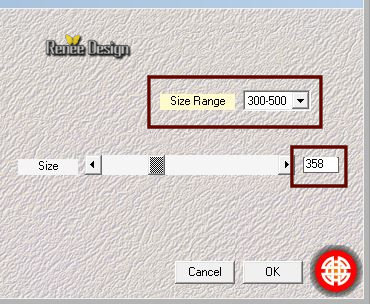
5.
Effects- Edge Effects- Enhance More
6.
Effects –Plugins – Ajust variation – More blue
7.
Selections –load/save selection –load selection from disc and select my selection: ‘’ Carnaval_2019_1’’
8.
Selections- Promote selection to Layer
9.
Layers- New Raster Layer
10.
Flood Fill Tool –
Flood Fill the selection with the background color #ffffff (2 clicks) –
Flood Fill the selection with the background color #ffffff (2 clicks)
11.
Layers- Merge- Merge Down
12.
Effects –Plugins - AP [ Color] Nightmares
You must first patch the AP filter O1 Innovations. The filter Color Nightmares is part of it
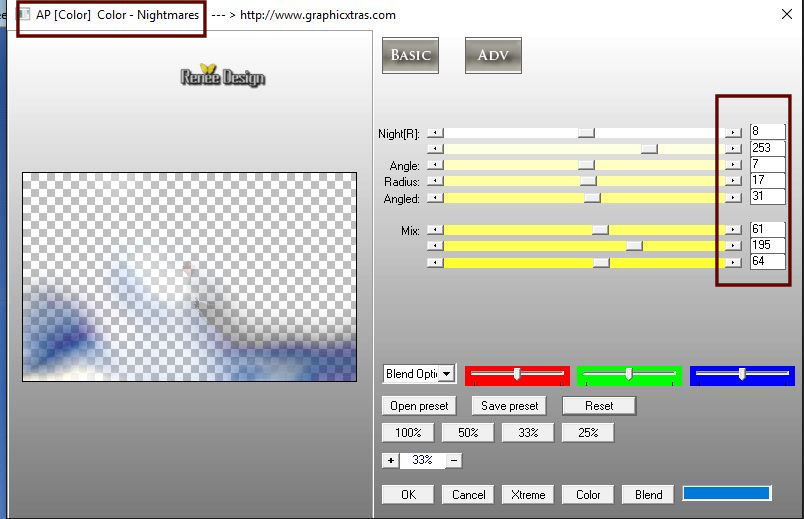
13.
Layers-Properties-Set the Blend Mode to "Dodge"
Selections- Deselect All
14.
Layers- New Raster Layer
15.
Selections –load/save selection –load selection from disc and select my selection: ‘’ Carnaval_2019_2’’
16.
Flood Fill Tool
 –
Flood Fill the selection with the background color #ffffff –
Flood Fill the selection with the background color #ffffff
Selections- Deselect All
17.
Effects – Distortion Effects –Ripple with these settings
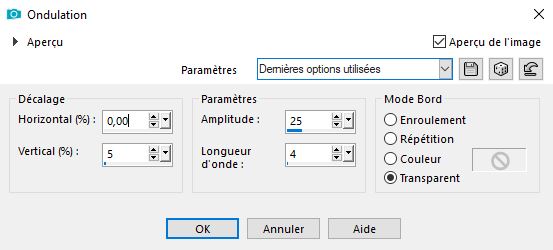
18. Layers- New Raster Layer
19.
Selections –load/save selection –load selection from disc and select my selection: ‘’ Carnaval_2019_3’’
20.
Flood Fill Tool
 –
Flood Fill the selection with the background color #ffffff –
Flood Fill the selection with the background color #ffffff
Selections- Deselect All
21.
Effects – Plugins– Vanderlee –Unplugged X-
Raster (Color to choose according to your colors /Renée has chosen color No 2)
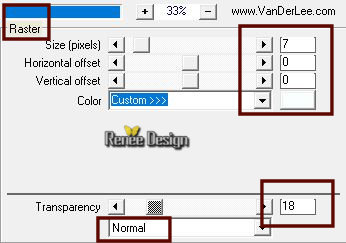
22.
Effects –Plugins – Mura’s Meister – Perspective
Tilling /using the default setting but put Height on 22
23.
Effects – 3 D-Effects – Drop Shadow with these settings: 0/0/85/15 foreground color
24.
Selections –load/save selection –load selection from disc and select my selection: ‘’ Carnaval_2019_4’’
DELETE

Keep the Selections
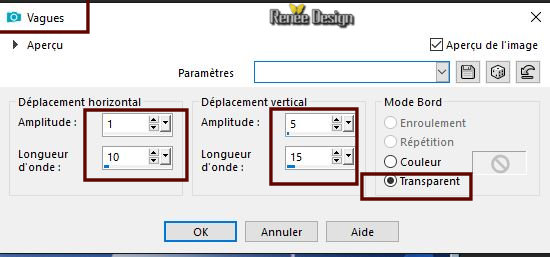
25. Effects –Distortion Effects– Wave use the settings below
26.
Promote Selection to Layer
Selections- Deselect All
27.
Effects- Edge Effects- Enhance More
28.
Layers-Properties-Set the Blend Mode to " Dissolve "
29.
Open the tube ‘’ Carnaval_2019_Image 1’
-
Edit - Copy- Activate your work -Edit - Paste as a new Layer
30.
Objects – Align -Right
31.
Layers-Properties-Set the Blend Mode to "Overlay"
32.
Open the tube ‘’ Carnaval_2019_Image 2’
-
Edit - Copy- Activate your work -Edit - Paste as a new Layer
33.
Effects – Image Effects – Offset with these settings : H = 185 and V = 6
34.
Effects – 3 D-Effects – Drop Shadow with these settings: 3/ - 2/ 29 /23 black
- Activate the bottom Layer = Raster 1
35.
Open the tube ‘’ballon’’
-Edit - Copy- Activate your work -Edit - Paste as a new Layer
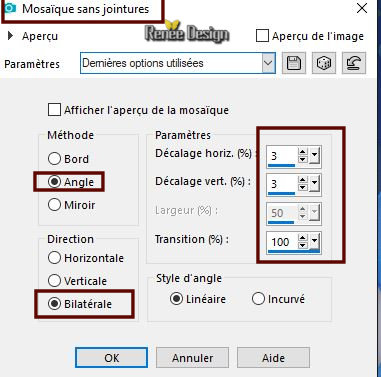
36.Effects – Image Effects- Seamless Tiling use the settings below
37.
Layers-Properties-Set the Blend Mode to " Soft Light "- Lower the Opacity of the layer to 73%
- To replace the top of the layer-palette
38.
Layers- New Raster Layer
39.
Selections –load/save selection –load selection from disc and select my selection: ‘’ Carnaval_2019_5’’
40.
Flood Fill Tool
 –
Flood Fill the selection with the background color #ffffff ( 2 or 3 clicks) –
Flood Fill the selection with the background color #ffffff ( 2 or 3 clicks)
Selections- Deselect All
41.
Effects – 3 D-Effects – Drop Shadow with these settings: 1/1/100/2 black
42.
Layers- New Raster Layer
43.
Selections –load/save selection –load selection from disc and select my selection: ‘’ Carnaval_2019_6’’
44.
Flood Fill the selection with the foreground color #74a7fe ( no 2)
45.
Effects – Plugins-Unlimited 2.0 - Andrew's Filters 6 - A Little
Bumpy Along... Using the default settings
Selections- Deselect All
46.
Layers- New Raster Layer
47.
Selections –load/save selection –load selection from disc and select my selection: ‘’ Carnaval_2019_7’’
Flood Fill the selection with the background color #ffffff
48.
Effects –Plugins - L & K-Dimitri : 120
Selections- Deselect All
49.
Adjust-Blur- Gaussian Blur : Radius 10
-
Activate the layer underneath =Raster 8
50.
Layers- Duplicate
51.
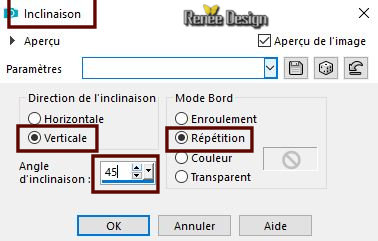
Effects- Geometric Effects - Skew with these settings
- To replace the top of the layer-palette
-
Material Properties: Set your foreground color to color #40cfdd = No3 – Set your background color to color #ffffff
52.
Layers- New Raster Layer
53.
Selections –load/save selection –load selection from disc and select my selection: ‘’ Carnaval_2019_8’’
54.
Flood Fill Tool
 –
Flood Fill the selection with the foreground color #40cfdd (2 clicks) –
Flood Fill the selection with the foreground color #40cfdd (2 clicks)
Selections- Deselect All
55.
Layers- Duplicate
56.
Layers-Merge- Merge Down
57.
Layers- New Raster Layer
58.
Selections –load/save selection –load selection from disc and select my selection: ‘’ Carnaval_2019_9’’
59.
Flood Fill Tool
 – Flood Fill the selection with the background color #ffffff
Selections- Deselect All
60.
Effects- Edge Effects- Enhance
61.
Layers-Properties-Set the Blend Mode to " Screen "
62.
Layers- New Raster Layer
63.
Selections –load/save selection –load selection from disc and select my selection: ‘’ Carnaval_2019_10’’
64.
Flood Fill Tool
 –
Flood Fill the selection with the background color #ffffff –
Flood Fill the selection with the background color #ffffff
Selections- Deselect All
65.
Layers-Properties-Set the Blend Mode to " Dodge "
66.
Layers- New Raster Layer
67.
Selections –load/save selection –load selection from disc and select my selection: ‘’ Carnaval_2019_11’’
8.
Flood Fill Tool
 –
Flood Fill the selection with the background color #ffffff –
Flood Fill the selection with the background color #ffffff
Selections- Deselect All
69.
Layers- New Raster Layer
70.
Selections –load/save selection –load selection from disc and select my selection: ‘’ Carnaval_2019_12’’
71.
Flood Fill Tool– Flood Fill the selection with the background color #ffffff ( 2 clicks)
Selections- Deselect All
72.
Layers-Properties-Set the Blend Mode to " Overlay "
73.
Layers- New Raster Layer
74.
Selections –load/save selection –load selection from disc and select my selection: ‘’ Carnaval_2019_13’’
75.
Flood Fill Tool– Flood Fill the selection with the background color #ffffff
Selections- Deselect All
76.
Activate your Magic Wand use the settings below /click inside the circle

77.
Layers- New Raster Layer
78.
Set the FG-Color to color black -Flood Fill Tool
 -
Flood Fill the selection with the foreground color black -
Flood Fill the selection with the foreground color black
Selections- Deselect All
79.
Layers-Properties-Set the Blend Mode to " Overlay "
80.
Layers- New Raster Layer
81.
Selections –load/save selection –load selection from disc and select my selection: ‘’ Carnaval_2019_14’’
82.
Flood Fill Tool
 –
Flood Fill the selection with the background color #ffffff (2 or 3 clicks) –
Flood Fill the selection with the background color #ffffff (2 or 3 clicks)
Selections- Deselect All
83.
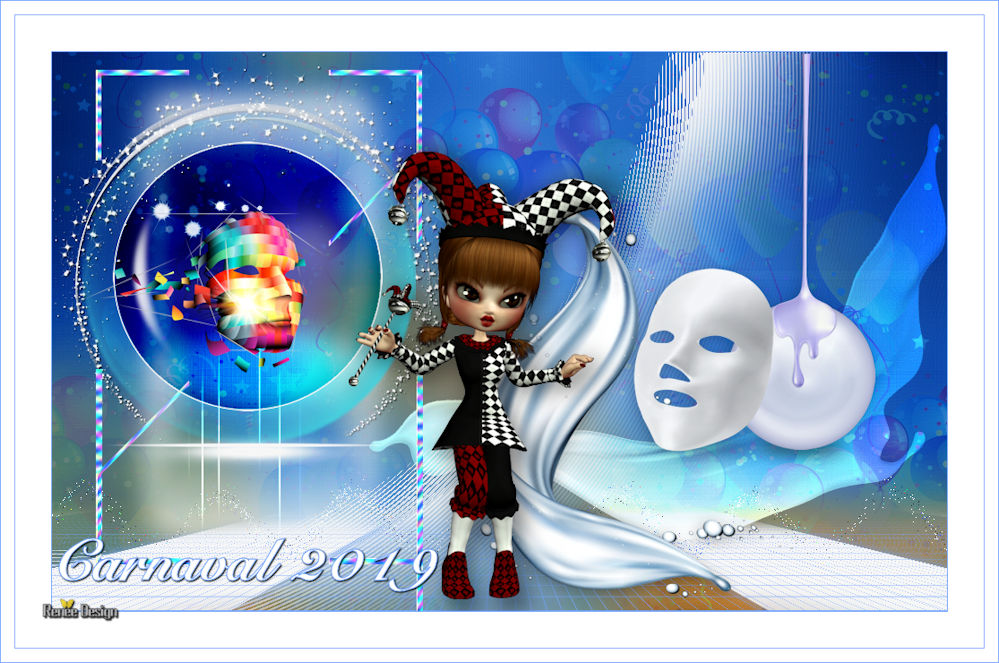
Open the ‘’Carnaval_2019_Image 3 -Edit - Copy- Activate your work -Edit - Paste as a new Layer
- Place in the middle of the circle
84.
Open the file "merci a cloclo " Feel free to choose a tube and past as a new layer and move
85.
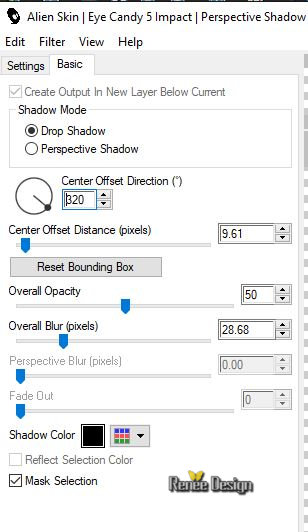
Apply a Drop Shadow or use Effects-Plugins Eyecandy 5 –Perspective
shadow with these settings
86.
With the attached font write your text
87.
Image - Add borders-Symmetric checked 1 Pixel color #74a7fe= No 2
88.
Image - Add borders-Symmetric checked 40 pixels #ffffff
89.
Image - Add borders-Symmetric checked 1 Pixel color #74a7fe= No 2
90.
Image - Add borders-Symmetric checked 15 Pixels #ffffff
91.
Image - Add borders-Symmetric checked 1 Pixel color #74a7fe= No 2
92.
Image Resize to 999 pixels width.
Save as JPG
I hope you enjoyed this lesson
Renée
This lesson was written by Renée 13-12-2018
Edited and Update
2019
*
Any resemblance with an existing lesson is a coincidence
* Do not forget to thank the people who work with us and for us I have appointed the tubeurs and translators
Thanks
*
|


 Translations


