|
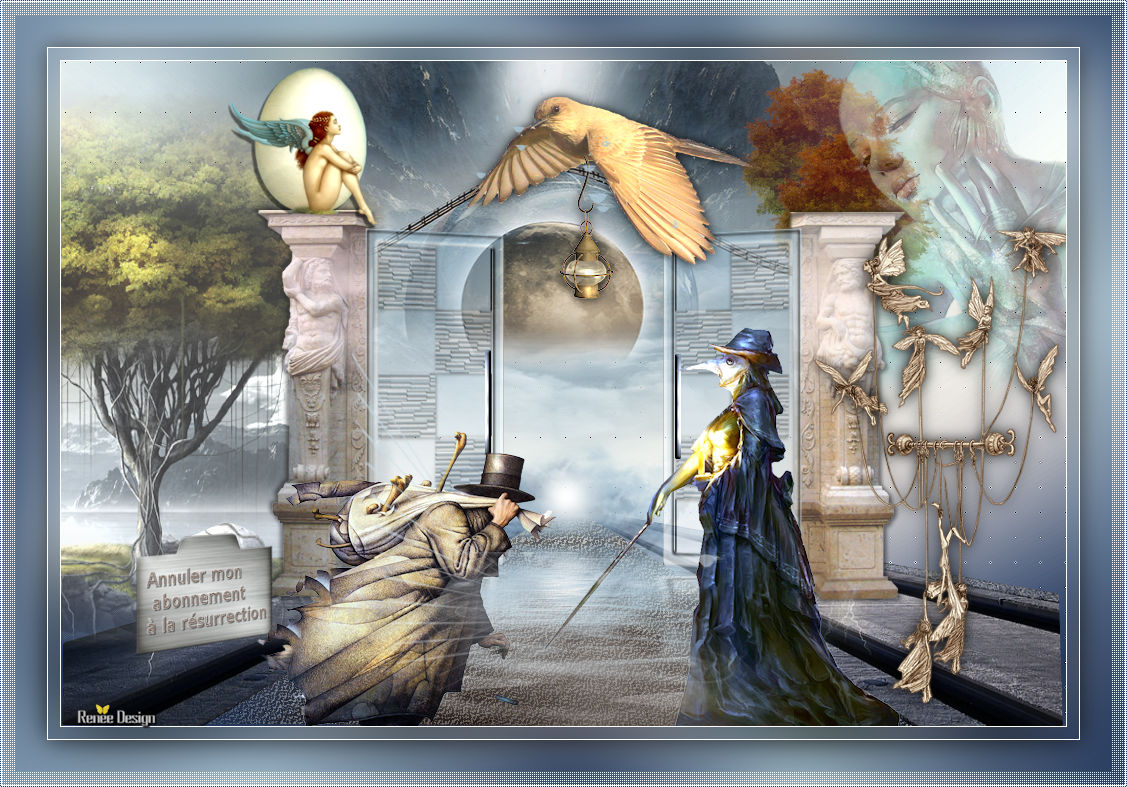
Let's start the lesson.
-
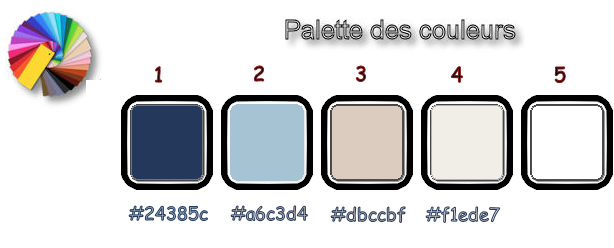
Preparation/ - Color Palette: Set your foreground color to #24385c=No.1 - Set your background color to #a6c3d4 =No.2
1. File: Open a new transparent Image 1005 x 665 pixels
2. Effects -
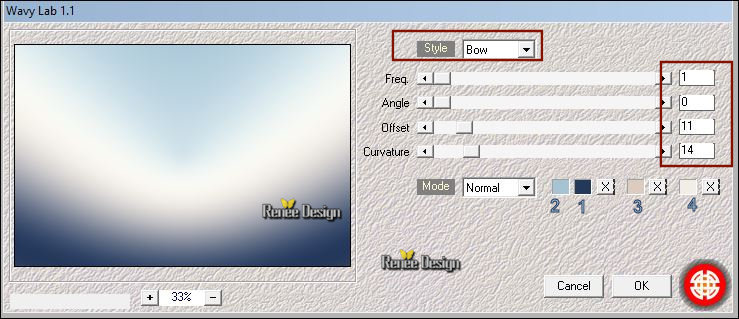
Plugins – Medhi – Wavy lab 1.1 use the settings below
3. Effects –
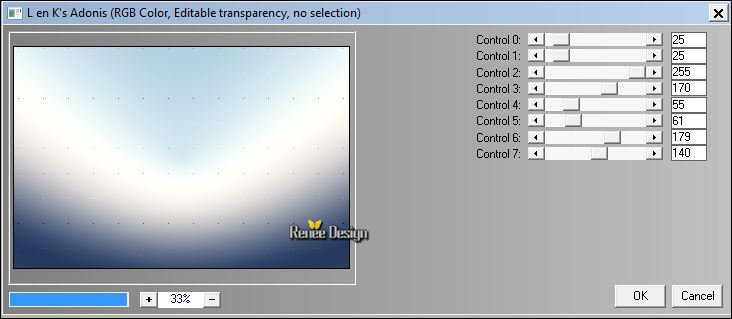
Plugins – L & K’s – Adonis use the settings below
4. Effects- Edge Effects- Enhance
5. Open the tube ‘’ Renee_No_ressurection_Image 1’’
- Edit/ Copy-Edit - Paste as new layer on your working image
6. Effects- Image Effects- Offset with these settings: H = 6 and V = 198
-
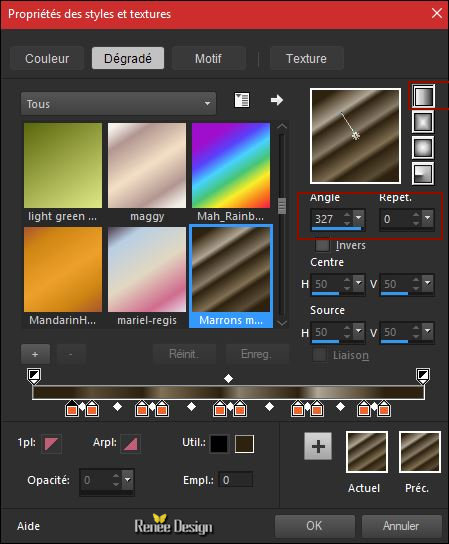
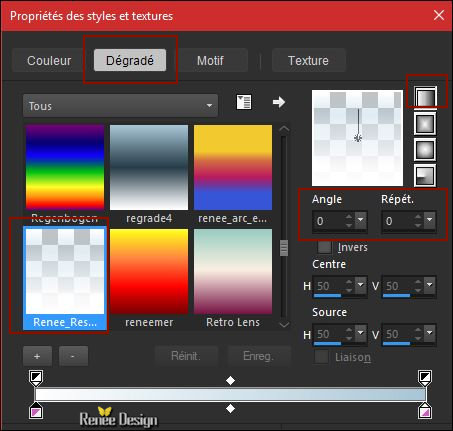
Material of the foreground: change material of the foreground into gradient and select‘’Corel_06_035’’- Prepare a foreground-Linear gradient configured like this
7. Layers- New Raster Layer
8.
Selections –load/save selection –load selection from disc and select my selection: ‘’to_ the_ resurrection
1’’
9. Activate Flood Fill Tool and fill the selection with the gradient
10. Adjust- Blur- Gaussian Blur: Radius: 65
11. Effects
–Plugins -ICNET FILTERS - Unlimited - Noise Filters- Add Noise
(Monochromatic) 91
12. Effects
– User Defined Filter – Emboss 6 using the default settings
Selections- Deselect All
13.
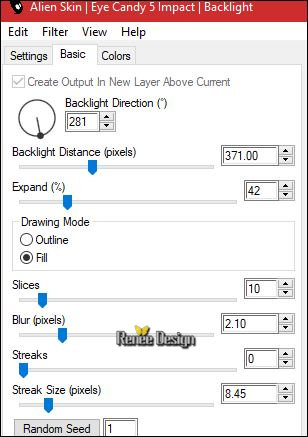
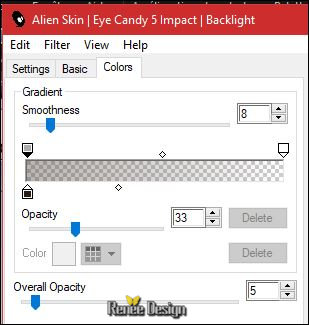
Effects –Plugins- EyeCandy 5 Impact –
Blacklight-tab Settings /User Settings and choose my Preset ‘’to _the
_resurrection.f1s’
Or manual settings as shown in the example below
14. Layers- New Raster Layer
15.
Selections –load/save selection –load selection from disc and select my selection: ‘’to_ the_ resurrection
2’’
16. Open the tube ‘’ Renee_No_ressurection_Image 2.pspimage’’
- Edit - Copy- Activate your work -Edit - Paste into Selection
Selections- Deselect All
- Activate your Pick Tool (k)
With your arrow keys on the keyboard 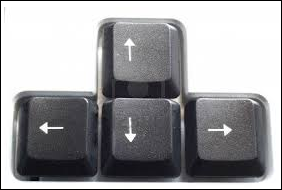
click once to the right
17. Effects
– Plugins -ICNET FILTERS – Unlimited - Color Effects -Swap
Red/Blue
18. Layers- New Raster Layer
19.
Selections –load/save selection –load selection from disc and select my selection: ‘’to_ the_ resurrection
3’’
20. Openn the tube ‘’Renee_No_ressurection_Image 3.pspimage’’
- Edit - Copy- Activate your work -Edit - Paste into Selection
-
Selections- Deselect All
- Activate your Pick Tool (k)
With your arrow keys on the keyboard
click once to the left
21.
Effects –Plugins- ICNET FILTERS – Unlimited - Color Effects -Swap
Red/Blue
22. Layers- Megre- Merge Down
23.
Selections –load/save selection –load selection from disc and select my selection: ‘’to_ the_ resurrection
4’’
DELETE
 2 times 2 times
Keep Selected
24.Activate the layer underneath = (Raster 3)
DELETE
2 times
Selections- Deselect All
Your work and Layer Palette look like this now
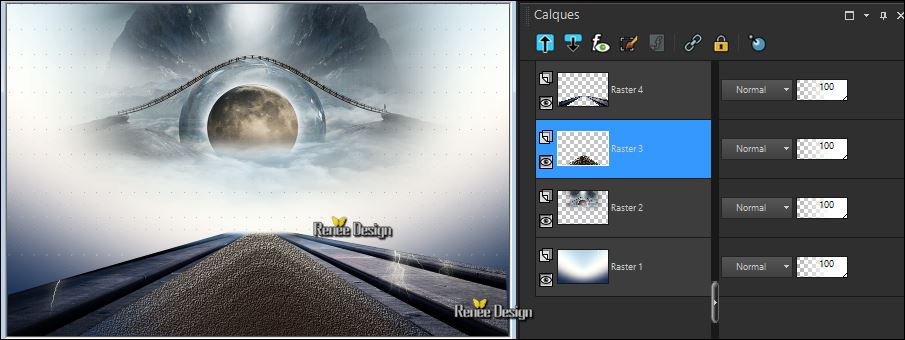
-Activate the top of the layer palette =Raster 4
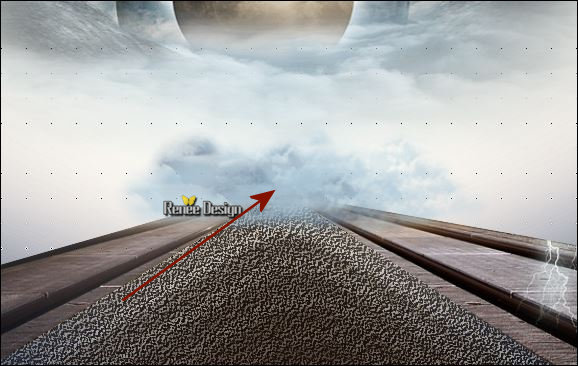
25. Open the tube ‘’ Renee_No_ressurection_Image 4.pspimage’’
- Edit/ Copy-Edit - Paste as new layer on your working image
- Move Tool/ Move it in the right place as shown in the example below
26. Activate the Tool Lighten/Darken Brush (push L on your keyboard) use settings below

- To lighten the cloud, click left and right of the cloud while holding down the right mouse button
-To darken the cloud click in the middle of the cloud while holding down the left mouse button
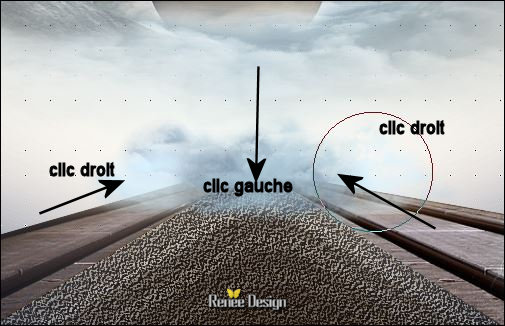
- Do not add a New Layer
27.
Selections –load/save selection –load selection from disc and select my selection: ‘’to_ the_ resurrection
5’’
28. Effects- Illumination Effects- Sunburst use the settings below

Selections- Deselect All
29.
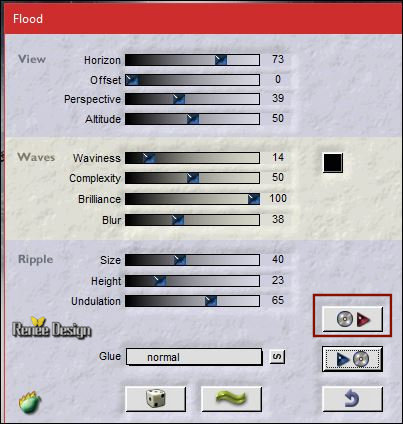
Effects – Plugins– Flaming Pear – Flood-click on the red arrow>> and select my file-preset ‘’ to
the resurrection_Flood settings.q8r’-can be used in any folder of your choice by clicking it. . Open it will be ok in your filter
Or manual settings as shown in the example below
-In the Layer-Palette-Make Raster 4 aktive
30. Open the tube ‘’Renee_No_ressurection_Image 5’’
- Edit/ Copy-Edit - Paste as new layer on your working image
31. Effects- Image Effects- Offset with these settings: H = - 407 and V = 38
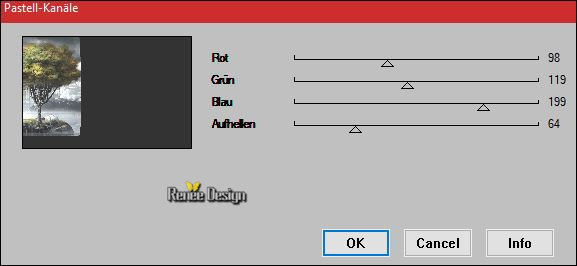
32.
Effects – Plugins-Nil’s Color Filters 2.1 – Pastell–Kanäle use the settings below ( Filter is included into the zipfile )
33.Open the tube ‘’ Renee_No_ressurection_Image 6.pspimage’’
- Edit/ Copy-Edit - Paste as new layer on your working image
34. Effects- Image Effects- Offset with these settings: H = 18 and V = - 12
35. Effects
– 3D Effects – Drop Shadow with these settings : 2/3/47/5 black
- Repeat: Effects
– 3D Effects –Drop Shadow -Negative
36. Open the tube ‘’ Renee_No_ressurection_Image 7.pspimage’’
- Edit/ Copy-Edit - Paste as new layer on your working image
- Move Tool /Move to the top right side of your image
37.Layers- Arrange- Move Down
- To replace the top of the layers palette
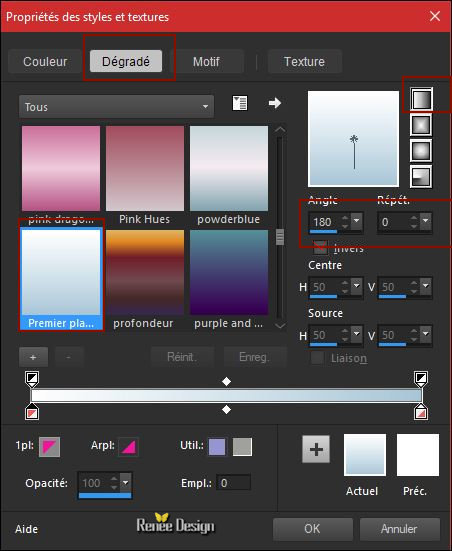
-Color Palette: Set your foreground color to # a6c3d4 =No 2 Set your background color to # ffffff No 5
- Prepare a foreground/background-Linear gradient configured like this-
Invert checked !!!
38. Layers- New Raster Layer
39.
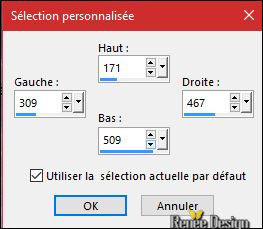
Activate Selection Tool -Custom Selection (S) -Rectangle with these settings
40. Activate Flood Fill Tool and fill the selection with the gradient
41.
Selections- Modify- Contract 14 Pixels
DELETE
Selections- Deselect All
42.
Selections- Select All-Selections- Float- Selections Defloat
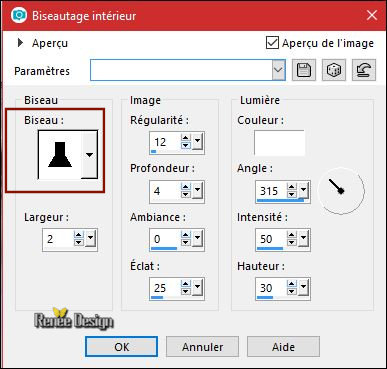
43. Effects
– 3D Effects – Inner Bevel use the settings below
Selections- Deselect All
44. Activate your Magic Wand with these settings

–
Select the interior of the door
45. Activate Flood Fill Tool and fill the selection with the gradient
46. Effects
–Plugins – L& K’s –Pia 64
Selections- Deselect All
47. Activate your wand and select the black squares
DELETE
48. Activate Flood Fill Tool and fill the selection with background color #ffffff
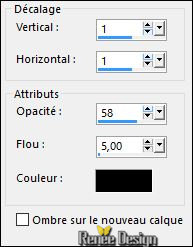
49. Effects
–3 D Effects – Drop Shadow with these settings
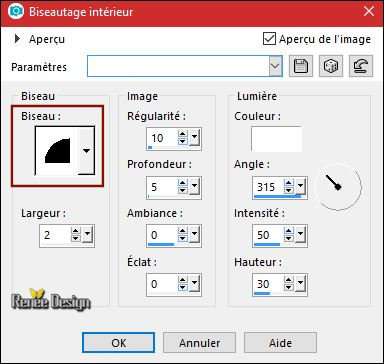
50. Effects
– 3D Effects – Inner Bevel use the settings below
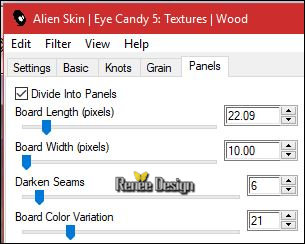
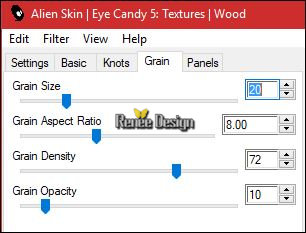
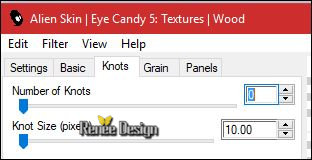
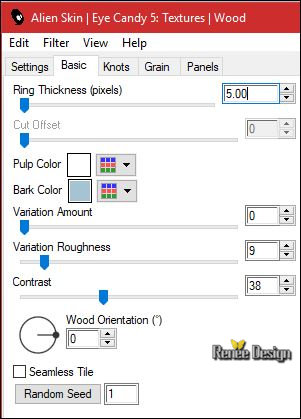
51.
Effects –Plugins-–Eye Candy 5 textures – Wood-tab Settings /User Settings and choose my-Preset
to the resurrection_Wood.f1s
Or manual settings as shown in the example below
Selections- Deselect All
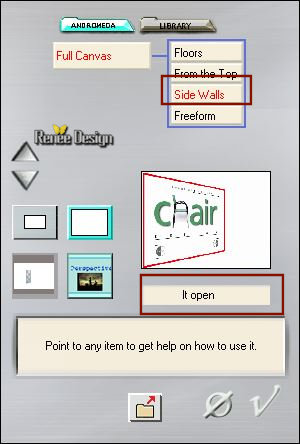
52.
Effects – Plugins - Andromeda – Perspective – Side
Walls – It Open
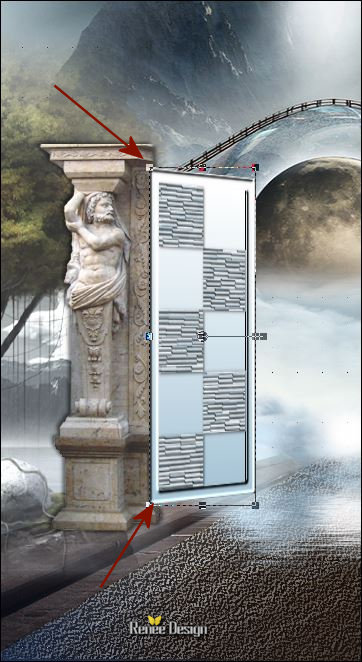
53. Activate your Pick Tool (k) - Place and pull on the upper and lower edge of the door to make it fit
54. Layers- Duplicate
55. Image - Mirror - Mirror Horizontal (Image - Mirror in older versions of PSP) (Place on the Pillar (use the arrow keys on your keyboard -arrow to the right to move it properly)
56. Layers- Merged- Merged Down
57.
Set the Opacity of this layer to 59%
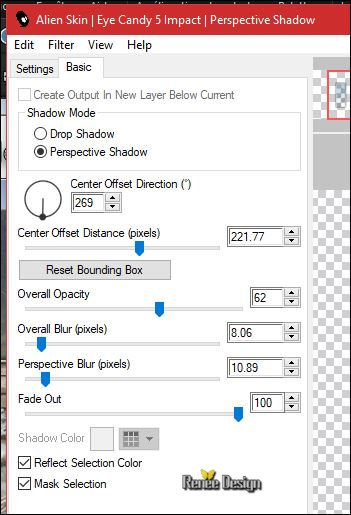
58.
Effects –Plugins – EyeCandy 5 impact –Perspective
shadow-tab Settings /User Settings and choose my-Preset ‘’To_ressurection_shadow’’
Or manual settings as shown in the example below
59. Open the tube ‘’Renee_Poignee_porte’’
- Edit - Copy- Activate your work -Edit - Paste as a new layer
60. Layers- Duplicate Move it to the right place on this door (see finished Image )
61. Layers- Merge 2 times down (Pillars and the two door elements on one layer)
- In the Layer-Palette-Make Raster 7 aktive ( the pillar)
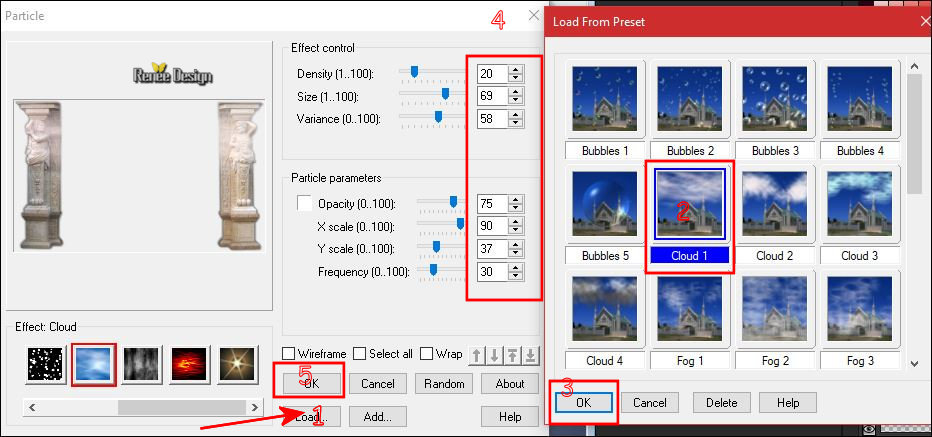
62. Effects
–Plugins – Ulead Effects -Particle
1. Click
Load – and select – Cloud 1 - Ok
2. Adjust the settings– Ok
Set the foreground color to #ffffff-(Is necessary)
- Color Palette: configured like this
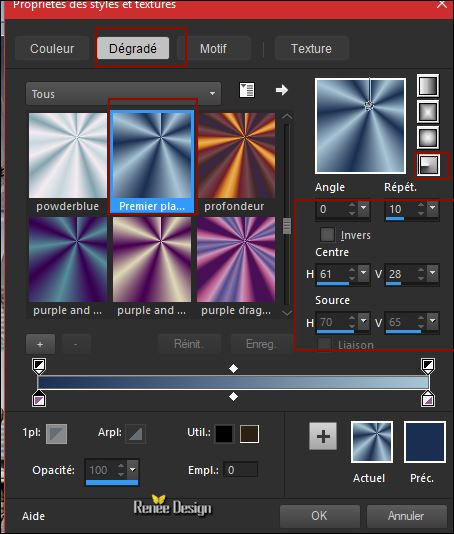
Material of the foreground: change material of the foreground into gradient and select
‘’Renee_Resurrection.PspGradient’’ Prepare a foreground-Linear gradient configured like this
- To replace the top of the layers palette
63.
Layers- New Raster Layer
64.
Selections –load/save selection –load selection from disc and select my selection: ‘’to_ the_ resurrection
6’’
65. Activate Flood Fill Tool-Change the opacity of the color to 50%-Fill the selection with the gradient
Selections- Deselect All
66. Layers- Duplicate
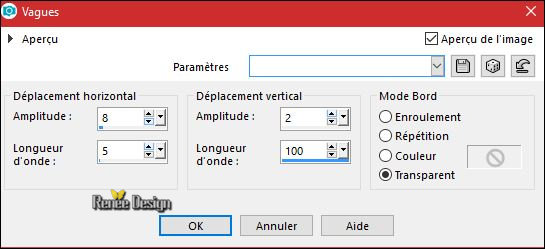
67. Effects
– Distortion Effects- Wave use the settings below
68. Open the ‘’No_ressurection_tubes_creation’’
- Activate and Paste all the tubes of this element as a new layer
- Move Tool/ Move it in the right place ( see finished image )
69. Open the tube ‘’ Renee_tube_man.pspimage’’
- Image
Resize to 35%
- Edit/ Copy-Edit - Paste as new layer on your working image
- Move Tool/ Move it in the right place
70. Layers- New Raster Layer
71.
Selections –load/save selection –load selection from disc and select my selection: ‘’to_ the_ resurrection
7’’
72. Activate Flood Fill Tool-Opacity of the color to 100% -Fill the selection with #ffffff
- Layers-Properties-Set the Blend Mode to " Soft Light "
Selections- Deselect All
73. Image - Add borders-Symmetric checked 1 pixel #ffffff
74.
Selections- Select All
75. Image - Add borders-Symmetric checked 12 Pixels # a6c3d4 =No. 2
76.
Selections- Invert
- Color Palette: Set your foreground color to # 24385c =No. 1- Set your background color to #a6c3d4 =No. 2
-
Prepare a foreground/background-Radial gradient configured like this
77. Activate Flood Fill Tool and fill the selection with the gradient
78. Adjust- Blur- Gaussian Blur: Radius: 35
Selections- Deselect All
79.Image - Add borders-Symmetric checked 1 pixel #ffffff
80. Selections- Select All
81. Image - Add borders-Symmetric checked 45 pixels # a6c3d4= No. 2
82.
Selections- Invert
83. Activate Flood Fill Tool and fill the selection with the gradient
84. Adjust- Blur- Gaussian Blur: Radius: 35
85.
Selections- Invert
86. Effects
–3D Effects – Drop Shadow with these settings 0/0/58/32 black
Selections- Deselect All
87. Image - Add borders-Symmetric checked 1 pixel #ffffff
88. Image - Add borders-Symmetric checked 1 pixel # 24385c =No. 1
89. Effects-Plugins – [AFS IMPORT] sqborder 2 with these settings:
10/17/215
Save as JPG
10/1/2018
I hope you enjoyed this lesson
Renée
This lesson was written by Renée January 2018
Edited and Update
2018
*
*
Any resemblance with an existing lesson is a coincidence
* Do not forget to thank the people who work with us and for us I have appointed the tubeurs and translators
Thanks
| 
 Translations


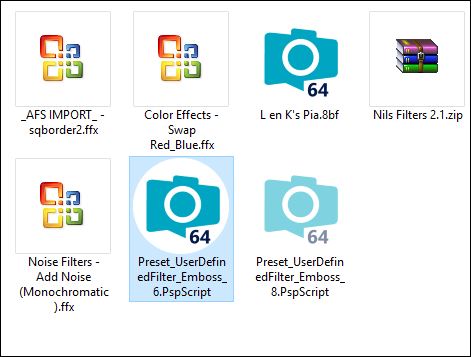


 If a plugin supplied appears with this icon it must necessarily be imported into Unlimited *