|
Let's start the lesson.
1.
Open the image ‘’fond_bonne_fete_maman’’/Window - Duplicate (or shift+D) - Close the original and proceed on the copy -Promote Background Layer =Raster 1
2.
Adjust-Blur- Gaussian Blur : Radius 32
3.
Layers- Duplicate
4.
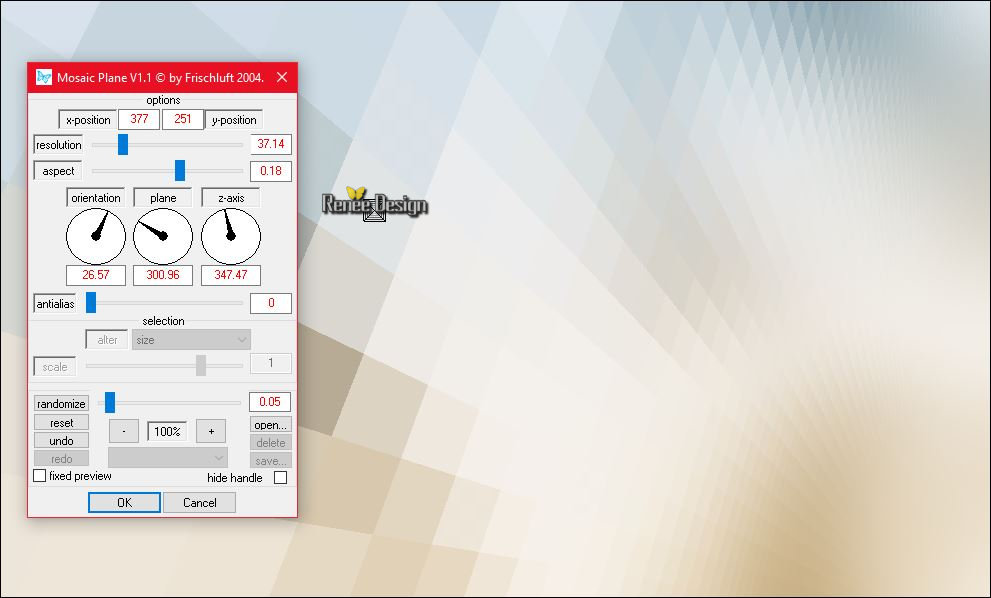
Effects - Plugins – Frischluft – Mosaic
Planeuse settings below -The Result
5.
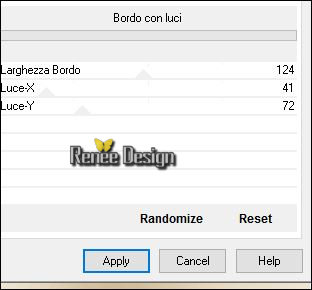
Effects –Plugins- Unlimited -It@lian Editors Effect- Bordo con
luci
6. Image Resize to 80% all layers not checked
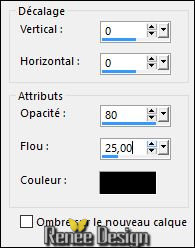
7. Effects- 3 D Effects- Drop Shadow with these settings
8. Layers- New Raster Layer
9. Properties foreground: Set your Foregroundcolor to #ffffff -Activate Flood Fill Tool and fill the layer with the Foregroundcolor #ffffff
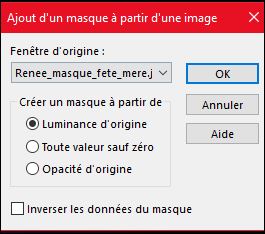
- Open the mask ‘’ Renee_masque_fete_mere’’ in psp
10. Layers- New Mask layer from Image and choose Mask:
11. Layers- Merge- Merge Group
12. Effects- 3 D Effects- Drop Shadow with the same settings
13. Effects- Illumination Effects- Lights-choose my preset click on the Preset « Preset_Lights_Renee_fete_mere »C:\Users\YourName\Documents\My PSP-files\ Presets
Or manual settings as shown in the example below -Color#cbcbcd

14. Open the tube ‘’ Alies
1-2VA196-valentine-girl-09012015.pspimage
- Edit/ Copy-Edit - Paste as new layer on your working image
-
With your Move tool place it in the right place
15.
Effects –Plugins– EyeCandy 5 Impact – Perspective
shadow -Settings -Factory Settings-Preset ‘’ Reflect in front – Faint’’
16. Open the tube ‘’ Alies 391-hartjesregen-13012011.pspimage’’
- Edit/ Copy-Edit - Paste as new layer on your working image
-
With your Move tool and move on top a little to the left
17. Effects- 3 D Effects- Drop Shadow with these settings: 1/1/77/1 black
18. Open the tube ‘’ Alies 1-2CH104-flowergirl-14092014.pspimage’’
- Edit/ Copy-Edit - Paste as new layer on your working image
- With your Move Tool move on the bottom left side
19. Open the tube ‘’ Renee_tube_arbre_bonne_fete_maman’’
-Edit/ Copy-Edit - Paste as new layer on your working image
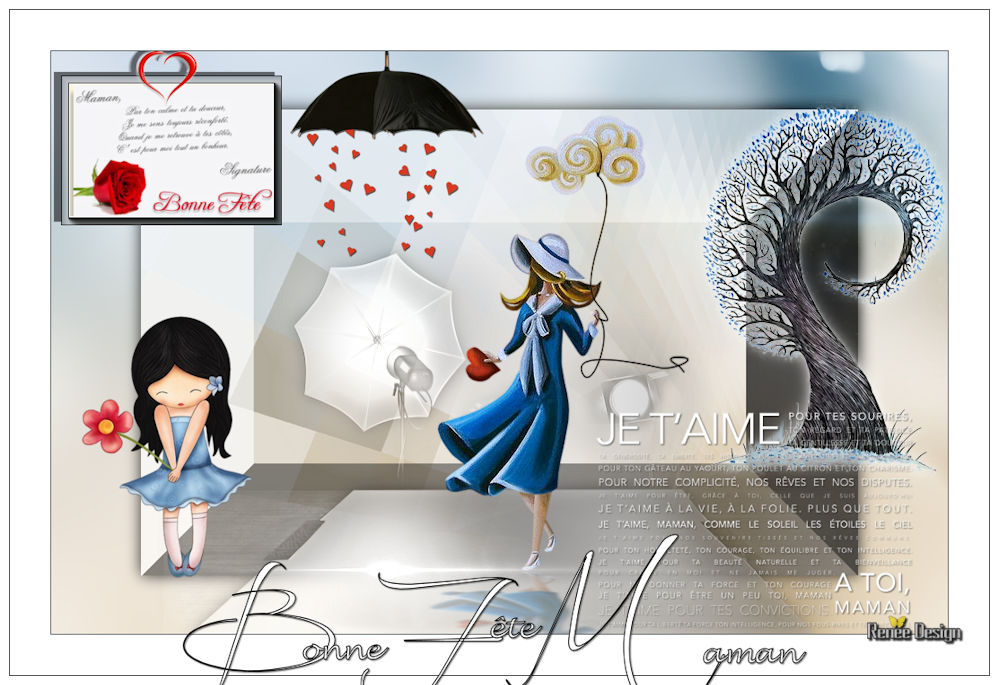
- With the move tool, move it in the upper right (see finished image )
20. Layers- New raster Layer
21.
Selections –load/save selection –load selection from disc and choose my selection:‘’
bonne_fete_maman_1’’
22. Activate Flood Fill Tool and fill the selection with the foregroundcolor white ( 2 clicks )
Selections- Deselect All
23. Effects- Edge Effects- Enhance
24. Open the tube ‘’ bonne_fete_maman_image_1 »
- Edit/ Copy-Edit - Paste as new layer on your working image
- With the move tool, move it in the upper right corner as shown in the example below
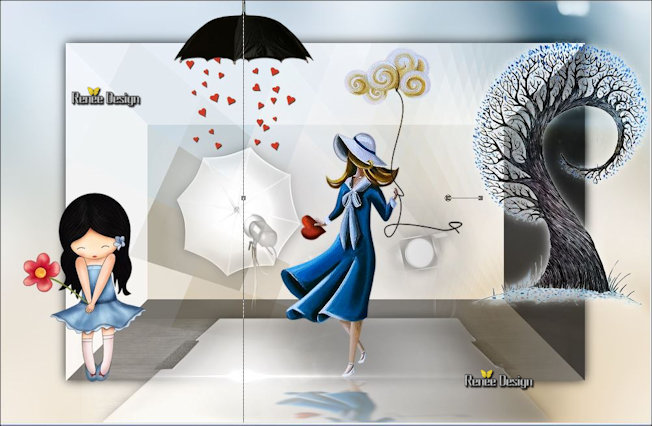
Blend Mode "Overlay "
- Activate the bottom of the layer palette= Raster 1
25.
Activate Selection Tool -Custom Selection (S) Rectangle with these settings
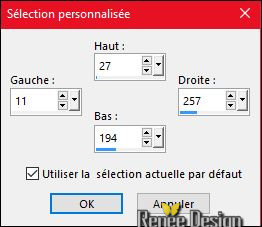
26.
Selections- Promote selection to Layer
27. Layers- Arrange- Bring to Top
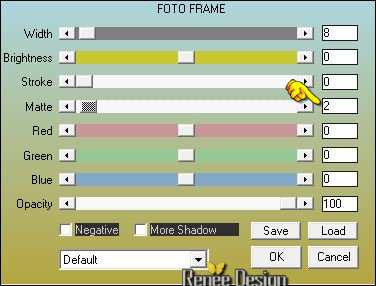
28. Effects
–Plugins– AAA Frame Foto Frame use settings below
29.
Selections – Modify – Contract 10 pixels
30. Open the tube’’ bonne_fete_maman_carte.jpg’’
- Edit/ Copy-Edit - Paste into selection
Selections- Deselect All
31. Open the tube ‘’ bonne_fete_maman_image_2.pspimage’’
- Edit/ Copy-Edit - Paste as new layer on your working image
- Activate Move Tool (M) place on top left
32. Layers-Merge- Merge Down
33. Effects- 3 D Effects- Drop Shadow with these settings: -4/-8/55/1 black
34.
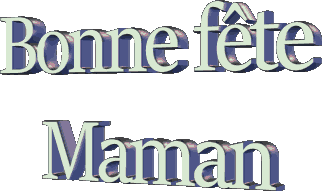
Open de brush image ‘’ texte-maman-fete-mere’’ in your Psp
- File- Export Custom Brush- Give it a name
35. Layers- New Raster Layer
36. Activate Brush Tool and select my file in the list ‘’ texte-maman-fete-mere’’ with these settings -Stamp in the right corner at the bottom by using your foregroundcolor white

37. Effects- 3 D Effects- Drop Shadow with these settings: 1/1/55/2 black
38. Image - Add borders-Symmetric checked: 1 black
39. Image - Add borders-Symmetric checked: 45 pixels white
40. Image - Add borders-Symmetric checked: 1 black
41. Image - Add borders-Symmetric checked: 10 pixels white
42. Open the tube Text -Edit/ Copy-Edit - Paste as new layer on your working image -Ore write your own text
43. Image Resize to 999 pixels width
Save as JPEG
I hope you enjoyed this lesson
Renée
This lesson was written by Renée 01/05/2016
Edited and Update
2016
*
Any resemblance with an existing lesson is a coincidence
* Do not forget to thank the people who work with us and for us I have appointed the tubeurs and translators
Thanks Renée
*
| 

 Translations


 When you see this logo the filter is imported in Unlimited

 All rights reserved