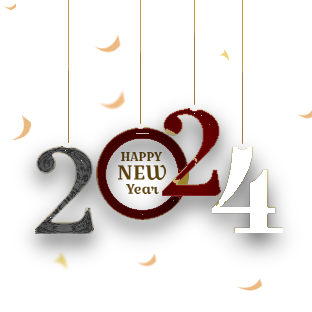
|
Let's start the lesson


- Preparation
-Material Properties: Set your Foreground color to color #831100 =1- Set your Background color to color #000000 = 2
1. Open the Background Image
‘’Fond-BA-2024.jpg’’- Promote Background Layer = Raster 1
2. Layers- New Raster Layer
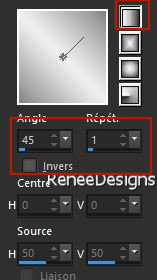
- Properties Foreground- Prepare a Foreground/Background linear Gradient configured like this
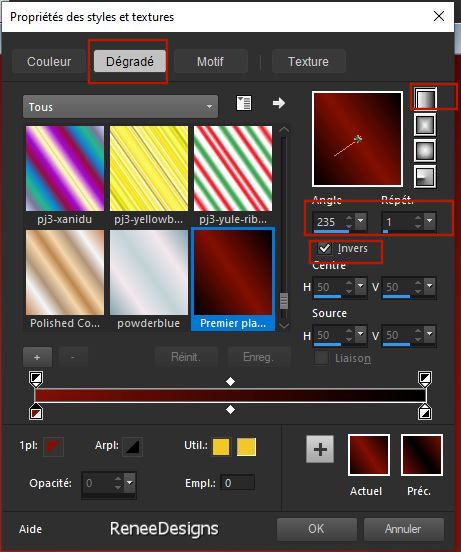
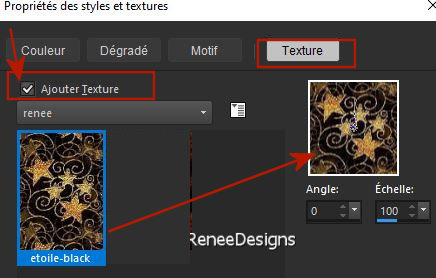
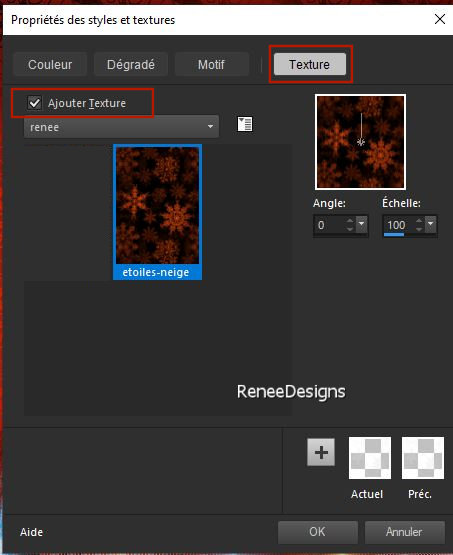
Add Foreground Texture -choose Texture ‘’etoile-black’’’(be sure to check 'add texture'.)
3. Activate Flood Fill Tool
-
Fill the layer with the Foreground Gradient and Texture (Apply 1 or 2 clicks)
4. Effects - Plugins- Filters in Unlimited 2.0 &<Background Designers
IV> -@Night Shadow Pool using the default settings –
Except
INTENSITY at 203
5. Layers- New Layer
6. Selections –load/save selection –load selection from disc and select my selection: ‘’BA-2024-1’’
- Properties Foreground- Prepare a Foreground Linear Gradient and select ‘’ ES Platinum 30’’-
configured like this
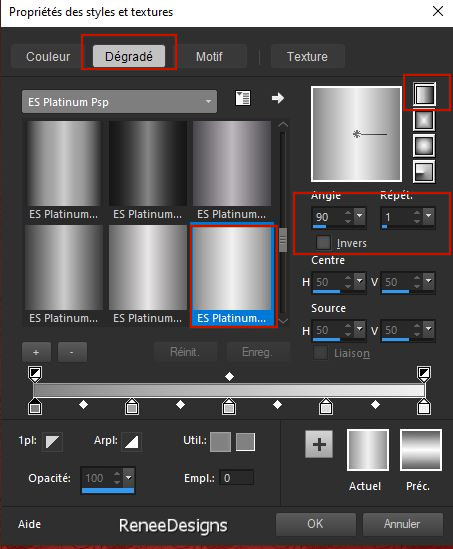
7.Activate Flood Fill Tool
 –
Fill the selection with the Gradient –
Fill the selection with the Gradient

8. Effects - Plugins - Filters in Unlimited 2.0 - Filter Factory
Gallery J - Window Screen..use the settings below
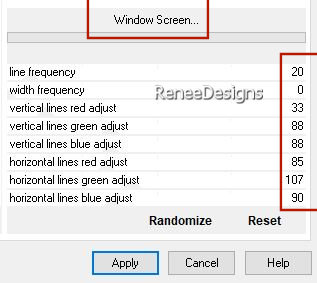
9. Effects - Plugins - Filters in Unlimited 2.0 - Tramages - Tow The
Line..with these settings: 44/0/255/255
10. Effects – Plugins – Mura’s Meister – Perspective Tiling use the settings below
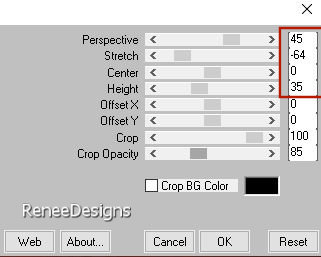
11. Effects– Distortion Effects- Waves use the settings below
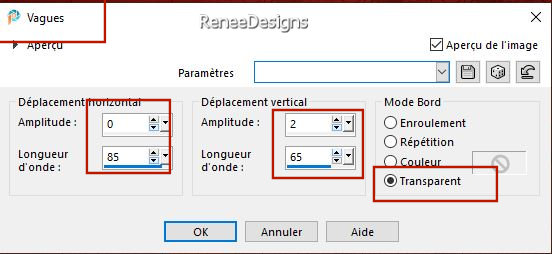
12. Effects – 3D-Effects -
Drop Shadow with these settings: 14/ -1
/38 /3 Color Black
13. Layers-Properties-Set the Blend Mode to " Hard Light "
14. Open the Tube Renee-TUBES- BA2024-Lumieres’’ --Edit - Copy- Activate your work -Edit - Paste as new layer
15. Pick Tool: (K) on your keyboard -Enter these parameters on the Toolbar
 47 / 449
Press ( M ) to close the Pick Tool
16. Layers-Properties-Set the Blend Mode to " Screen "
- Foreground Properties - Change your linear Gradient to a Radial Gradient configured like this
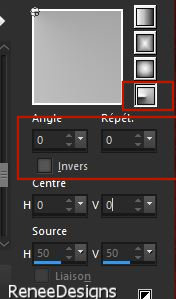 Add Foreground Texture -choose Texture Add Foreground Texture -choose Texture
17. Layers- New Raster Layer
18. Selections –load/save selection –load selection from disc and select my selection: ‘’BA-2024-2’’
19. Activate Flood Fill Tool
 –Fill the selection with the Foreground/Texture (Apply 2 clicks) –Fill the selection with the Foreground/Texture (Apply 2 clicks)

20. Effects – 3D-Effects - Drop Shadow with these settings: 10/10/65/12 Color Black
21. Layers-Properties– Reduce the Opacity of this layer to 69%
22. Layers- Arrange –
Move down twice
23. Layers- New Raster Layer
24. Selections –load/save selection –load selection from disc and select my selection: ‘’BA-2024-3’’
-Foreground properties-Set the Foreground to linear Gradient and take this Gradient again ‘’ES Platinum 30’’- configured like this
25.Activate Flood Fill Tool  – Fill the selection with the Gradient
26. Effects - Plugins - Filters in Unlimited 2.0 - Tramages -
Accelerating Glass..using the default settings

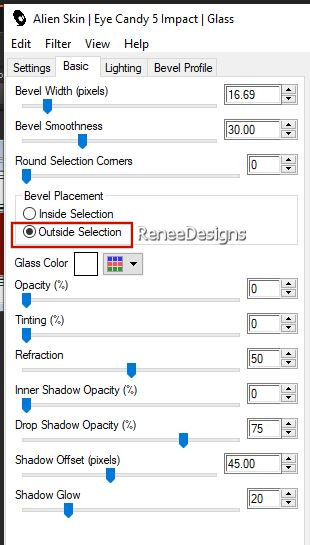
27. Effects -Plugins- Alien Skin EyeCandy 5 – Impact- Glass use the settings below
Put the image aside for now, we will need it later
28. File: Open a Transparent Image in this size : 650
x 650 Pixels
29. Selections –load/save selection –load selection from disc and select my selection: ‘’BA-2024-4’’
Color-Palette-Set the Foreground color to color #ec0205=3
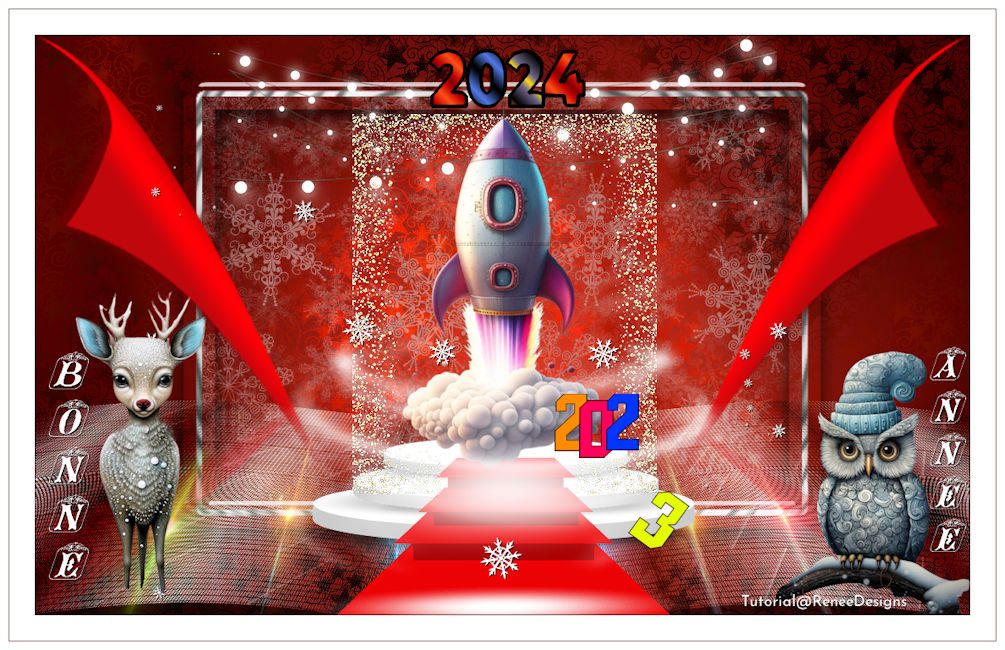
-Activate Flood Fill Tool
 –Fill the selection with the Foreground color #ec0205=3 –Fill the selection with the Foreground color #ec0205=3
30. Layers- New Raster Layer
- Selections –load/save selection –load selection from disc and select my selection: ‘’BA-2024-5’’
Color-Palette-Set the Foreground color to color #000000=2
-Activate Flood Fill Tool
 –Fill the selection with the Foreground color #000000=2 –Fill the selection with the Foreground color #000000=2
- Adjust-Blur- Gaussian Blur-Radius 15%
31. Layers- New Raster Layer
- Selections –load/save selection –load selection from disc and select my selection: ‘’BA-2024-6’’
Color-Palette-Set the Foreground color to color #cbcbcb=5
-Activate Flood Fill Tool
 –Fill the selection with the Foreground color#cbcbcb=5 –Fill the selection with the Foreground color#cbcbcb=5
32. Layers- New Raster Layer
- Selections –load/save selection –load selection from disc and select my selection: ‘’BA-2024-7’
Color-Palette-Set the Foreground color to color #aa0001=4
-Activate Flood Fill Tool
 –
Fill the selection with the Foreground color #aa0001=4 –
Fill the selection with the Foreground color #aa0001=4
33. Layers- New Raster Layer
- Selections –load/save selection –load selection from disc and select my selection: ‘’BA-2024-8’’
Color-Palette-Set the Foreground color to color #ffffff
-Activate Flood Fill Tool
 –
Fill the selection with the Foreground #ffffff –
Fill the selection with the Foreground #ffffff
34. Layers- New Raster Layer
- Selections –load/save selection –load selection from disc and select my selection: ‘’BA-2024-9’’
Color-Palette-Set the Foreground color to color #ec0205=3
-Activate Flood Fill Tool
 –
Fill the selection with the Foreground color #ec0205=3 –
Fill the selection with the Foreground color #ec0205=3

In the Layer Palette-Close the layer 1
35. Edit - Copy Special - Copy Merged
36. Edit - Paste as new layer
37. Image - Resize to 80%- Resize all Layers NOT checked.
38. Layers - Duplicate
39. Image - Resize to 80%- Resize all Layers NOT checked.
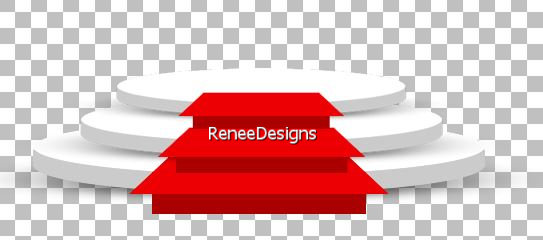
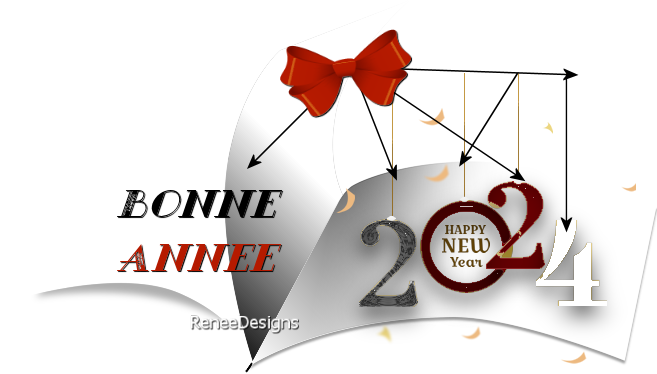
- Move as shown in the example below
40.Activate and open the bottom layer (Raster 1)
41. Layers- Merge- Merge Visible
Edit- Copy!!
42. Activate your minimized image from step 27
43. Edit - Paste as a new layer
44. Objects – Align – Bottom
- Layers- Arrange- Bring to Top
45. Open the Tube ‘’Renee-TUBES- BA2024-
lampes’’ -Edit - Copy- Activate your work -Edit - Paste as new layer
-
Objects - Align - Top
46. Layers- New Raster Layer
47. Selections –load/save selection –load selection from disc and select my selection: ‘’BA-2024-10’’
48.Color-Palette-Set the Foreground color to color #ffffff
Activate Flood Fill Tool
 –
Fill the selection with the Foreground color #ffffff (Apply 3 clicks) –
Fill the selection with the Foreground color #ffffff (Apply 3 clicks)
49.Open the Tube ‘’ Renee-TUBES- BA2024-
Image1’’ -Edit - Copy- Activate your work -Edit - Paste as new layer
50. Objects – Align – Top
– Objects-Align- Left
51. Layers- Duplicate
52.
Image - Mirror - Mirror Horizontal (Image - Mirror in older versions of PSP)
53. Layers- Merge- Merge Down
54. Effects - Plugins - Alien Skin EyeCandy 5 – Impact –Perspective
Shadow–Tab-Settings- User Settings and select my File- Preset ’’BA2024-Shadow’’
55. Layers- New Raster Layer
56. Selections –load/save selection –load selection from disc and select my selection: ‘’BA-2024-11’’
57.Activate Flood Fill Tool
 –
Fill the selection with the Foreground color #ffffff (Apply 2 clicks) –
Fill the selection with the Foreground color #ffffff (Apply 2 clicks)

58. Effects–3D- Effects- Drop Shadow with these settings: 1/1/100/1 Color Black
59. Open the Tube ‘’Renee-TUBES- BA2024- cadre
doré’’ -Edit - Copy- Activate your work -Edit - Paste as new layer
60. Pick Tool: (K) on your keyboard -Enter these parameters on the Toolbar
 375/ 93
Press ( M ) to close the Pick Tool
61. Open the Tube ’’ Renee-TUBES-Bonne Annee 2024 decos’’ and open the Tube
''Renee-fusée'' -Edit - Copy- Activate your work -Edit - Paste as new layer
Place to your liking
62. Image - Add Borders-Symmetric checked:
- 1 Pixel -Color #ec0205= 3
- 10 Pixels -Color #ffffff
- 1 pixel -Color #831100- 1
- 20 Pixels -Color #ffffff
63. Image-Resize, 1005 Pixels width-resize all layers checked
64. Paste the author's watermark on your work and your own watermark
65.
Layers- Merge - Merge All( flatten)
Save as JPG
******
A year of sharing is coming to an end. Thank you for your loyalty.
We'll be back ... I hope in 2024 for new tutorials.

I hope you enjoyed this lesson
Renée
This lesson was written by Renée 05/11/2023
Edited and Update
in 2023
*
Any resemblance with an existing lesson is a coincidence
* Do not forget to thank the people who work with us and for us
- I have appointed the tubeurs and translators
Thanks
*
|
 Translations


