|
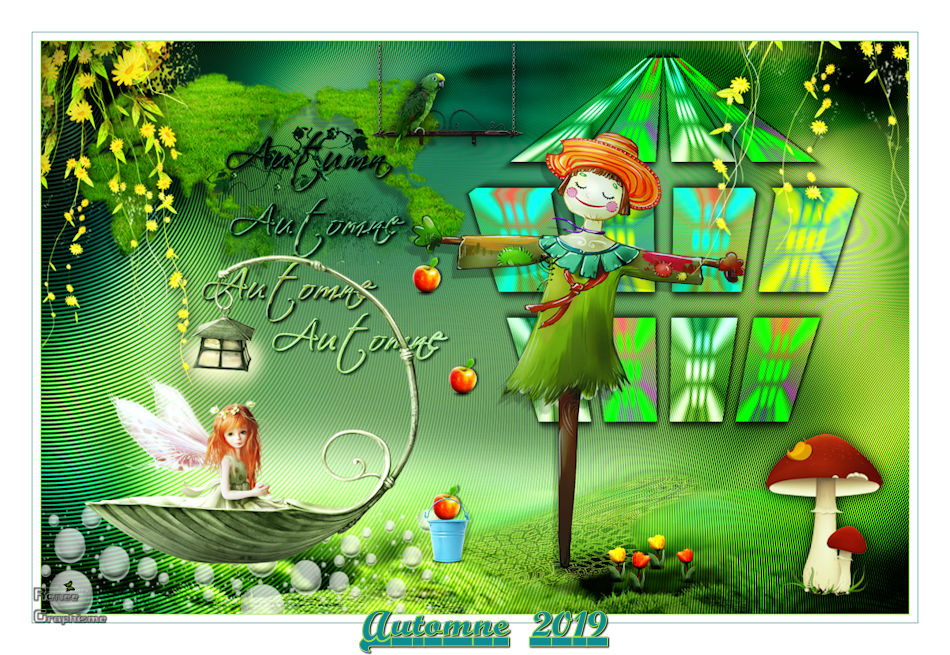
Automne/Autumn 2019
-Preparation
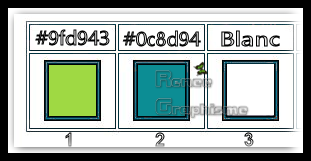
- Color Palette:
Set your Foreground color to color #9fd943=1 – Set your Background color to color #0c8d94= 2
1. Open the BG-Image
‘’Fond-automne-2019''- Window - Duplicate (or shift+D) - Close the original and proceed on the copy -Promote Background Layer =Raster 1
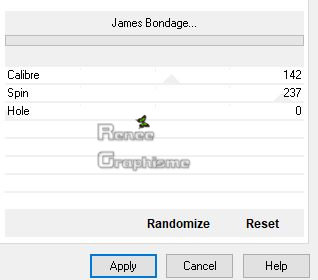
2. Effects –
Plugins-Unlimited 2.0 - VM Extravaganza - James Bondage..use the settings below .
3. Effects – Plugins – Two Moon – Grinder: 82
4. Effects – Edge Effects – Enhance
5. Layers- Duplicate
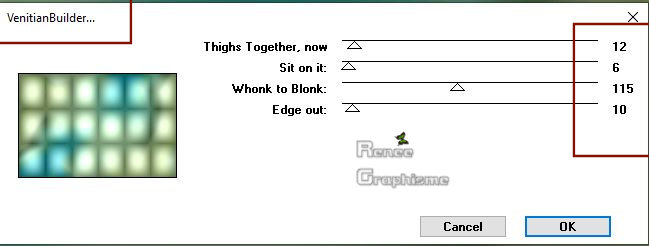
6. Effects - Plugins – Two Moon – VenitianBuilder use the settings below
7. Image –
Resize at 80% (
(Resize all the layers not checked) )
8. Effects –Plugins-
Unlimited 2.0 - VM Extravaganza - James Bondage...: 111/ 0/0
9. Image –
Resize at 80%
(Resize all the layers not checked)
10. Effects –Plugins – Mura’s Seamless – Tiling with Shrink with these settings:
4/3/0/0/197
11. Effects – 3 D-Effects – Drop Shadow with these settings: 1/1/100/28 Color Black
12. Effects- Geometric Effects – Pentagon ( transparent checked )
13. Layers-Properties-Set the Blend Mode to " Hard Light "
14. Image –
Resize at 68 % (Resize all the layers not checked)
15. Effects- Image Effects- Offset with these settings: H = 238 and V = 112 –Transparent checked
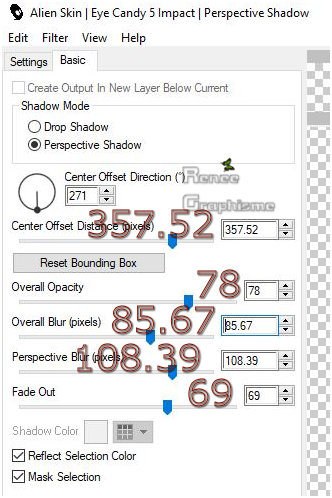
16. Effects – Plugins – Alien Skin Eye Candy 5 Impact- Perspective
Shadow use the settings as below
17. Layers- New Raster Layer
11. Selections –load/save selection –load selection from disc and select my selection: ‘’automne-2019-1’’
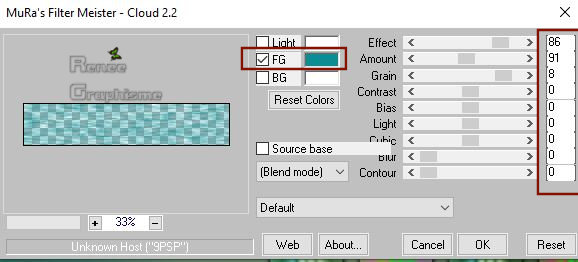
12. Effects – Plugins – Mura’s Meister – Clouds use the settings as below (Color #0c8d94= 2)
Selections - Select none
13. Adjust-Blur- Gaussian Blur : Radius 5
- Layers-Properties-Set the Blend Mode to " Burn "
- In the Layer-Palette-Activate
Raster 1
14. Activate the tube ‘’
Automne-renee-image1’’ -Edit - Copy- Activate your work -Edit - Paste as a new layer
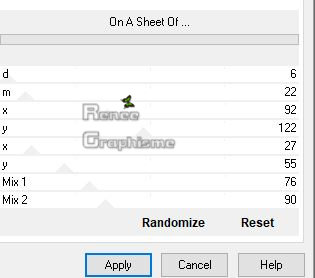
15. Effects –Plugins-
Unlimited 2.0 - Andrew's Filters 49 - On A Sheet Of ..use the settings below.
16. Layers-Properties-Set the Blend Mode to " Hard Light "
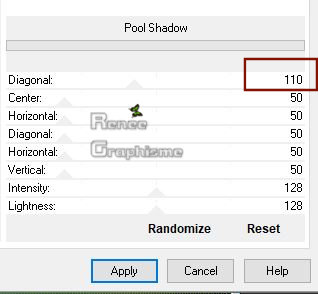
17. Effects –Plugins-
Unlimited 2.0 - Greg's Factory Output Vol. II - Pool
Shadow use the settings below
18. Activate the tube ‘’
Automne-renee-image2’’ -Edit - Copy- Activate your work -Edit - Paste as a new layer
19. Objects – Align
–Bottom
20. Layers-Properties-Set the Blend Mode to " Overlay "
- To replace the top of the layer-palette
21. Activate the tube ‘’
Automne-renee-image3’’ -Edit - Copy- Activate your work -Edit - Paste as a new layer
Move as shown in the example below
22. Layers- New Raster Layer
23. Activate Tool Selection (s) Ellipse
- Draw a selection like this
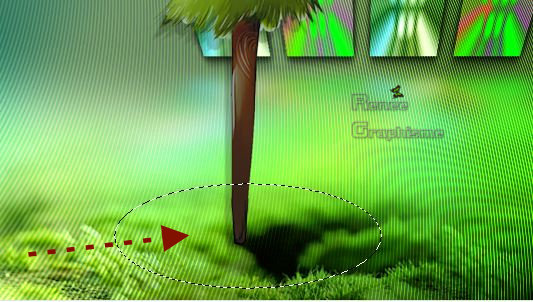
24. Activate Flood Fill Tool
 –
Opacity 50 %- Flood fill the selection with the foreground color –
Opacity 50 %- Flood fill the selection with the foreground color
(Opacity of the color pot at 100 %)
25. Effects –Plugins-
Unlimited 2.0 – Distorsion Filters – Cracked : 205
26. Effects – Edge Effects – Enhance
Selections - Select None
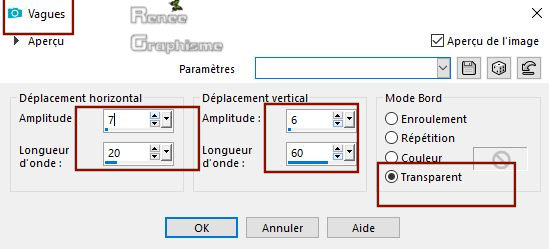
27. Effects –Distortion Effects – Wave use settings as below
(
Effect will be significantly different on the lines of the ellipse. Then change the wave effect for a similar effect)
28. Effects – 3 D-Effects – Drop Shadow with the same settings
29.Layers- Arrange- Move Down
- To replace the top of the layer-palette
30. Activate the tube ‘’
Automne-renee-image4’’ Edit - Copy- Activate your work -Edit - Paste as a new layer
- Activate your Move Tool (M) move it in the right place
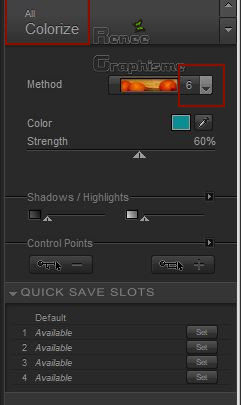
31. Effects –Plugins- - Nick Softwar Color Effex Pro.3 0- Colorize 6–
use the settings below -Color #0c8d94=2
32. Activate the tube‘’
Automne-renee-image5’’ - Edit - Copy- Activate your work -Edit - Paste as a new layer
33. Effects- Image Effects- Offset with these settings: H = - 295 and V = - 156 – Transparent
checked
34. Activate the tube
‘’ Tubes-pour tutoriel -renee-automne 2019’’
Choose tubes to decorate your work of choice
I have 8 layers (1 to 8) with decorations that you can use.
The tube layers were closed for the weight. . You can arrange the tubes according to your wishes.
-Drop Shadow at your choice
- Make sure everything is at the right place
35. Image - Add borders-Symmetric checked: 1 Pixel Color #9fd943= 1
36. Image - Add borders-Symmetric checked: 10 Pixels Color White
37. Image - Add borders-Symmetric checked: 1 Pixel Color #0c8d94=2
38. Image - Add borders-Symmetric checked: 40 Pixels Color White
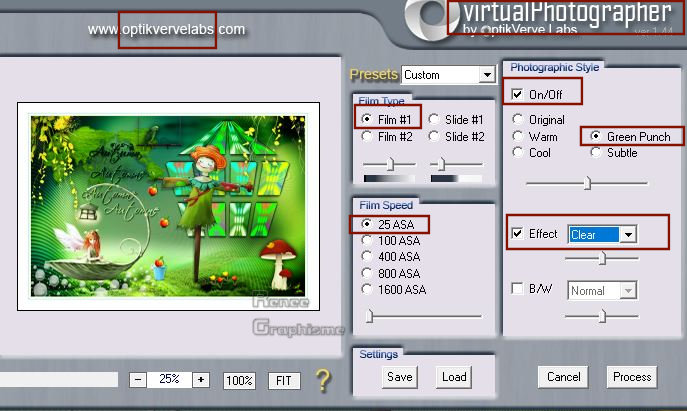
39. Effects – Plugins - OptikVerve Labs- virtualPhotographer with these settings
40. Activate your Text Tool- For Renée Font "TeamSpiritNF" (Included into the zipfile) Size and Colors to your taste -Write your text
- Image - Resize to 950 Pixels Width.
Save as JPG
I hope you enjoyed this lesson
Renée
This lesson was written by Renée 04-08- 2019
Edited and Update
2019
*
Any resemblance with an existing lesson is merely a coincidence
*
Do not forget to thank the people who work with us and for us. I have appointed the tubeurs and translators
Thanks
|
 Translations


 If a plugin supplied appears with this icon it must necessarily be imported into Unlimited *