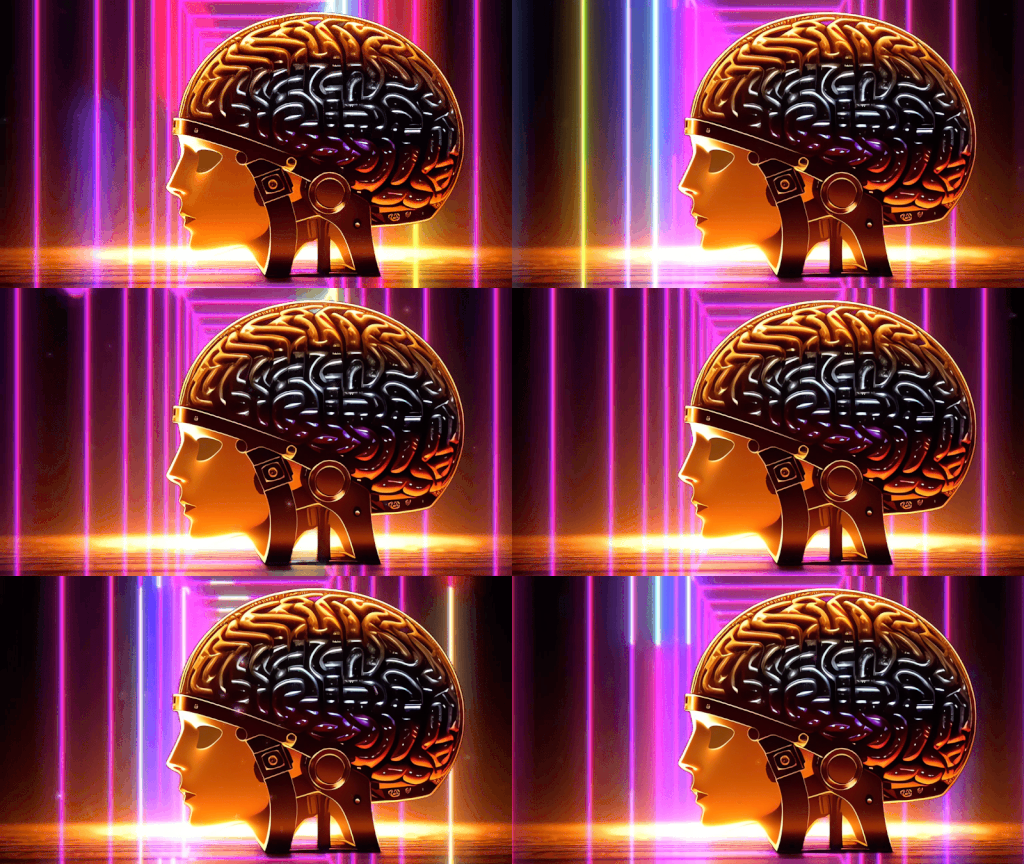
|
Let's start the lesson
Artificiel


1.
Open the Background Image ‘’Fond-artificiel’’- Promote Background Layer = Raster 1
2.
Adjust- Blur- Gaussian Blur- Radius 20
3.
Effects- Plugins - Filters in Unlimited 2.0 -
Filter Factory Gallery H - Sun Raze..with these settings: 35/ 49
4.
Effects – Reflection Effects - Rotating Mirror using the default settings
5.
Layers- New Raster Layer
6.Selections –load/save selection –load selection from disc and select my selection: ‘’Artificiel-1’’
7. Material Properties: Set your Foreground color to color #ffffff=4
Flood Fill Tool  – Fill the selection with the Foreground color #ffffff=4 – Fill the selection with the Foreground color #ffffff=4

8.
Effects – Reflection Effects- Feedback use the settings below
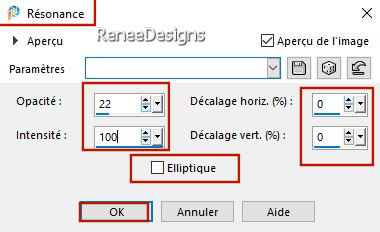
9.
Effects – Distortion Effects -Pinch - Strength 100%
-
Repeat: Effects – Distortion Effects -Pinch - Strength 100%
10.
Effects – Geometric Effects – Cylinder Vertical -
Strength 100%
11.
Effects- Plugins - Filters in Unlimited 2.0 Filter
Factory Gallery B - Circulator 2 use the settings below
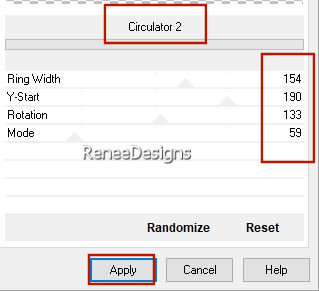
12.
Effects – Plugins – Medhi – Weaver use the settings below
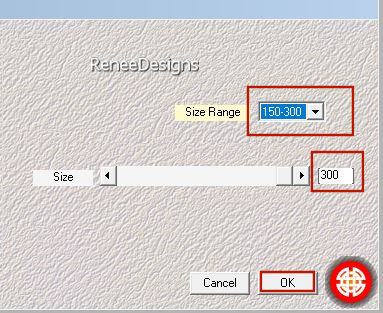
13.
Effects - Edge Effects - Enhance More
14.
Effects – Effects - Image Effects - Seamless Tiling-Side by side
15.
Effects- Plugins - Filters in Unlimited 2.0 -
Filter Factory Gallery Q - Archie's Spirals..using the default settings
16.
Effects – 3D Effects– Drop Shadows with these settings: 25/ -18 / 65 /3 Color Black
17.
Layers – Duplicate
18.
Image - Mirror - Mirror Horizontal (Image - Mirror in older versions of PSP)
19.
Layers- Merge- Merge Down
20.
Layers-Properties-Set the Blend Mode to "Hard Light "
21.
Layers- New Layer
22.
Flood Fill Tool – Opacity 60% – Fill the layer with the Foreground color #ffffff=4
23.
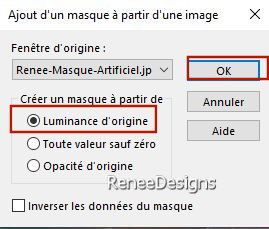
Layers-New Mask Layer- From Image and select Mask
‘’Renee-Masque-Artificiel’’
-
Layers- Merge- Merge Group
24.
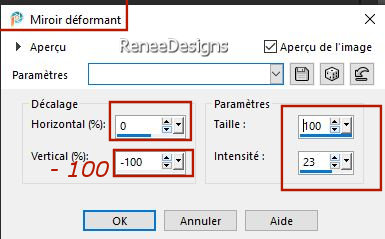
Effects – Distortion Effects– Warp use the settings below

-
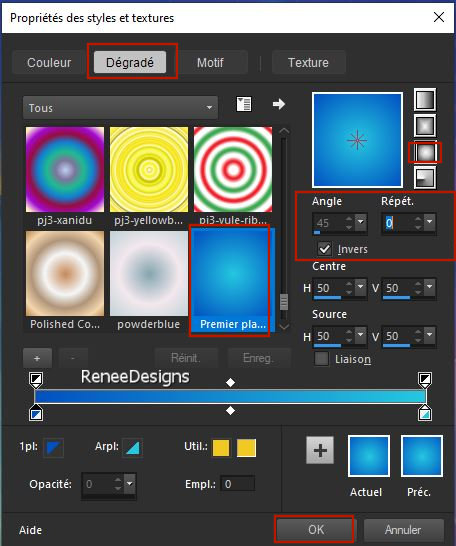
Material Properties: Set your Foreground color to color #0250c0=color 1 – Set your Background color to color #1183ce= 2
-
Properties Foreground- Prepare a Foreground/Background Sunburst Gradient configured like this
25.
Layers-New Raster Layer
26.Selections –load/save selection –load selection from disc and select my selection: ‘’Artificiel-2’’
27.
Flood Fill Tool
 –
Opacity 100 % – Fill the selection with the Gradient –
Opacity 100 % – Fill the selection with the Gradient
DO NOT DESELECT
28.
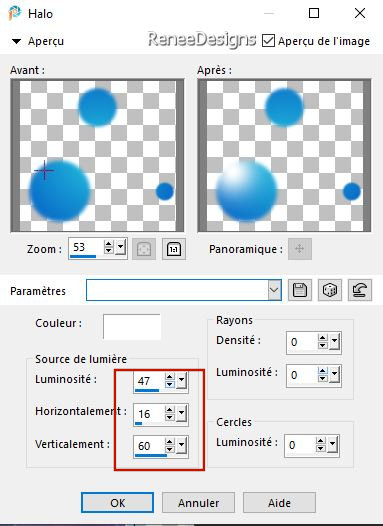
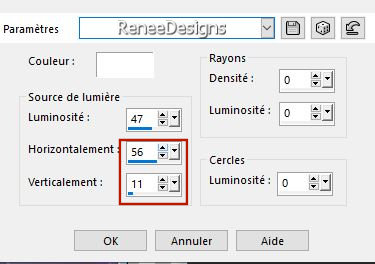
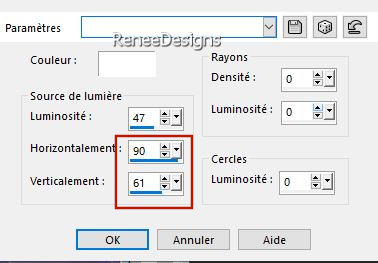
Effects – Illumination Effects – Sunburst use the settings below
Make the 3 effects by following the captures with the parameters

29.
Layers -Duplicate
30.
Layers-Properties-Set the Blend Mode to " Burn" – Reduce the Opacity of this layer to 65%
31.
Layers- Merge- Merge Down
32.
Layers- New Raster Layer
33.
Activate Selection Tool -Custom Selection (S) -Rectangle use the settings below 
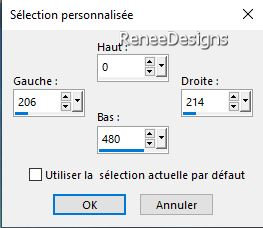
34.
Properties Foreground -Set your Foreground color to color #ffffff=4
Flood Fill Tool
 –Fill the selection with the Foreground color #ffffff=4 –Fill the selection with the Foreground color #ffffff=4

35.
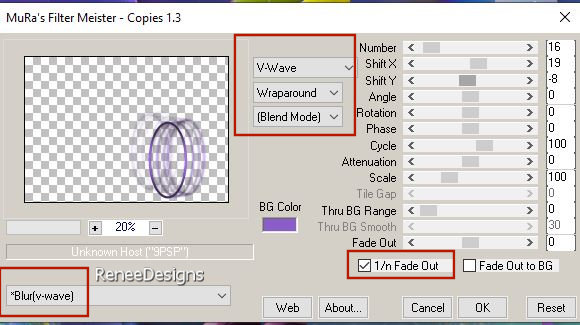
Effects – Plugins – Mura’s Meister – Copies use the settings below
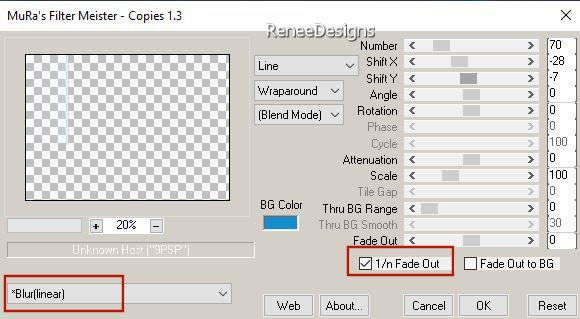
36.
Effects – Distortion Effects– Wave use the settings below
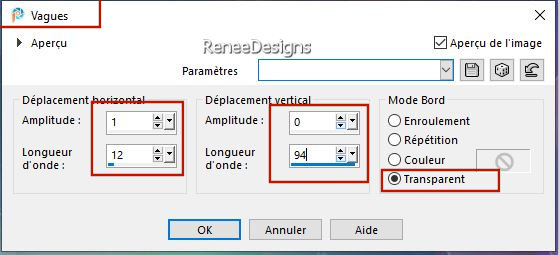
37.
Effects- Plugins - Alien Skin EyeCandy 5 –
Impact – Perspective Shadow use the settings below
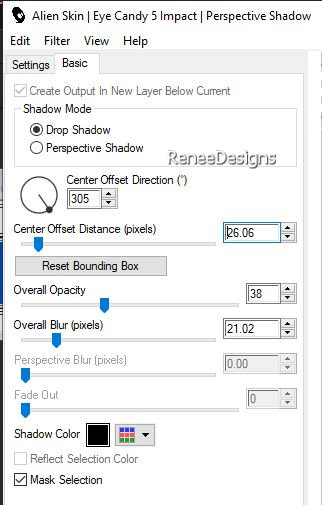
38.
Layers-Properties-Set the Blend Mode to "Overlay "
39.
Layers- New Raster Layer
40.Selections –load/save selection –load selection from disc and select my selection: ‘’Artificiel-3’’
41.
Properties Foreground -Set your Foreground color to color #9b418e=3
Flood Fill Tool
 –
Fill the selection with the Foreground color #9b418e=3 –
Fill the selection with the Foreground color #9b418e=3
42.
Effects- Plugins - Alien Skin EyeCandy 5 –
Impact – Glass –Tab-Settings- User Settings and select my File - Preset : ‘’ Artificiel –Glass’’

43.
Effects – Reflection Effects – Feedback use the settings below
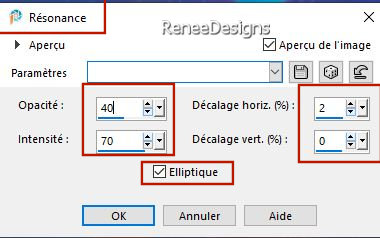
44.
Effects–3D- Effects- Drop Shadow with these settings:1 /22 / 50 /5 Color White
45.
Layers- New Raster Layer
46.Selections –load/save selection –load selection from disc and select my selection: ‘’Artificiel-4’’
47.
Properties Foreground -Set your Foreground color to color #ffffff=4
Flood Fill Tool
 –
Fill the selection with the Foreground color #ffffff=4 (zoom in if necessary) –
Fill the selection with the Foreground color #ffffff=4 (zoom in if necessary)

48.
Effects – Reflection Effects – Rotating Mirror use the settings below
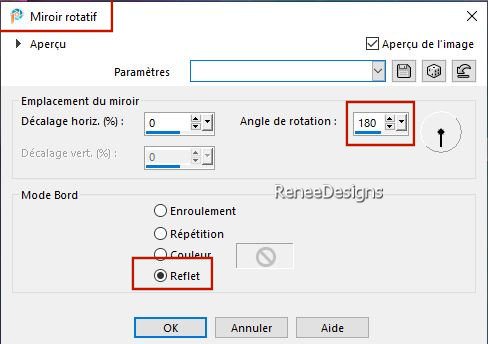
49.
Effects – Plugins– Mura’s Meister – Perspective
Tiling use the settings below
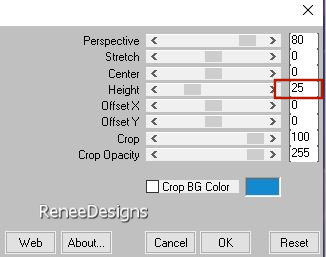
50.Selections –load/save selection –load selection from disc and select my selection: ‘’Artificiel-5’’
 5 or 6 times

51.
Effects- Plugins - Alien Skin EyeCandy 5 –
Impact – Perspective Shadow with the same settings
52.
Open the Tube ‘’Renee-Tubes-Artificiel-3 points’’- -Edit - Copy- Activate your work -Edit - Paste as new layer
53.
Objects - Align- Bottom (Move the Tube a little downwards)
54.
Activate Selection Tool (S) -Rectangle
Select the middle one as follows
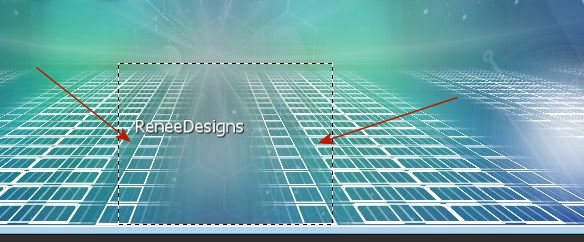
55.
Selections – Promote selection to layer
56.
Layers-Properties-Set the Blend Mode to "Dissolve " -Reduce the Opacity of this layer to 48%

57.
Open the Tube ‘’Renee-Tubes-Artificiel-plante’’ -Edit - Copy- Activate your work -Edit - Paste as new layer
-
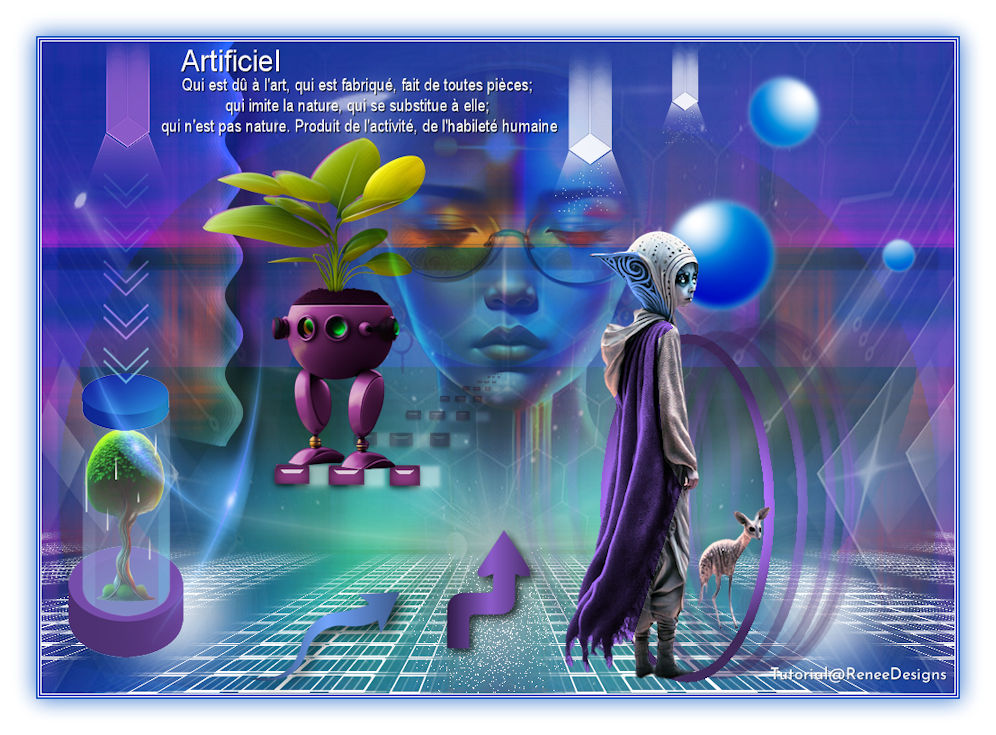
Place on the small rectangles (see finished image)
58. Open the Tube
‘’Renee-Tubes-Artificiel-visage’’ -Edit - Copy- Activate your work -Edit - Paste as new layer
59.
Pick Tool: (K) on your keyboard -Enter these parameters on the toolbar
 349/ - 10
Press ( M ) to close the Pick Tool
60.
Layers-Properties-Set the Blend Mode to "Overlay " -Reduce the Opacity of this layer to 61%
-
Material Properties: Set your Foreground color to color #ffffff=color 4 – Set your Background color to color #8c5cc9= 5
61.
Layers- New Raster Layer
62.Selections –load/save selection –load selection from disc and select my selection: ‘’Artificiel-6’’
63.
Flood Fill Tool
 –Fill the selection with the Foreground color
#ffffff=color 4 (click 6 times in the selection) –Fill the selection with the Foreground color
#ffffff=color 4 (click 6 times in the selection)

64.
Layers-Properties-Set the Blend Mode to "Screen"
65.
Layers- New Raster Layer
66.Selections –load/save selection –load selection from disc and select my selection: ‘’Artificiel-7’’
67.
Flood Fill Tool
 –
Fill the selection with the Background color #8c5cc9=5 (click 6 times in the selection) –
Fill the selection with the Background color #8c5cc9=5 (click 6 times in the selection)
68.
Effects – Edge Effects- Enhance

69.
Open the Tube ‘’Renee-Texte-tuto-Artificiel’’ -Edit - Copy- Activate your work -Edit - Paste as new layer
-
Place at the top (see finished image)
70.
Open the Tube ‘’
Renee-Artificiel-Image1’’ -Edit - Copy- Activate your work -Edit - Paste as new layer
Please note: if you wish to change the colors or image of the center of the tube - you have the construction of the tube in psp image in the folder
71.
Pick Tool: (K) on your keyboard -Enter these parameters on the toolbar
 30
/ 369 30
/ 369
Press ( M ) to close the Pick Tool
72. Open the Tube
‘’Renee-Tubes-Artificiel-fleches’’ -Edit - Copy- Activate your work -Edit - Paste as new layer
-
Place on top of previous tube (see finished image)
-
Change the Blend Mode if you wish – Renée opted for the Blend Mode 'Screen"(depending on your choice of colors)
73.
Open the Tube ‘’Renee-Tubes-Artificiel-image2’’- Edit - Copy- Activate your work -Edit - Paste as new layer
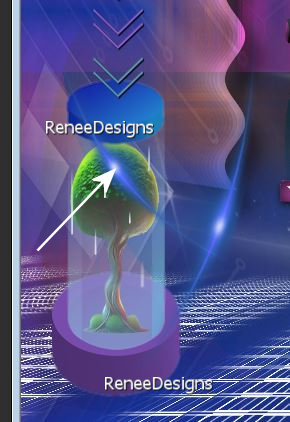 -
Place as shown in the example -
Place as shown in the example
74.
Layers-Properties-Set the Blend Mode to "Screen"
75.Layers- New Raster Layer
76.Selections –load/save selection –load selection from disc and select my selection: ‘’Artificiel-8’’
77.
Flood Fill Tool  – Fill the selection with the Background color #8c5cc9=5
78.
Effects – Plugins – Carolaine & Sensibility – CS
Reflection using the default settings
79.
Selections – Modify – Contract - 11 Pixels
80.
Effects – 3D -Effects– Cutout use the settings below
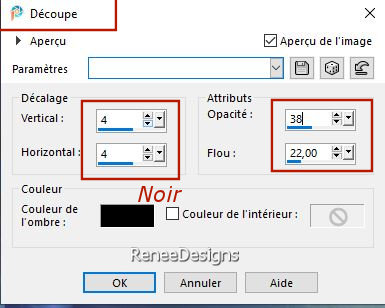

81.
Effects – Plugins – Mura’s Meister – Copies
(attention click on
 and then set the settings) and then set the settings)
82.
Open the Tube ‘’Renee-Artificiel-Personnage’’or another -Edit - Copy- Activate your work -Edit - Paste as new layer
Place the tube exactly in the circle ( see finished image )
83.
Open the Tube ‘’Renee-TUBES-Diverses Fleches’’
-
Choose 1 or 2 arrows and paste as a new layer on your creation and put in the right place
-
Coloring of your own choice
84.
Image - Add Borders-Symmetric checked: 1 Pixel -Color #ffffff=4
Image - Add Borders-Symmetric checked: 2 Pixels -Color #0250c0= 1
Image - Add Borders-Symmetric checked: 1 Pixel -Color #ffffff=4
Image - Add Borders-Symmetric checked: 2 Pixels -Color #0250c0= 1
85.
Selections – Select All
86.
Image - Add Borders-Symmetric checked: 40 Pixels Color #ffffff=4
87.
Effects–3D- Effects- Drop Shadow with these settings: 3 / 3/ 45 /35
Color #0250c0= 1
-
Repeat the Drop Shadow in negative -3 /- 3
88.
Selections- Select None
Paste the author's watermark on your work and your own watermark
89.
Layers- Merge - Merge All( flatten)
90.
Image - Resize - to 90% - Resize all layers- Checked
Save as JPG
I hope you enjoyed this lesson
Renée
This lesson was written by Renée 20/10/2023
Edited and Update
in 2023
*
*
Any resemblance with an existing lesson is a coincidence
* Do not forget to thank the people who work with us and for us -
I have appointed the tubeurs and translators
Thanks
|
 Translations


