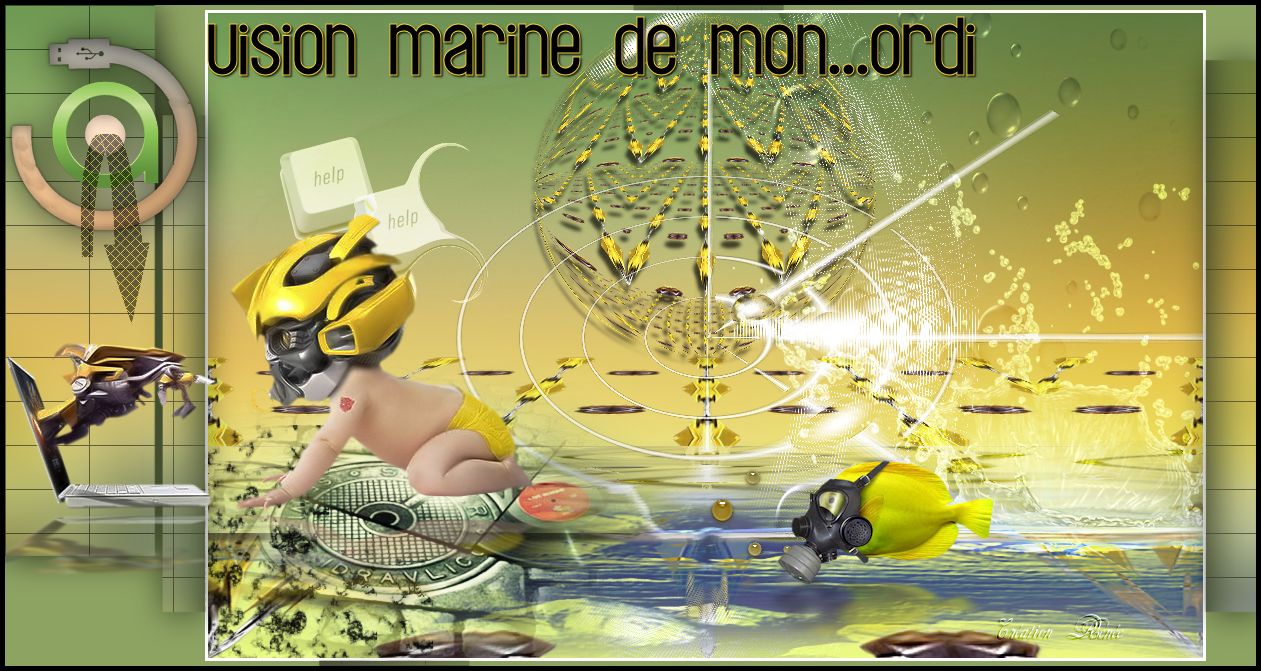
|
Let's begin
1. Open your background "fond_vision_marine"
Window /Duplicate and then close original. We will work
with the copy
2. Layers - Add a new layer
3. Selections - select all
4. Open the tube and paste ''logane-baby_30juin2013''
into the selection
5. Selections - deselect
6. Effects - Simple - Center Tile
7. Effects - Simple - Top left Mirror
8. Effects - User defined filter - Emboss3 - default
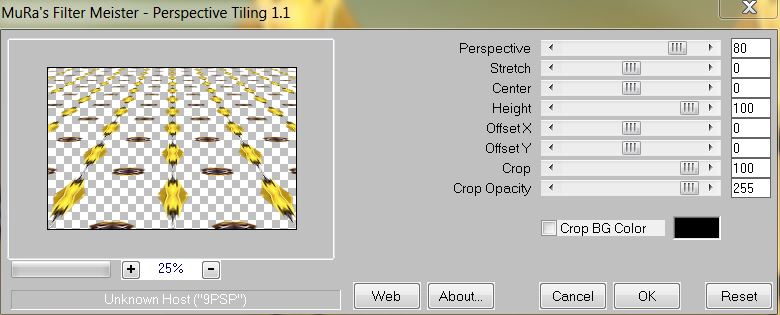
9. Effects - Mura's Meister / Perspective tiling
10. Effects - Mura's Meister/ Repeat
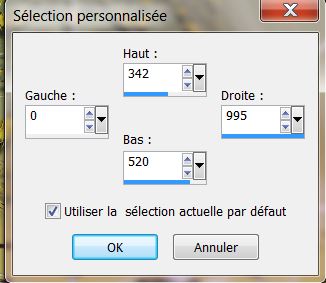
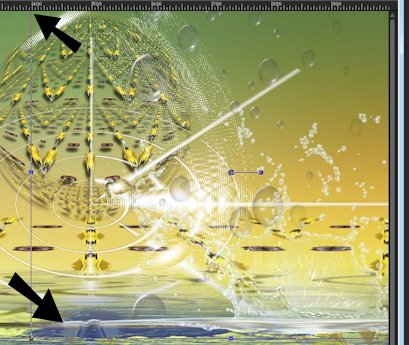
11. Selection Tool - Custom selection
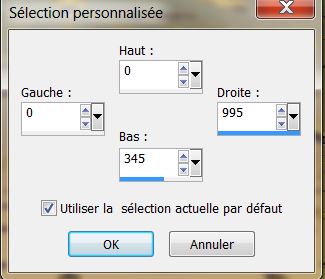
11. Selection Tool - Custom selection
12. Selections - Promote selection to layer
13. Effects - Geometric Effects - circle / transparent
selected
14. Selections - Promote selection to layer / select
none
15. Activate Raster 1 / Using the same personalized
selection / Delete
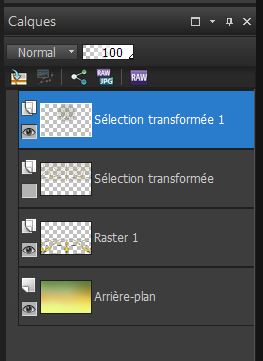
- You have this in your layers palette
16. Delete the layer ''Promoted
selection''
17. Click on the top layer (Promoted Selection 1 )
18. Effects - 3-D effect / Drop Shadow
19. Layers - new raster layer
20. Flood fill tool - Fill with white
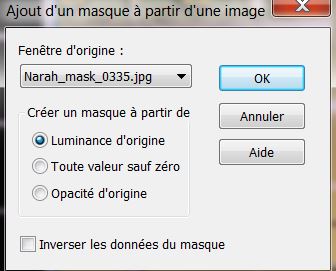
21. Layers - New mask layer from image/ "narah_mask_0335
jpeg"
22. Layers - merge group
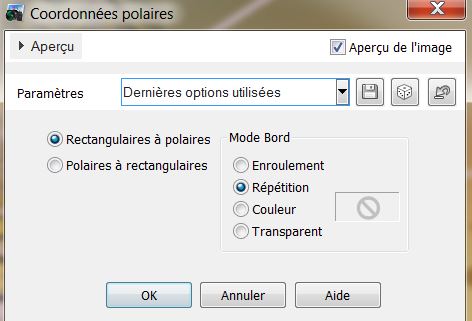
23. Effects - distortion effects / Polar Coordinates
24. Effects - edge effects - Enhance
25. Layers - add a new layer / fill with white
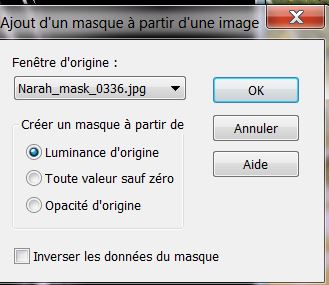
26. Layers - New mask layer from image "narah_mask_0336
jpeg"
27. Layers - merge group
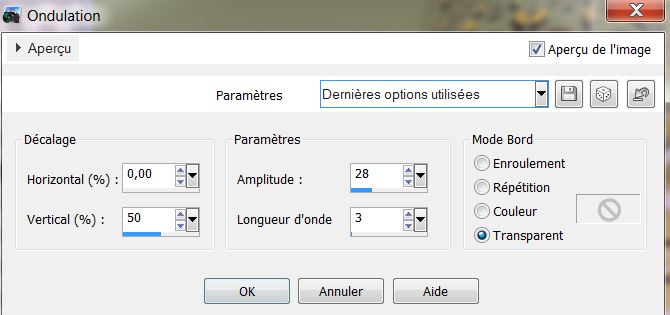
28. Effects - distortion effects - ripple
29. Click on Raster 1
30. Selection Tool - Custom selection
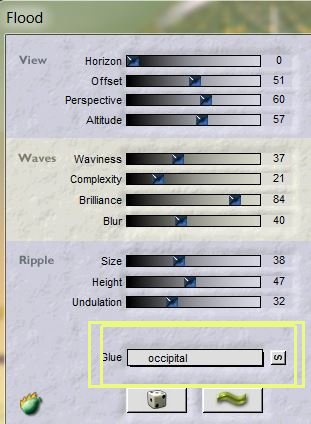
31. Effects - Flaming Pear
/ Flood
32. Effect - 3-D effect / Drop Shadow / Same settings as
before
33. Selections - select none
34. Go back to the top of the Layers palette
35. Open tube "image1" - Paste as a new layer/ place as
shown
36. Change the blend mode to Exclusion and lower the
opacity to 93
37. Open the tube "image2" Paste as a new layer and
place like this
38. Change the layer to Overlay Mode
39. Open tube "logan_poisson_bulle_30 juin 2013"
Highlight the layer "poisson" - image - resize 60% -
paste as a new layer. Move as shown
40. Go back to the poisson tube and click on the bubbles
layer. Paste as to your liking / merge layers (bubbles +
fish)
41. You have this / Raster layer = fish + bubbles
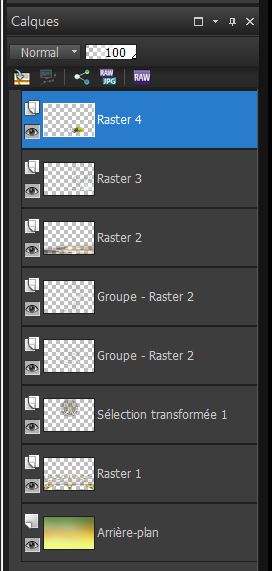
42. On raster 4/5 Effects
- EyeCandy perpsective Shadow / preset "vision_marine_de_mon_ecran_persp"
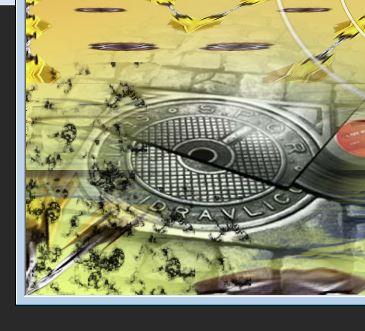
43. Open the tube "logane_plaqueegout_30juin2013" Click
on the tube1/edit - copy / edit - paste as new layer
44. Place on the bottom left corner
45. Layers - add a new layer / Set the foreground color
to black
46. Open brush tool "Brush-Corel-01-029'' (= marble 2)
with the brush size 165 / apply in the left corner
(if you have trouble open the image - "brush
pinceau_029" - import a custom brush )

This is my result - (adapt
this to your own taste )
47. Layers - merge down
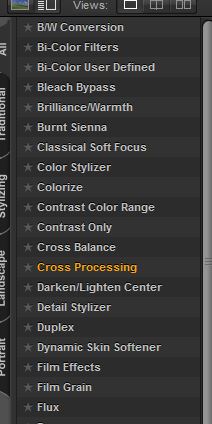
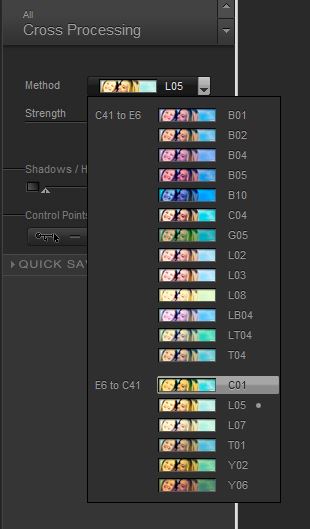
48. Effects - Nik Color Effex Pro3.0 / Cross Processing
/ Method L05
49. Open the tube "image_help" Paste as new layer
50. Effects - Image effect - offset
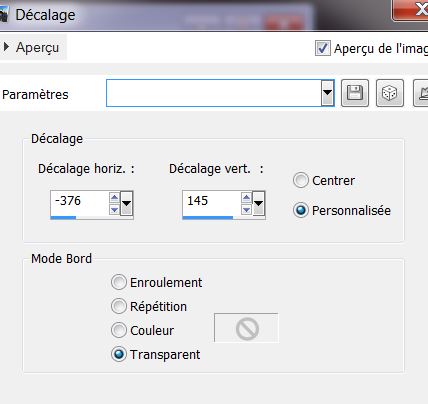
51. Change layer mode to
overlay (erase the piece of pipe that is on the fish)
52. Layers - duplicate
53 Effects - Image effect - Offset
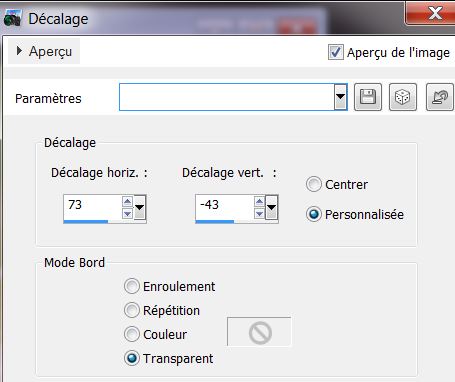
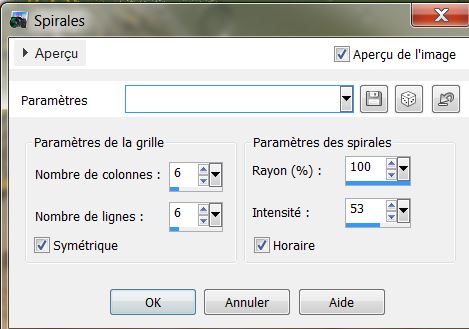
54. Effects - distortion effects - Curlicues
55. Layers merge visible
56. Edit/ copy
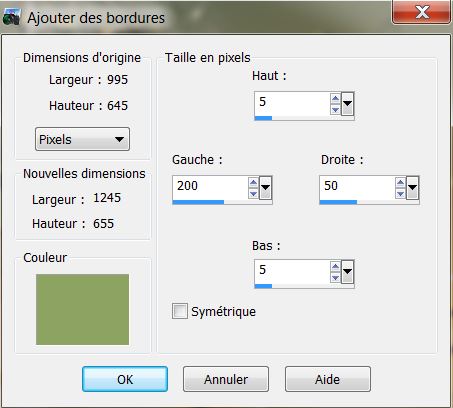
57. Image - add borders 3 pixels in white
58. Image - add borders/ asymmetric - color #8da362
59. With the magic wand select the border
60. Layers - Add a new layer
61. Edit - paste into selection the image in memory
62. Adjust - blur - gaussian blur at 30
63. Selections - selection Invert
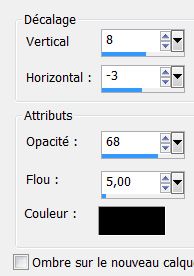
64. Effects - 3-D effects - Drop Shadow/ 2/2/68/50 black
65. Selections - deselect
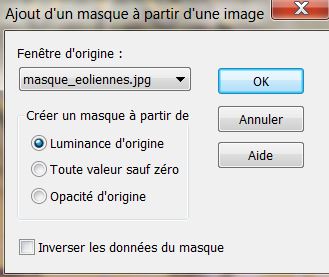
66. Click on raster 2
67. Layers - new mask layer from an image
"masque_eoliennes.jpg"
68. Layers - merge group
69. Effects - 3-D effects - Drop shadow/ Same settings
as before
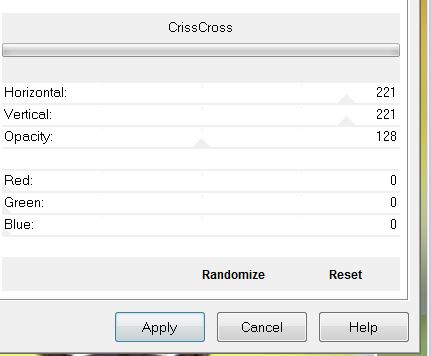
70. Effects - Filters Unlimited 2.0 / Tormentia
Criss-Cross
71. Open the tube "logane_baby_30juin2013" Paste as new
layer and move into place
72. Effect - EyeCandy 5 perpsective Shadow / preset "vision_marine_de_mon_ecran_persp"
73. Open the tube "logo_d_mon_ordinateur". On the tube /
close raster 1 and 5 / Merge Visible Layers / Image
Resize to 35%
Edit/ Copy and Edit/ Paste as new layer
74. Effects - 3-D effect - Drop Shadow / Same settings
75. Layers - Add a new layer
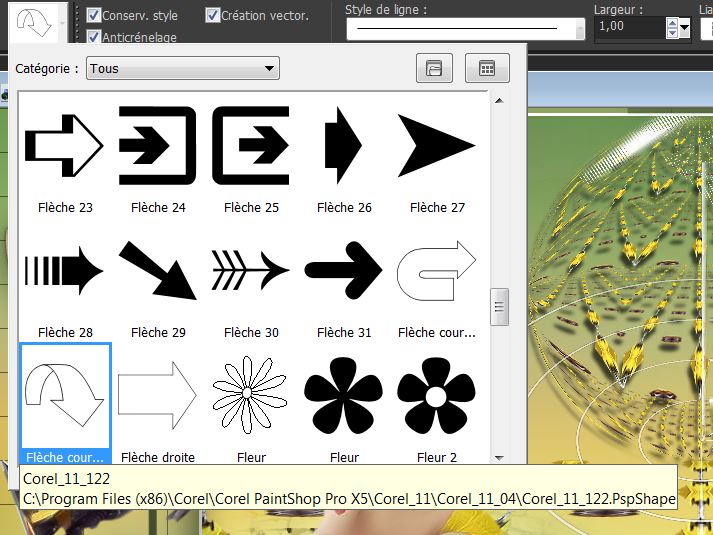
76. Preset shape tool - (M) / Tracer tool with
predefined shape ( Corel_11_122) that forms curved arrow
77. Select inside the shape with wand / delete
78. Selections - Promote selection to layer
79. Set your foreground color to #f6d138 and background
to black
80. Fill the selection with thr foreground color
81. Effects - AP01 (Innovations) - Lines Silverlining
82.
Selections - Deselect
83. lower the opacity of the layer down to 57 / and move
into place as shown
84. Image add borders 5 pixels in black
85. Open tube "text" Paste as new layer and place well.
*
All
finished
Thanks Sally

|