|
Let's begin
1.
File:Open the image ''fond-night_owl'' - Promote Background Layer =raster 1
2.
Layers-Duplicate
3.
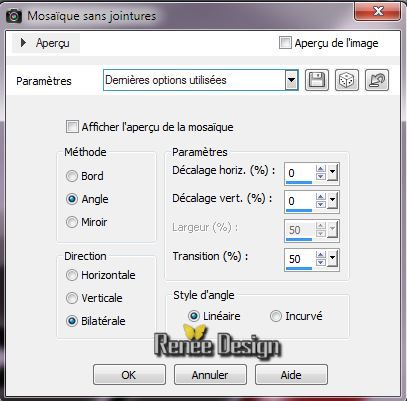
Effects - Image Effects-Seamless Tiling
4.
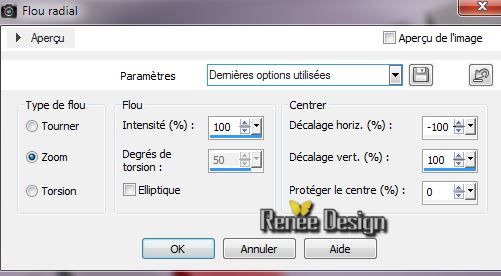
Adjust-Blur-Radial Blur with these settings
5.
Adjust-Blur-Gaussian Blur : Radius: 22
6. Layers-Arrange -Move Down
7.
Aktivate the top of the Layers palette(Raster 1)
8.
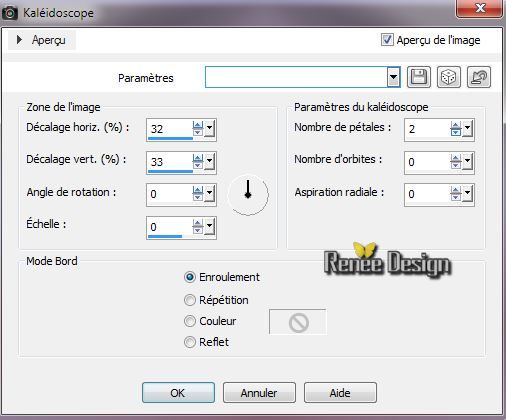
Effects - Reflection Effects-
Kaleidoscope
9.
Layer-Palette: Blend Mode "Hard Light"
10
. Layers-Merge-Merge Visible
11.
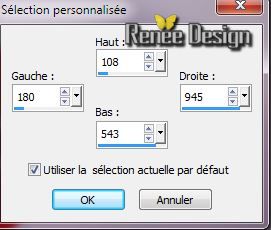
Selections-Custom Selection with these settings
12.
Selections-Promote selection to layer
-
Selections-Deselect All
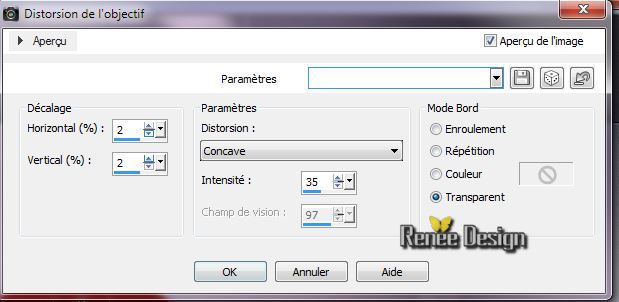
13.
Effects - Distortion Effects-Lens Distortion-Pincushion
14.
Effects - Plugins -EyeCandy5 Impact-Perspective
shadow and choose my -preset ''night_owl_ombre''
15.
Effects - 3D Effects-Drop Shadow:5/5/30/15 black
16.
Aktivate the bottom of the Layers palette (Fusionné)
17.
Effects - Plugins - Simple - Half
Warp
18.
Aktivate the top of the Layers palette
19.
Layers- New Raster layer/Flood Fill Tool: Fill the layer with color white
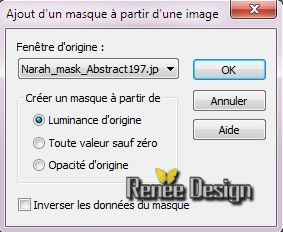
20.
Layers- New Mask Layer From Image and choose:Narah_mask_Abstract 197
21.
Effects- Edge Effects-Enhance
22.
Layers- Merge- Merge Group
23.
Layers-Palette: Blend Mode "Soft Light"
24.
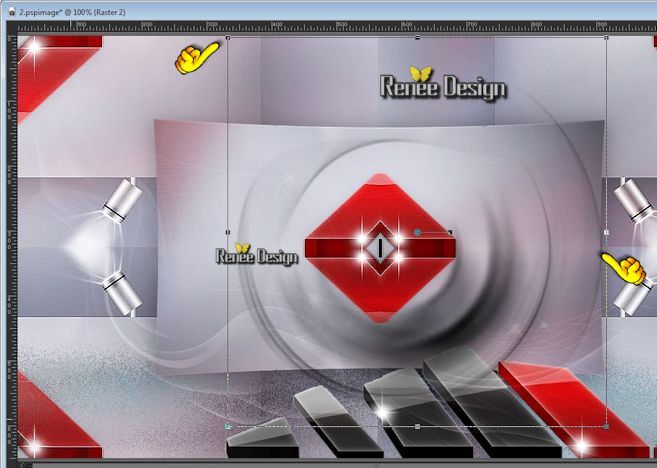
Activate tube ''night_owl_marches" /Edit/copy-Edit/paste as a new Layer
Place like this
25.Layers-Arrange -Move Down
Your Layer Palette looks like this now

26.
Layers-Duplicate/ Layers- Arrange-2x Move Down (above the merged)
27.
Effects -Plugins Unlimited - &<Bkg Designer sf10I> / Blur'em!
/ 90/12
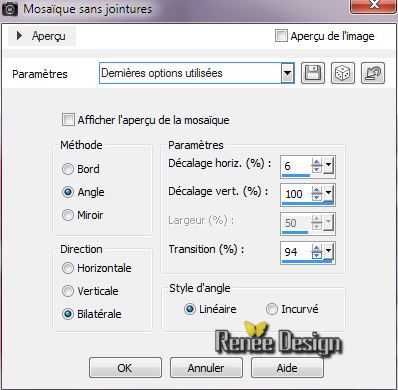
28. Effects - Image Effects-Seamless Tiling
29. Layers-Palette: Blend Mode "Difference" Opacity: 79%
Activate the top of the layers-Palette
30.
Layers- New Raster layer/Material Properties: Foreground color to color Black
31. Activate
Brush: ''pinceau_Night_olwn'' /File- Export Custom Brush (Give it a name)Activate Brush Tool and select my file: ''pinceau_Night_olwn'' Size 601

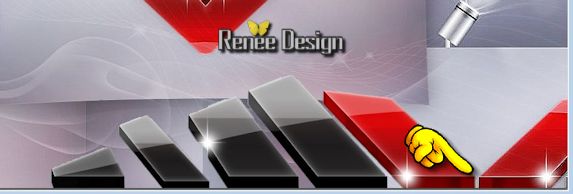
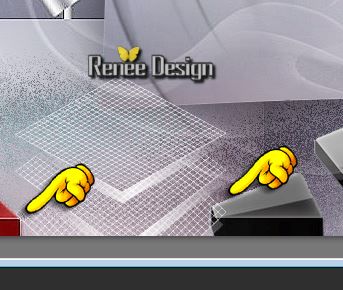
32.
Stamp the brush as shown in the example below (Important that it will be placed at the right place)
33. Effects
-Plugins Unlimited - &<Bkg Kaleidoscope> / QFlip UpperR (For problems with the filter ''effet BKG Flip upper '' there is a image in the zip. Edit/copy-Edit/paste as a new layer and place)
34. Layers- Duplicate/ Layers-Merge Merge Down
35. Activate tube ''texte_night_shadow.png'' / Edit/copy-Edit/paste as a new layer (do not move, it is the right place)
36. Layers-Palette: Blend Mode "Difference" Opacity: 95%
37. Activate tube ''Alies 1VR609-woman-28072013.pspimage/Image
Resize 85%
/Edit/copy-Edit/paste as a new layer and place
38. Layers- New Raster layer .Material Properties: Foreground color to color white
39 . Activate
Brush: ''pinceau_night_owl_3D''/File- Export Custom Brush (Give it a name) Activate Brush Tool and select my file:''pinceau_night_owl_3D" Size 252

Stamp the brush as shown in the example below
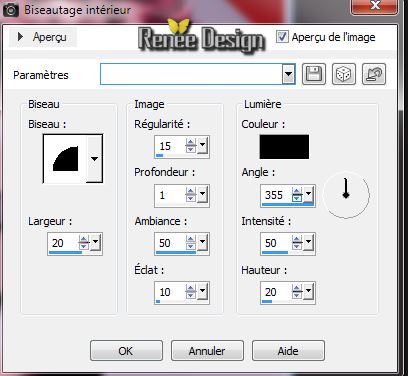
40. Effects -
3D Effects-Inner Bevel
41. Activate tube ''black_cat_misted_MMC.psp''/ Image Resize 50
%/ Edit/copy-Edit/paste as a new layer and place
42.Layers-Merge-Merge Visible
43. Layers- New Raster layer
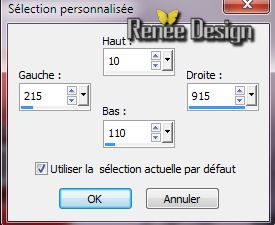
44.Selections-Custom Selection with these settings
45. Flood Fill Tool: Fill the layer with this color: #a20e11
46.
Selections-Deselect All
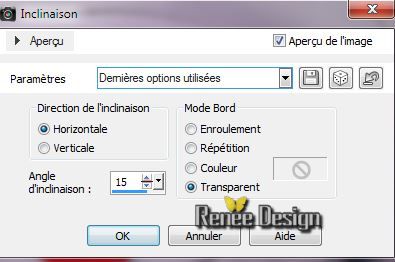
47. Effects -
Geometric Effects -Skew
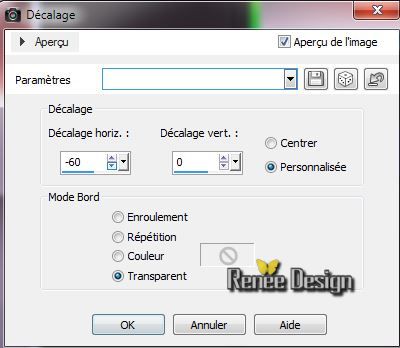
48. Effects -
Image Effects- Offset
49.
Effects - Plugins - Toadies - What are you mettre
a 10/10
50.
Selections - load/save selection - load selection from disk and choose : ''night_owl_1''
51.
Selections- Promote selection to layer
52.
Selections-Deselect All
53. Effects -
Geometric Effects /Circle /Transparent
54. Layers-Merge Merge Down
55. Effects -
3D Effects-Drop Shadow:25/2/50/12 black
56. Layers- New Raster layer
Material- Properties:Foreground color to color black
57. Activate
Brush: ''pinceau_night_owl_4D'' File- Export Custom Brush (Give it a name) /Size
250 / Activate Brush Tool and select my file ''pinceau_night_owl_4D''. Stamp the brush as shown in the example below.

58. Layers- Duplicate -Image Mirror - Layers-Merge- Merge Down
59. Layers- Duplicate
60.
Effects- Plugins - EyeCandy 5 Impact - Glass and choose my preset
''night_owl_glass''
61. Layers-Merge- Merge Down
62. Activate tube''night_owl-effets'' /Edit/copy-Edit/paste as a new layer /Image Resize 80% and place
63. Layers-Palette: Blend Mode "Darken" Opacity: 67
%
64. Image - Add Borders - Symmetric 2 pixels #a20e11
65. Image - Add Borders - Symmetric 50 pixels white
66.
With the magic wand -select the white border of 50 pixels
67.
Selections- Promote selection to layer
- Material- Properties:Background color to color black !!!!!
67.
Effects -Plugins Unlimited - &<Bkg Designer sf101>
Cruncher 20/20
68. Effects- Edge Effects-Enhance More
69 .Selections-Invert
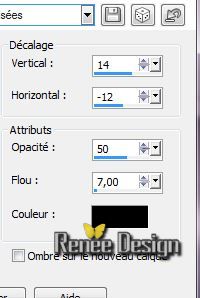
70. Effects -
3D Effects-Drop Shadow
71. Repeat: Effects - 3D Effects-Drop Shadow -14/ 12
72.
Selections-Deselect All
73. Image - Add Borders - Symmetric 2 pixels black
74. Image - Add Borders - Symmetric 25 pixels white
75. Activate tube ''night_owl4 images '' Edit/copy-Edit/paste as a new layer and place. Activate the Text". Edit/copy-Edit/paste as a new layer / paste to your taste
76.Layers - Merge - Merge all layers (flatten)
77. Image
Resize 1025 pixels Width
I hope you enjoyed this lesson
Renée
This lesson was written by Renée the 22/04/2014
Created the
05/2014
*
Any resemblance with an existing lesson is merely a coincidence
*
Don't forget to thank the people who work for us and with us. I named the tubeurs - Testers and the translators.
Thanks Renée | 
 Translations