|
Let's start the lesson
1.
File - New - New Transparent Image: 995 x 625 pixels and open your color palette in your PSP
2.
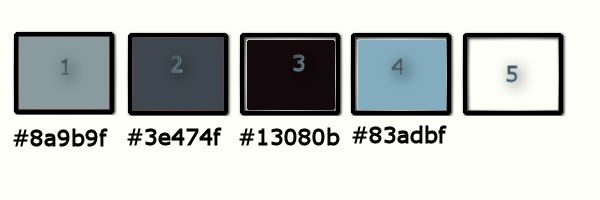
Material of the foreground color 4
Background color 2
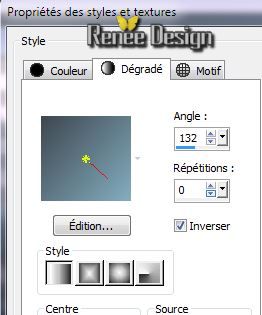
3.
Prepare a linear gradient configured like this.
4.
Flood Fill Tool: Fill the layer with the gradient
5.
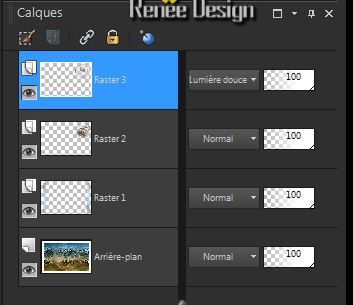
Layers-New raster layer /Selections - Select all
6.
Activate this tube ''1228507089_feerie_nikita.jpg'' be placed on this layer of the tube(please see example)
 Edit/copy-Edit paste into selection Edit/copy-Edit paste into selection
Selections - Deselect all
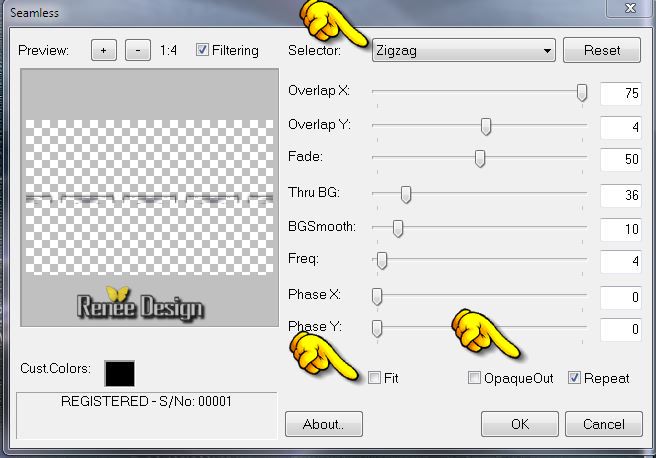
7.
Effects - Image effects - Seamless tiling
8.
Effects-Edge effects-Enhance
9.
Activate this tube ''renee-solstice.pspimage''/Edit/copy- Edit/ paste as new layer (do not move it is in the right place)
10.
Selections - load/save selection - load selection from disk and choose ''solstice_1''/
Selections - Promote selection to layer
11.
Effects - 3D Effects - Drop shadow: 3/3/80/18
color black
Selections - Deselect all
12.
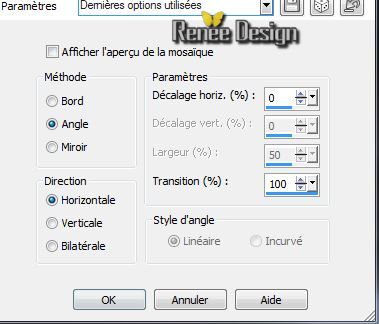
Effects-Filter- Simple -Pizza slice Mirror / Repeat this filter 1 more time
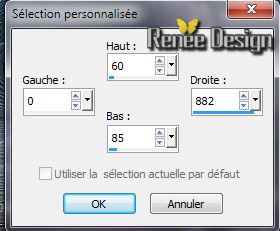
13.
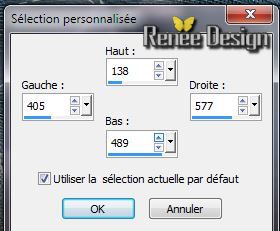
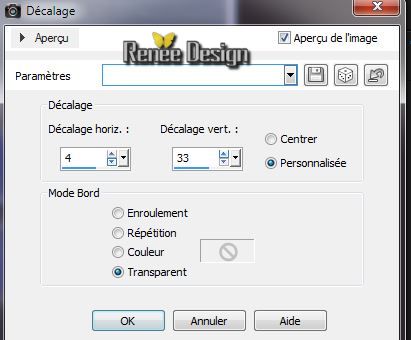
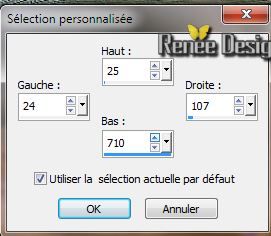
Activate selection tool - custom selection with these settings/Take the S on the keyboard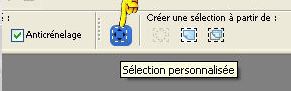
14.
Edit-Cut /Edit - Paste as new layer on your working area
15.Selections - Deselect all
16.
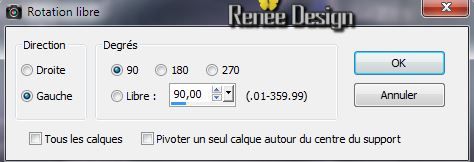
Image Free Rotate-Free 90 to the left
17.
Effects-Filter- Mura's Pro/
Seamless with these settings:
18. Layers-New raster layer raster
19.
Activate selection tool - custom selection with these settings/ Take the S on the keyboard (S)
20. Activate flood fill tool and fill the selection with the gradient
21.
Selections - Deselect all
22. Effects-Distortion Effects-Wind/Winddirection From right 100
23. Effects - 3D Effects - Drop shadow: keep the settings
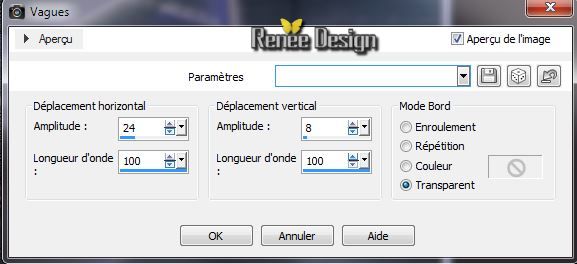
24. Effects-Distortion Effects-Wave with these settings
25.
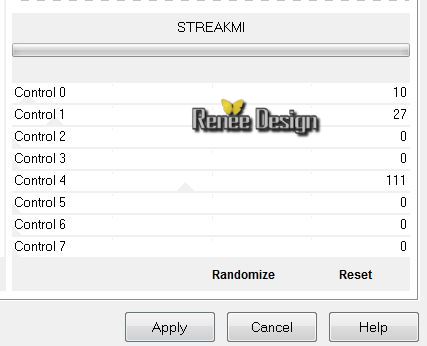
Layers-Duplicate
26.
Effects- Filter - Mura's Pro -
Seamless-with these setiings

27. Image
mirror/Image Flip
28.
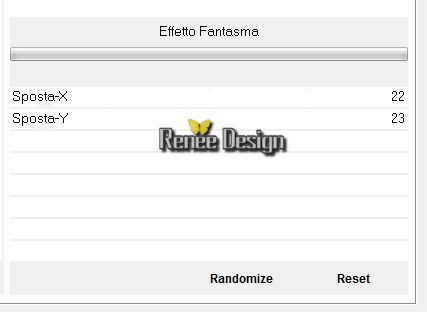
Effects-Filter Unlimited -It@lian Editor /Effeto
fanstasma
29.
Effects-Edge effects-Enhance
30. Activate this tube ''solstice_image_1''/Edit - Copy -Edit - Paste as new layer on your working area
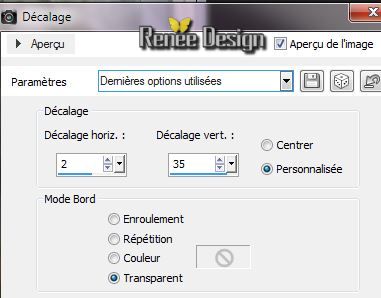
31. Effects - Images Effects - Offset with these settings
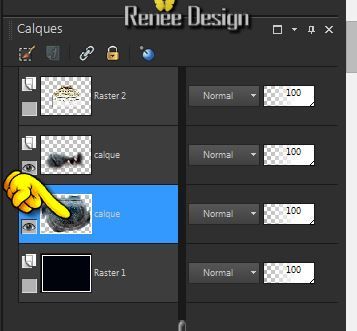
32. Layer Palette: change your Blend Mode to "Screen"
33. Layers-Duplicate /Image Flip
34. Layers-Merge-Merge-Down
35.
Effects-Edge Effects-Enhance
36. Activate this tube ''renee_solstice_logo_.pspimage'' /Edit - Copy -Edit - Paste as new layer on your working area(do not move!!!)
37. Layer Palette: change your Blend Mode to "Screen" .Reduce the opacity of this layer to : 36%
38.
Effects-Edge Effects-Enhance
39. Effects- Filter - EyeCandy 5 -Impact -Perspective
shadow-in the settings tab, click on the Preset ''solstice_persp''
40. Layers-Merge-Merge Visible
41.
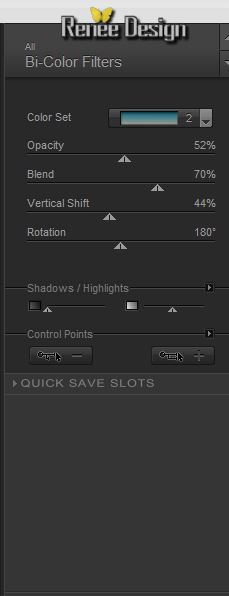
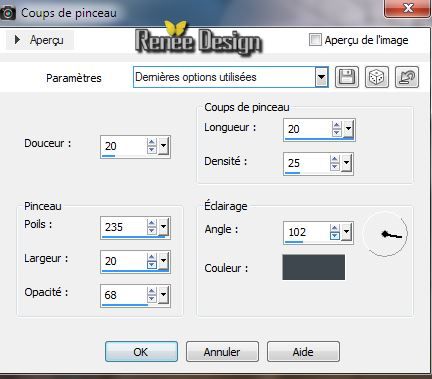
Effects-Filter-Nick Color Pro3. effex-/Bi Color
Filters / Color set -Cool warm/2
42.Image - add borders 1 pixel take color3
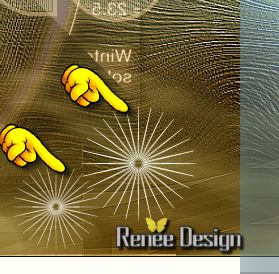
43. Image - add borders 55 pixels take color 5(
white)
44. Image - add borders 1 pixels take color 3
45. Layers-New raster layer
46.
Activate selection tool - custom selection with these settings
47. Material of the foreground color take color
4
48. Pot of Paint: lower the opacity to 50% Activate flood fill tool and fill selection with the foreground color
49.
Selections - Deselect all
50. Layers-Duplicate /Image Mirror
51. Layers-Merge-Merge-Down
52.
Effects- Filter Unlimited - SYBIA -Streakmi (not to be confused with Cybia)
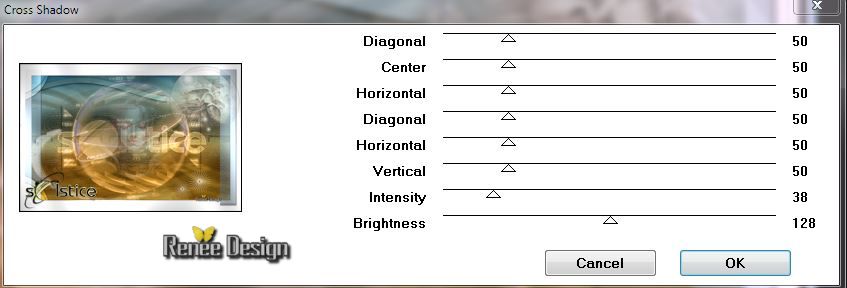
53. Effects- Filter
Graphic plus Cross shadow /default
54. Layers-New raster layer
55.
Selections - load/save selection - load selection from disk and choose ''solstice_2"
56. Activate this tube ''1228505999_feerie.pspimage''/ Edit - Copy -Edit - Paste into selection
57. Layers-Duplicate / Layers-Merge-Merge-Down(strengthening effect of the tube)
58.
Selections -Modify -Select-Selection Border-Outside 2 pixels
59. Layers-New raster layer/Activate flood fill tool and fill selection with color
2
Selections - Deselect all
60.Effects - 3D Effects - Drop shadow: 1/1/100/0 color black
61. Layers-Merge-Merge-Down
62. Layers-New raster layer
63.
Selections - load/save selection - load selection from disk and choose
''solstice_2"
64. Activate this tube ''solstice_loupe"/Edit - Copy -Edit - Paste into selection
Selections - Deselect all
65. Layer Palette: chance de Blend Mode to "Soft Light"
You have
this result in your layers palette and
your work like this now
66. Activate this tube '' solstice_image_2 .pspimage''/Edit - Copy -Edit - Paste as new layer on your working area/With your move tool:move to the top left corner
67. Layers-Duplicate
68. Effects - Images Effects - Offset with these settings
69. Layers-Merge-Merge-Down
70. Layer Palette: chance de Blend Mode to "Overlay'
71. Layers-Duplicate /Image Flip /Layer Palette: chance de Blend Mode to "Overlay'
72. Activate this tube '' 13186825938_feerique_nikita.pspimage''/Edit - Copy -Edit - Paste as new layer on your working area(do not move!!!)
-
Reduce the opacity of this layer to :79%
73. Layers-New raster layer
74.
Selections - load/save selection - load selection from disk and choose ''solstice_3''
75. Material of the foreground : foreground color to color white
76. Pot of Paint:Opacity :100 %/ Flood fill tool: fill with color white click 3 times in
the selection
77.
Effects-Edge effects-Enhance More
Selections - Deselect all
78.Effects-Art Media Effects-Brusch Strokes with these settings. Color no 2
Art Media effect it takes a little
time
79.
Effects-Edge effects-Enhance More /Reduce the opacity between 30 and 40%
80. Layers-New raster layer
81. Activate Brush Tool and select my file:''solstice_pinceau'' with these settings/Size 158

-Place it in the right place like this with color white
82. Layers-Duplicate /Image Resize 75% Resize all the layers not checked
/Place it in the right place Layers-Merge-Merge-Down
83. Activate the tube Text: Edit-Copy-Edit Paste as a new layer and move. Or write your own text
84.
Effects-Filter Graphic plus - Cross
shadow with these settings
85. Layers - Merge - Merge all layers (flatten)
86. Effects- Filter - Graphic plus - Cross shadow keep the settings
87. Image Resize 995 pixels Width
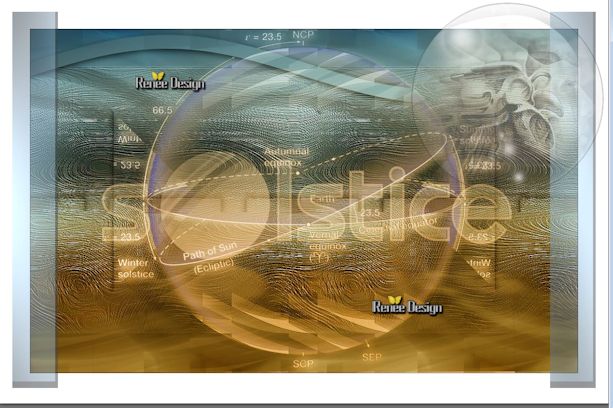
I hope you enjoyed this lesson
Renée
This lesson was written by Renée the 29/05/2014
Created the
the /06/2014
*
Any resemblance with an existing lesson is merely a coincidence
* Don't forget to thank the people who work for us and with us. I named the tubeurs - Testers and the translators.
Thanks Renée. | 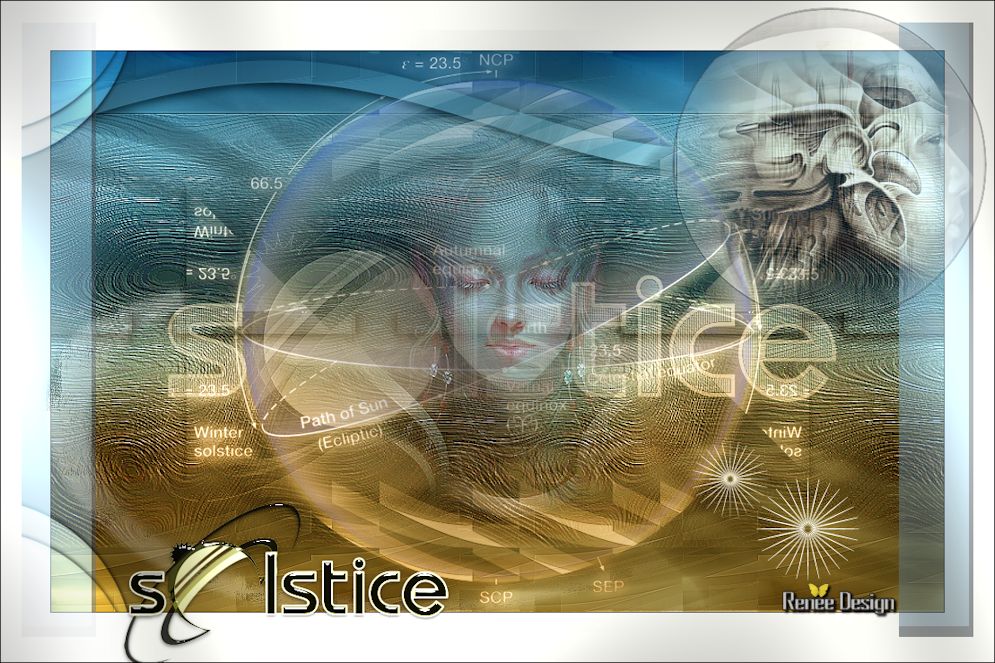
 Translations