|
New
Translations here
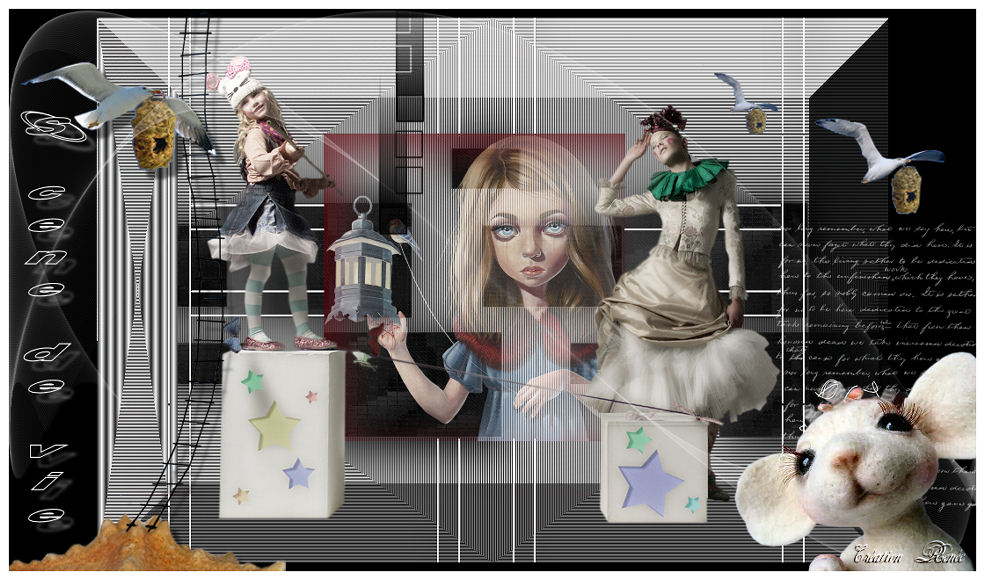
Scène de vie
Let's start the lesson. 1. Open the Background Image ''fond bibiche ''Window - Duplicate (or shift+D) - Close the original and proceed on the copy -Promote Background Layer =Raster 1(remove the signature) -We will work on it 2. Effects- Image Effects- Seamless Tiling using the default settings
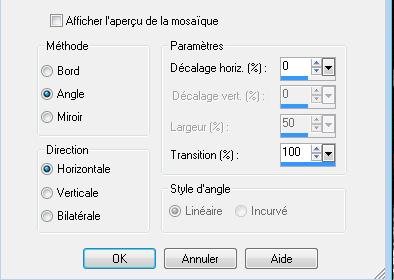
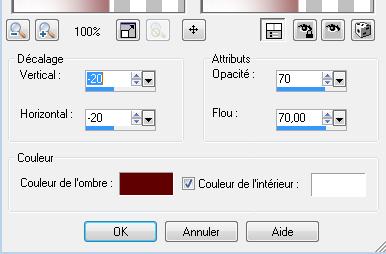
3. Layers- New raster layer - -Activate Flood Fill Tool and fill the layer with black 4. Layers- New Mask layer from Image and select Mask ''maskcameronair1''/ source luminance aktive 5. Layers- Merge- Merge Group 6. Effects-3D Effects-Cutout with these settings /and with these colors #600001 and #ffffff
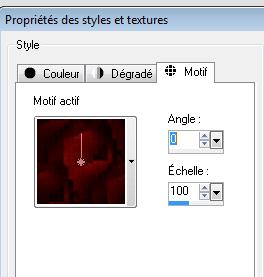
- Repeat: Effects-3D Effects-Cutout with these settings: V 20/ H 20 7.Selections-All-Selection Float-Defloat 8. Layers- New raster layer - 9. Open the Pattern texture-156 in your psp /Properties Foreground: foreground to pattern with these settings
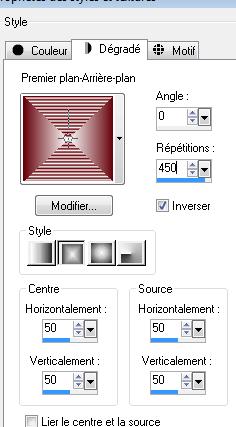
10. Food Fill Tool: fill the selection with the pattern 11. Selections- Deselect All 12. Effects-Plugins - EyeCandy 5 /Impact /perspective shadow- Tab-Settings-User/settings-and choose my preset ''renee scene-de -vie'' 13. Material Properties : Set your foreground color to #640008 -Set your background color to #ffffff -Set your foreground to gradient 'Foreground-background' -Rectangular with these settings as shown below
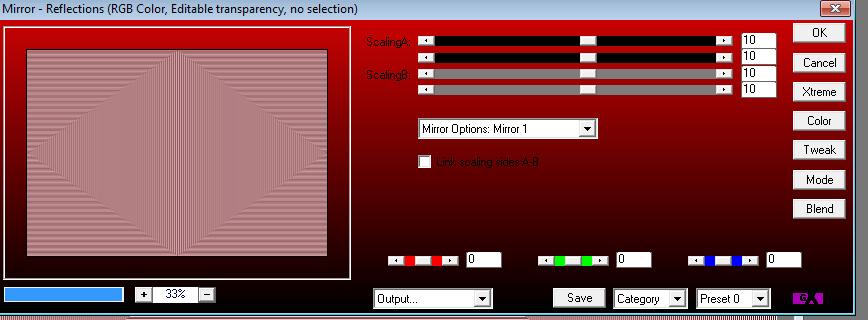
14. Activate Flood Fill Tool and fill the layer with the gradient 15. Effects-Plugins - AP01 Lines (Innovation )/Mirror-Reflections (it is in the list of filters see the connection)
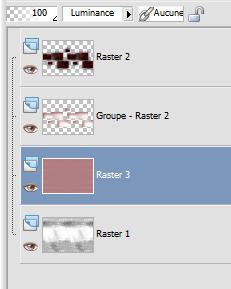
16. Double click on this layer and set the Blendmode to Luminance 17. Layers-Arrange- Move 2 x Down - Layer palette look like this now
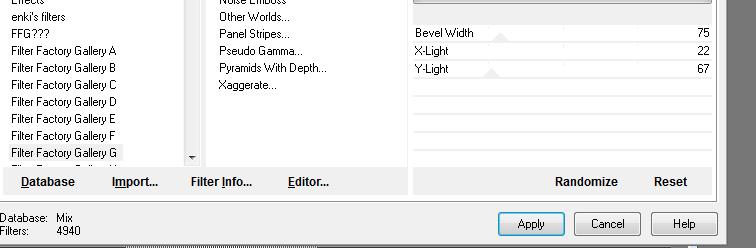
18. Layer-Palette -Close bottom layer =raster 1 but keep top layer active 19. Layers- Merge- Merge Layers Visible- Blendmode to Luminancer 20. Effects-Plugins -Unlimited - Filter FactoryGalley G /Bevel 2 with these settings
- On this layer: /Selections - load/save selection - load selection from disk and select my file: ''renee -scene-de-vie-selection2 21. Layers- New raster layer-Activate Flood Fill Tool and fill the selection with the gradient 22. Double click on this layer and set the Blendmode to Luminance 23. Selections-Deselect All 24. Activate the tube ''renee-scene-de-vie-barre '- Edit/ Copy-Edit - Paste as new layer on your working area and move 25. Layers- New raster layer 26. Selections - load/save selection - load selection from disk and select my file: ''renee-scene-de-vie1 » 27. Color Palette: Set your foreground color to #640008 -Activate Flood Fill Tool and fill the selection with the foreground color #640008 28. Effects-3D Effects-Cutout with these settings -FG- Color -#640008
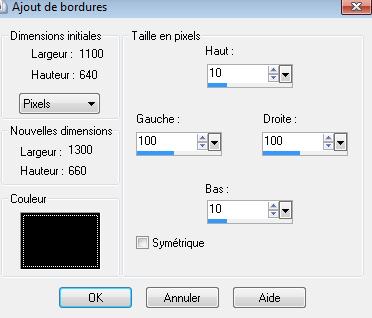
29. Layers- New raster layer /Activate the tube Jen_Vrouw340_19_2010'' -Edit/ Copy-Edit - Paste into selection Double click on this layer and set the Blendmode to Screen 30. Selections-Deselect All 31. Activate the tube ''Xtreme-woman-54-jesus_Cordero_21_04_08'' Edit/ Copy-Edit - Paste as new layer on your working area (do not move it is in the right place) Open the bottom layer in the layer palette 32. Layers- Merge -Merge All 33. Image - Add Borders -No Symmetric !!! with these settings-Black
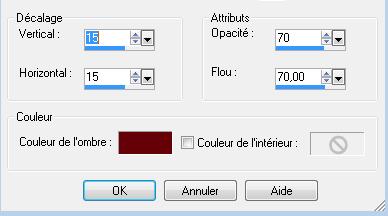
34. Activate the tube ''claudiaviza-fantasia93'' - Make raster 1 of the tube aktive - - Edit/ Copy-Edit - Paste as new layer on your working area and move 35.Effects - 3D Effects - Drop shadow using the default setting - Make raster 2 of the tube aktive ''claudiaviza-fantasia93'' Edit/ Copy-Edit - Paste as new layer on your working area and move 36. Layers- New raster layer 37.Effects-Plugins -Dragon Fly /Sinedot II with these settings
- Set the layer opacity of this layer to 42% 38. Layers- New raster layer /Color Palette: Set the foreground color to #ffffff 39. Activate Brush:''scene de vie "in your psp '' - File- Export -Custom Brush Give it a name ''scene de vie ''/ Activate Brush Tool and select my file: ''scene de vie '' with these settings
- Size 250/ Stamp your brush in the right place by using your foreground color 40. Open the tube ''mou easter'' /Image Resize 55% / Edit-Copy– Edit - Paste as new layer on your working area /With the move tool, move it in the bottom right corner 41. Image - Add borders-Symmetric checked: 10 pixels #ffffff 42. Open the tube '' text '' /Edit - Copy -Edit - Paste as new layer on your working area and move. Ore write your own text. 43. Image Resize at 985 pixels Width
Save as JPG
* I hope you enjoyed this tutorial . Renée This lesson was written by Renée
Placing 2011 * Any resemblance with an existing lesson is merely a coincidence *
* Don't forget to thank the people who work for us and with us.
I named the tubeurs - Testers and the translators.
Thanks Renée.
I am part of Tutorial Writers Inc.
My tutorials are regularly recordedt
ReneeGraphisme_All rights reserved *
*
|
 Translations