|
New
Translations here
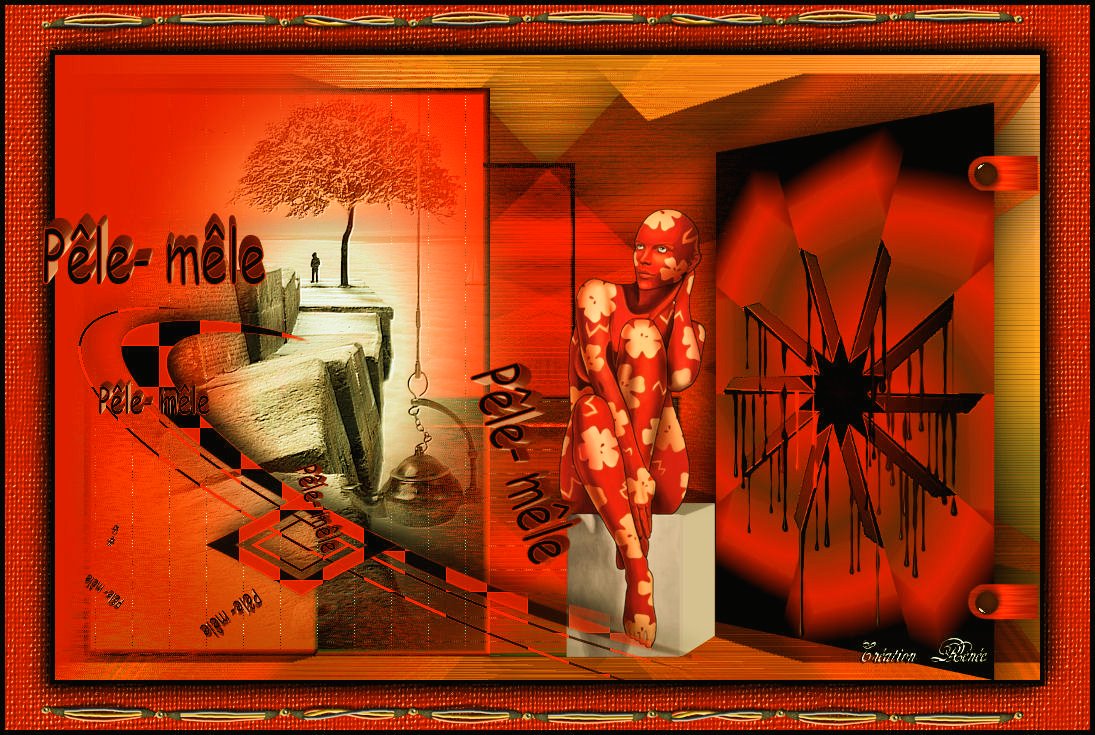
Pèle -Mêle
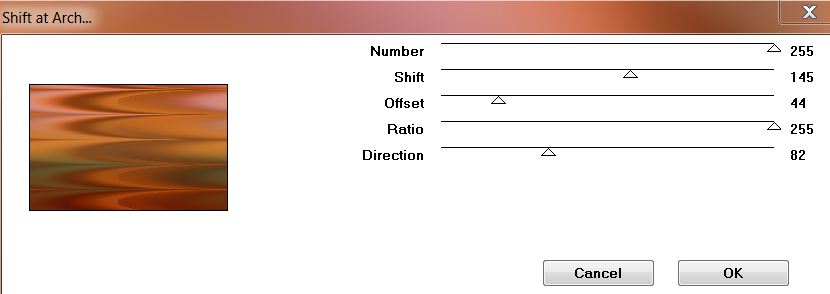
- Let's start the lesson. 1. Open the tube ''fond '' -Promote Background Layer =Raster 1'' 2. Effects- Plugins - Mura's seamless -Shift at arch with these settings
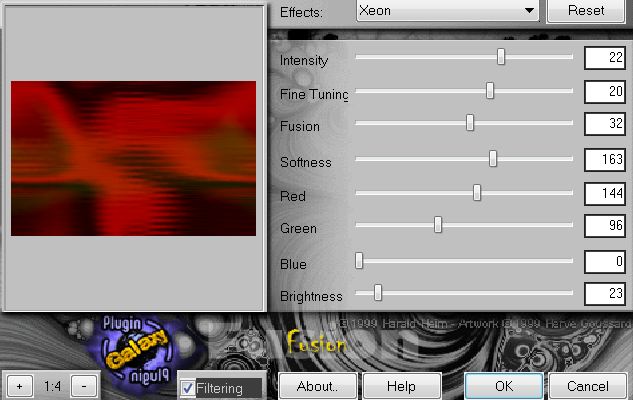
3. Layers- Duplicate 4. Effects- Plugins-Plugin Galaxy/Fusion >>Xeon with these settings
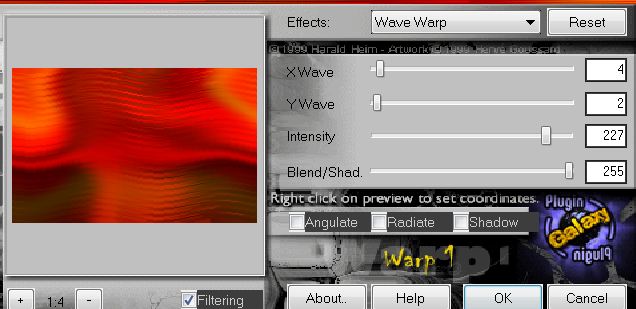
Stay on this layer 5. Effects-Plugins - Plugin Glaxy /Wrap 1
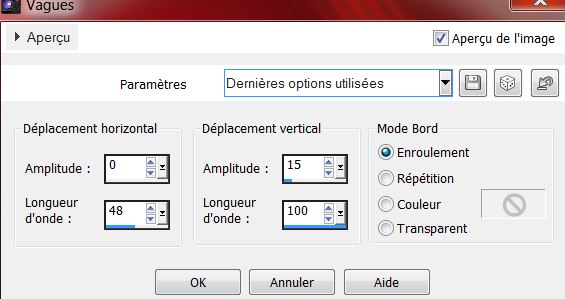
6. Effects - Distortion Effects-Wave with these settings
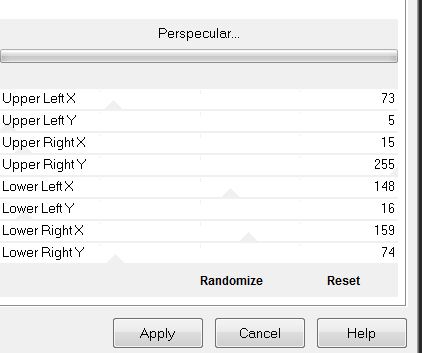
7. Effects-Plugins -Filter -Factory Gallery L/ Perspecular
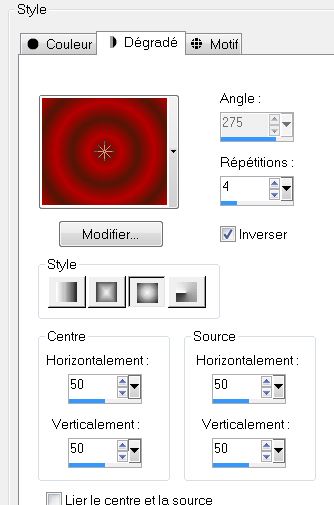
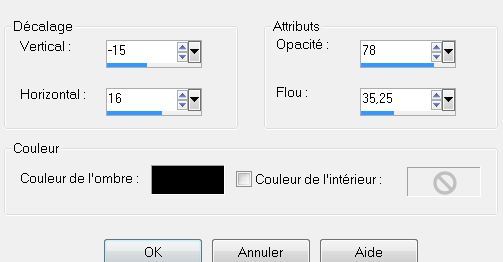
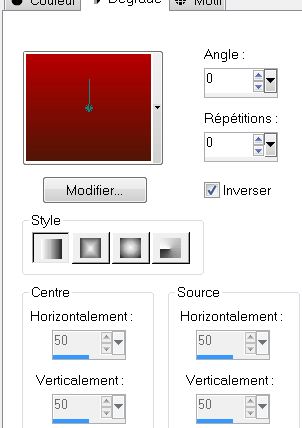
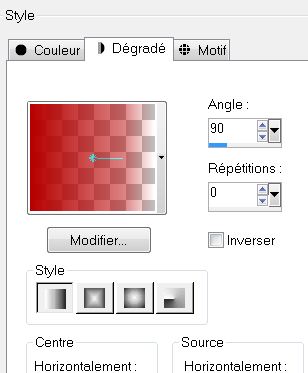
8. Effects- Plugins- EyeCandy 5 Impact /perpsective shadow /Preset -drop shadow blury 9. Layers- Duplicate - Image Flip 10. Layers- Merge- Merge Down 11. Effects- Plugins - Simple /4 way average - Layer Palette -Double click on this layer and set the Blendmode to Hard Light 12. Material Properties: Foreground color to this color #b70000 -Background color to this color:#511607 - Prepare a sunburst gradient configured like this.
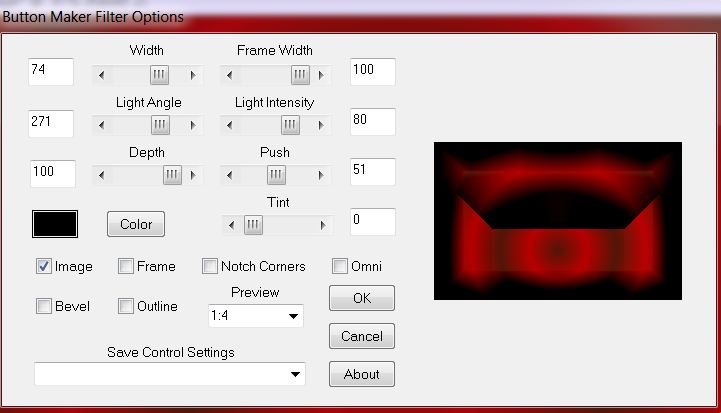
13. Layers- New raster layer /Activate Flood Fill Tool and fill the layer with the gradient 14. Effects- Plugins - Photo Swizzle / Button marker with these settings
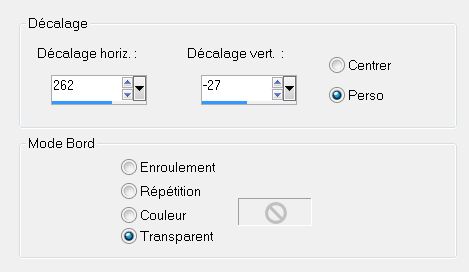
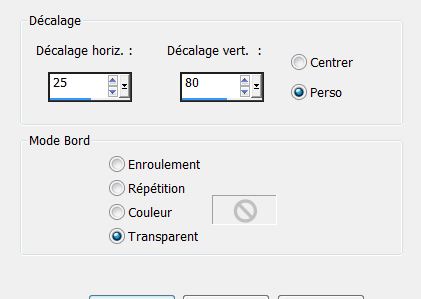
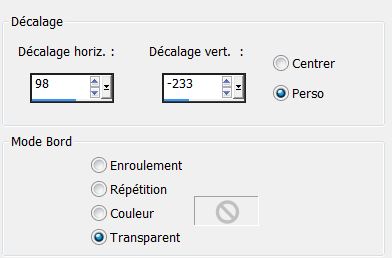
15. Effects- Plugins -Unlimited - Tile and Mirror – Kaleidoscope / settings 3 / 143/ 128 16. Image Resize 60% resize all layers not checked 17. Image Free Rotate 90° Right 18. Effects- Image Effects- Offset with these settings
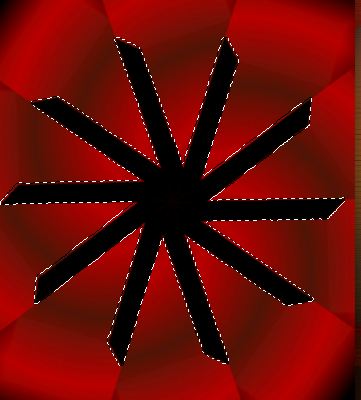
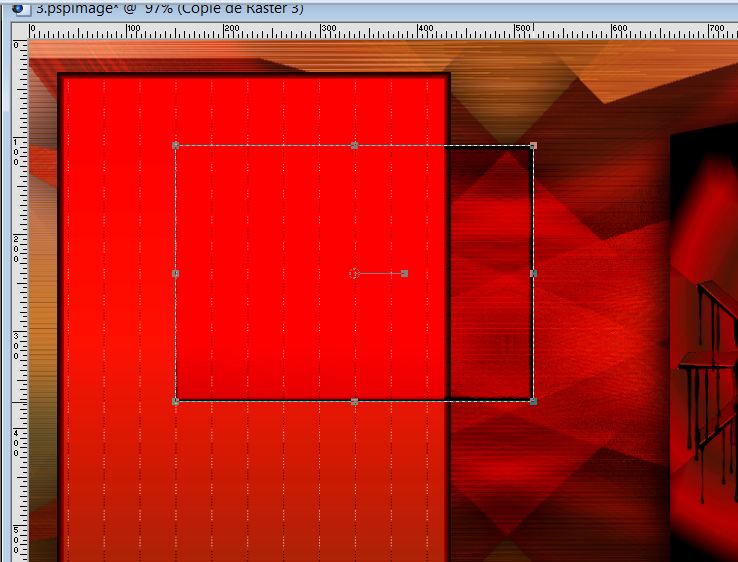
19. Effects- Plugins Eyecandy5 Impact - Perpsepective shadow-Tab- Settings/user settings choose my preset '' renee pele mele_1'' 20. With your magic wand - select inside the form like this
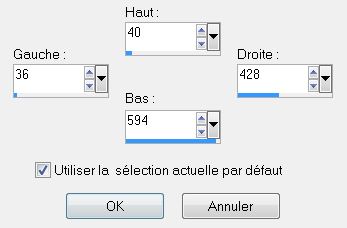
-Keep selected 21. Effects- Plugins - Unlimited2-Tile & Mirror/ Semless Blend(vertical) 22. Effects- Edge Effects- Enhance More 23. Effects- Plugins -Eyecandy 6 -Tab- Settings/user settings choose my preset-Setting Tour_renee_Drip-Spray Paint_pele mele'' 24. Selections- Deselect All 25. Effects- Plugins - Andromeda Perspective /preset - ''rtopen '' - Activate the top of the Layer Palette 26. Layers- New raster layer 27. Activate Selection Tool - Custom selection with these settings
28. Effects- 3 D Effects- Chisel with these settings
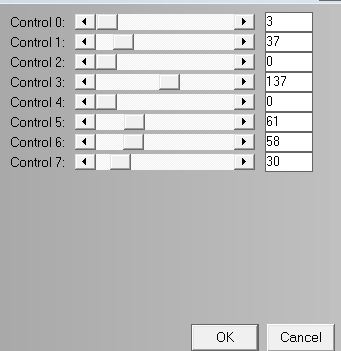
29. Effects- 3 D Effects-Cutout with these settings
- Keep selected 30. Layers- New raster layer - Properties Foreground: change the foreground into a linear gradient configured like this. ( with the same colors)
31. Effects- Plugins L and K's -Adonis
32. Selections- Deselect All 33. Layers- Merge- Merge Down -Set the Blendmode to Normal 34. Layers- Duplicate 35. Image Resize 65% resize all layers not checked 36. Image - Free rotate 90° Right - Layer Palette -Double click on this layer and set the Blendmode to Burn 37. Effects- Image Effects- Offset with these settings
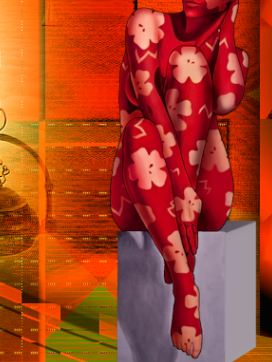
- The Result
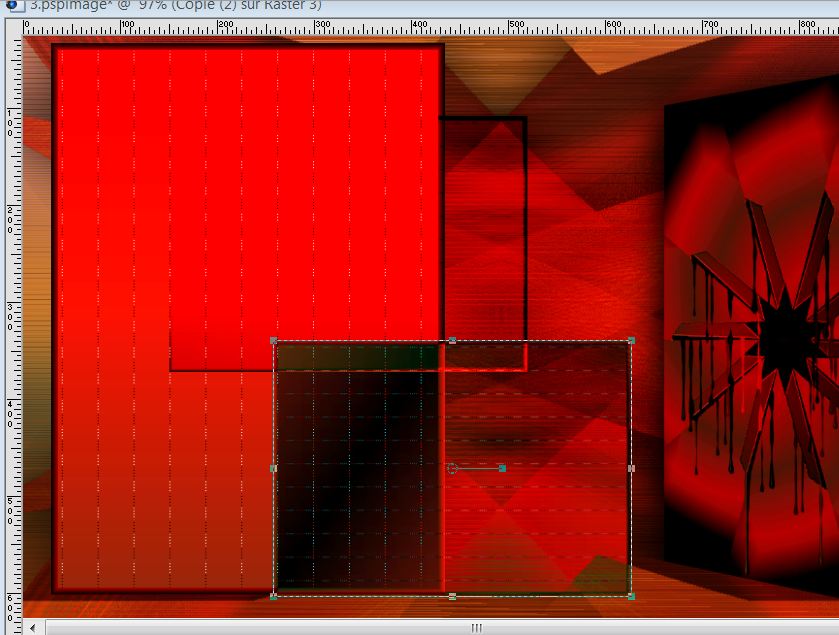
38. Layers- Duplicate 39. Effects- Image Effects- Offset with these settings
- Layer Palette -Double click on this layer and set the Blendmode to Difference - Your work look like this now
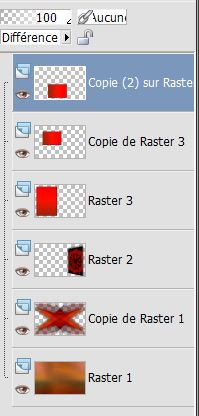
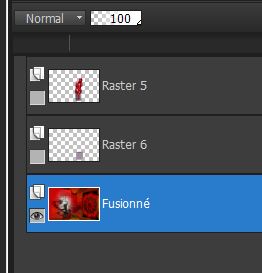
- Your layer palette looks like this:
40. Layers- New raster layer -Properties Foreground:foreground to gradient and select " Fading White"Prepare a linear gradient configured like this.
41.Selections - load/save selection - load selection from disk and choose my selection: ''renee_pele mele_1'' -Flood Fill Tool: fill the selection with the fading white gradient 42. Selections- Deselect All 43. Effects-Plugins – Filter Factory Gallery N- Wee Scratches / 255 44. Layers- New raster layer 45. Selections - load/save selection - load selection from disk and choose my selection: ''renee_pele mele_2'' - Flood Fill Tool: fill the selection with the fading white gradient 46. Effects- Plugins – L and K 's – Pia 41 47. Selections- Deselect All 48. Effects- Edge Effects- Enhance 49. Effects - 3D effects - drop shadow with these settings -8/8/100/28 black 50. Layers- Duplicate 51. Effects- Plugins -Simple – Center tiles - Activate the top of the Layer Palette 52. Open the tube ''nicole-personnage6b'' Image Resize 60% Edit-Copy-Edit-Paste as a new layer area and move 53. Activate Selection Tool-Rectangle ( S) draw a selections like this
54. Layers- New raster layer -Flood Fill Tool: fill the selection with this color #9f8ea0 55. Effects- Plugins -Eyecandy 5Impact – Extrude tab Settings/User settings choose my preset- ''renee_extrude _pele mele'' 56. Selections- Deselect All 57.Layers-Arrange- Move Down- with your Move Tool, place the tube here
-Activate the top of the Layer Palette 58. Open the tube 'ATHE-py17- Image Mirror Edit-Copy-Edit-Paste as a new layer area and move 59. Layers-Arrange- Move 4x Down- under raster 4 >Your Layer Palette look like this now
60. Effects- Plugins – FM Tile Tools - Blend Emboss / using the default settings 61. Layer palette; Close layer 5 and 6 - Activate an open layer 62.Layers- Merge- Merge Visible Your Layer Palette look like this now:
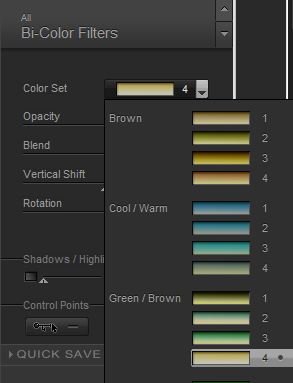
- Activate the merged layer 63. Effects- Plugins -Nick Color Pro 3.0 /Bi color /Color set / Green Brown 4
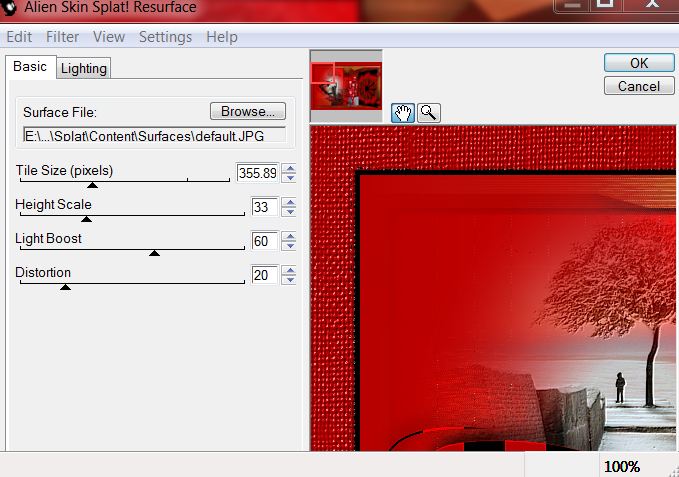
64. Open the two layers - Activate the top of the Layer Palette 65. Open the tube renee_attache _pele mele '' Edit-Copy-Edit-Paste as a new layer area and move to the right side 66. Open the tube ''renee_bouton _pele mele ''Edit-Copy-Edit-Paste as a new layer area and move to the right side 67. Layers- Merge- Merge Visible 68. Image - Add borders-Symmetric checked: 5 pixels black 69.Image - Add borders-Symmetric checked: 45 pixels foreground color 70. With the Magic Wand select the border of 45 pixels 71. Effects-Plugins - Alien Skin Splat- Resurface with these settings
72. Selections- Invert 73. Effects-3D effects-Drop Shadow with these settings: -8/8/100/28 black - Repeat: Drop Shadow with these settings: 8/ -8 /100 /28 black 74. Selections- Deselect All 75. Open the tube ''cordes _pele mele'' Edit-Copy-Edit-Paste as a new layer area and move 76. Layers- Duplicate -Image Flip and move 77. Image - Add borders-Symmetric checked: 5 pixels black 78. Activate the tube "text "/Edit/copy-Edit paste as a new layer on your working area / Ore write your own text Save as JPG
I am part of Tutorial Writers Inc. My tutorials are regularly recorded. ReneeGraphisme_All rights reserved
*
|
 Translations