|
New
Translated soon
Translations here
Onirique
*
- Let start the lesson 1. Open the background image fond ''renee_onirique _fond1'' Windows Duplicate -Promote background Layer = Raster 1 2. Effects- Plugins - &<Bkj Designer sf10III>/ Radial Split06 /Moirgnitude to 82 3. Effects- Edge Effects-Enhance 4. Layers - New raster layer
5. Selections - load/save selection - load selection from disk and choose my selection: ''renee_onirique_1'' 7. Effects- Plugins -EyeCandy 5- Texture -marbre -Tab- Settings/User Settings and choose my preset ''renee_onirique_marbre'' 8. Selections- Deselect All 9. Layers - New raster layer 10.Selections - load/save selection - load selection from disk and choose my selection: ''renee_onirique_2 -Properties foreground: Foreground to color #4a554f -Activate Flood Fill Tool: fill the selection with the foreground color #4a554f 11. Effects- 3D Effects- Cutout -FG-Color #4a554f
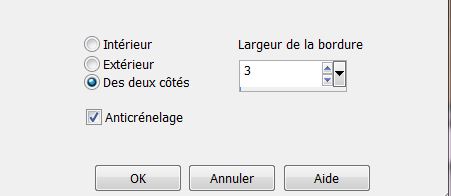
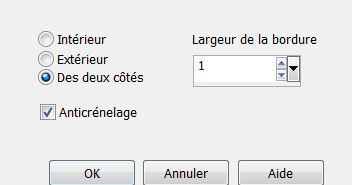
12. Selections-Modify-Select-Selection Borders with these settings -Both Sides
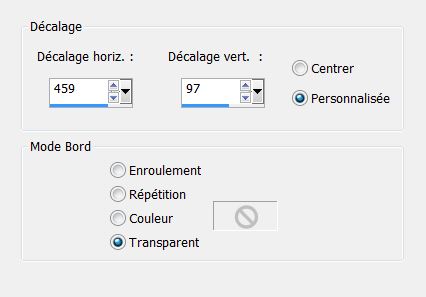
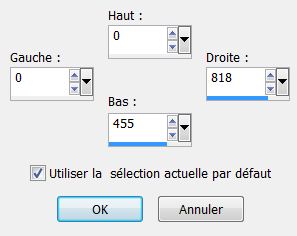
13. Layers - New raster layer /Activate Flood Fill Tool: fill the selection with the foreground color #4a554f 14. Effects- Plugins -EyeCandy5 Impact– Extrude -Tab -Settings/User Settings and choose my preset ''renee_onrique _extrude '' 15. Selections- Deselect All 16. Layers- Merge 2x Merge Down 18. Activate the top of the Layer Palette 19. Open the tube ''renee_onirique_panneau '' Edit/copy-Edit paste as a new layer on your working area 20. Effects- Image Effects Offset with these settings
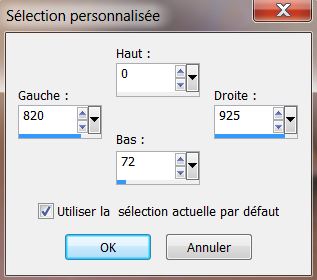
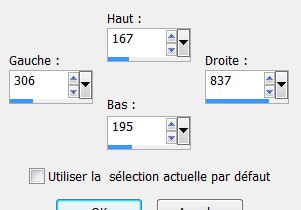
21. Layers - New raster layer 22. Selection Tool ( S ) Custom selection use settings below
24. Properties foreground:Foreground to color: #efa75b-Activate Flood Fill Tool and fill the selection with the FG-Color #efa75b 25. Effects-Plugins - Eye Candy 5-Texture - Marbre-Tab -Settings/User Settings and choose my preset ''renee_yellowSupren_onirique'' 26. Selections-Modify-Select-Selection Borders with these settings Both Sides
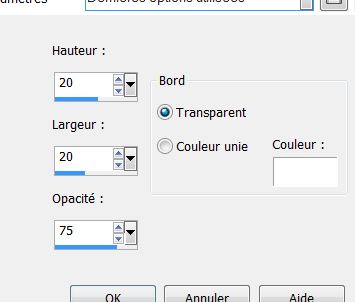
27. Effects - 3D Effects – Boutonnize with these settings
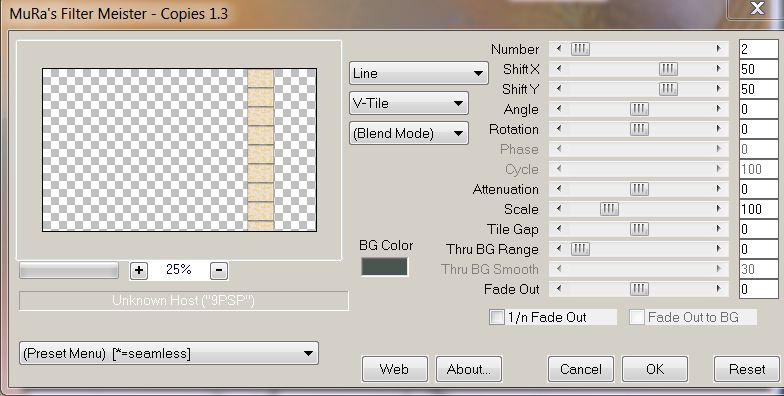
28. Selections- Deselect All 29. Effects- Plugins - Mura's meister- Copies use settings below
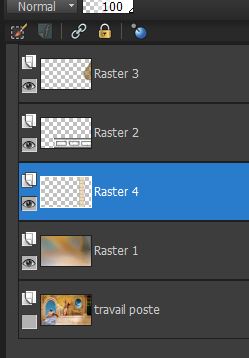
30. Layers- Arrange- Move 2x Down - Your Layer Palette look like this now:
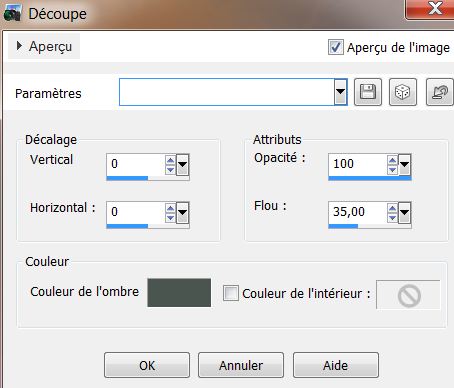
31. Effects - 3D Effects - Drop shadow with these settings 10/-6/85/60 black 32. Activate the top of the layer palette 33. Layers - New raster layer 34. Selections - load/save selection - load selection from disk and choose my selection: ''renee_onirique_3'' 35. Properties foreground: Foreground to color #4a554f : Flood Fill Tool: fill the selection with the foreground color #4a554f 36. Selections- Deselect All 37. Effects - 3D Effects - Drop shadow with the same settings - In the layer palette -activate raster 3 -Selection Tool-Rectangle- select this part and delete
38. Activate the top of the layer palette 39. Layers - New raster layer 40. Selection Tool ( S ) Custom selection use settings below
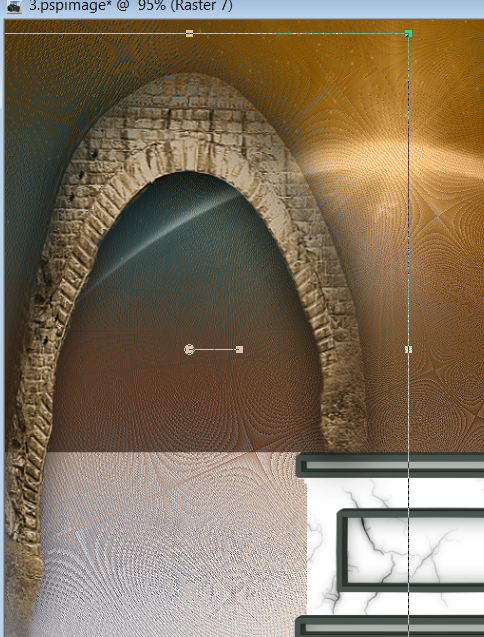
41. Open the tube ''image6'' Edit/copy-Edit paste into selection 42. Selections- Deselect All 43. Layer Palette -Double click on this layer and set the Blendmode to Luminance Legacy-and set the layer opacity of this layer to 55% 44. Open the tube ''onirique_porche'' Edit/copy-Edit paste as a new layer on your working area and move to the left side like this
45. Effects - 3D Effects - Drop shadow with the same settings 46. Open the tube ''Mist corinne vicaire-nuages01-2012'' -Edit/copy-Edit paste as a new layer on your working area and move to the bottom left side With the clone brush (C)/How do we proceed: Open the Tool – size not larger than 65 Make your shape using this tool . Place the brush on the spot you want to create (clouds ) and push on your right mouse button- Layers- New raster layer- Go to the spot where you want to apply your shape and push your left mouse button to apply.
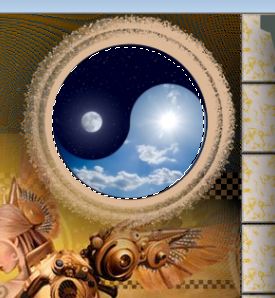
47. Layers- Arrange- Move Down 48. Activate the top of the layer palette 49. Open the tube ''Jhanna_230_tube'' /Image Mirror- Image Resize 55 % -Edit/copy-Edit paste as a new layer on your working area and move to the left 50. Open the tube ''onirique_oeuf'' Edit/copy-Edit paste as a new layer on your working area and move to the feets of the tube Jhanna 51. Layers - New raster layer 52. Selections - load/save selection - load selection from disk and choose my selection: ''renee_onirique_4'' /Properties foreground:Foreground to color : #d9b797 -Flood Fill Tool: fill the selection with the foreground color #d9b797 53. Selections- Deselect All 54. Effects - 3D Effects - Drop shadow with the same settings 55.With the magic wand select inside the circle like this
55. Open the tube ''claudiaviza-mix34'' Edit/copy-Edit paste into selection 56. Selections- Deselect All 57. Open the tube ''lune ''Edit/copy-Edit paste as a new layer . With the move tool, move it in the upper right corner 58. Open the tube ''onirique_briques_cassées'' Edit/copy-Edit paste as a new layer . With the move tool, move it to the left side -Layer Palette -Double click on this layer and set the Blendmode to Luminance 59. Activate the bottom of the Layer-Palette=raster 1 60. Layers - New raster layer 61. Selection Tool ( S ) Custom selection use settings below
62. Properties foreground: Foreground to #d9b797- Properties background :Background color to #000000 -Activate Flood Fill Tool and fill the selection with the FG-Color #d9b797 63. Effects- Plugins - L and K 's/ Pia 6 64. Selections- Deselect All 65. Effects - 3D Effects - Drop shadow with these settings 8/ 9/100/15 black 66. Activate the top of the Layer-Palette 67. Open the tube ''onirique_femme leopard '' Edit/copy-Edit paste as a new layer on your working area and move 68. Layers- Arrange- Move Down under the layer of the circle 69. Layers- Merge- Merge Visible 70. Open the tube ''Alies 1FA304-fantasy-15022013'' Image Resize 40% Edit/copy-Edit paste as a new layer on your working area and move - Set the layer opacity of this layer to 73% 71. Layers- Merge- Merge All ( flatten) 72. Open the tube ''wordart_fantasy_CibiBijoux'' Image Resize 40% Edit/copy-Edit paste as a new layer on your working area and move 73. Image - Add borders-Symmetric checked: 2 pixels black 74. Image - Add borders-Symmetric checked: 20 pixels white 75. Image - Add borders-Symmetric checked: 3 pixels black 76. With the magic wand select the white border of 20 pixels 77. Effects- 3D Effects- Cutout with these settings - FG-Color #4a554f
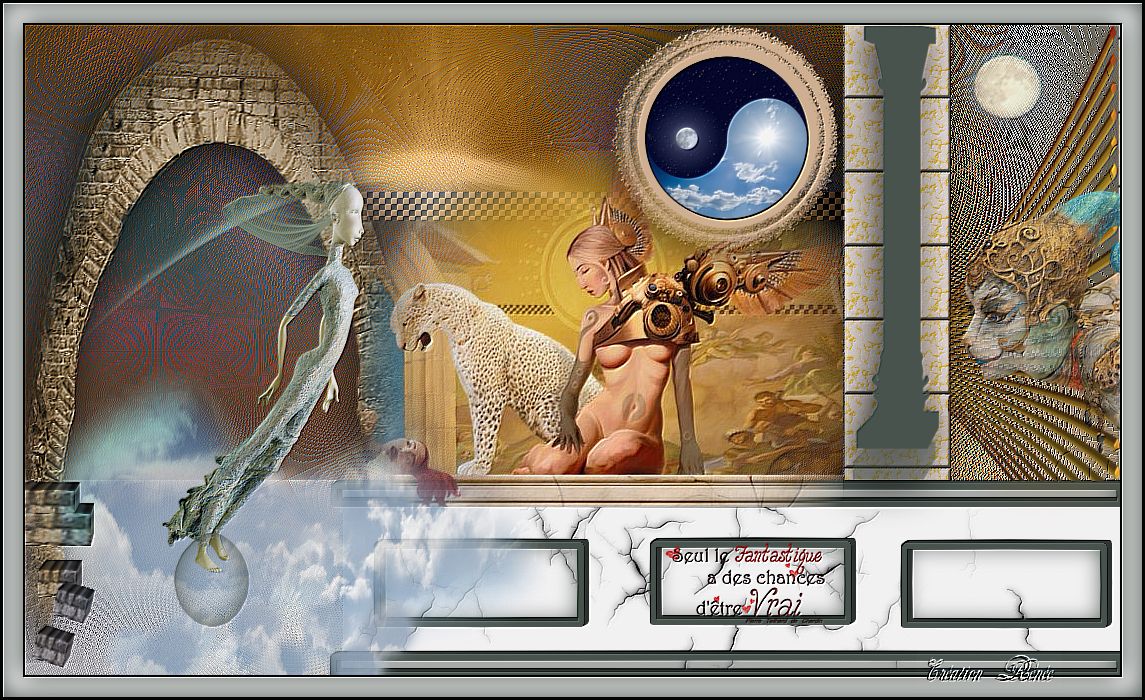
78. Selections- Deselect All Effects- FM Tile Tools –Blend Emboss use the default settings Save as JPG I hope you enjoyed this lesson Renée This lesson was written by Renée le 19/02/2013 *
Any resemblance with an existing lesson is merely a coincidence * * Don't forget to thank the people who work for us and with us. I named the tubeurs - Testers and the translators. Thanks Renée. *
I am part of Tutorial Writers Inc My tutorials are regularly recorded. ReneeGraphisme_All rights reserved
|
 Translations