|
Noir ...Atmosphère New
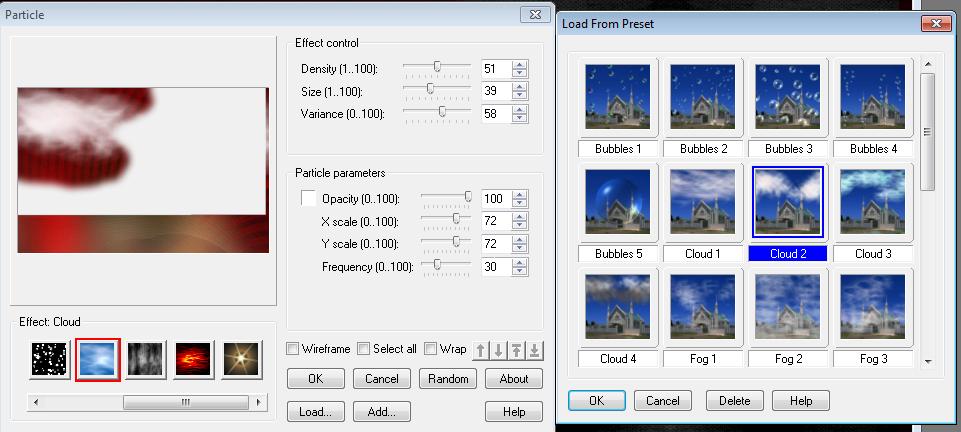
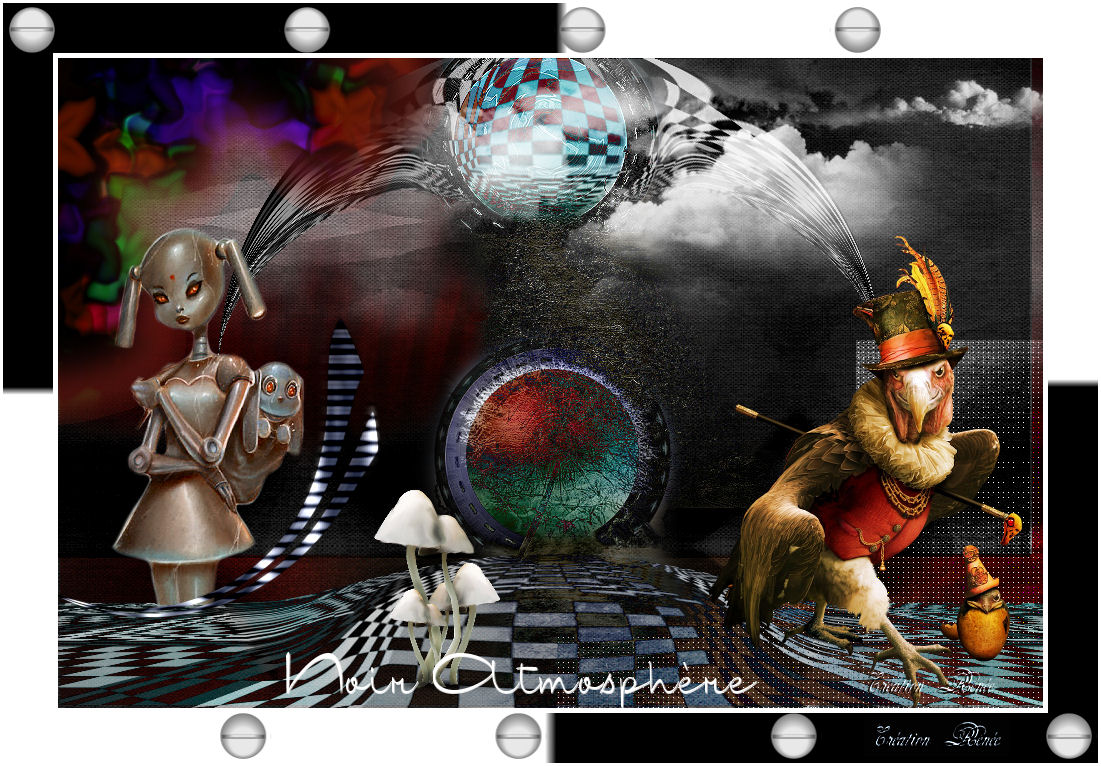
Let's start the lesson. 1. Open the Backgroundimage ''fond noir atmosphère"Window - Duplicate (or shift+D) - Close the original and proceed on the copy -Promote Background Layer =Raster 1 2. Layers- New raster layer 3. Selections - load/save selection - load selection from disk and select my file: '' renee-noir-atmosphere'' / Set your foreground color to #808080 --Activate Flood Fill Tool and fill the selection with the foreground color #808080 4. Double click on this layer and set the Blendmode to "Burn " -Set the layer opacity of this layer to 24% 5. Selections- Invert 6. Layers- New raster layer 7. Open the tube ''renee-noir-atmosphere-image 1 '' - Edit/ Copy-Edit - Paste into selection 8. Selections- Deselect All 9. Double click on this layer and set the Blendmode to Overlay - Layer- Palette- Stay on (raster 3 ) 10.Effects-Plugins - Ulead particle / Click on Cloud /with these settings /Click on Load select preset - cloud 2 as shown below
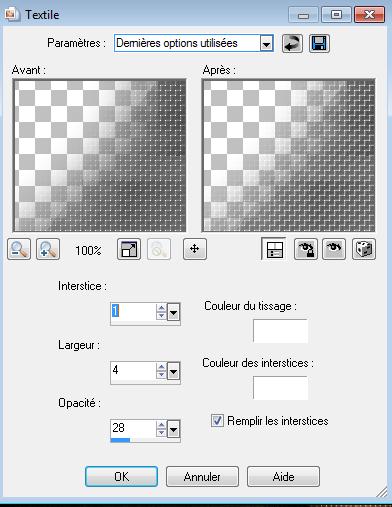
11. Layers- New raster layer 12.Selections - load/save selection - load selection from disk and select my file: ''renee-noir-atmosphere2'' //Open the image ''renee-noir-atmosphere fond 2'' - Edit/ Copy-Edit - Paste into selection 13. Effects- Texture Effects- Weave with these settings
14. Selections-Deselect All //Double click on this layer and set the Blendmode to" Dodge" 15. Open the tube ''renee-noir-atmosphere-image 2'' Edit/ Copy-Edit - Paste as new layer on your working area and move - Double click on this layer and set the Blendmode to "Difference " 16. Layers- Duplicate /Double click on this layer and set the Blendmode to "Normal " 17. Effects- Geometric Effects /Circle/ Transparent - Image Flip 18. Open the tube ''Corinne.Vicaire -fantaisie13'' coller Edit/ Copy-Edit - Paste as new layer on your working area Activate your Pick Tool(K) and move as shown below
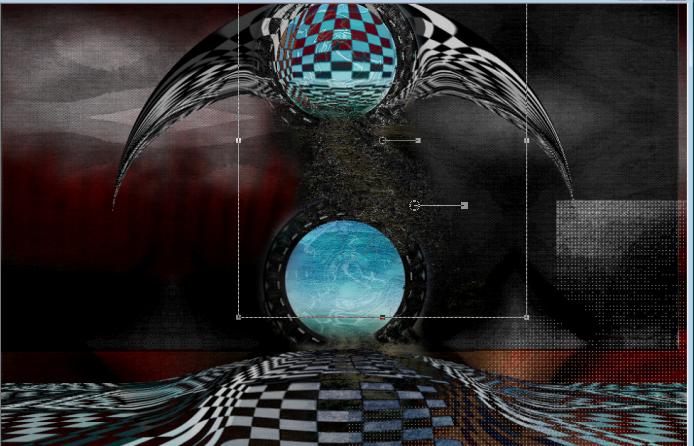
- Double click on this layer and set the Blendmode to "Difference " 19. Your work look like this now
20. Layers- Duplicate -With your Pick Tool move to as shown below
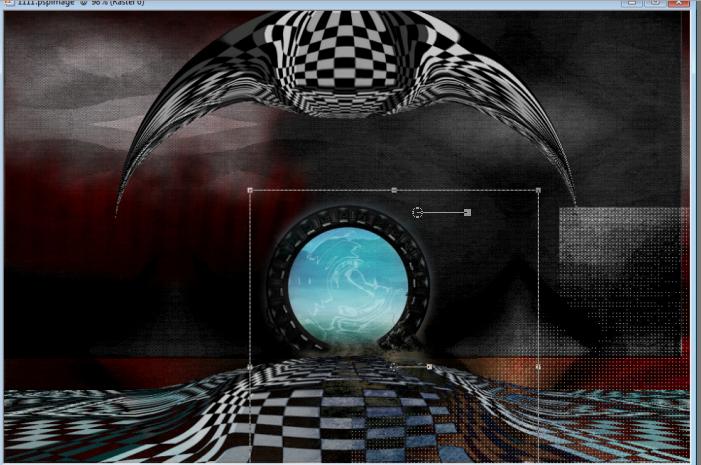
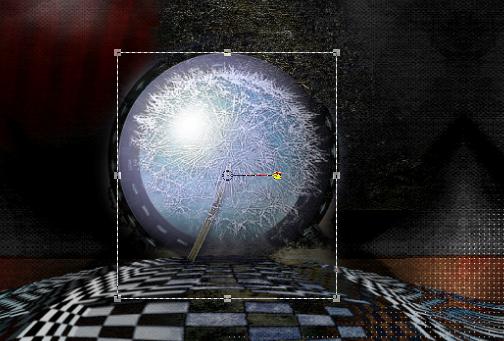
21. Effects-Edge Effects-Enhance //Double click on this layer and set the Blendmode to "Difference " 22. Open the tube ''image fleur blanche '' //Edit/ Copy-Edit - Paste as new layer on your working area and move as shown
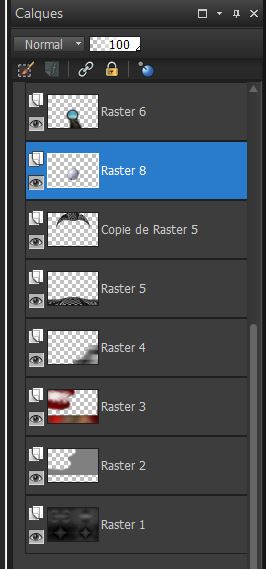
24. Layers- Arrange- Move under Raster 6
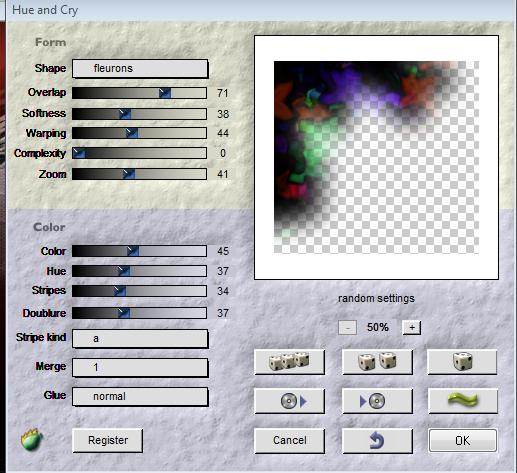
25. Open the tube ''renee-noir-atmosphere-nuage '' Edit/ Copy-Edit - Paste as new layer on your working area 26. Effects-Image Effects-Offsett with these settings : = 200 and V=185 Transparent 27. Layers- New raster layer 28. Selections - load/save selection - load selection from disk and select my file: ''renee-noir-atmosphere- 3'' -Set the foreground color to #962419-Activate Flood Fill Tool and fill the selection with the foreground color #962419 29. Effects- Plugins -Flaming Pear /Hue and Crywith these settings
30. Selections-Deselect All 31. Open the tube ''kikirou216-bot_n_dog'' Image Resize with 65% - Edit/ Copy-Edit - Paste as new layer on your working area and move 32. Open the tube ''renee-noir-atmosphere-image4'' - Edit/ Copy-Edit - Paste as new layer on your working area and move (effects of Plugins Andrews 43 has already happened on the tube )
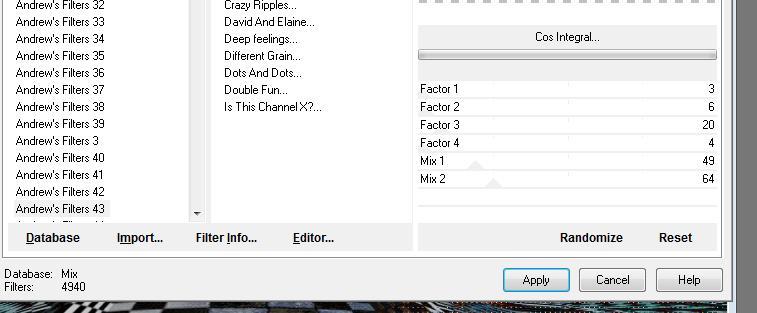
33. Effects- Plugins- Unlimted 2.0 - Andrews Filters 43 / Cos Integral..with these settings .
34. Open the tube ''Alie-ajgv-The -Entertrainer *MB-070712'' Image Resize with 55% - Edit/ Copy-Edit - Paste as new layer on your working area and move 35. Open the tube ''renee-noir-atmosphere-champignons '' Image Resize with 35% - Edit/ Copy-Edit - Paste as new layer on your working area and move 36. Layers- Merge- Merge-Visible 37. Image - Add borders-Symmetric checked:5 pixels color white 38. Image - Add borders-Symmetric checked:45 pixels color black 39. With the magic wand select the border of 45 pixels 40. Open the tube ''image damier '' Edit/ Copy-Edit - Paste into selection 41. Selections- Deselect All 42. Image - Add borders-Symmetric checked:3 pixels color white 43.Open the tube ''renee-image ecrou '' - Edit/ Copy-Edit - Paste as new layer on your working area and move 44. Layers- Duplicate /Image Mirror/ Image Flip 45 Close the foreground color-Set the background color to color white/Activate the Text Tool-Font ''International Palms '' Size 40 -Write your text. Save as JPG
* I hope you enjoyed this tutorial . Renée This lesson was written by Renée Placing 2010 * Any resemblance with an existing lesson is merely a coincidence * * Don't forget to thank the people who work for us and with us. I named the tubeurs - Testers and the translators. Thanks Renée. *
* I am part of Tutorial Writers Inc. My tutorials are regularly recordedt ReneeGraphisme_All rights reserved
|
 Translations