|
Memory

Translated by Sally
Translator Here

Material Here

*
|
The TUBES
are
YOKA -Guismo et masque de
Narah
These
tubes were received from tubeurs sharing groups
Or found
by me searching on the net
I am
grateful to have been given permission these beautiful
tubes so
please
use any copyright information as needed
If one of
these tubes is yours,
Contact
me
so I can
make a link to your site
or remove
it
Thank you
Renee
|
|
Before you start
*
Open PSP
Open / tubes duplicate and close originals
Open then Minimize the mask in PSP
Put filters in their proper folders
Brushes and other tools in their respective folders
To import presets / Double-click the file it will
automatically install
|
Let's begin
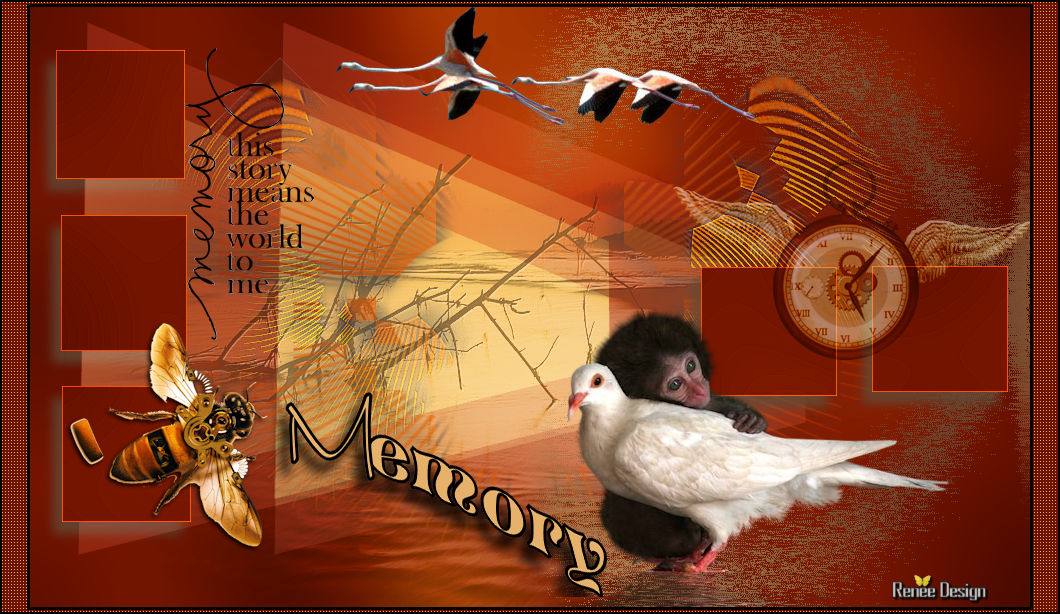
1. Open transparent image of 1000 x 600 pixels
2. Selections - select all and paste ''fond memory'' in the
selection
3. Selections - Select none
4. Adjust/ blur - gaussian blur at 50
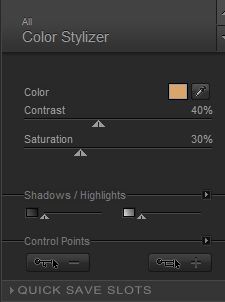
5. Effects - Nik Software - Color Effex Pro.3 / Color Stylizer with
this color #d9a56d.
Repeat this effect
6. Layers - duplicate
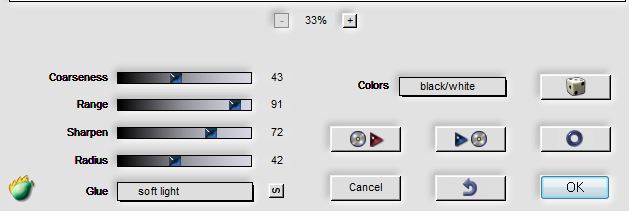
7. Effects - Flaming Pear - pixels trash/ glue on soft light
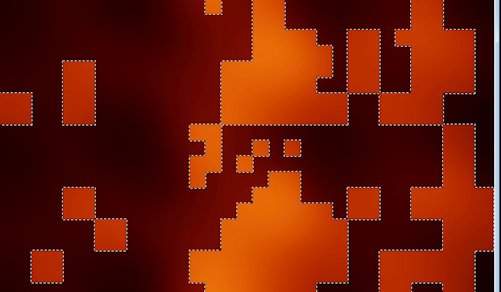
8. Select the transparent parts with your magic wand
Like this:

9. Selections - Invert - delete
10. Selections - deselect
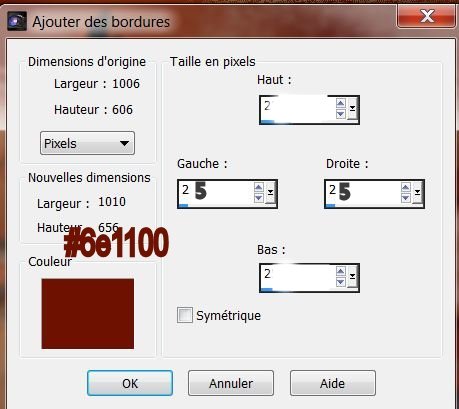
11. Effects - 3D effects - Drop shadow

12.
Effects - geometric effects - horizontal perspective 45
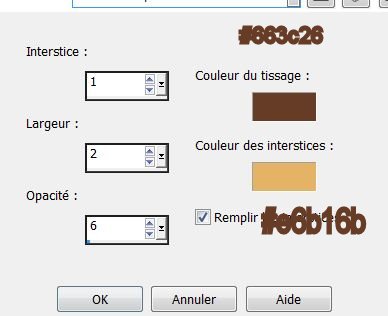
Uncheck circulation - move from the left side so it looks like this
13. Layers - Duplicate layer - image flip
14. Layers - merge - merge down
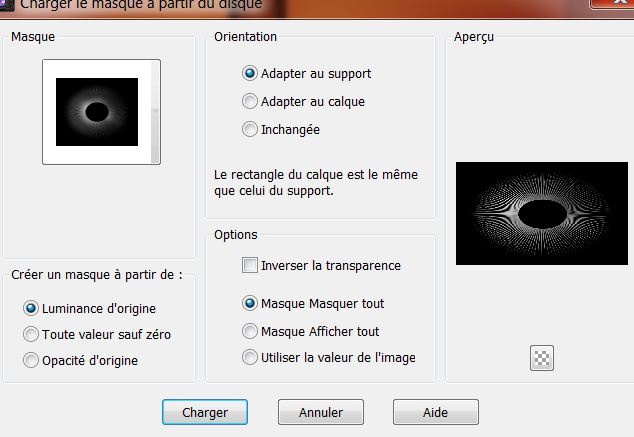
15. Layers - load mask from disk "narah_mask - 0186"
16. Layers - merge group
17. Effects - Drop shadow same parameters in memory
18. Layers - Duplicate layers
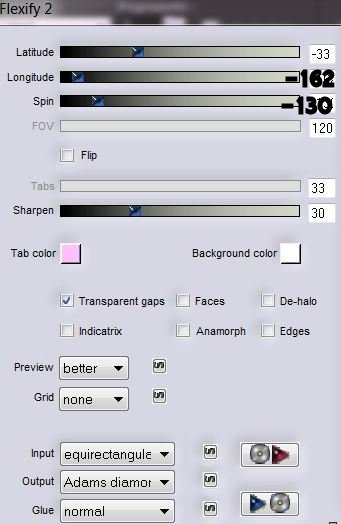
19. Effects - Flaming Pear - flexify2
20. Effects - Edge effects - enhance
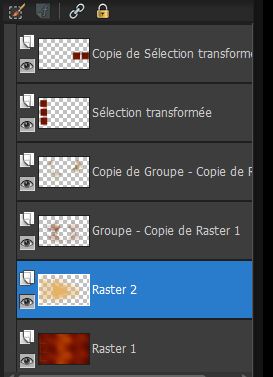
21: Go to raster 1
22. Selections - load selection from disk/ "renee_memory_1"
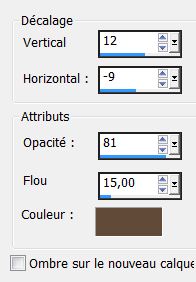
23. Effects - 3D effects - Drop shadow color #614a37
24. Selection - Promote selection to layer
25. Effects - Edge effects - enhance
26. Selections - select none
27. Layers - Adjust/ move to the top
28. Layers - Duplicate layers - Image flip
29: Image - free rotate 90 °/ right
30. Image - flip
31. Effects - 3D effects - Drop shadow
32. Stay on the top layer
33. Layers - new raster layer
34. Selections - load selection from disk/ "renee_memory_2" -
Fill with color #e5b365
35. Selections - select none
36. Effects - Toadies - what are you with the following settings
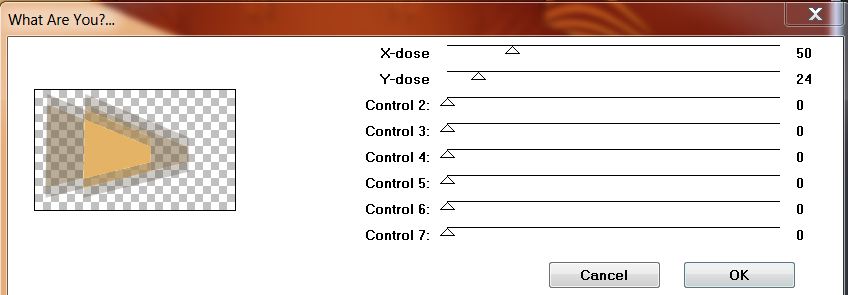
37. Change the blend mode to Screen
* Layers - Adjust/ move down 4 times/ to above raster 1/ you have
this:
38. Go back to the top of the Layers palette
39. Layers - add a new layer
40. Selections - load selection from disk "renee_memory_3"
41. Change foreground color to #673c28 and background to #e5b365
42. Prepare a sunset gradient configured as follows:
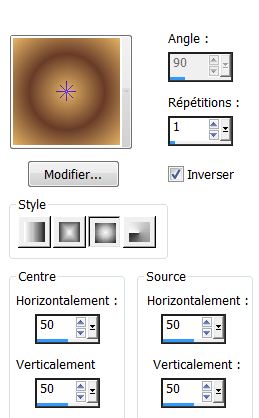
43. Fill the selection with the gradient
44. Selections - select none
45. Effects - Filter factory N - wee scratches at 255 -
Layers - Adjust/ move down two times
46. Open the tube "lac" Paste as a new layer - move as shown
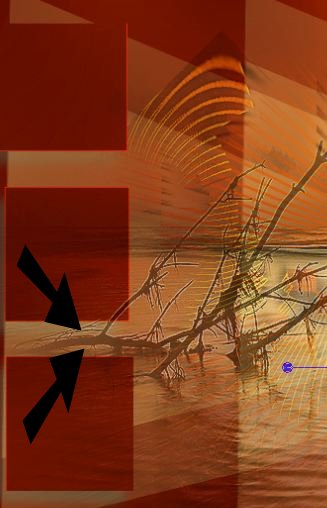
This layer should be above raster2 - change the mode to hard light
and opacity to 44
47. Effects - FM Tile Tools - Blend emboss (default)
48. Open tube "abeille_stream" - Paste as new layer - move into
place
49. Open tube "calguisflamand 459" Paste as new layer and place well
50. Open tube "text" Paste as new layer - move into place
51. Open tube "yoka_photos_animals_birds_monkeys_130309" - Paste as
new layer
52. Resize to 75%/ no format changes and uncheck all layers - make
sure it is well placed
53. Effects - Flaming Pear - Flood
(A caution: the horizon depends on the placement of the tube. You
can change the setting in the horizon depending on the placement of
your tube)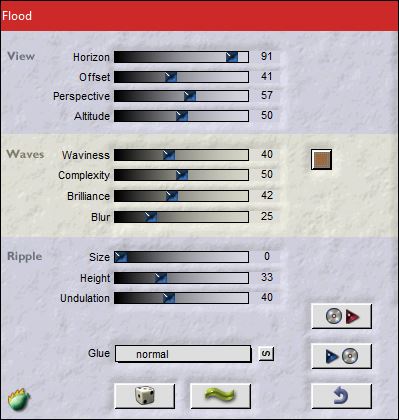
54. Open the tube "bello_steamxpress_element". Move to a suitable
place or as shown
55. Change the blend mode to hard light and opacity to 51
56. Layers - Merge visible layers
57. Image - add border 3 pixels
58. Image - add borders asymmetrical
59. Select this border with your magic wand
60. Effects - Texture effects - weave
61. Image - add borders
2 pixels black
62. Open tube "memory" paste in place
*-*-*
Lesson
Over
Thanks Sally
*
I am part of Tutorial
Writers Inc.
My tutorials are
regularly recorded


|
Your creations here
 |
|