|
Nouveau
 Traduit Traduit
|
En [Néerlandais par Patricia
ici
 |
En [Anglais ] par SALLY
ici
 |

These tubes are
*
PACHA - THAFS- PSP DEVIL -MTM.MISC- YOKA et
SILVINAORSI
These tubes were
received from tubeurs sharing groups
Or found by me
searching on the net
I am grateful to have
been given permission these beautiful tubes so
please use any
copyright information as needed
If one of these tubes
is yours,
Contact me
so I can make a link
to your site
or remove it
Thank you Renee
*****************
FILTERS
*
Andromeda design
Flaming Pear
EyeCandy5 impact
Filter Factory U
EyeCandy 6
Here :
http://www.reneegraphisme.fr/filtres/Mes filtres.html
*********************
Let's begin
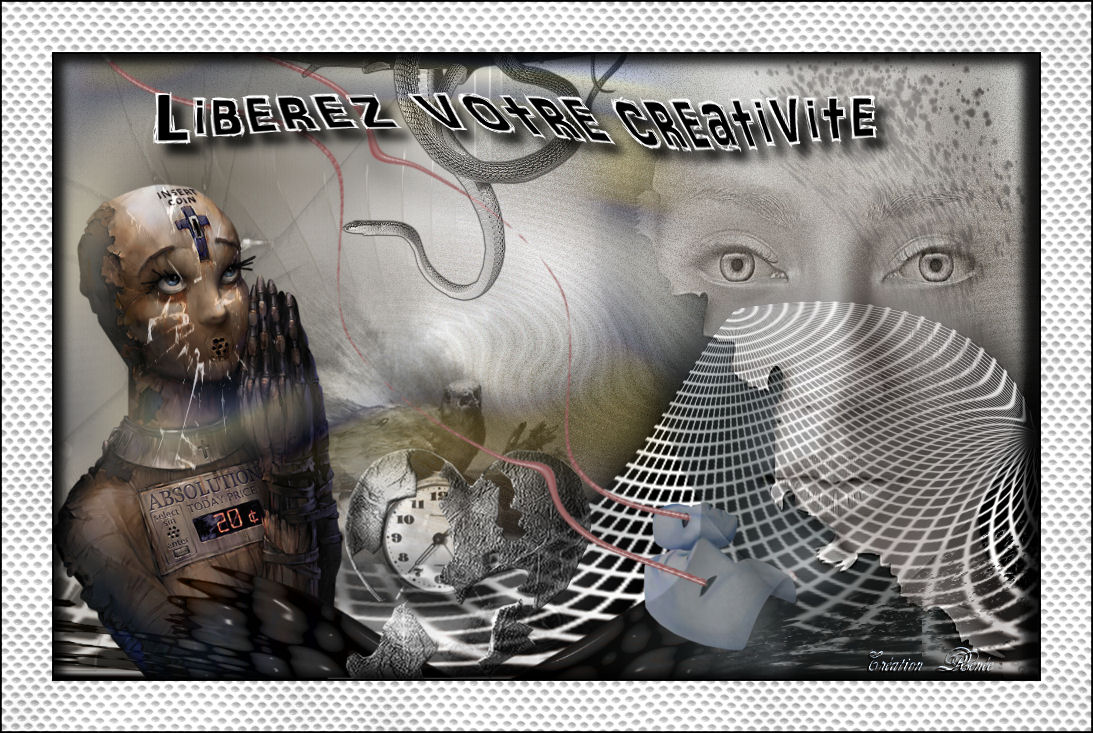
1. Open a new transparentimage 985 x 625 pixels
2. Selections - select all
3. Open the tube "liberez-votre-creativite-fond"
Copy and Paste into the selection
4. Selections - select none
5. Layers - duplicate
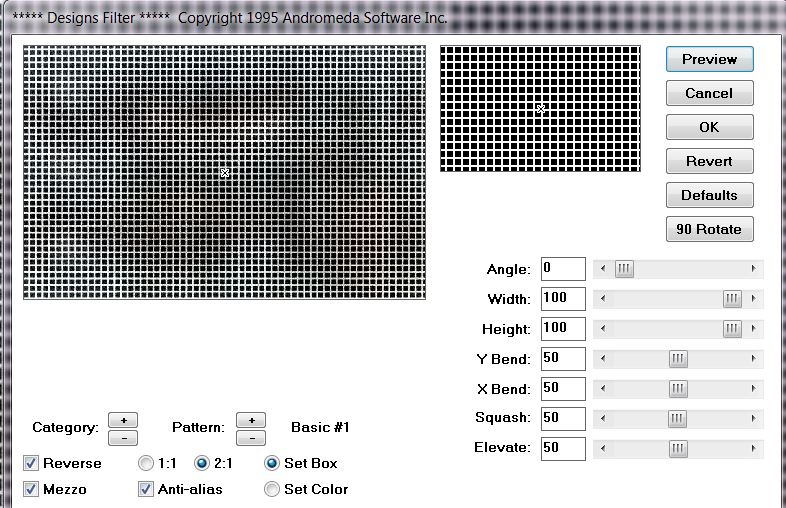
6. Effects / Filter - Andromeda/ Designs with the following settings
7. Repeat with the same settings
8. Effects - Geometric effect/ Perspective Vertical
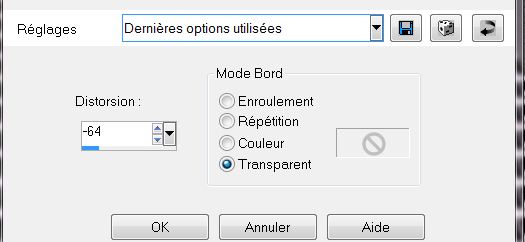
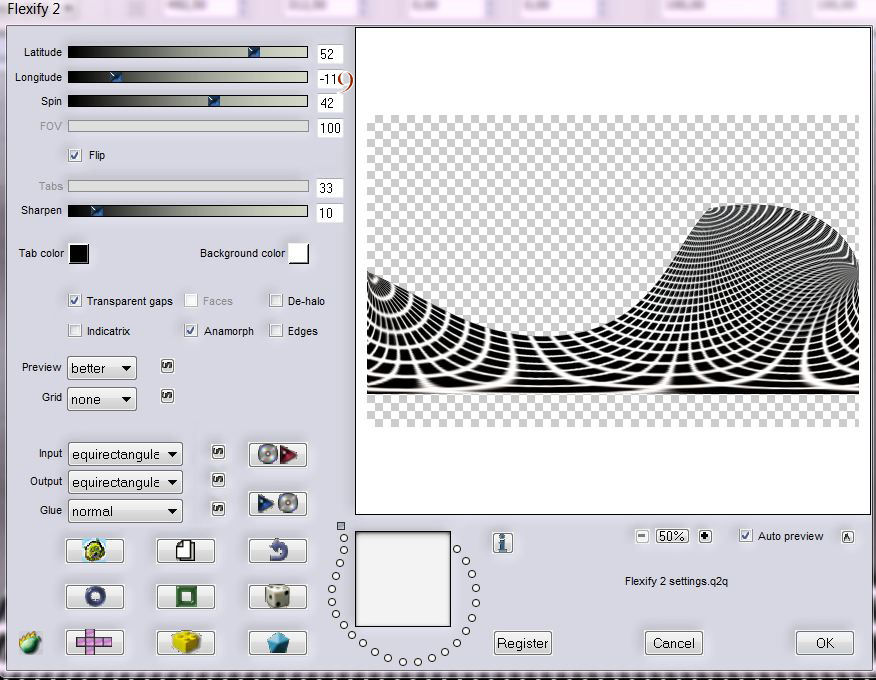
9. Effects - Filter Flaming Pear/ flexify2. Make sure Longitude is
set at 119
10. Effects - Filter Eyecandy5/ Impact-Perspective shadow preset "liberez-votre-creativite-persp
1"
- Repeat a second time
11. With your Pick tool (K) - pull the layer down to the bottom edge
12. Activate the bottom layer - Raster 1
13. Layers - New raster layer
14. Go to your Colour Pallet - Foreground color #e5e5e5 and
Background color #746c5e
15. Prepare a linear gradient configured like this
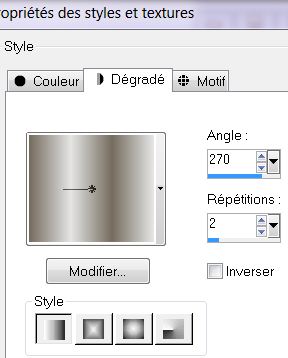
16. Fill the layer with the gradient
17. Effects - Distortion effect - Polar Coordinates/ Polar to
rectangular
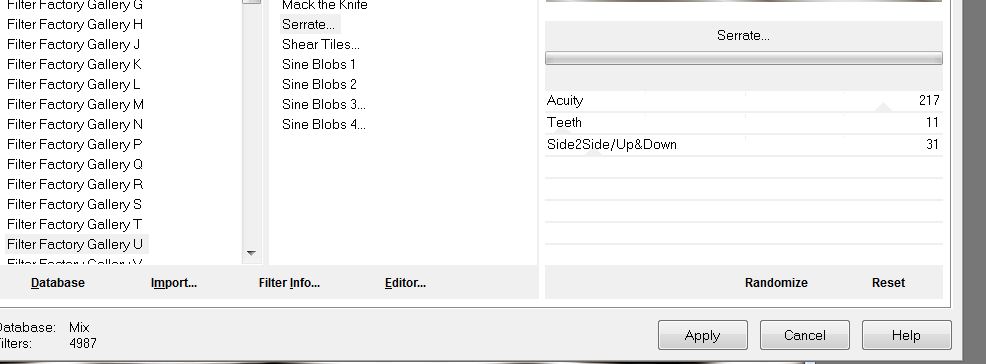
18. Effects - Filters Unlimited2.0 - Filter Factory U/ Serrate
19.Effects - Edge effect/ Enhance More
20. Effects - Distortion effect/ Twirl - set at 125
21. Layers Palette - Set mode to hard light
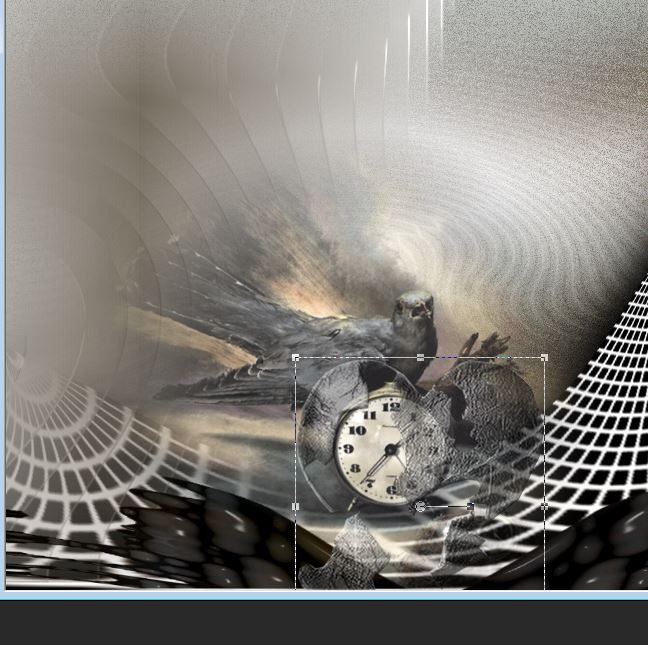
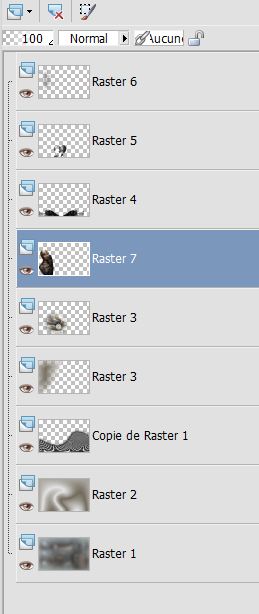
22. Your layers palette should look like this now

23. Activate the top layer of the Layers palette
24. Layers - New raster layer
25.Selections - load the selection "@ renee-liberez creativite 1" /
fill with the gradient
26.Effects - User Defined filter/ emboss3 (default)
27.Effects - Edge Effects/ Enhance
Selections - Select none
28. Open tube "231023pacha1"/ resize to 75%
Copy and paste as new layer placed as shown
29. Open tube "Absolution
machined-tubed by A pspDevils-group"/ resize to 75%
Copy and Paste as new layer as shown
30. Layers Palette/ Set the mode to luminance Legacy and lower the
opacity down to 79
31. Open tube "liberez creativite-image1"/ copy and paste in place,
leave luminance legacy with 100% opacity
32. Open tube "098_silvana_vanesa_orsi_enero_17_2009"/ Copy and
paste as new layer and place as shown
33. Lower opacity to 59%
34. Open tube "90e47d0f" and paste in place on the face as shown
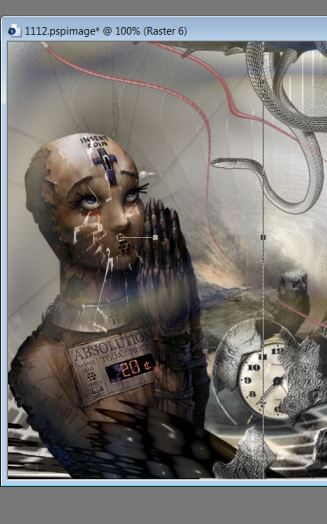
35. Layers Palette - Set mode to hard
light and lower opacity to 75%
your layers palette should look like this
36. Get back on the top of the layer stack
37. Open tube "renee liberez-votre-creativite-image 2"/ Paste as new
layer as shown. Set mode to Hard Light
38. Open tube "Mtm_Misc39_ @ Britta-Seifert-one Night"/ resize to
50%
Paste as shown
39. Open tube "igor moski_tubes by thafs" Paste as shown
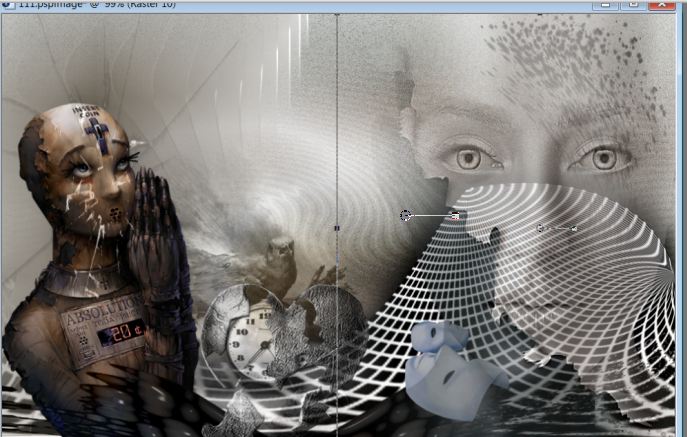
40. Lower its opacity to 65
41. Stay on the top layer
42. Layers - New raster layer
43. Selections - load the selection " renee-liberez creativity-2"
44. Set your foreground color to
#53525E. Fill the selection with
the new color.
* Paint settings normal mode but the opacity down to 45
** Do not forget to return your opacity back to 100 **
45. Selections - select none
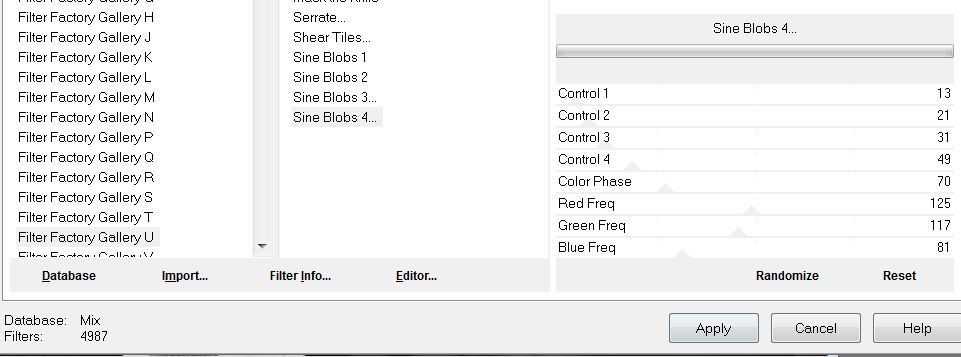
46. Effects - Filters Unlimited 2.0 - Filter Factory U / sine blobs
47. Open tube "renee-liberez-votre creativite-image3"/ Copy and
paste as shown
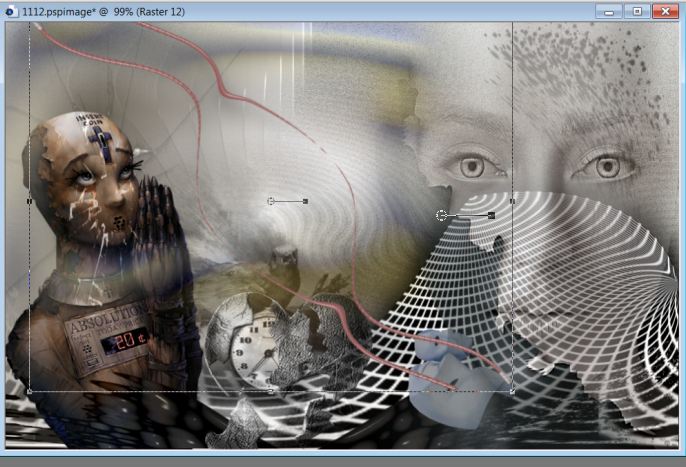
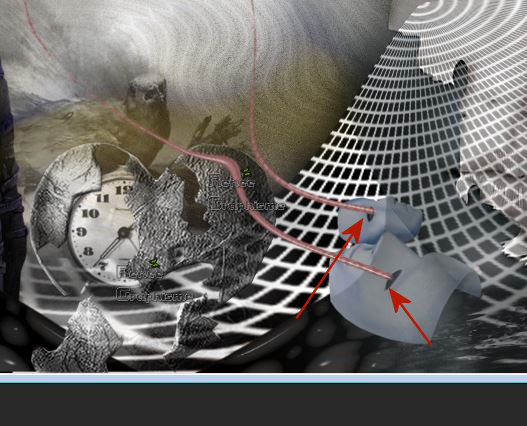
48. With your eraser tool to erase
where it covers the eyes of the mask. See example.
49. Open, copy and paste tube "yoka -snake/ Mirror and place as
shown
50. Set to luminance legacy mode and lower opacity down to 83
51. Layers - merge layers
52. Image - add borders 2 pixels black
53. Image - add borders 50 pixels #908b86
54. Image - add borders 2 pixels black
55. Image - add borders 5 pixels in gray #908B86
56. Image - add borders 2 pixels black
57. With the wand - select the 50 pixels border
58. Effects - Filter EyeCandy 5 - Texture/ reptile skin-preset "renee-texture-reptile"
59. Selections - convert selection to layer
60. Selections - select none
61. Effects - Filter EyeCandy 6 - perspective shadow / preset "Drop_renee
perspective liberez creativite"
62. Open "titre-pspimage" Copy and paste placing as shown in the
final image.
63. Layers - merge all
This is finished.
Thank you Sally
*
I am part of Tutorial Writers Inc.
My tutorials are regularly recorded


|
Vos créations ici

|
|