|
New
Translations by Marion
Let's begin. 1. File: Open the Image: ''fond 1'' Promote to background layer =Raster 1 2. Effects –Filter FM Tile Tools - Emboss default 3. Open the tube ''les larmes de la mer_image_1''/Edit/copy-Edit paste as a new layer . With your keyboard and the arrow keyboard back up/stop when the tube touches the bottom of your work 4. Layer Palette: change your Blend Mode to "Hard Light" Opacity down 69% 5. Open the tube ''les larmes de la mer_image_2'' -Edit/copy-Edit paste as a new layer . /With your move tool put down against the edge - Layer Palette: change your Blend Mode to "Multiply" 6. Open the tube ''les larmes de la mer_image_3'' /Edit/copy-Edit paste as a new layer . With your move tool move to the left
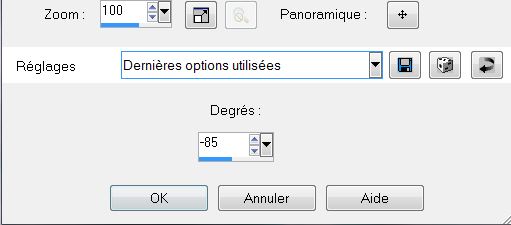
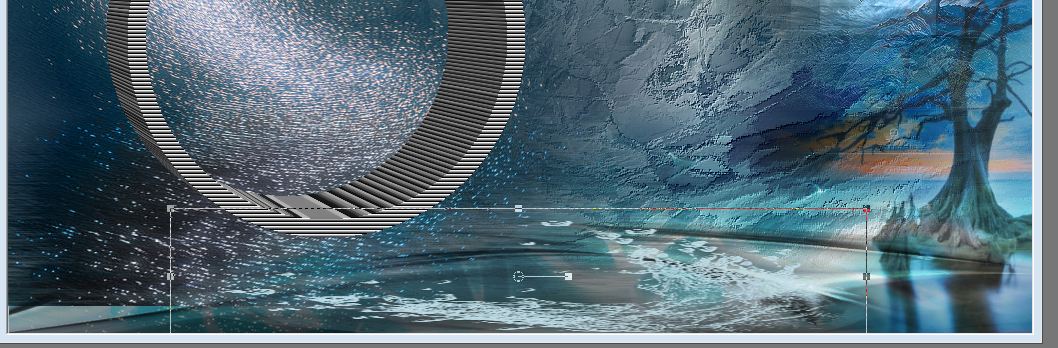
7. Effects-Distortion Effects- Twirl with these settings
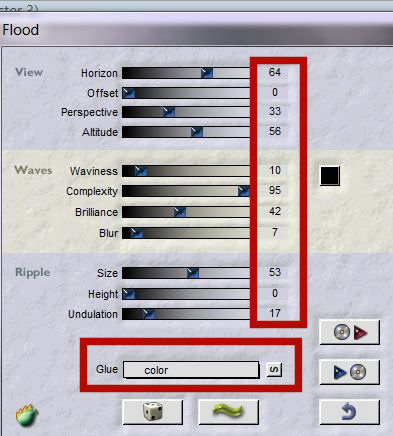
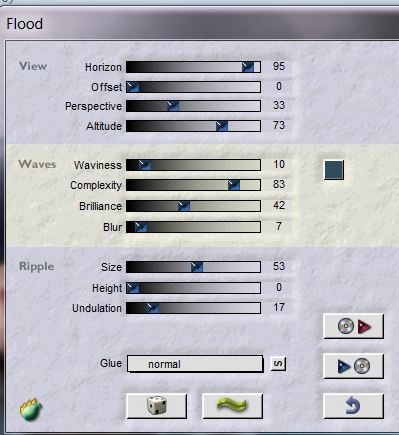
8. Effects-Filter Flaming Pear - Flood (Glue-Color)
9. Open the tube ''lonelytree'' Edit/copy-Edit paste as a new layer . With your move tool move to the right side 10. Layer Palette: change your Blend Mode to "Hard Light" Opacity down 71% 11. Open the tube ''les larmes de la mer_image_4'' / Edit/copy-Edit paste as a new layer .With your move tool move to the right side
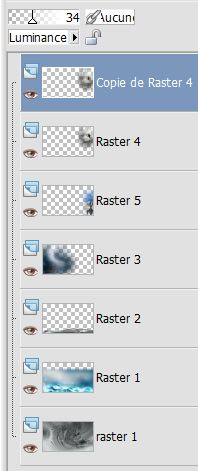
- Layer Palette: change your Blend Mode to "luminace-Legacy" 12. Layers- Duplicate. Effects-Distortion Effects-Pixelate
- Opacity: 34% -
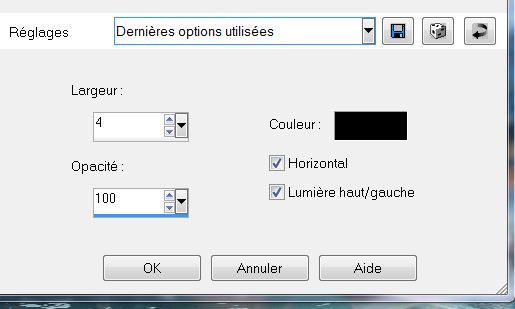
13.Layers- New Raster layer 14. Selections - load/save selection - load selection from disk and choose : ''renee-les larmes de la mer_1'' - Flood Fill Tool: fill the selection with this color: #f5f5f5 15. Effects - Texture Effects- Blinds with these settings
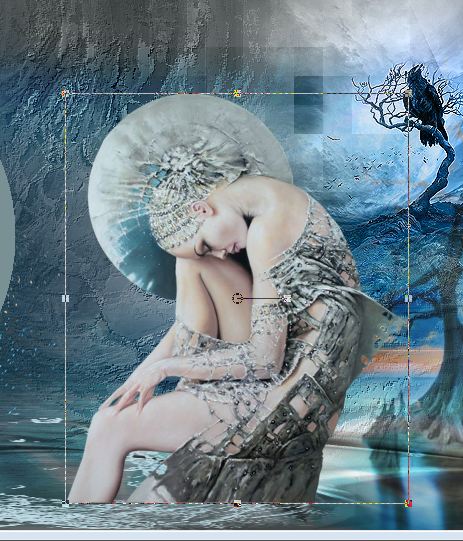
16. Selections-Deselect All 17. Effects-Filter EyeCandy 5 Impact -Extrude -in the settings tab, click on the Preset ''renee -les larmes de la mer_extrude'' 18. Open the tube ''renee_les larmes de la
mer_image _5'' Edit/copy-Edit paste as a new layer /
- Layer Palette: activate >Raster 6 19. Selections - load/save selection - load selection from disk and choose : ''renee-les larmes de la mer_'1' -Flood Fill Tool: fill the selection with this color: #799094 20. Selections-Deselect All - Aktivate the top of the Layers palette 21.Layers- New Raster layer 22. Selections - load/save selection - load selection from disk and choose : ''renee_les larmes de la mer_2'' 23. Open the tube ''Treagen3545_05_8_012''/ Edit/copy-Edit paste into selection 24. Selections-Deselect All -Aktivate the top of the Layers palette 25. Open the tube ''Yoka_draw art-LightBlue-Lady0111109'' Image Resize 55% Edit/copy-Edit/paste as a new layer With your move tool place it in the right place like this
26. Effects-Filter Flaming Pear - Flood
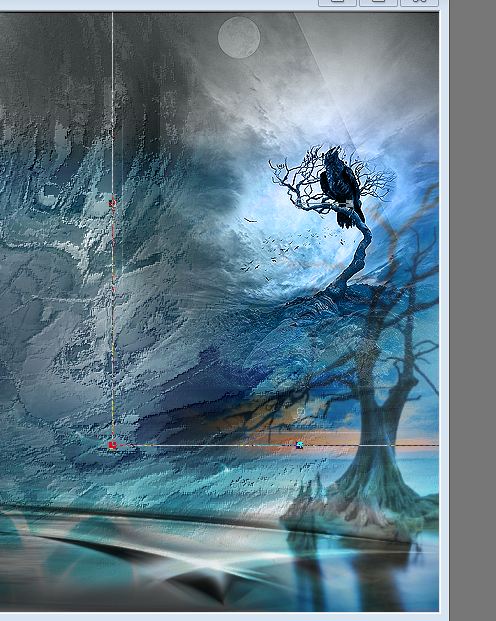
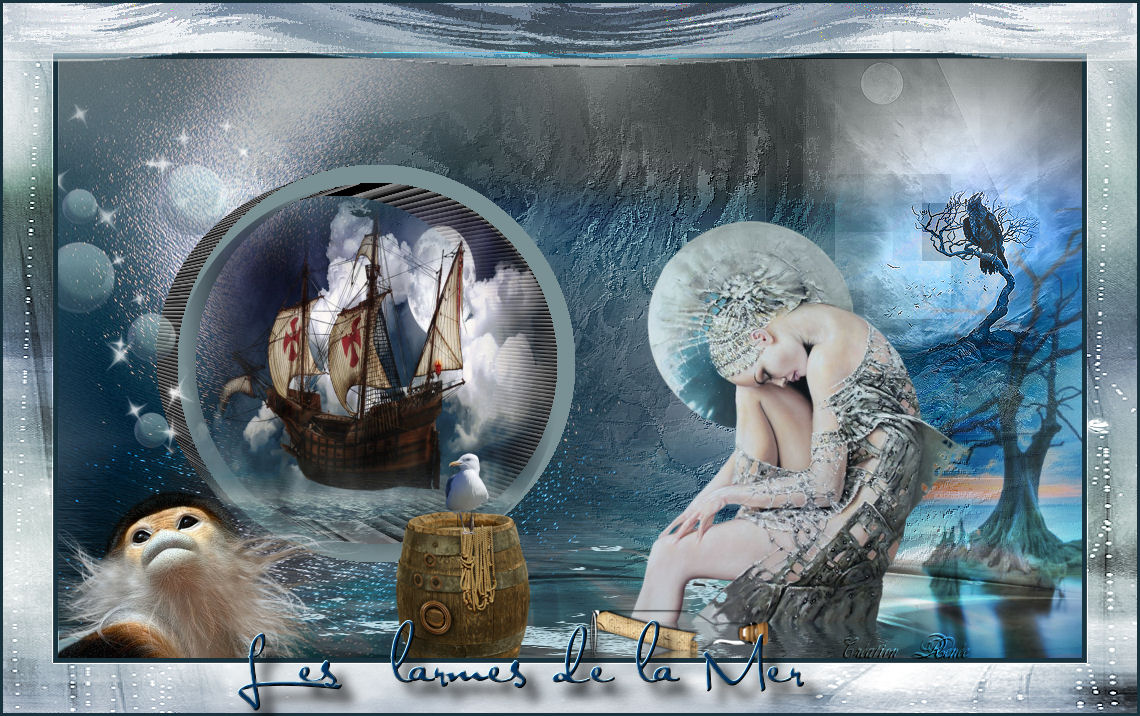
27. Open the tube '' Yoka-Animals-aapie240309'' Image resize 35% Edit/copy-Edit paste as a new layer .With your move tool place it in the right place 28. Open the tube ''renee_les larmes de la mer_image bulles'' /Edit/copy-Edit paste as a new layer .With your move tool place it in the right place 29. Open the tube ''renee_ les larmes de la mer_tonneau'' /Edit/copy-Edit paste as a new layer .With your move tool place it in the right place 30. Open the tube ''renee_ les larmes de la mer_bouteille ''/Edit/copy-Edit paste as a new layer .With your move tool place it in the right place 31. Open the tube ''Sea Breeze By Juli-14'' / Image Resize 35% Edit/copy-Edit paste as a new layer .With your move tool place it in the right place 32. Layers- Merge- Merge All 33. Image - add borders 5 pixels color #19333e 34. Image - add borders 50 pixels color #799094 35. With the magic wand -select the border of 50 pixels /Open the Image "p9" Edit/copy-Edit paste into selection 36. Effects- Edge Effects-Enhance 37. Selections- Deselect All 38. Open the tube ''renee_ les larmes de la mer_bordure'' Edit/copy-Edit paste as a new layer .With your move tool place it in the right 39. Layers Palette: change your Blend Mode to : "Luminance" 40. Open the tube text/ Edit/copy -Edit/paste as a new Layer and place. Or write your own text 41. Image - add borders 3 pixels color #19333e - Lesson over
I am part of Tutorial Writers Inc. My tutorials are regularly recorded
*
|
 Translations