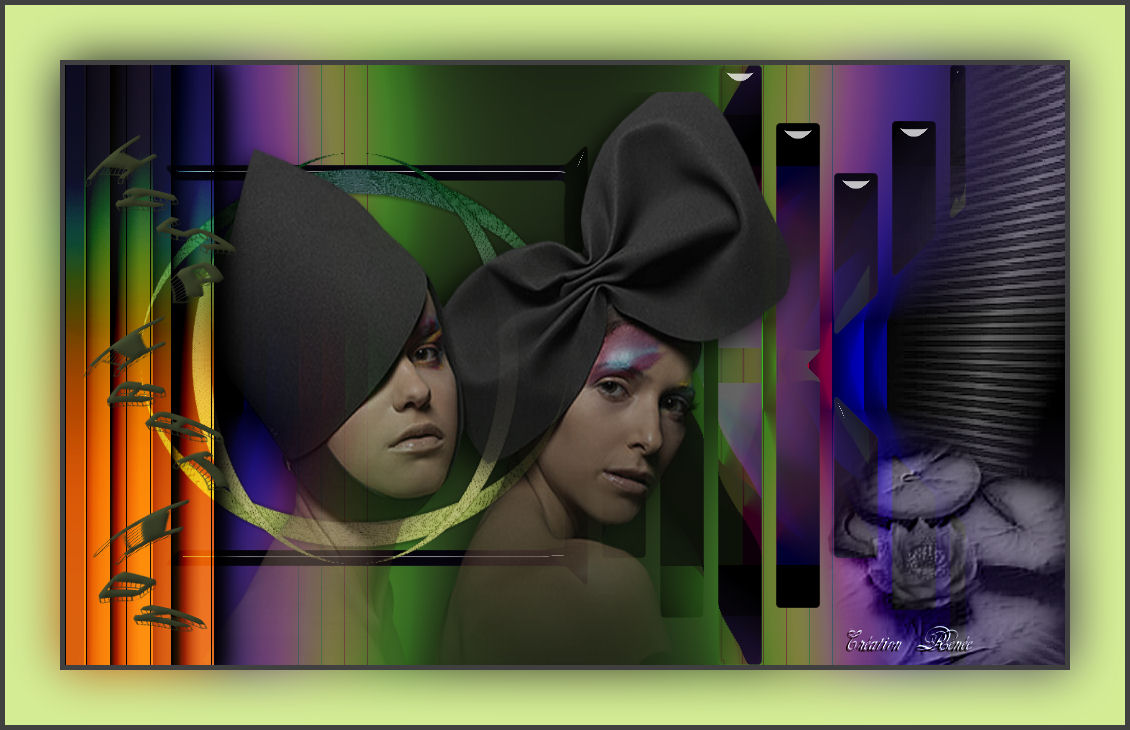
|
New
Inspiration Traducteur
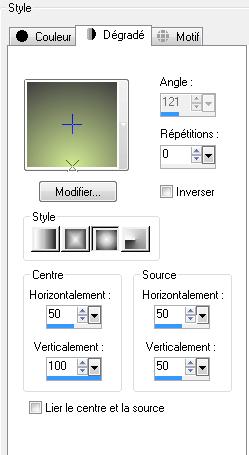
Let's start the lesson. 1. Open a new transparent image of :1000 x 600 pixels 2. Material Properties:Set your foreground color to: #d4ed95 - Set your background color to: #404040 - Set your foreground to gradient 'Foreground-background' - Sunburst -with these settings
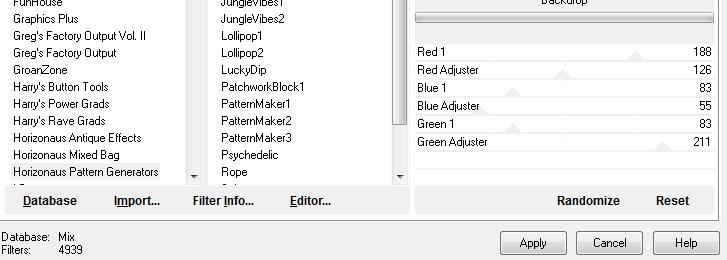
3. Activate Flood Fill Tool and fill the layer with the gradient 4. Layers-New raster layer - Activate Flood Fill Tool and fill the layer with the background color 5. Effects-Plugins -Unlimited -Horizonaus pattern Generators/ Backdrop
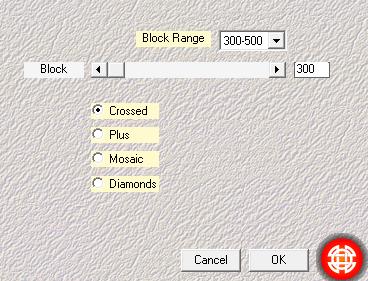
6. Effects-Plugins -Simple /4 way average 7. Layers- Duplicate 8. Image Resize a 80% resize all layers not checked 9. Effects-Plugins- Medhi/Sorting tiles with these settings
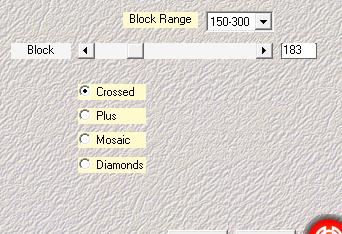
10. Effects-Plugins- Medhi/Sorting tiles with these settings
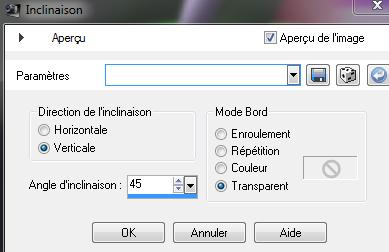
11. Effects-Geometric Effects-Skew with these settings
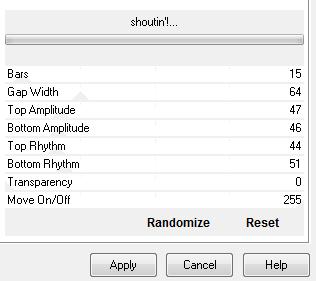
12. Effects-Plugins- VM Extravanga /shoutin...!
13. Effects-Plugins - Simple - pizza slice mirorr 14.
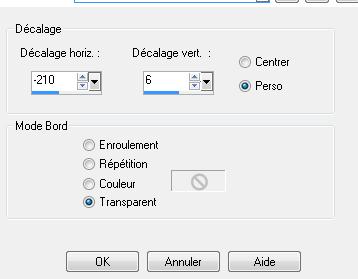
Selections –load/save selection –load selection from disc and choose: ''renee -inspiration'' / 15. Selections-Deselect All 16. Effects-Plugins -Eyecandy 5 Impact / Glass -tab Settings/User settings choose my preset: ''renee-inspiration '' 17. Open the tube ''cercle-inspiration "-Edit/ Copy-Edit - Paste as new layer on your working area 18. Effects-Image Effects-Offset with these settings
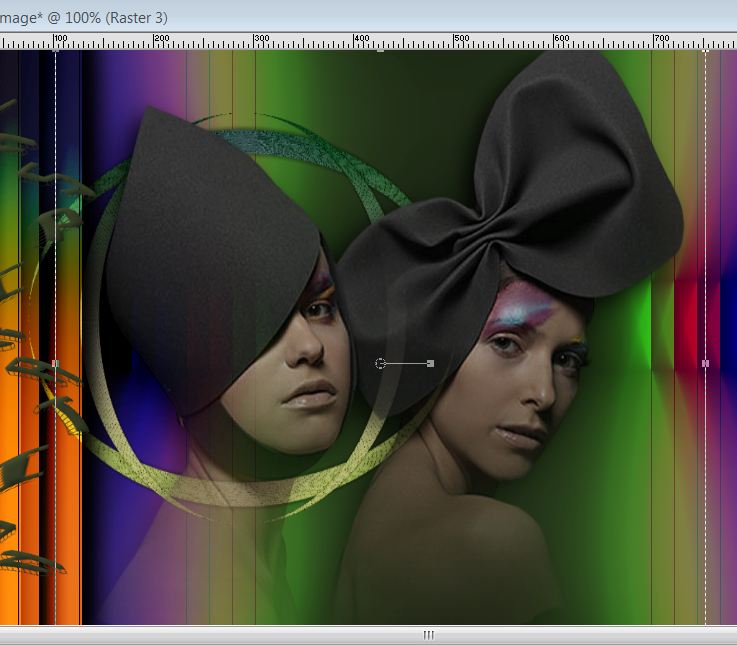
19. Open the tube ''double femme -inspiration ''/Image Mirror / -Edit/ Copy-Edit - Paste as new layer on your working area -Activate your Pick Tool (K) Mode Scale place it in the right place as shown in the example below
20. Open the tube ''barre latérale-inspiration''/ -Edit/ Copy-Edit - Paste as new layer on your working area and move to the left side between 185 and 205 pixels as shown below
- Blend Mode to "Hard Light "-Opacity 100 21. Open the tube ''pinceau-inspiration ''- -Edit/ Copy-Edit - Paste as new layer on your working area //Double click on this Layer and set the Blend Mode to "Luminance "-I have lowered the opacity of that layer to 73% /Activate your Pick Tool (K) stretch on the both sides and upwards that it fits (see finished image) 22.
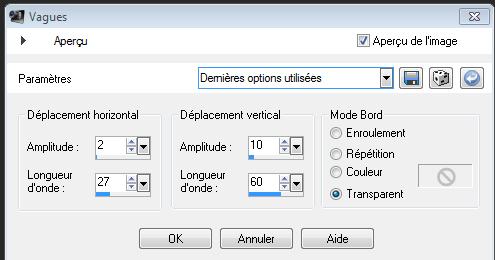
Activate Text Tool-Font ''bloktilt'' write your text - Text vertical 23. Effects- Distortion Effects- Wave with these settings
- Repeat-Effects- Distortion Effects- Wave with the same settings -**Do you have problems with this- PNG image is into the zipfile and paste as a new layer on your working area and move** '' 24. Open the ''fleurs-inspiration'' -Edit/ Copy-Edit - Paste as new layer on your working area //Double click on this Layer and set the Blend Mode to "Luminance-Legacy"-With your move tool place it to the bottom right corner 25. Effects-User Defined Filter-- Emboss 3 using the default settings 26. Image - Add borders-Symmetric checked: 5 pixels background color 27. Image - Add borders-Symmetric checked: 55 pixels foreground color 28. Image - Add borders-Symmetric checked: 5 pixels background color 29. With the magic wand -select the border of 55 pixels 30. Adjust-Blur-Gausian Blur: Radius 25 31. Selections-Deselect All Save as JPG
I am part of Tutorial Writers Inc. My tutorials are regularly recordedt ReneeGraphisme_All rights reserved
*
|
 Translations


 et
et 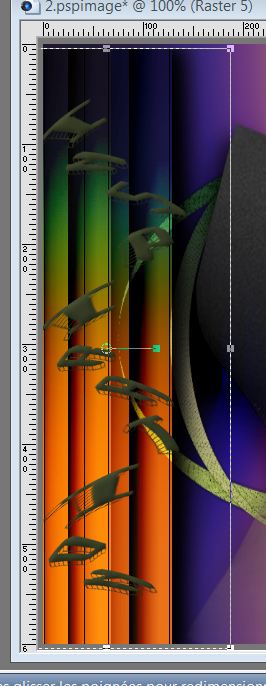
 attention to the direction