|
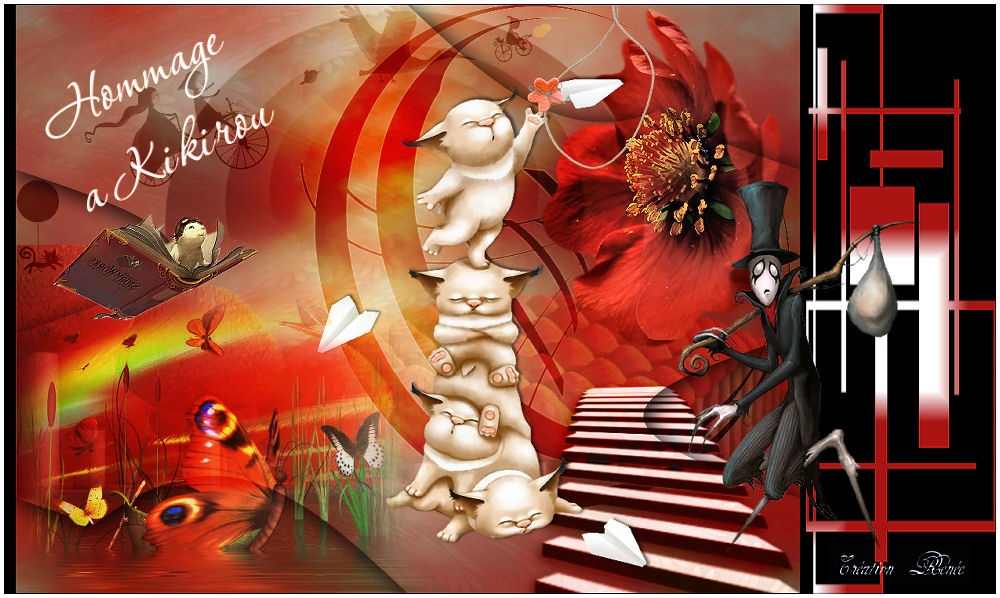
Homage to Kikirou This work to make a deserved tribute to a great tubeuse - Kikirou thank you for your beautiful tubes ... We miss your tubes New
**********
Let's start the lesson. 1. Open the backgroundimage : ''fond .jpg-"Window - Duplicate (or shift+D) - Close the original and proceed on the copy -Promote Background Layer =Raster 1 2. Layers- New raster layer 3. Set the foregroundcolor to #c03d23 and the backgroundcolor to white 4. Effects-Plugins - Mura's Meister /Cloud with these colors #FFFFFF- #C53a1d -#A8aa9f
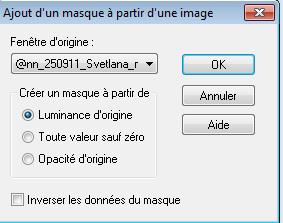
5. In the Layerpalette, set Blend Mode to Hard Light 6. Layers- New raster layer/ Selections - load/save selection - load selection from disk and choose my selection: ''renee-hommage1'' 7. Open the tube ''kikirou405_arbes _rouges'' - Edit/copy-Edit paste into selection 8. Selections-Deselect All 9. Layers- New raster layer 10. Selections - load/save selection - load selection from disk and choose my selection: ''renee-hommage3'' /Flood Fill Tool: Fill the selection with color black 11. Selections-Deselect All /In the Layerpalette, set Blend Mode to Overlay and set the layer opacity of this layer to 75% 12. Open the tube ''kikirou431_flower'' Edit /copy -Edit -paste as new layer on your working area 13. Effects-Image Effects-Offset with settings below H = 324 and V = 150 / Transparent 14. Layers- New raster layer 15. Activate Flood Fill Tool: fill the layer with black 16.Layers- New Mask layer from Image and select Mask''@nn_250911_Svetlana_mask1''
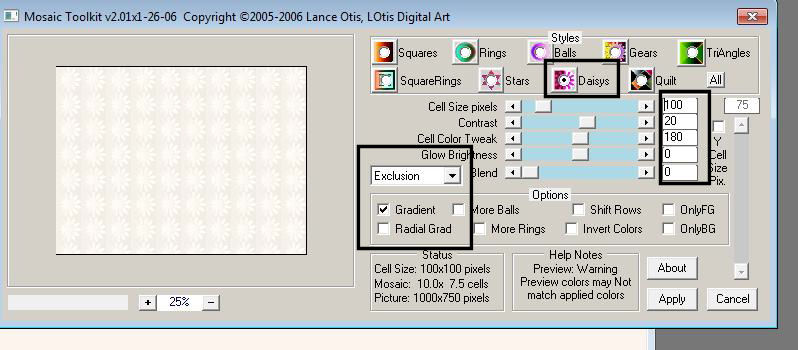
17. Layers- Merge-Merge Group 18. In the Layerpalette, set Blend Mode to Overlay 19. Open the tube ''renee-hommage-escalier ''Edit/copy-Edit paste as a new layer- With the move tool, move it in the bottom right corner 20. In the Layerpalette, set Blend Mode to luminance Legacy 21. Layers- New raster layer - Activate Flood Fill Tool: fill the layer with #faf4ee 22. Effects-Plugins - Lotis Filter/Mosaic Toolkitv02 with settings below
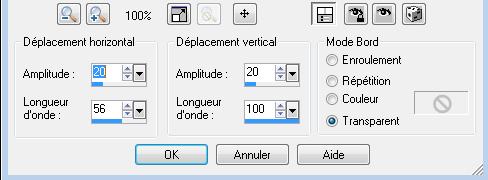
23. Effects-Distortion Effects-Wave with settings below
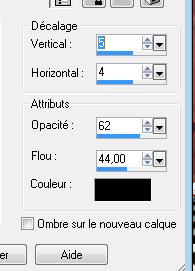
24. Effects-3D Effects-Drop Shadow with settings below
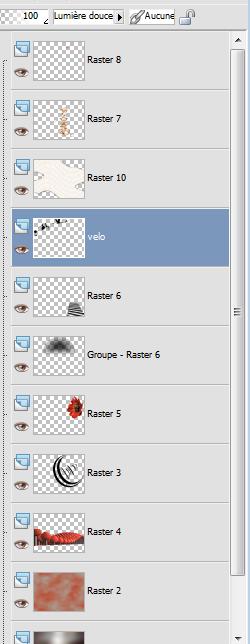
25. In the Layerpalette, set Blend Mode to Multiply 26. Open the tube ''kikirou1748-totem'' /Edit /copy -Edit -paste as new layer on your working area and move 27. Effects-Plugins - EyeCandy5 Impact - perspective shadow -Tab-Settings-User/settings and choose my Preset '' renee-hommage-perspective''- 28. Open the tube ''hommage corde '' /Edit /copy -Edit -paste as new layer on your working area and move 29. Open the tube ''kikirou-velos-volants''/ Edit /copy -Edit -paste as new layer on your working area and move -In the Layerpalette, set Blend Mode to Soft Light - Layer palette look like this now
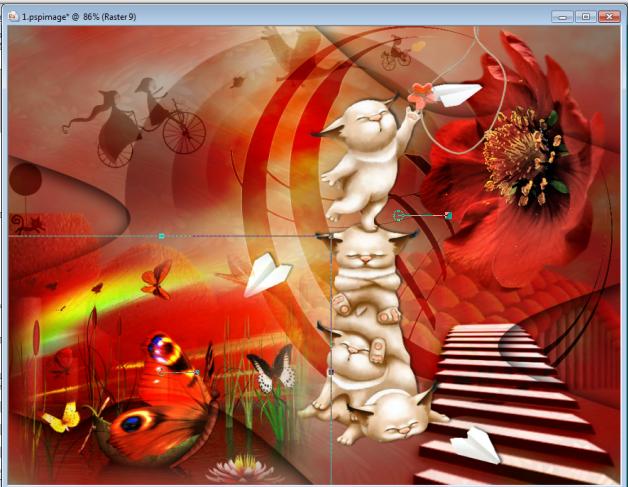
30. Open the tube ''hommage -papillons '' Edit /copy -Edit -paste as new layer on your working area.Activate your Pick Tool (K) Mode Scale -place it in the right place as shown belowcomme ceci
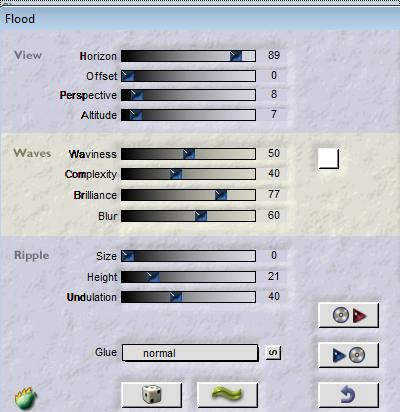
31. In the layer palette set the Blendmode to Hard Light and set the layer opacity of this layer to 85% 32. Effects-Plugins - Flaming Pear /Flood with settings below
33. Open the tube ''nicole-livre''/Image Resize a 50% / Edit /copy -Edit -paste as new layer on your working area and move 34. Effects-Plugins -FM Tile Tools -Blend Emboss -Using the default settings 35. Layers – Merge -Merge Visible 36. Image - Add Borders NO SYMMETRIC-with settings below-color black
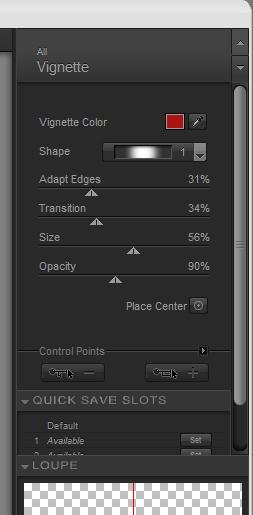
37.Selection Tool (S) Rectangle Select the black part of the right 38. Layers- New raster layer 39. Open the tube ''hommage grille '' - Edit/copy-Edit paste into selection 40. Effects-Edge Effects-Enhance Keep selected 41. Effects-Plugins Nick Color effex . Pro3/Vignette /couleur de la vignette with settings below -color #aa1412
42. Selections-Deselect All 43. Open the tube ''kikirou780_belovedcreatre-Sorrow'' Edit /copy -Edit -paste as new layer on your working area and move 44.Image - Add borders-Symmetric checked: 5 pixels white 45. Image Resize a 1000 pixels Width 46. Text Tool- Font ''P22Corinthia ''Write your text
Save as JPG I hope you enjoyed this tutorial . Renée This lesson was written by Renée Edited and update on 2012 *
Any resemblance with an existing lesson is merely a coincidence *
* Don't forget to thank the people who work for us and with us.
I named the tubeurs - Testers and the translators.
Thanks Renée. I am part of Tutorial Writers Inc.
My tutorials are regularly recorded
ReneeGraphisme_All rights reserved
*
|
 Translations