|
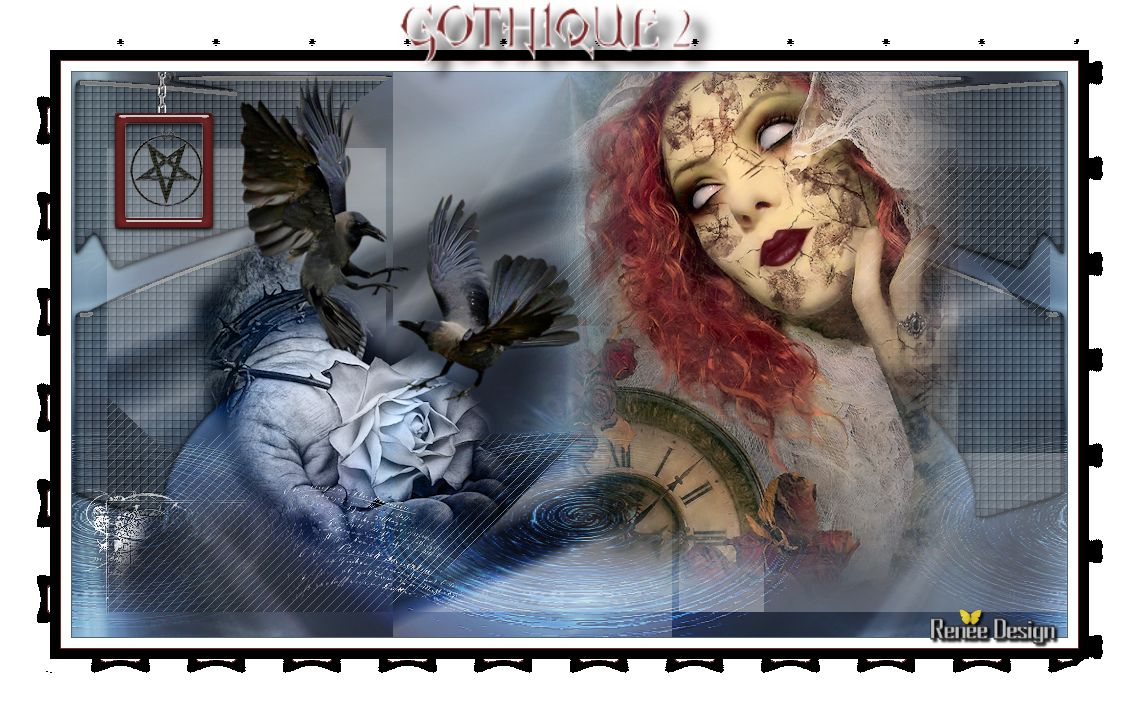
Gothique_2
Gothic fonts you find here
http://www.ffonts.net/Gothic.html.
Open your color palette in PSP
Before you start
- Material Properties: FG-Color to color: #d2cec2 and BG-Color to color: #51637b
1. File - New - New Image:995
x 565 pixels transparent
2. Put your foreground on the foreground/background linear gradient configured like this.
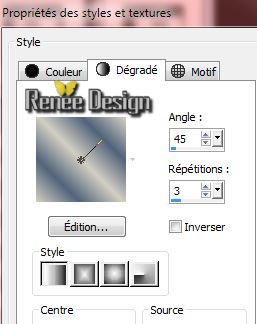
- Flood Fill Tool:fill the layer with the gradient
3. Layers- New Raster layer
4. Selections- Select All
- Activate the tube
''12283242540_divers_nikita.pspimage''/ Edit-Copy-Edit Paste into selection
Selections- Deselect All
5. Layers- Merge - Merge Down
6. Effects-Image Effects-Seamless Tiling Default settings
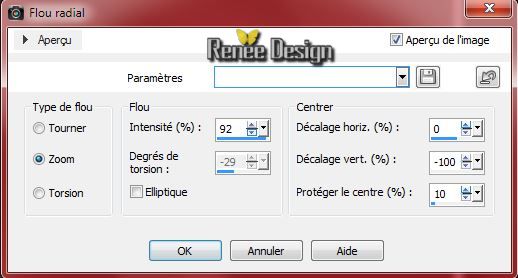
7. Adjust-Blur-Radial Blur use settings below
8. Effects-Image Effects-Seamless Tiling Default settings
9.Adjust-One Steps Photo Fix
10. Layers- Duplicate
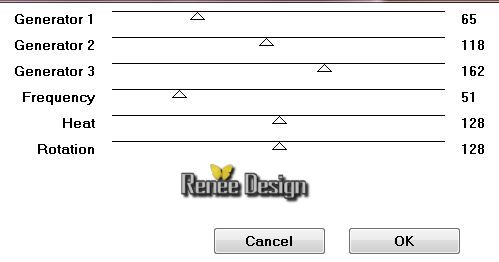
11. Effects- Plugins - VM Distorsion - Radiator II use settings below
12. Effects- Plugins -Unlimited 2.0 &
/<Bkg Kaleidoscope > Kaleidoscope Flower - with these settings224/19
13. Effects- Plugins - Unlimited 2.0
&<Bkg Kaleidoscope > Kaleidoscope Butterfly- with these settings 125/181
14.
Effects- Plugins - Muras'Meisters -
Perspective Tilling Default settings
15.
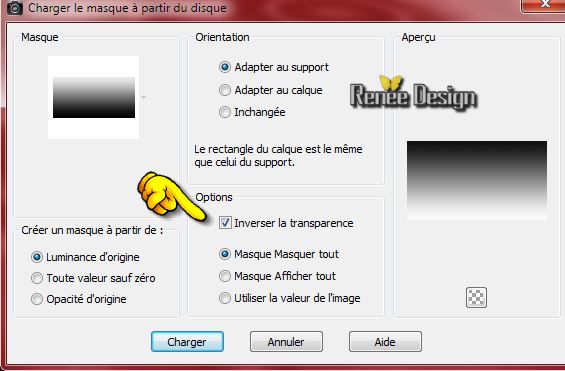
Layers-load/save Maske Load Mask from Disk and choose Mask:"!!!!.mask.ket-fademedio''
-
Layers- Duplicate
-
Layers- Merge Merge Group
16.
Layer Palette :Double click on this Layer and set the Blend Mode to"Overlay"
Activate Raster 1 in the layer-Palette
17.
Selections - load/save selection - load selection from disk and choose my selection:
''gothique2_selection1''
-
Selections- Promote selection to layer
Selections- Deselect All
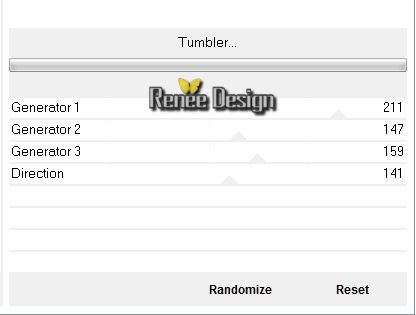
18.
Effects- Plugins - VM Distorsion -Trumbler
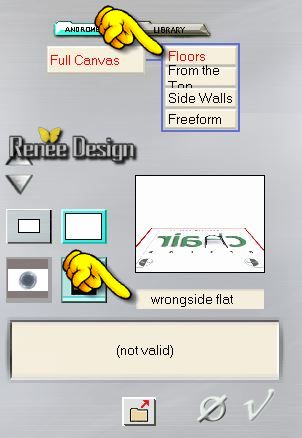
19.
Effects- Plugins Andromeda -Perspective - Floors
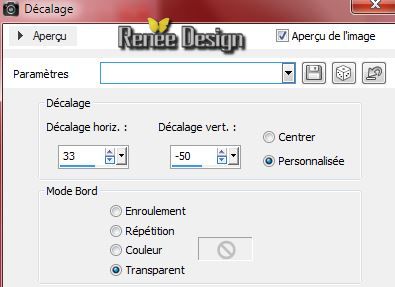
20.
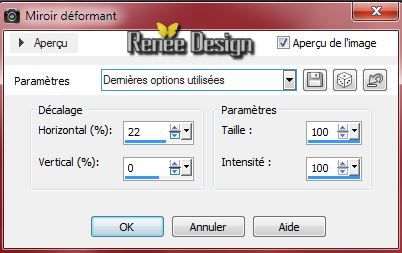
Effects- Image Effects- Offset use the settings below
-
Layer Palette -double click on this Layer and set the Blend Mode to "Hard Light "
21.
Layers- Duplicate
22.
Effects-Image Effects-Seamless Tiling with this setting-Side by side
23.
Effects- Edge Effects- Enhance
-
Lower the opacity down to: 57%
- Activate the top of the layer-Palette
24.
Layers- New Raster layer
25.
Selection Tool ( S ) Custom selection use settings below
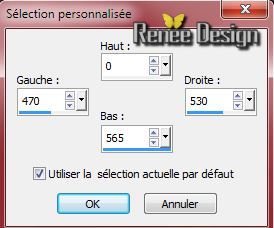
-Flood Fill Tool: fill the selection with the background color
Selections- Deselect All
24. Effects- Plugins - Toadies - What are you with these settings 20/20
25.
Effects- Distortion Effects- Warp use settings below
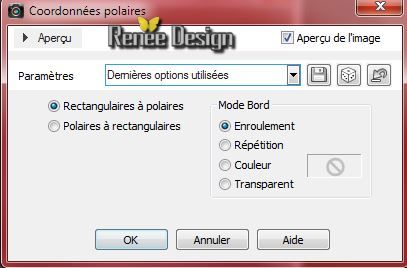
26.
Effects- Distortions Effects-Polar Coordinates-Rectangular to Polar
27.
Effects- Distortion Effects-Twirl setting 65
28.
Effects - 3D Effects - Drop shadow with these settings: 10/ -10/ 52/ 5 color black
29.
Layers- Duplicate-Image Mirror
-
Layers- Merge - Merge Down
30.
Effects- Distortion Effects- Warp use settings below
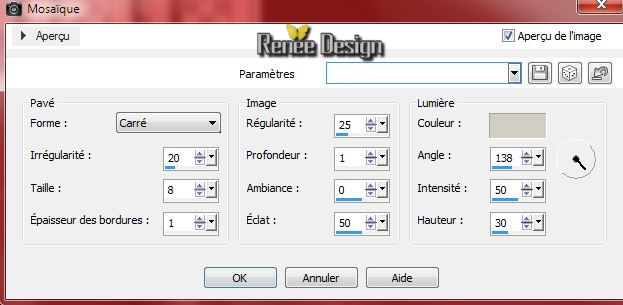
32.
Effects- Texture Effects- Tiles use settings below-Foreground color
33. Effects- Plugins EyeCandy 5 Impact - Glass Tab- Factory Settings choose -Preset /Clear
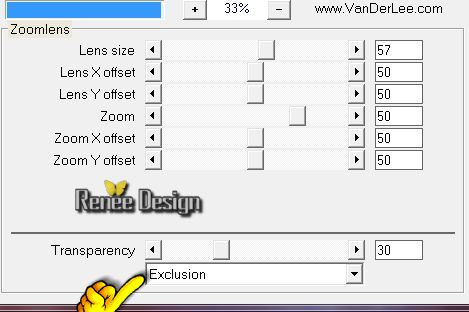
34. Effects- Plugins - Vanderlee Unplugged
X/Zoomlens use settings below
35.
Activate the tube ''DECAYING MDZ TUBE FEB 2011.pspimage''
/ Image Resize68% - Edit/copy- Edit/ paste as new layer on your working area
-
With the move tool, move it in the upper right corner like this
36.
Layers- New Raster layer
37.
Effects- Plugins - Medhi Wavy Lab 1.1 / Red# 7b2829- third and fourth color #AA7975

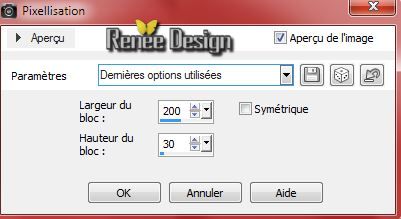
38.
Effects- Distortion Effects-Pixelate use settings below
39.
Selections - load/save selection - load selection from disk and choose my selection:
''gothique2_selection2''
-
Selections- Invert -Press the delete button on your key board
-
Selections- Deselect All
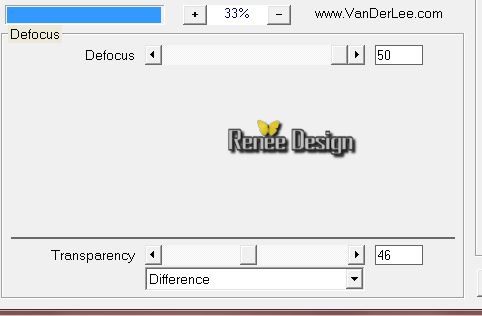
40.
Effects- Plugins - Vanderlee Unplugged X-
Defocus
41.
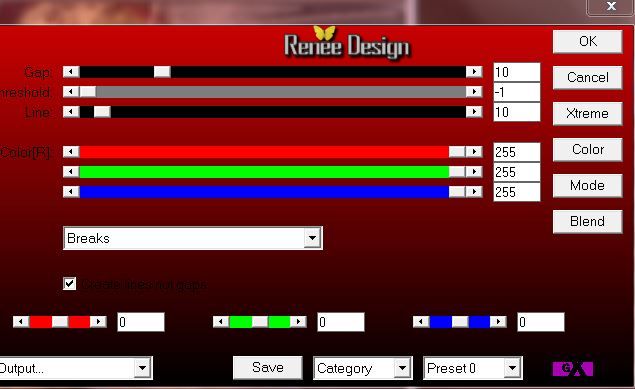
Effects- Plugins - AP01- Line silverling use settings below
42.
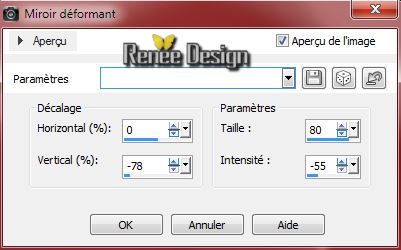
Effects- Image Effects -Page Curl use settings below
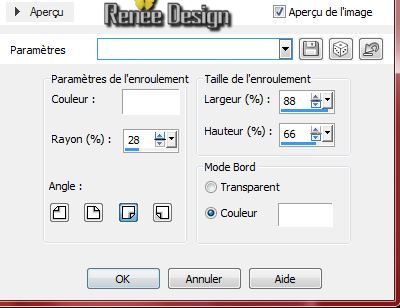
43.
Effects- Image Effects -Page Curl use settings below

-
Layers- Arrange- Move Down
-
Layer Palette -double click on this Layer and set the Blend Mode to "Hard Light "
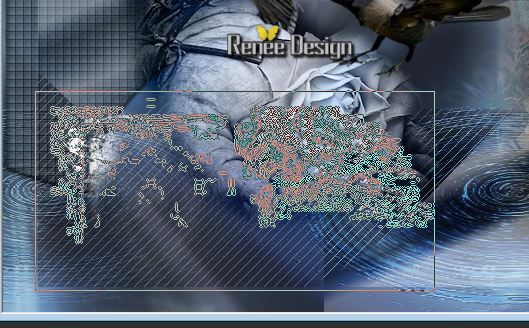
44.
Activate the tube" various_48" /Image Resize 70%
-
-
Layer Palette -double click on this Layer and set the Blend Mode to "Luminance- Legacy"
-
Layers- Arrange- Move Down
- Activate the top of the layer-Palette
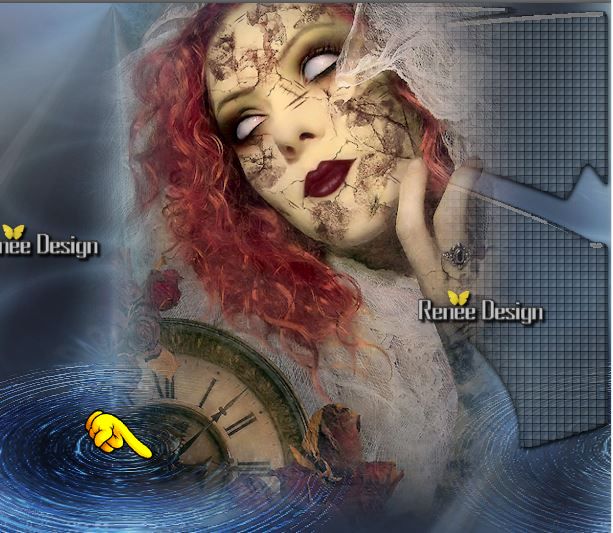
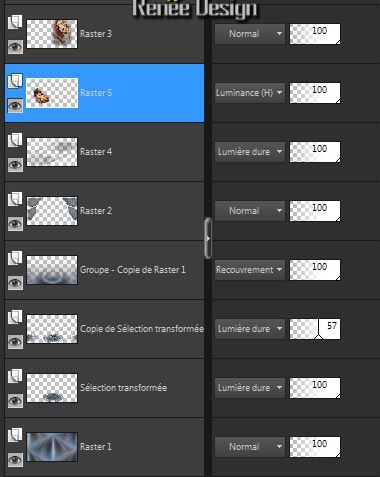
This is what you should have now
45.
Activate the tube "corbeau_vol'' - Edit-Copy -Edit Paste as a new layer on your working area.With your move tool place it on the left .
46.
Activate the Brush- ''pinceau_gothique_2'' in your psp -
File- Export Custom Brush and give it a name ''pinceau_gothique_2''
47.
Activate the brush tool and choose the brush:''pinceau_gothique_2'' Properties Foreground-foreground color to color white.Stamp with the foreground color white
-
Decreased slightly as shown in the screen
48.
Activate the tube ''renee_gothique2-cadre'' - Edit-Copy -Edit Paste as a new layer on your working area. With your move tool place it on the upper left corner .
49.
Layers- Merge- Merge Visible

50.Image - Add borders-Symmetric checked: 1 pixel color 2
51.Image - Add borders-Symmetric checked: 10 pixels color 4
52.Image - Add borders-Symmetric checked: 1 pixel color 3
53.Image - Add borders-Symmetric checked: 10 pixels color black
54.Image - Add borders-Symmetric checked:50 pixels color 4
55.
With your magic wand select the border of 50
pixels
56.
Effects- Plugins - VM Distorsion- Smallpox
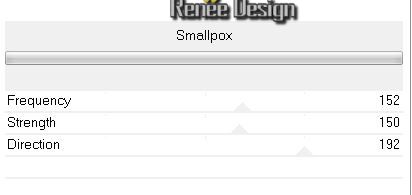
Selections- Deselect All
57.
Open the tube text. Edit-Copy-Edit Paste as a new layer and move ( If you want to write a text- font is included into the zip file)
Save as JPG
I hope you enjoyed this lesson
Renée
This lesson was written by Renée 13/08/2014
Created the
09/2014
*
Any resemblance with an existing lesson is merely a coincidence *
* Don't forget to thank the people who work for us and with us. I named the tubeurs - Testers and the translators.
Thanks Renée.
|
 Translations


 All rights reserved