|
New
Translations here
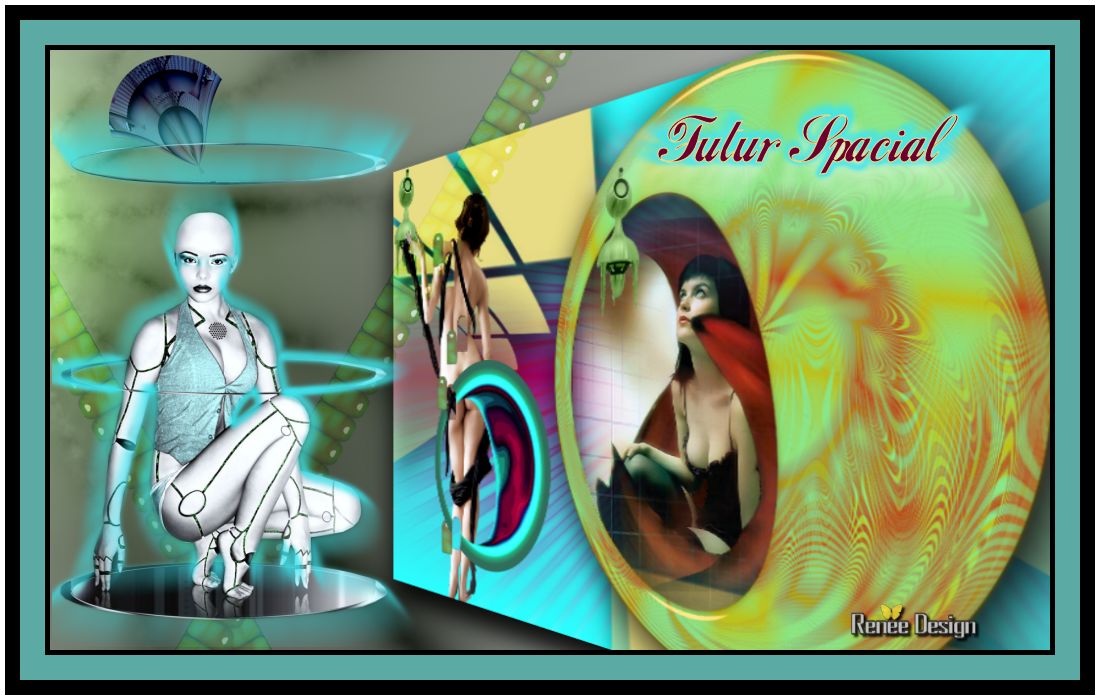
Futur Spatial
Let's start the lesson.
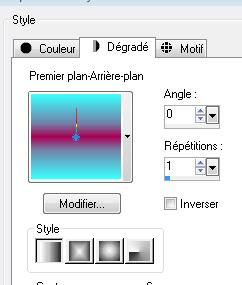
2. File: Open a new transparent image of 1000 x 600 pixels 3. Set your foreground to gradient 'Foreground-background' - Linear - with these settings-- Activate Flood Fill Tool and fill the layer with the gradient
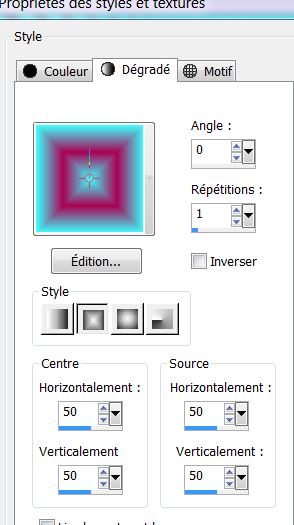
4. Layers-New Raster Layer //Set your foreground to gradient 'Foreground-background' - Rectangle- with these settings //Activate Flood Fill Tool and fill the layer with the gradient
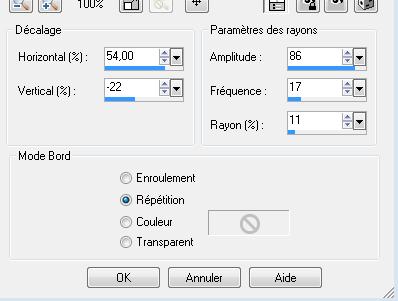
5. Effects- Distortion Effects- Spiky Halo use settings below
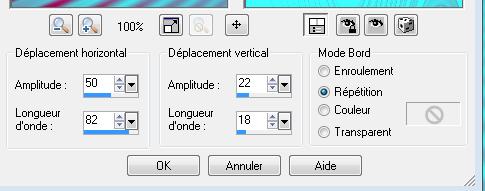
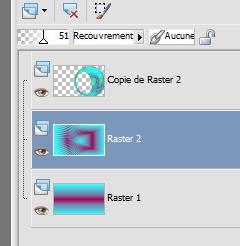
6. Layers- Duplicate 7. Activate the layer underneath =(raster 2) Layer Palette - Double click on this Layer -and set the Blend Mode to "Overlay" -Set the layer opacity of this layer to 51% - Activate the top layer (copy of raster 2) Double click on this Layer -and set the Blend Mode to "Normal" 8. Effects-Distortion Effects- Wave use settings below
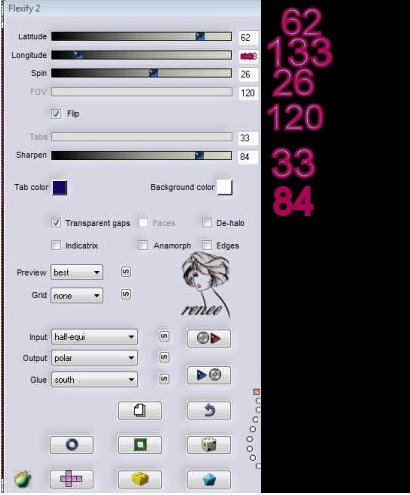
9. Effects- Plugins- Flaming pear - flexify2 with these settings 62/ -133/26/120/33/84
10. Effects- Plugins -Eye Candy 5 Impact /glass /Preset "-clear " - You should have this result
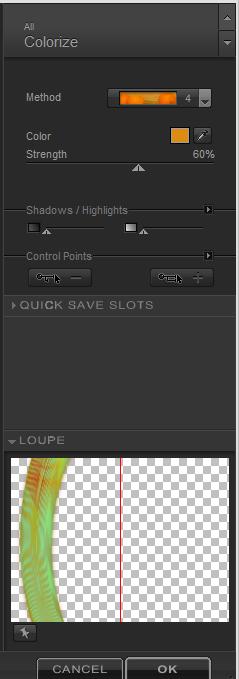
11.Effects- Image Effects-Offset with these settings H= 200 and V =0 transparent 12. Effects- Plugins-Nick Color effex pro.3 /Colorize-method 4 use settings below
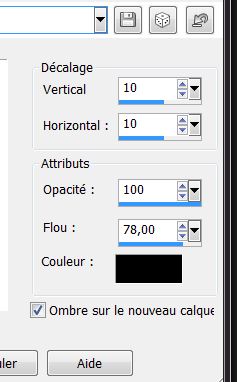
13. Effects- 3 D Effects- Drop Shadow use settings below -Shadow on new Layer checked
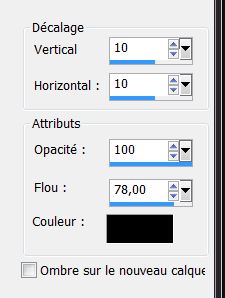
14. Selections –load/save selection –load selection from disc and choose my selection:''futur_spatial'' 15 Layers- New Raster Layer 16. Open the tube « drevers-woman »/Edit-Copy-Edit Paste into selection 17. Selections- Deselect All Layers- Arrange- Move Down 18. Activate the top of the layer palette 19. Layers- New Raster Layer 20. Selections –load/save selection –load selection from disc and choose my selection: ''futur_spatial1""/ Color-Palette: set the background color to color: #e8dd84/ Activate Flood Fill Tool and fill the selection with the background color 21. Selections- Deselect All attention allowing the background color #e8dd84 22. Effects- Plugins-Unlimited 2.0- Filter Factory Gallery A- Rings a 81 - Effects- 3 D Effects- Drop Shadow use settings below -Shadow on new Layer not checked
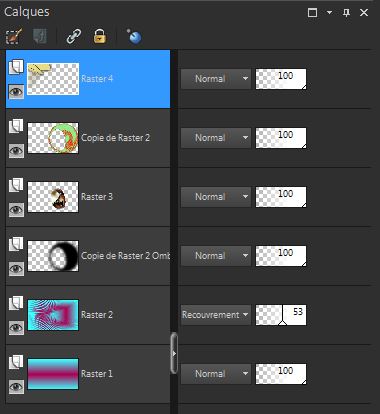
Layer Palette look like this now-You should have this result
- Stay on the top of the layer palette 23. Open the tube « femalle « Edit/ Copy-Edit - Paste as new layer on your working image and move 24. Open the tube « puzzle /( do not close) Edit/ Copy-Edit - Paste as new layer on your working image and move (see finished image) 25. Effects- 3 D Effects- Drop Shadow use settings below
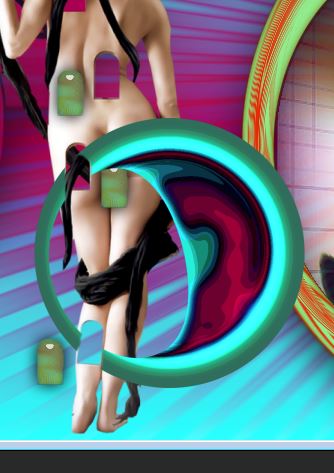
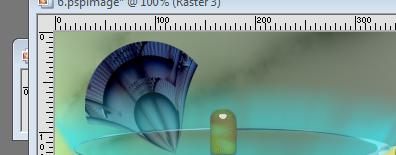
26. Open the tube '' circle '' -Edit/ Copy-Edit - Paste as new layer on your working image and move as shown in the example below
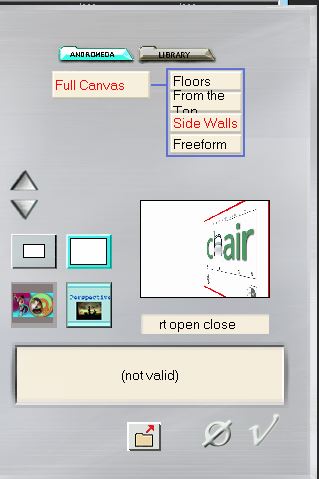
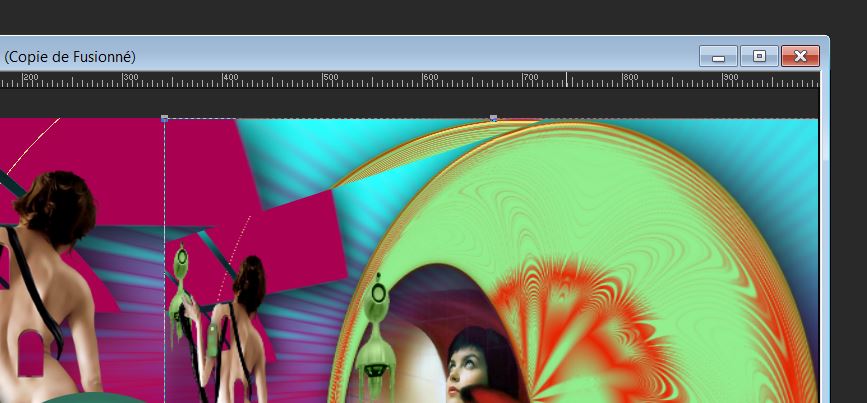
27. Open the tube ''robot'' Edit/ Copy-Edit - Paste as new layer on your working image and move /Layers- Arrange- Move 3 times down 3 ( tube to be placed under '' left woman ') Layers- Duplicate and move 28. Layers- Merge- Merge Visible 29.Layers- Duplicate 30. Effects- Plugins - Andromeda perspective/preset =rt open close / Activate Pick Tool - Mode Scale Pull Node to 350 pixels as show in the example below
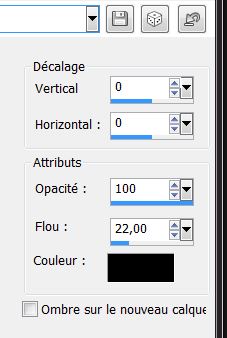
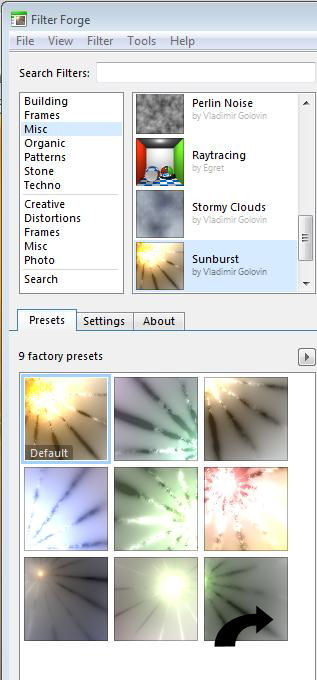
31. Effects- Plugins -EyeCandy 5 -perpsective shadow -Preset Drop shadow blury Filter Forge for the codes are 32. Activate the bottom of the layer palette Effects- Plugins-Forge/misc /sunsburt/take the selected preset with the arrow as shown in the example below (Do you have problems with this- PNG image is into the zipfile and paste as a new layer on your working area and move)
33. Activate the tube « calguisorbit4109 »/Image Resize to 55% /Image Mirror - Edit/ Copy-Edit - Paste as new layer on your working image and move 34. Effects- Plugins- Eyecandy5 /Blacklight" -tab Settings/User settings choose my preset ''reneespatial " 35. Activate the tube « soucoupe « / Image Resize to 55% / Edit/ Copy-Edit - Paste as new layer on your working image and move Layers- Arrange- Move Down Activate the top of the layer palette 36. Activate tube « puzzle »-Edit/ Copy-Edit - Paste as new layer on your working image and move as shown in the example below
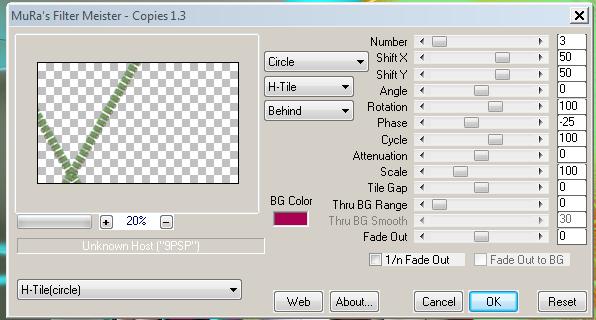
37. Effects- Plugins - Mura's meister /copies use settings below
38. Activate the bottom of the layer palette/ Layer Palette - Double click on this Layer -and set the Blend Mode to "Overlay" -Set the layer opacity of this layer to 91% 39. Layers- Merge- Merge Visible 40. Image - Add borders-Symmetric checked: 5 pixels #000000 41. Image - Add borders-Symmetric checked: 25pixels #5baba4 42. Image - Add borders-Symmetric checked: 15 pixels #000000 43. Image - Add borders-Symmetric checked: 5 pixels #ffffff 44. Text Tool-Font /Color-Palette: Set the foregroundcolor to color #e8dd84 and set the background color to color #6c0030- Size 72 45. Write: ''Futur Spatial''/Convert to Raster Layer and move to the top 46. Layers- Duplicate 47. Activate your Move Tool (M) move to the bottom right 48. Effects- Plugins - EyeCandy 5 Impact /blacklight -tab Settings/User settings choose my preset ''reneespatial''(You can change the color of this as your work) Save as JPEG *
I am part of the Tutorial Writers Inc. My tutorials are registered regularly ReneeGraphisme_All rights reserved
*
|
 Translations