|
Let's start the lesson .
1. Open a new transparent image of 995 x645 pixels
2.
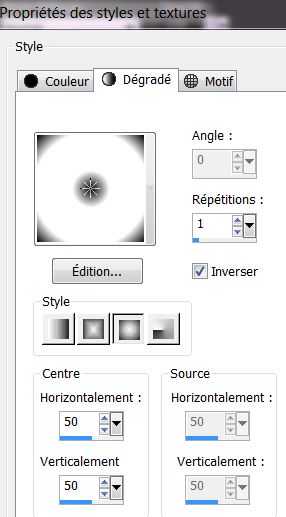
Material Properties: Foreground color to this color:#ffffff Background color to this color #000000
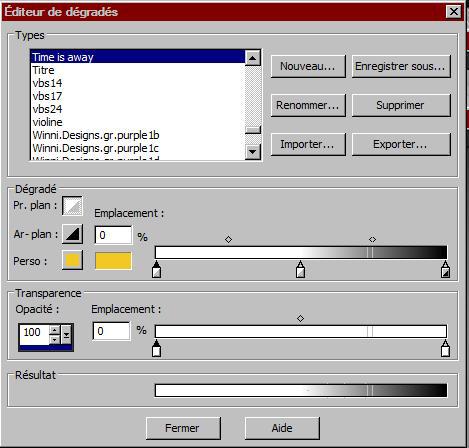
3. Put your foreground/background into a linear gradient with settings below.(foreground/background= Corel 06-029)
4.
Activate Flood Fill Tool and fill the layer with the gradient
5. Effects- Artistic Effects-Contours with these settings
6. Layers- Duplicate
7. Effects- Plugins - Unlimited 2.0 -CPKDesigns- Flex Emboss

8. Effects- Plugins -Transparency- Eliminate Black
9.
Layers- Duplicate
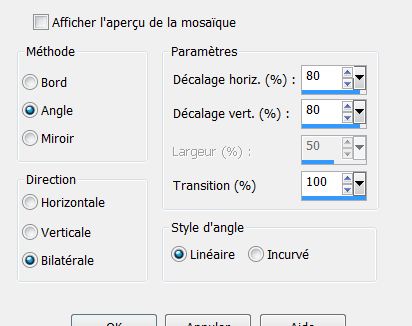
10.Effects-Image Effects-Seamless Tiling use the settings below
11.Layers- Merge -Merge Down
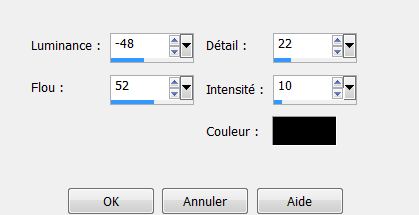
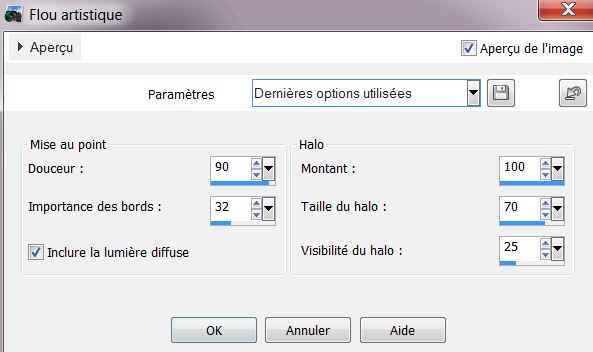
12. Adjust- Softness-Soft Focus with these settings
13. Layers- Duplicate
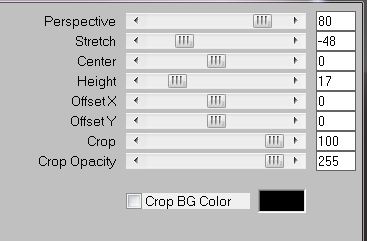
14. Effects- Plugins - Mura's Meister - Perspective Tilling with these settings
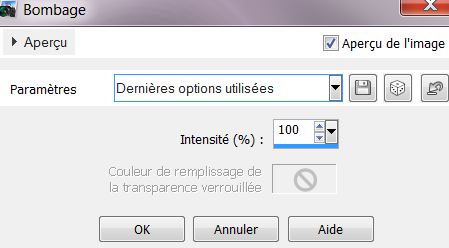
15. Effects- Distortion Effects-Punch
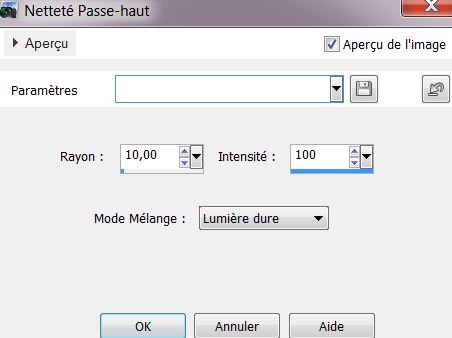
16. Adjust-Sharpness-High-Pass Sharpen
17. Open the tube ''logane_2mistedarbre2012'' Edit/copy-Edit paste as a new layer.
Activate Pick Tool (K) and move to the right side like this
18. Effects- Edge Effects-Enhance More
19.
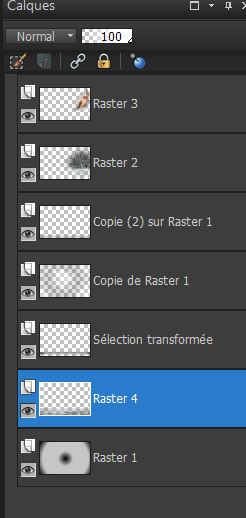
Activate the bottom of the Layer-Palette = Raster 1
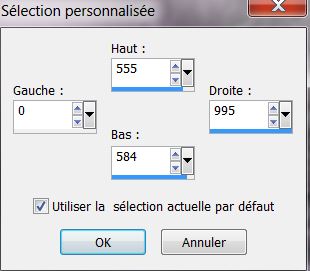
20.Selection Tool ( S ) Custom selection use settings below
21.Selections- Promote selection to layer
22. Effects- 3D Effects- Drop Shadow with these settings 0/15/100/30 color black
23. Effects- Plugins
-AP Line-Silverling use settings below

24. Selections- Deselect All
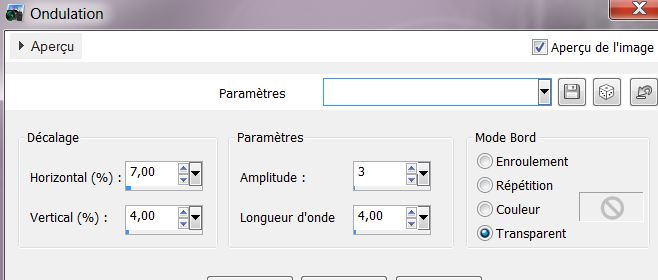
25. Effects- Distortion Effects- Ripple with these settings
26.Activate the top of the Layer-Palette
27. Open the tube ''woman_746_tubed_by_thafs
''Image Resize 60% /Image Mirror Edit/copy -Edit - paste as new layer on your working area and move
28. Opacity of this layer to 87%
29. Activate the bottom of the Layer-Palette =Raster 1
30. Open the tube ''renee_experience_glaciale_image_1'' Edit/copy -Edit - paste as new layer on your working area
31. Effects - Images Effects - Offset use settings below H= 0 and V = - 255
32. Activate the top of the Layer-Palette
33. Open the tube''logane_misted1femme_15mars2013'' /Edit/copy -Edit - paste as new layer on your working area
34.With your move tool place it in the right place like this
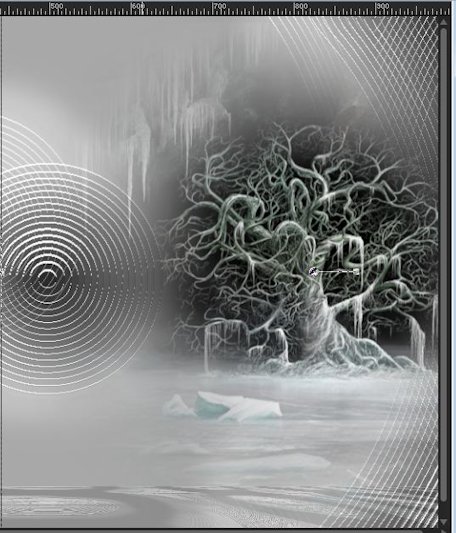
- The result
35. Activate Brush: 'stalactite'' in your Psp
- File- Export Custom Brush 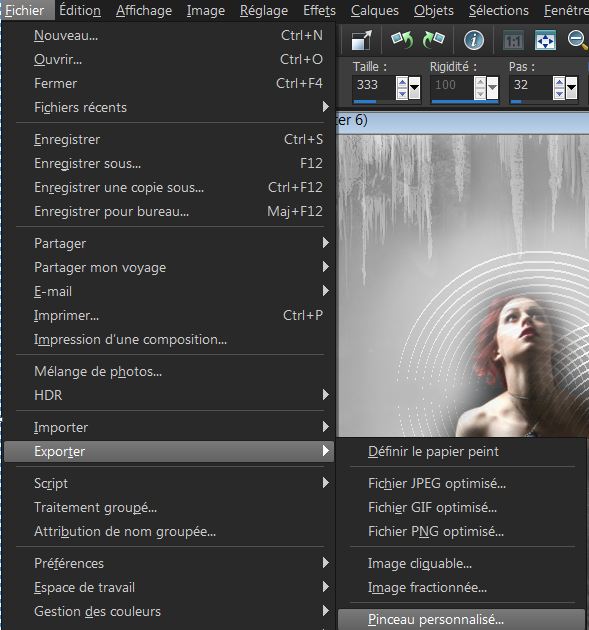
- Give it a name ''stalactite''
36. Activate Brush Tool and select my file:
''stalactite'' with these settings

37.Properties Foreground: Foreground color to color white
38.Layers- New Raster layer
- Put the brush on the left and the right side with the foreground color white /see example

*Take a new layer for each brush.
Then you get a nice effect
39. Activate the Brush layer : Effects- 3D Effects- Drop Shadow with these settings :0/8/85/40 color black
40. Open the tube ''renee_experience_glaciale_image_2''
Edit/copy-Edit paste as a new layer on your working area and move
41. Layer palette: Activate the layer with the woman
- Freehand Selection-Point to Point -Draw a selections like this
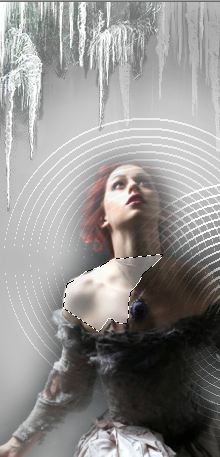
42. Layers- New Raster layer
43. Set your Foregroundcolor to #ffffff / Pot of Paint Opacity 35 % Activate Flood Fill Tool and fill the selection with color white
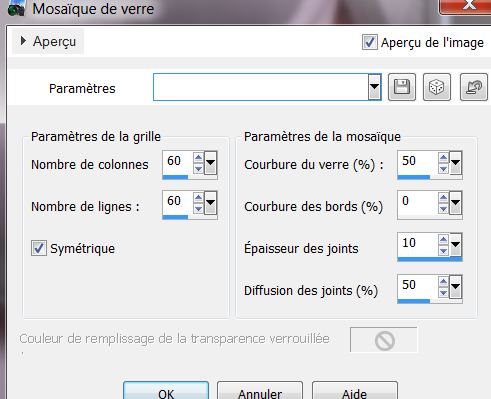
44. Effects- Texture Effects -Mosaic Glass with these settings
45. Selections- Deselect All
46. Layers- Duplicate- Layers- Merge-Merge Down
- Repeat : Layers- Merge- Merge Down .
47. Open the tube ''renee_experience_glaciale_image_3 Edit/copy-Edit paste as a new layer on your working area and move
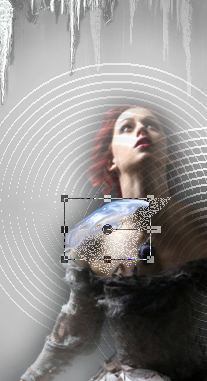
* Activate Smudge Brush you can blur it and make softer so it looks nice
48.Layers- New Raster layer
49. Set your Foregroundcolor to: #dae3f8
50.
Selection Tool - Ellipse with these settings- Select this part
 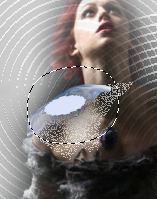
51. Activate Flood fill tool and fill the selection with this color #dae3f8
52. Selections- Deselect All
53. Effects - 3D Effects - Drop shadow with these settings:0/8/85/40 color black
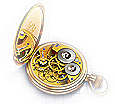
54. Open the tube ''renee_experience_glaciale_image_4 /Edit / copy -Edit - paste as new layer on your working area and move
55. Open the tube ''renee_experience_glaciale_image_5 /Edit / copy -Edit - paste as new layer on your working area and move
56. Open the tube ''renee_experience_glaciale_image_6 /Edit / copy -Edit - paste as new layer on your working area and move
57. Open the tube ''logane_mistedarbre2012'' /Edit/copy-Edit paste as a new layer. Move to the bottom left corner
58. Open the tube ''renee_experience_glaciale_image_7/Edit/copy-Edit paste as a new layer. Move to the left
59. Open the tube ''Yoka-DrawnArt-Hand''
Activate Freehand Selection- Select the bird .
60. Image
Mirror/Image Resize 60% (Resize all the layers not checked)
Edit / copy -Edit - paste as new layer on your working area and move to the bottom left
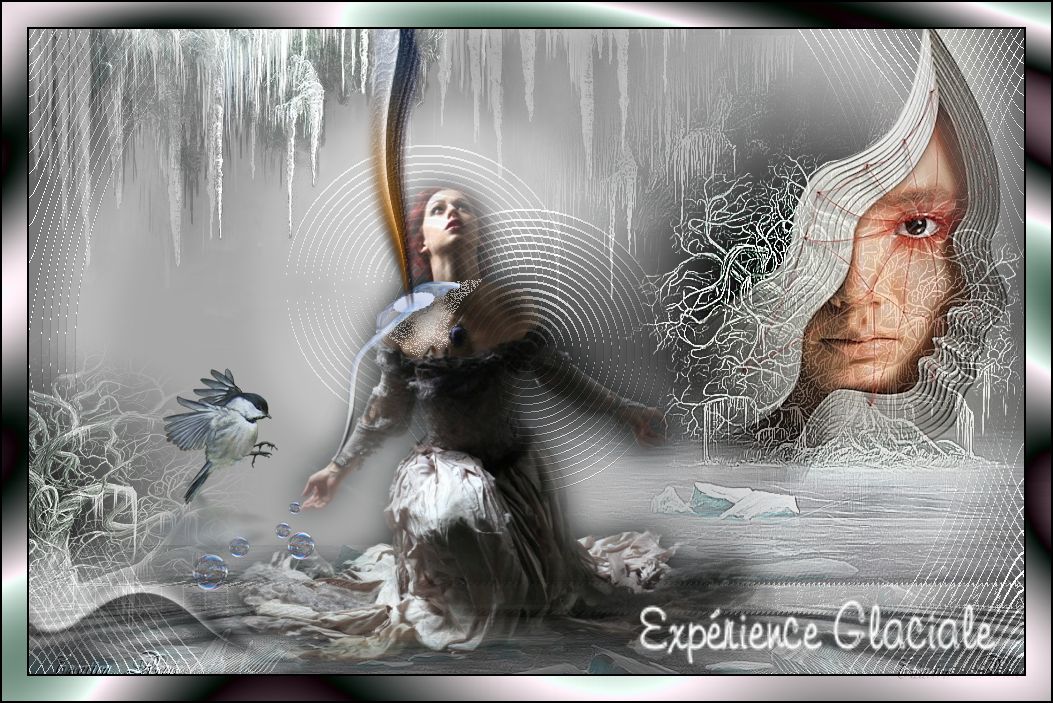
- Well make sure everything is in place
61. Layers- Merge- Merge All
62. Image - Add borders-Symmetric checked:2 pixels color black
63. Image - Add borders-Symmetric checked:25 pixels with this color #b1b1b1
64. Image - Add borders-Symmetric checked:2 pixels color black
65. Magic Wand : click with your magic wand in the border of 25 pixels
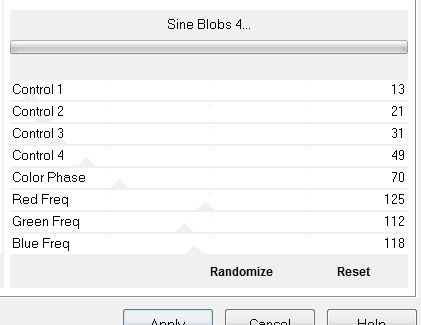
66. Effects- Plugins
-Unlimited 2.0- Filter Factory U- Sine Blobs 4
67. Open the tube "text" Edit/copy-Edit paste as a new layer on your working area and move/ Ore write your own text
I hope you enjoyed this lesson
This lesson was written by Renée 21/03/2013
* |
 Translations


 All rights reserved