|
New
Translations here
Espace rouge
Let's start the lesson.
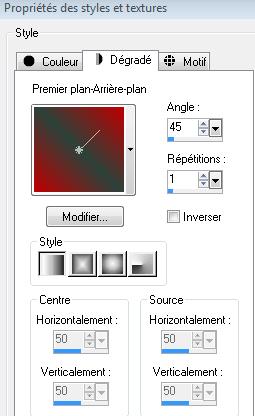
2. Material Properties: foreground color to color: #c00000 Background color to color: #2c413a - Prepare a linear gradient configured like this.
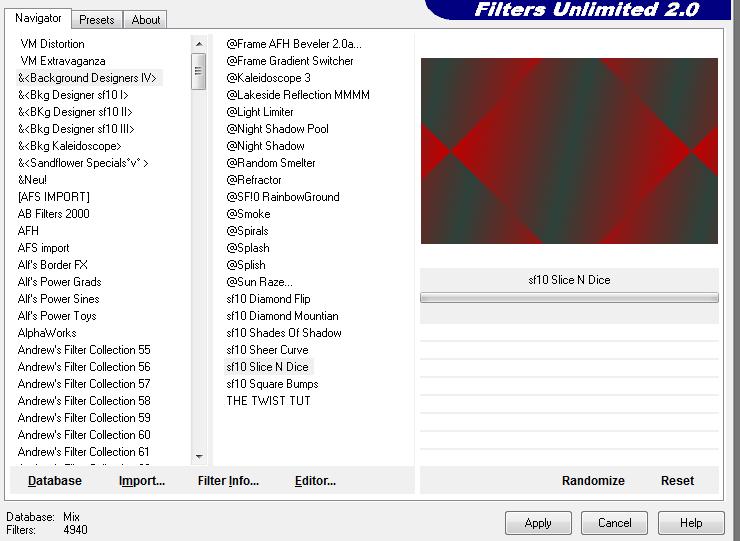
3 Flood Fill Tool: fill the layer with the gradient 4. Effects-Plugins -Unlimited &<BkgDesigners IV/ sf10 Slice N Dice
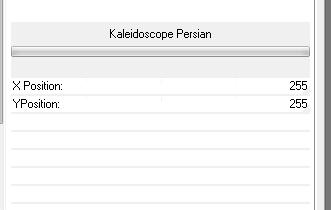
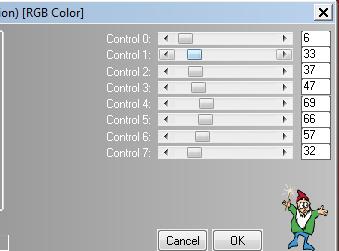
5. Effects-Plugins - Unlimited / &<Bkg Kaleidoscope/ Kaleidoscope Persian
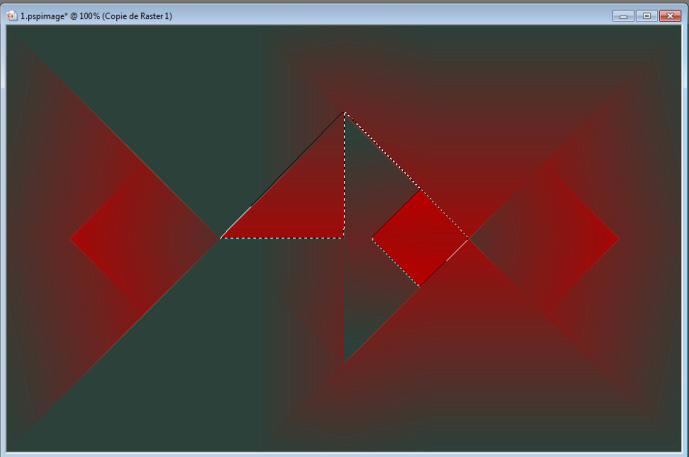
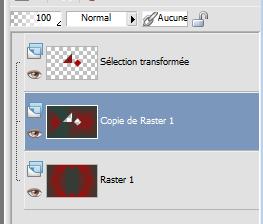
6. Layers- Duplicate 7. Effects-Plugins - Simple pizza slice mirror /Repeat 1x 8. Activate Freehand Selection-Point to Point /select these 2 parts
9. Selections-Promote selection to layer 10 Activate the layer underneath (copy raster 1)/Delete This is the result
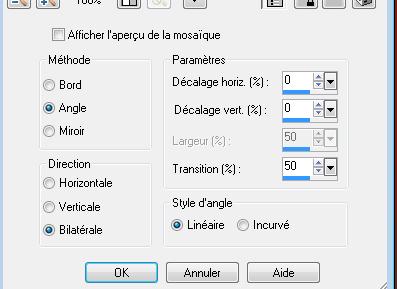
11. Selections-Deselect All /Stay on this layer (copy raster 1) 12. Effects-Image Effects-Seamless Tiling use the settings below
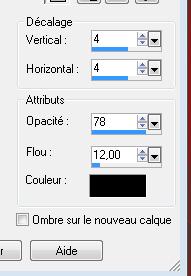
13. Effects-Plugins - Simple -Top left mirror 14. Effects-Plugins - Simple - Pizza slice mirror 15. Effects- 3D Effects- Drop Shadow use settings below/color black
- Repeat: Effects- 3D Effects- Drop Shadow/negative H-4 and V-4 16. Activate the bottom of the layer-palette >>raster 1 17. Effects-Plugins L and K's / zitah
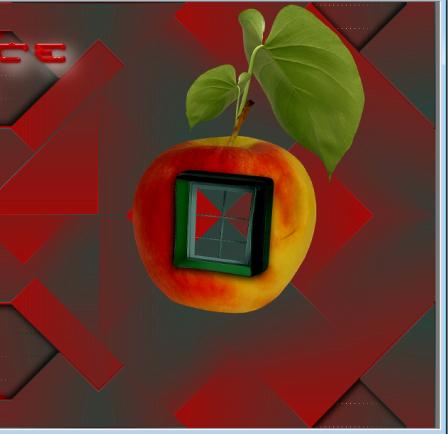
18. Activate the tube ''renee -espace -rouge -texte '' Edit/copy-Edit paste as a new layer.With your move tool move to the left side 19. Activate the tube ''aline_design_champignon2''/Image-Resize 75% /Image Mirror Edit/copy-Edit paste as a new layer.With your move tool move to the left side 20. Activate the tube ''renee-espace rouge _ pomme'' /Image-Resize 75% - Edit/copy-Edit paste as a new layer.With your move tool move to the right side
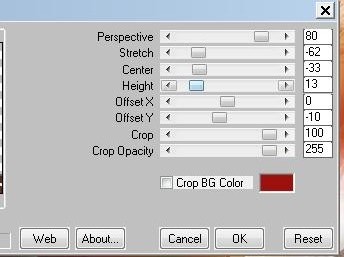
21. Effects-Plugins EyeCandy5 Impact /perspective shadow-in the settings tab, click on the Preset ''renee-espace_rouge1'' 22. Layer Palette -double click on this layer and set the Blendmode to "Hard Light" and set the layer opacity of this layer to 57% 23. Activate the tube ''GINAMISREDFEMME100''.Edit/copy-Edit paste as a new layer.With your move tool move to the right side Layer Palette -double click on this layer and set the Blendmode to "Hard Light" 24. Activate the tube '' renee-espace-rouge-tache brune''/ Edit/copy-Edit paste as a new layer and move . Layer Palette -double click on this layer and set the Blendmode to "Screen" 25. Activate the ''AD_i_walk_in_the_rain 103'' Edit/copy-Edit paste as a new layer. With your move tool place it in the right place Layers-Arrange- Move Down - Activate the second layer from the bottom of the Layers Palette (copy raster 1) 26. Layers- Duplicate 27. Effects-Plugins - Mura's Meister/ perspective tilling / color #9D120E
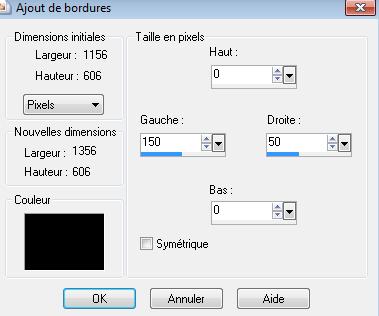
28. Effects- Edge Effects- Enhance -Activate the top of the layer-palette 29. Activate the tube ''AD_i_walking_in_the_rain-3'' Image-Resize 25% Edit/copy-Edit paste as a new layer .With your move tool place it to the left 30. Layers- Merge- Merge Visible 31.Image - Add borders -symmetric checked: 3 pixels color white 32.Image - Add borders- Asymmetric
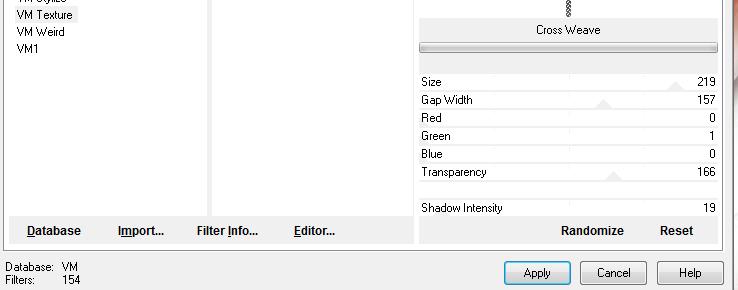
33. Layers- New raster layer 34. Selections - load/save selection - load selection from disk and select my file ''renee-espace-rouge '' Activate Flood Fill Tool and fill selection with color white 35.Effects-Plugins - VM texture / Cross Weave
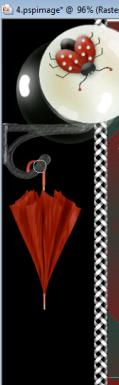
36. Selections- Deselect All 37. Activate the tube ''R&W LADY BUG'' /Image-Resize 20% . Edit/copy-Edit paste as a new layer. With your move tool place it in the right place 38.Activate the tube ''AVG-lampe antique'' activate lampe1 of the tube .Edit/copy - Layer palette: activate raster 1 .Edit paste as a new layer With your move tool move to the left 39. Layers- Merge - Merge Down ( the 2 layers ) 40. Activate the tube ''AD_I_walk_in_the_rain 15''. Edit/copy-Edit paste as a new layer./Image Mirror With your move tool move to the lef. Activate your Eraser Tool and erase that small circle away from the umbrella
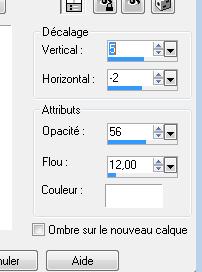
41. Effects- 3D Effects-Drop Shadow use settings below
42. Layers- Merge- Merge Visible 43.Image - Add borders symmetric checked: 1 pixels color white 44. Image Resize 1000 pixels Width
I hope you enjoyed this lesson Renée This lesson was written by Renée Created 2012 *
Any resemblance with an existing lesson is merely a coincidence * Don't forget to thank the people who work for us and with us. I named the tubeurs - Testers and the translators. Thanks Renée. I am part of Tutorial Writers Inc. My tutorials are regularly recorded
*
|
 Translations