|
New
Translations
*
*
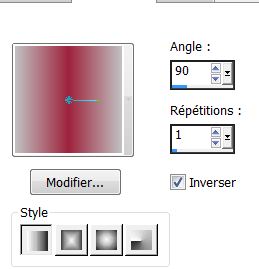
Let's start the lesson. 1. Open a transparent image 955 x 625 pixels 2. Activate Flood Fill Tool and fill the layer with #c0c0c0 3. Material Properties: Change the foreground color into color #9e223c Background color into color #c0c0c0 4. Put your foreground on the linear gradient with settings below
5. Layers -New raster layer - ATTENTION - Flood Fill Tool with these settings-Mischmodus Multiply /Food Fill Tool :fill the layer with the gradient
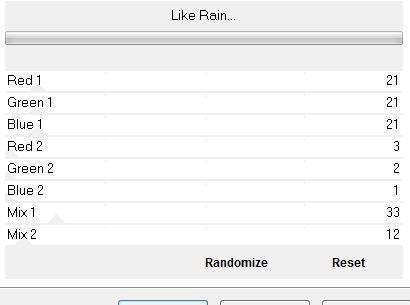
6. Effects -Plugins -Unlimited -Andrew's Filter Collection 16- Like Rain
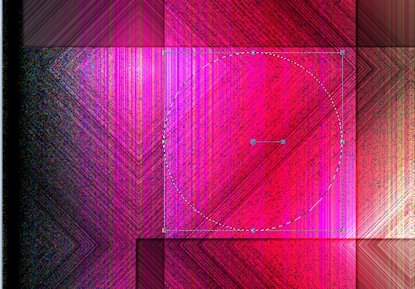
7. Layers- Duplicate 8. Effects- Plugins -Simple -Diamonds 9. Effects-Plugins -Simple -Center Tile 10. Layer Palette -Double click on this layer and set the Blendmode to Luminance 11. Layers -New raster layer 12. Selections - load/save selection - load selection from disk and choose my selection: ''renee_ eclater la musique'' - Activate Flood Fill Tool and fill the selection with the gradient 13.Effects- Plugins -Unlimted- Andrew's Filter Collection 16 - Into the reverse / use the default settings 14. Selections- Deselect All 15. Effects- 3D Effects- Drop Shadow with these settings 1/1/100/8 black - Layer Palette -Double click on this layer and set the Blendmode to Overlay 16. Layer Duplicate 17. Image Free rotate 90° to the left 18. Layers -New raster layer 19. Selections Tool-Circle with these settings
- Draw a circle like this
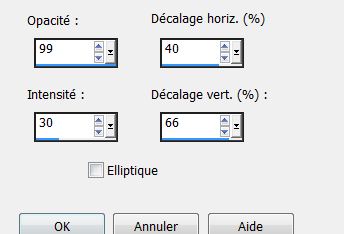
20. Activate Flood Fill Tool and fill the selection with the gradient 21. Selections- Deselect All 22. Effects- Reflexion effects -Feedback
23. Effects- 3D Effects- Dropshadow with these settings 3/1/80/22 black 24. Open the tube ''eclater la musique_barriere'' Edit/copy-Edit paste as a new layer on your working area and move 25. Layers- Duplicate-Image Mirror and move 26. Open de tube ''renee_eclater la musique_disque ''Edit/copy-Edit paste as a new layer on your working area and move, and set the layer opacity of this layer to 71% Is the tube layer to light?, Mischmodus « Hartes Light » Opacity 100% 27. Layers -New raster layer 28. Selections - load/save selection - load selection from disk and choose my selection: ''renee-eclater la musique 2 '' 29. Activate Flood Fill Tool and fill the selection with the FG-Color #9e223c 30. Selections- Deselects All 31. Effects-Plugins -EyeCandy 5- extrude '' tab Settings/User settings choose my preset ''renee-eclater la musique_extrude'' 32. Open the tube ''eclater la musqiue_casque '' Edit/copy-Edit paste as a new layer on your working area and move 33. Open the tube ''renee_grand plancher'' /Edit/copy-Edit paste as a new layer on your working area and move 34. Open the tube_bras -eclater la musique '' /Edit/copy-Edit paste as a new layer on your working area 35. Open the tube ''nicole-abstrait-12-2012'' Image Mirror -Edit/copy-Edit paste as a new layer on your working area 36. Image Resize 43% resize all layers not checked 37. Open the tube ''eclater la musique_CD'' Edit/copy-Edit paste as a new layer on your working area and move 38. Layer Palette -Double click on this layer and set the Blendmode to Luminance and set the layer opacity of this layer to 85% 39. Open the tube ''agv-DogTraning-230412''/ Image Resize 65 % Edit/copy-Edit paste as a new layer on your working area and move 40. Image - Add borders-Symmetric checked:1 pixels black 41. Image - Add borders-Symmetric checked:25 pixels white 42. Image - Add borders-Symmetric checked:1 pixels black 43. Open de tube ''eclater la musqiue_note de musique'' Edit/copy-Edit paste as a new layer on your working area and move 44. Activate the tube "text "/Edit/copy-Edit paste as a new layer on your working area / Ore write your own text Save as JPG
I hope you enjoyed this lesson Renée This lesson was written by Renée17/02/2013
25/11/2013 *
I am part of Tutorial Writers Inc. My tutorials are regularly recorded.
ReneeGraphisme_
*
|
 Translations


 All rights reserved