|
New
Translations here
Tubes are of Athe - Roby- Yoka and Nikita ATTENTION : If it is your intention to share these tubes or these lessons in a group, please ask permission to the owner . The tube may not be send without the lesson . Please do not make changes to the tube, because this tube was made for this lesson only. It is forbidden to share this tutorial without a link to the original lesson. Thank you very much Renée * These tubes were received from tubeurs sharing groups. Or found by me searsching on the net. I Am grateful to have been given permission these beautiful tubes so please use any copyright information as needed. If one of these tubes is yours? Contact me so I can make a link to your site or remove it. Thanks Renée **************************** These Plugins are used for this Tutorial Mura's Meister / Copies Mura's Meister -Perspective Tilling Filtre personnalisé /Emboss 3 &<Bkj designers sf10IV / @ instant Tile &<Bkj Designers Sf 10/ Cruncher Unlimited – Italian Editors Effect /disturbo con dissolvenza sui Bordi Unlimited – Sapphire Filters 01/Sapphire Plugin 0004 Transparency Eliminate Black Unlimited Mura's Seamless /Tile Frame
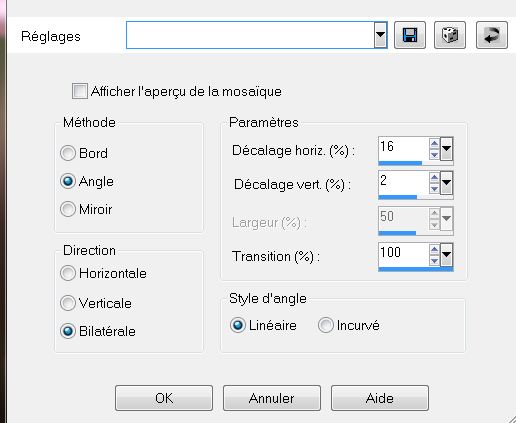
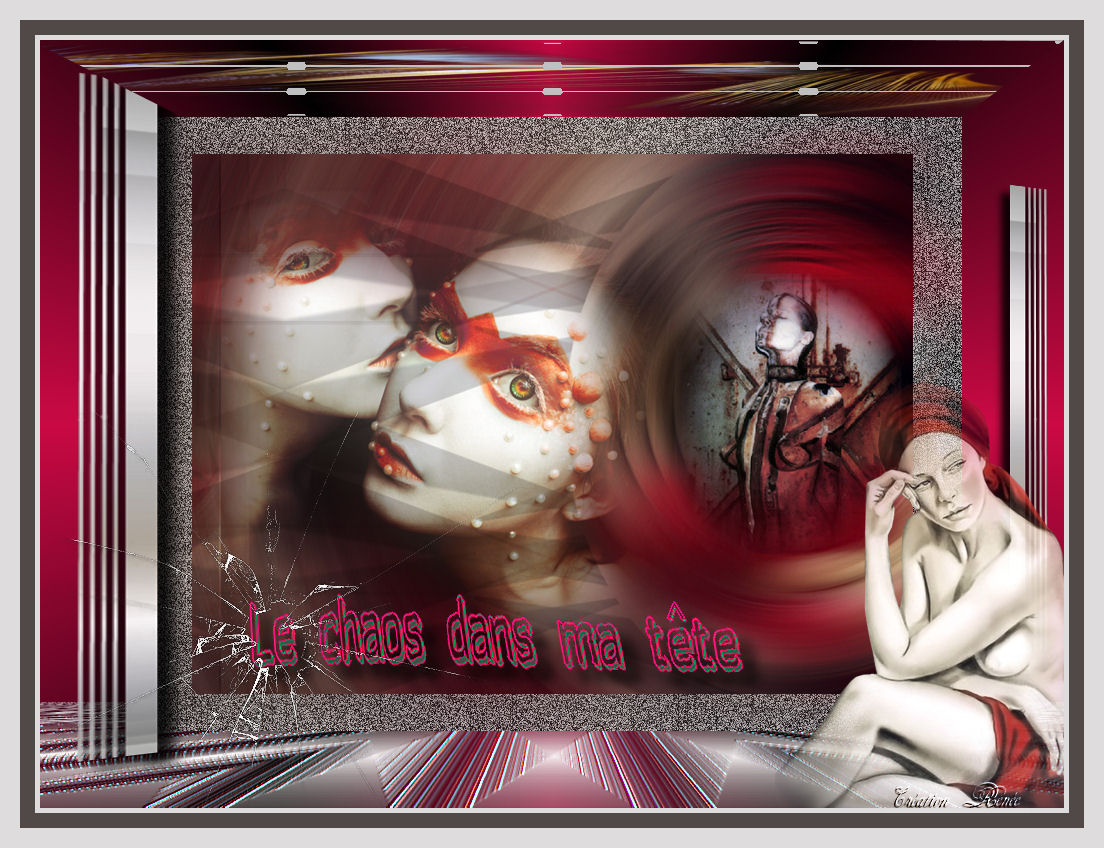
*** You can find my filters here http://www.reneegraphisme.fr/filtres/Mes filtres.html Let's start the lesson. 1. Open the Background Image: fond ''renee_chaos dans ma tête'' -Windows Duplicate -Promote Background Layer =Raster 1'' 2. Layer- New raster layer 3. Selections- Select All 4. Activate the tube ''271 woman in red by Roby2765'' Edit/copy-Edit-paste into selection 5. Selections- Deselect All 6. Effects- Image Effects- Seamless Tiling with these settings
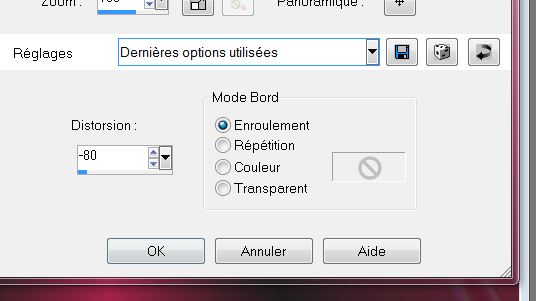
7. Adjust-Blur-Radial Blur with these settings
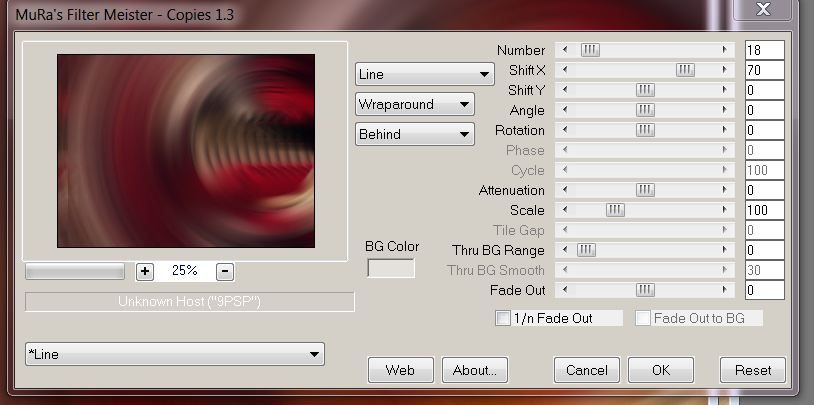
8. Effects- Plugins - Mura's Meister -Copies with these settings -color #e4e0dc
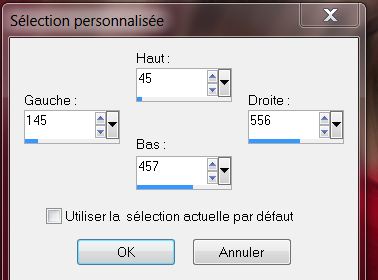
9. Effects- User Defined Filter-Emboss 3 using the default settings 10. Activate Selection Tool (S) - Custom Selection with these settings
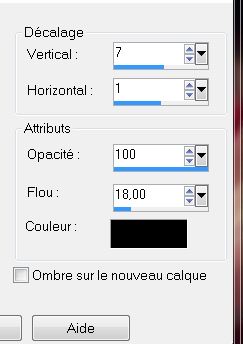
11.Selections- Promote selection to Layer 12. Selections- Deselect All 13. Effects-3D effects-Drop Shadow with these settings
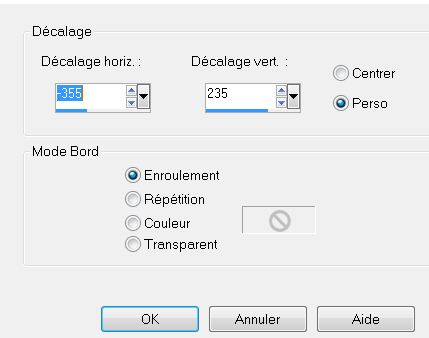
14.Repeat -Drop Shadow with these settings -7/ -1 15.Effects- Image Effects- Offset with these settings >>Wrap
16. Effects- Geometric Effects-Perspective Horizontal with these settings
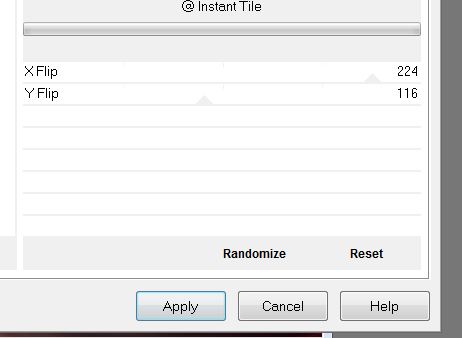
17. Layer Palette -Double click on this layer and set the Blendmode to Multiply and set the layer opacity of this layer to 46% 18. Effects- Plugins -Unlimted 2.0 - &<Bkj designers sf10IV / @ Instant Tile
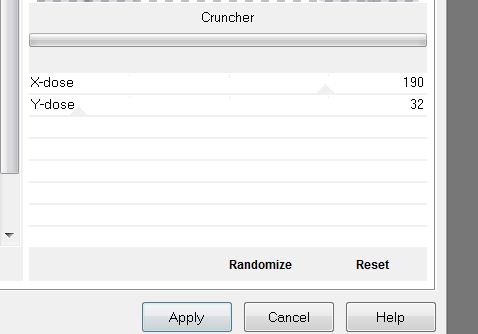
19. Effects- Plugins -Unlimted2.0 / &<Bkj Designers Sf 10/ Cruncher
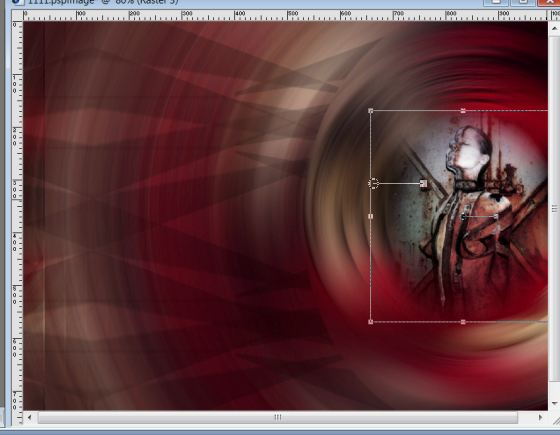
20. Selections - load/save selection - load selection from disk and choose my selection: ''renee_chaos dans ma tete _1'' 21. Hit the Delete Key of your Keyboard 22. Selections- Deselect All 23. Effects-3D effects-Drop Shadow with these settings 0/0/100 /2 black 24. Activate the tube ''renee_femme chaos ''Edit/copy-Edit paste as a new layer on your working area and move
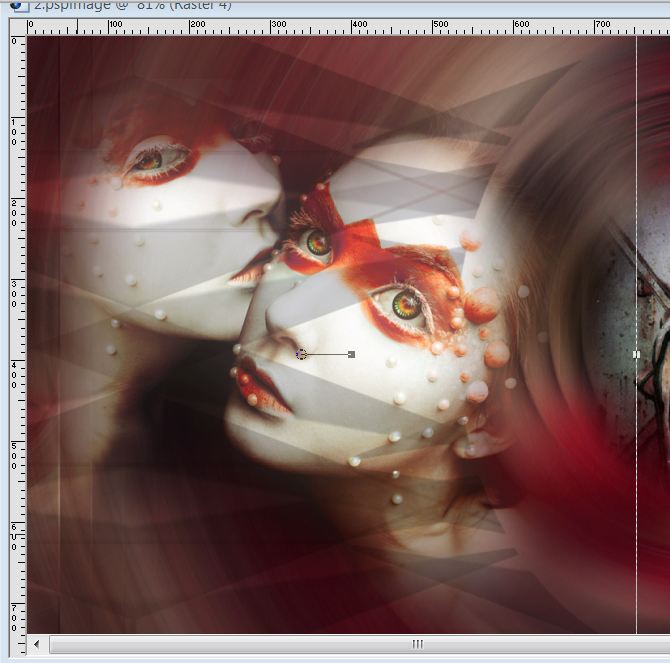
25. Activate the tube ''yoka-Misted-Faces-Orange021212'' Image Resize with 68% Edit/copy-Edit paste as a new layer on your working area and move
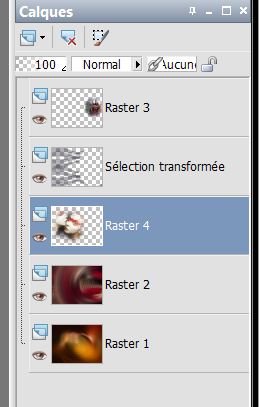
26. Layers- Arrange- Move 2x Down 27. Your layer palette looks like this:
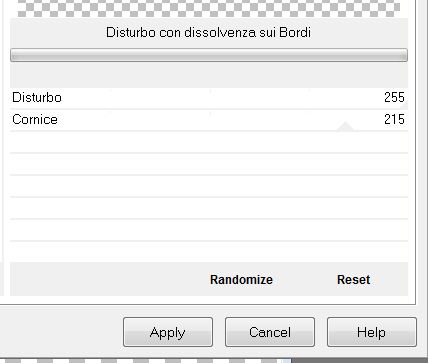
28. Layers- Merge- Merge Visible 29. Image resize with 80 % resize all layers not checked 30. Layers- Duplicate -Image resize with 88% resize all layers not checked 31. Activate the bottom of the Layer Palette 32. Effect-Plugins – Unlimited – Italian Editors Effect /Disturbo con dissolvenza sui Bordi
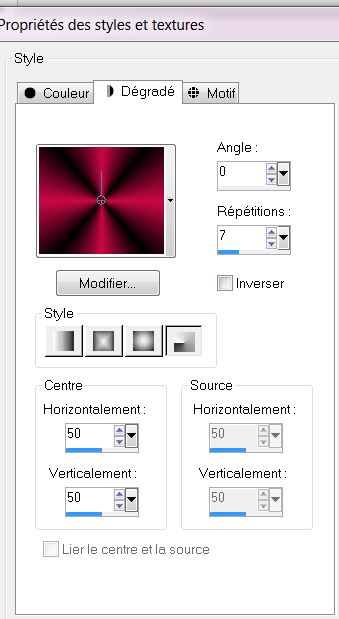
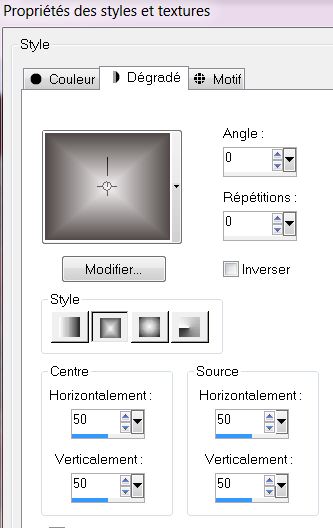
33. Material Properties: Foreground color to this color #cb0945 -Background color to black 34. Prepare a Radial Gradient as configured like this.
35. Layer- New raster layer 36. Layers- Arrange- Sent to Bottom Activate Food Fill Tool :fill the layer with the gradient 37. Activate the top of the layer palette 38. Activate the tube ''femme_chaos_barres '' Edit/copy-Edit paste as a new layer on your working area - Activate Move Tool -Move to the left side
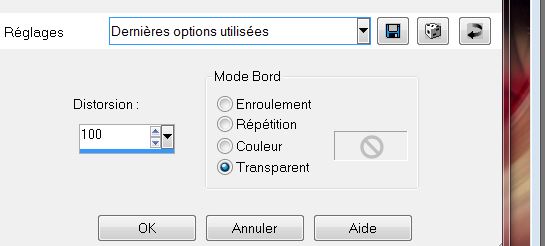
39. Layers- Duplicate -Image Mirror 40. Layers- Merge- Merge Down 41. Effects- Geometric Effects -Perspective Horizontal - Distorsion 25 Transparent 42. Close the Background Layer-Activate an Open Layer 43. Layers- Merge- Merge Visible 44. Open the Background layer 45. Layers- New Raster layer 46. Material Properties: Foreground color to this color #f5f1f2 Background color to this color: #504948 47. Prepare a rectangular gradient configured like this.
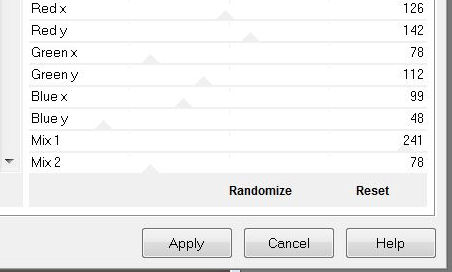
48. Activate Food Fill Tool :fill the layer with the gradient 49. Effects- Plugins -Unlimited 2.0 – Sapphire Filters 01/Sapphire Plugin 0004
50. Effects- Plugins-Transparency- Eliminate Black 51. Effects- Geometric Effects -Perspective Vertical with these settings
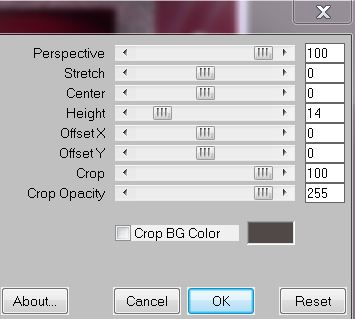
52. Effects-Image Effects-Offset with these settings H= 0 and V = 30 53. Image Flip 54. Effects- Plugins -Mura's Meister -Perspective Tilling with these settings -Background color
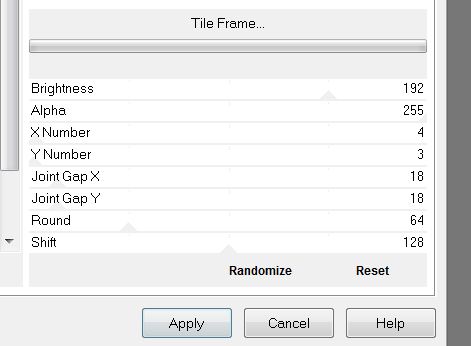
55. Effects- User Defined Filter - Emboss 3 using the default settings 56. Activate the bottom of the Layer Palette 57. Selections - load/save selection - load selection from disk and choose my selection: ''renee_chaos dans ma tete_2'' 58. Selections- Promote selection to layer 59. Layers- Arrange-Bring to Top 60. Activate the tube ''12283242503_divres_nikita'' Edit/copy-Edit-paste into selection - Keep selected 61. Effects- Plugins -Unlimited2.0/ Mura's Seamless /Tile Frame
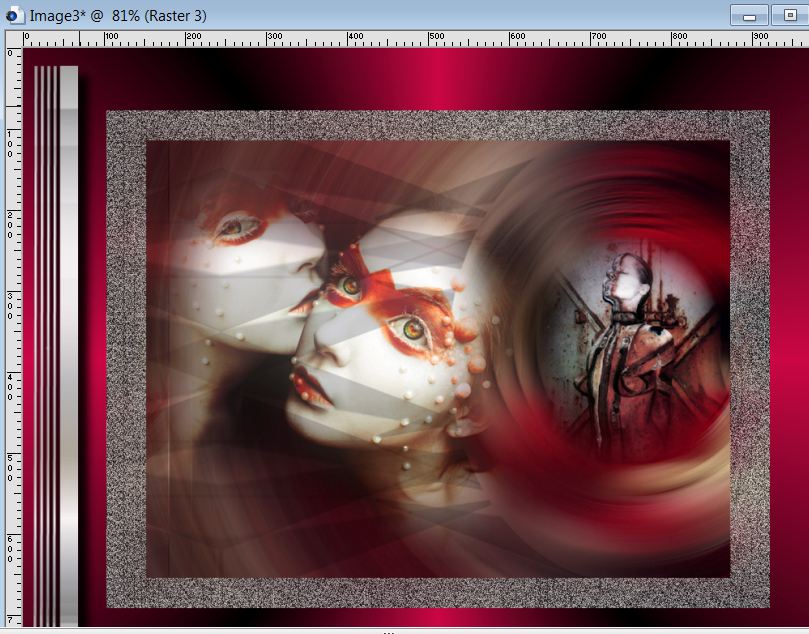
62. Selections- Deselect All 63. Activate the tube ''ATHE- FM310 '' Image Resize with 55% / Image Mirror Edit/copy-Edit paste as a new layer on your working area and move 64. Activate the tube "text "/Edit/copy-Edit paste as a new layer on your working area / Ore write your own text 65. Image - Add borders-Symmetric checked: 5 pixels FG-Color 66. Image - Add borders-Symmetric checked: 15 pixels BG-Color 67.Image - Add borders-Symmetric checked: 20 pixels FG-Color Save as JPG I hope you enjoyed this lesson Renée This lesson was written by Renée Placing 05/01/2013 * Any resemblance with an existing lesson is merely a coincidence * * Don't forget to thank the people who work for us and with us. I named the tubeurs - Testers and the translators. Thanks Renée. Renée 05/01/2013 I am part of Tutorial Writers Inc. My tutorials are regularly recorded.
ReneeGraphisme_All rights reserved
|
 Translations