|
Bail pour Automne Translations
New
- Let's start the lesson. 1. File - New - Transparent - New Image: 985 x 655 pixels 2. Material Properties:Foreground color to #929a79- Background color to #202020 3. Prepare a rectangular gradient configured like this.
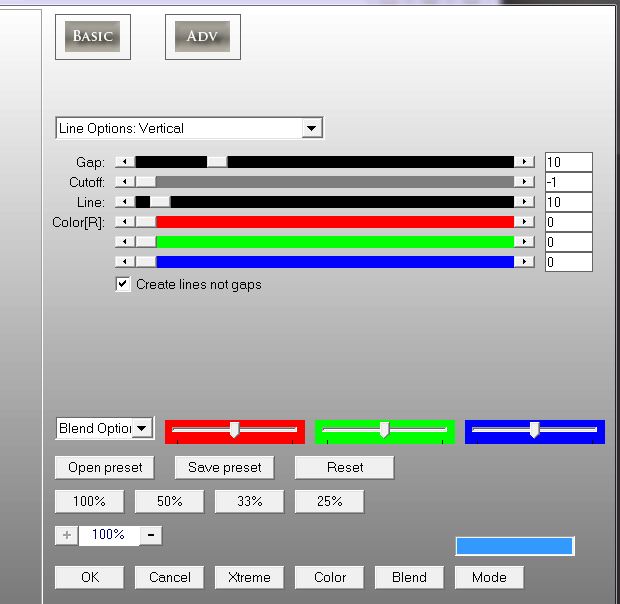
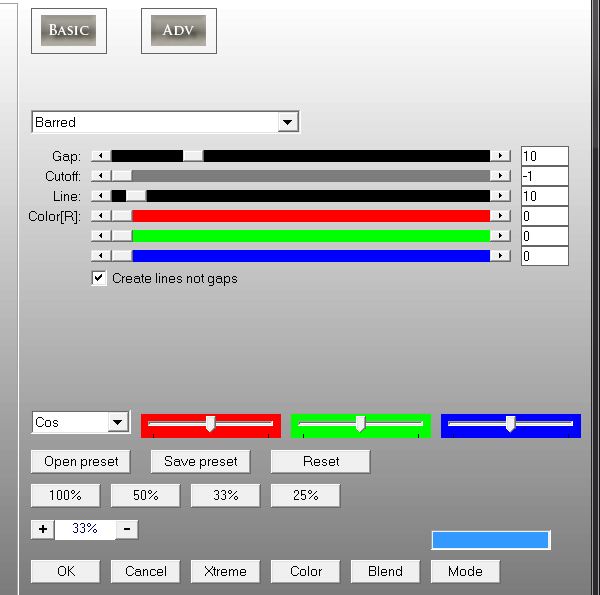
4. Activate Flood Fill Tool and fill the layer with the gradient 5. Layers- New raster layer 6. Selections - load/save selection - load selection from disk and select my file: ''renee couleur automne1" 7. Open the tube" SS_1586_Misted " Edit /copy -Edit -Paste into selection 8. Effects-Plugins - Eyecandy 5-perspective "- tab Settings/User settings choose my preset: "renee-couleur automne perspective'' 9. Layers- New raster layer 10. Selections - load/save selection - load selection from disk and select my file: "renee-couleur automne 2" 11. Properties Foreground: Change your gradient into a linear gradient - Angle = 0/ Repeats = 0 invert no checked....Activate Flood Fill Tool and fill the selection with the gradient 12. Effects- Plugins - AP / line Silverling with these settings
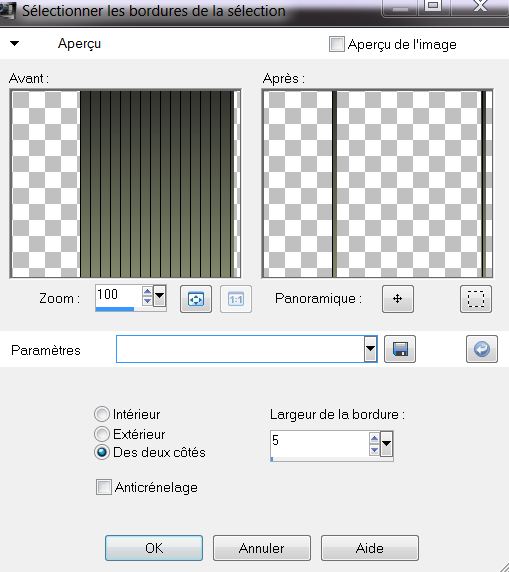
13. Selections - Modify - Select Selection Borders with these settings
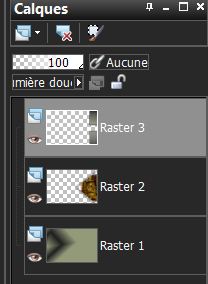
14. Layers - New raster layer-Activate Flood Fill Tool and fill the selection with the selection with the backgroundcolor 15. Selections- Deselect All 16. Layers- Merge- Merge- Down 17. Double click on this layer and set the Blendmode to Soft Light 18. Layers- Duplicate - Image Flip 19. Layers- Merge- Merge- Down 20. Effects- Edge Effects- Enhance More Layer Palette look like this now-You should have this result
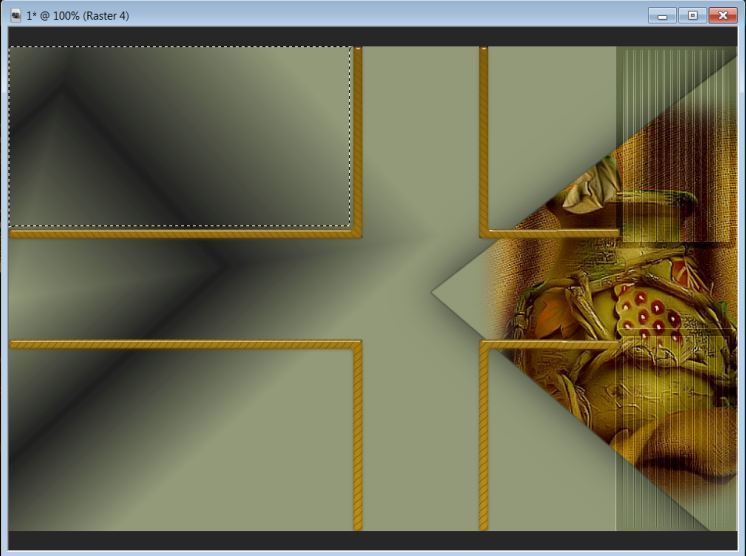
21. Layers - New raster layer 22. Selections - load/save selection - load selection from disk and select my file: "renee-couleur automne 3" - Activate Flood Fill Tool and fill the selection with the gradient 23. Effects- Plugins - AP Lines Silverling with the same settings but select " ARROW " 24. Effects- Plugins - EyeCandy 5 /Glass /- tab Settings/User settings choose my preset: ''renee couleur automne glass'' 25. Selections- Deselect All 26. Double click on this layer and set the Blendmode to Hard Light 27. With the magic wand -select the left upper frame like this
28. Layers- New raster layer 29. Open the tube "Paysage 05.10 tubey by corinne vicaire" Edit /copy -Edit -Paste into selection 30. Selections- Deselect All 31. Effects- Plugins - EyeCandy 5 perpsective ''- tab Settings/User settings choose my preset: ''renee -couleur automne perspec 2" -In the Layer Palette-Activate Raster 4= Fram layer 32. With the magic wand -select the left bottom frame 33. Layers - New raster layer- 34 Open the image "mc-x70" Edit /copy -Edit -Paste into selection 35. Selections- Deselect All-/Effects- Plugins - EyeCandy 5 perpsective Shadow ''- tab Settings/User settings choose my preset: ''renee -couleur automne perspec 2" 36. Activate the bottom of the layer-Palette= Raster 1 37. Layers - New raster layer 38. Selections- Select All >>>Open the tube "renee -couleur automne -image 1 " Edit /copy -Edit -Paste into selection 39. Selections- Deselect All 40. Effects-Plugins - AP lines Silverling with these settings(-This filter can have different effects. This does not affect their work.)
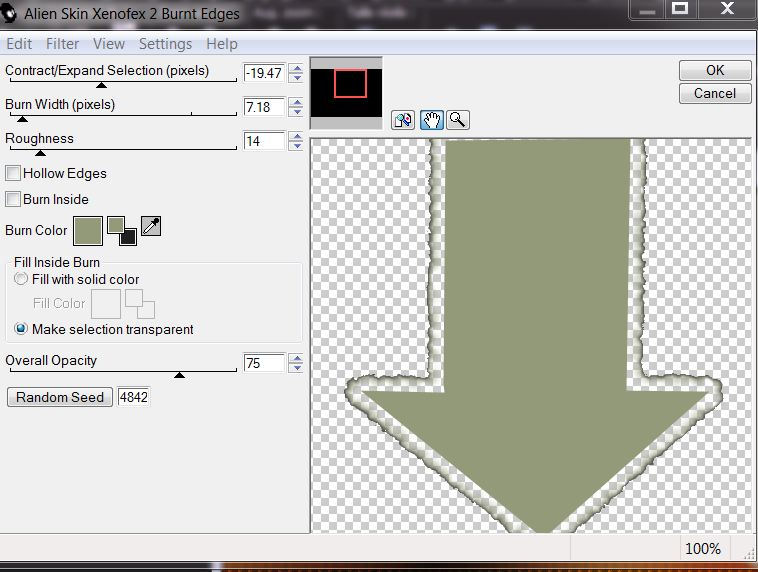
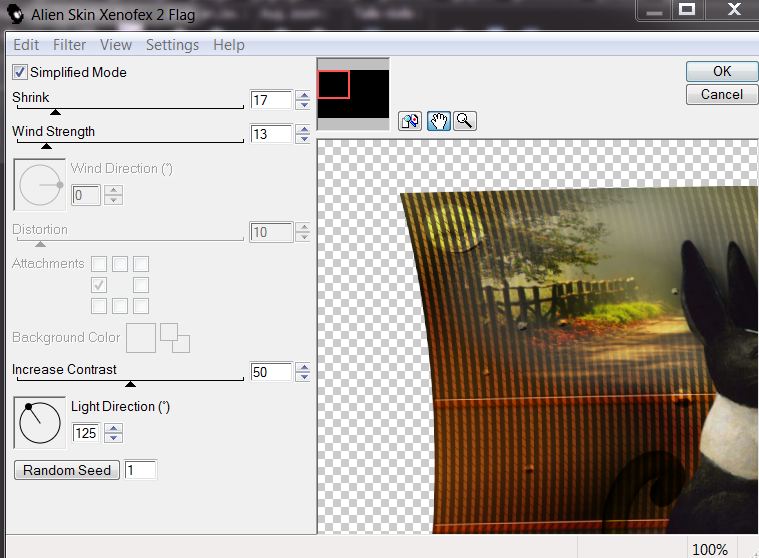
41. Double click on this layer and set the Blendmode to Hard Light - Activate the top of the layer-Palette 42. Layers - New raster layer 43. Selections - load/save selection - load selection from disk and select my file: "renee couleur autome 4''Flood Fill Tool: fill the selection with the foregroundcolor #929a79 44. Selections- Deselect All 45. Effects-Plugins -Alien Skin XENOFEX 2 -Burnt Edges with these settings as shown in the example - 46. Double click on this layer and set the Blendmode to Hard Light - Adjust-Sharpness -Sharpen 47. Open the tube "renee -couleur automne -image 2''- Edit /Copy -Edit - Paste as new layer on your working area -Move to the left 48. Open the tube " TReagen3585_26_08_12'' -Edit /Copy -Edit - Paste as new layer on your working area -Move to the left 49. Open the tube ''renee-couleur automne-image 3" Edit/copy-Edit paste as a new layer on your working aera and move to the bottom -/Double click on this layer and set the Blendmode to Hard Light 50. Layers- Merge- Merge Visible 51. Effects- Plugins - Alien Skin Xenofex 2 /Flag with these settings as shown in the example
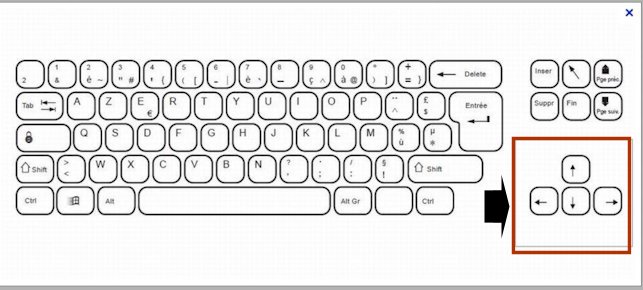
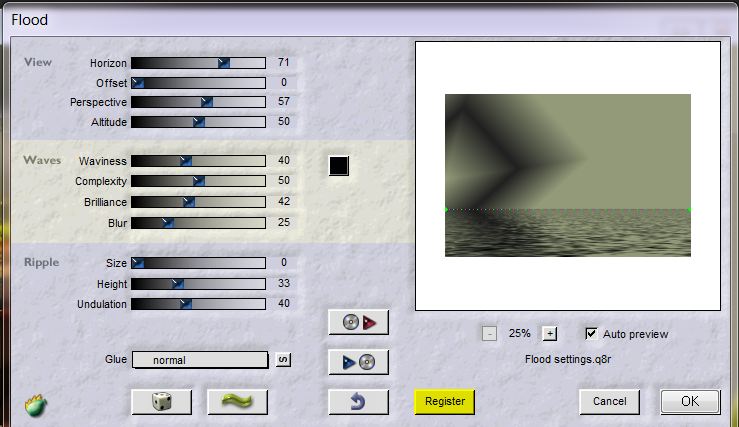
52. Layers - New raster layer 53. Properties Foreground: Change your linear gradient . Prepare a rectangular gradient with the same settings ( stepp 3) Activate Flood Fill Tool and fill the layer with the gradient -Layers-Arrnage- Bring to Bottom 54. In the layer-palette: activate the merged layer 55. Effects-Plugins - Eyecandy 5 perspective shadow - tab Settings/User settings choose my preset:''renee-shadows couleur automne" 56. On this merged layer:Image Resize with 85% (Resize all the layers not checked) 57. Pick Tool (K) mode scale - Use the arrow keys on the keyboard click to the left side 58. Activate the top of the Layer Palette 59. Open the tube'' Pmarie_Weather_Tellers_element6'' Edit/copy-Edit paste as a new layer on your working area and move 60. Effects - 3D Effects - Drop shadow with these settings: 10/10/50/5 black 61. Open the tube'' Pmarie_Weather_Tellers_element28'' Edit/copy-Edit paste as a new layer on your working area and move 62. Activate the bottom of the Layer Palette =Raster 1 63. Effects- Plugins - Flaming Pear -Flood with these settings as shown in the example
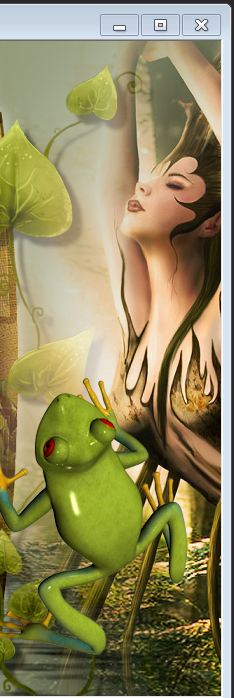
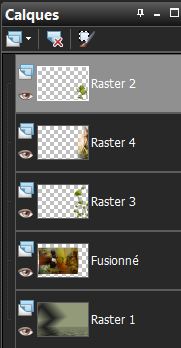
64. Activate the top of the Layer Palette 65. Open the tube " TReagen_2272'' Edit/copy-Edit paste as a new layer on your working area- With your move tool place it to the right side - 66. Layers- Arrange- Move Down - Layer Palette look like this now-You should have this result
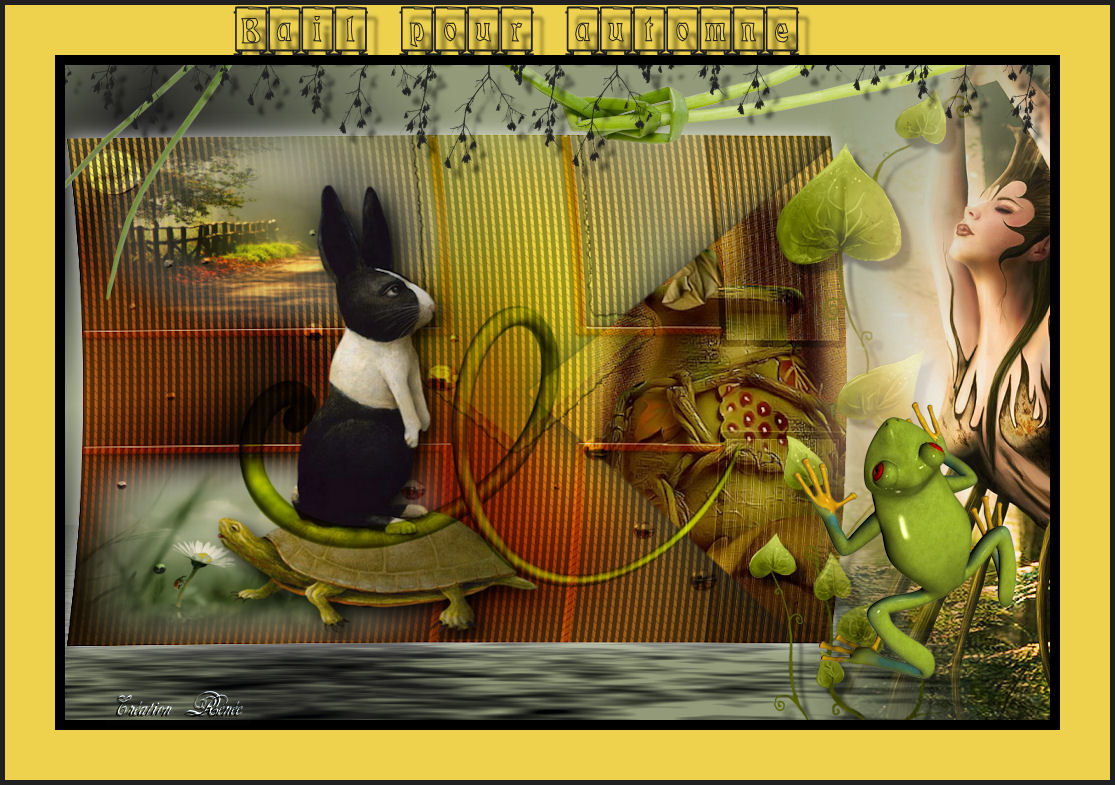
67. Open the tube '' Pmarie_Weather_Tellers_element11'' Edit/copy-Edit paste as a new layer on your working area and move 68. Open the tube ''branches'' Edit/copy-Edit paste as a new layer on your working area and move as shown in finished image 69. Layers- Merge- Merge Visible 70. Image - Add borders-Symmetric checked: 10 pixels black 71. Image - Add borders-Symmetric checked: 50 pixels #eed24e 72. Activate the tube "text "/Edit/copy-Edit paste as a new layer on your working area / Ore write your own text (Font is into the zipfile) 73. Image - Add borders-Symmetric checked: 5 pixels black Save as JPG I hope you enjoyed this lesson This lesson was written by Renée 2012 Any resemblance with an existing lesson is merely a coincidence * * Don't forget to thank the people who work for us and with us. I named the tubeurs - Testers and the translators. Thanks Renée. I am part of Tutorial Writers Inc. My tutorials are regularly recorded. ReneeGraphisme_All rights reserved
|

 Translations