|
New
Translations here
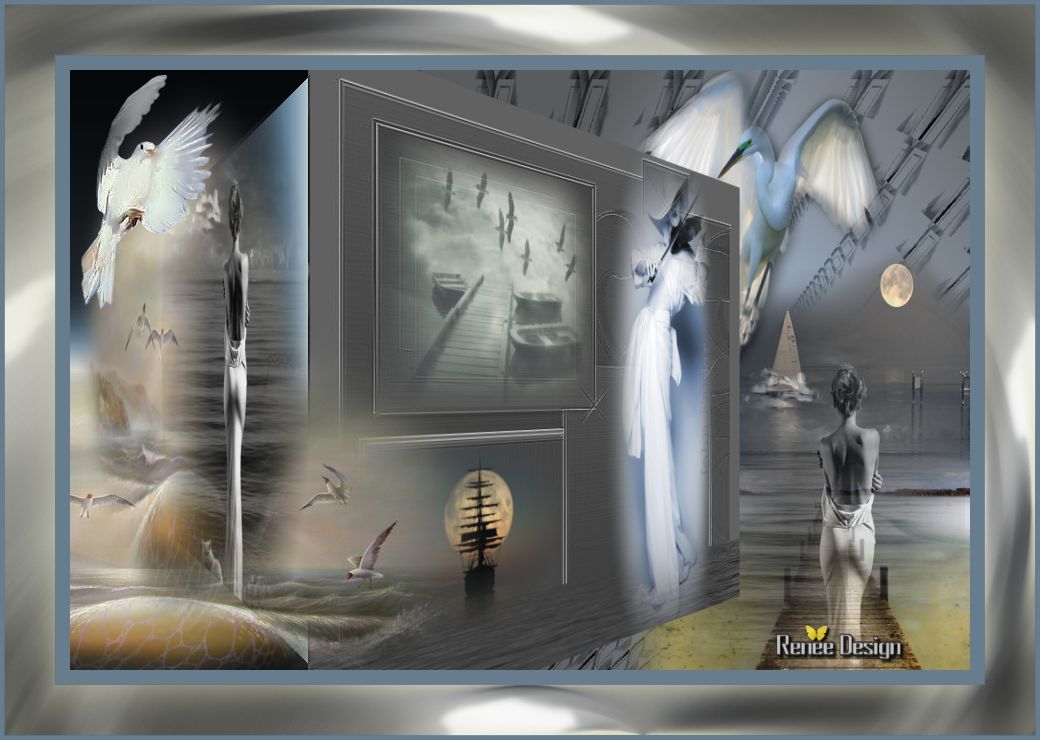
Au loin
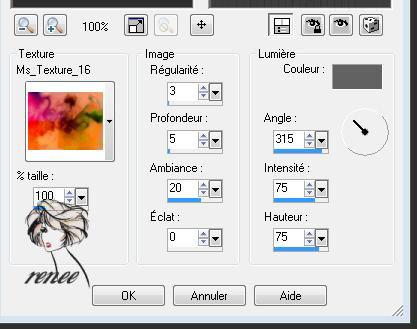
Let's start the lesson. 1. File - New - Open a new transparent image 950 x 650 pixels 2. Color-Palette:Set your foreground color to color #626262 -Set your background color to color #2e2e2e 3. Activate Flood Fill Tool and fill the layer with the backgroundcolor 4. Effects- Texture Effects-Textur-''Ms_texture_16'' with these settings / foreground color
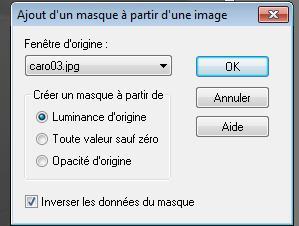
5. Effects-Image Effects-Seamless Tiling using the default settings 6. Layers- New Raster Layer /Activate Flood Fill Tool and fill the layer with the foregroundcolor 7. Layers- New Mask layer from Image and choose Mask: « caro03.jpg »
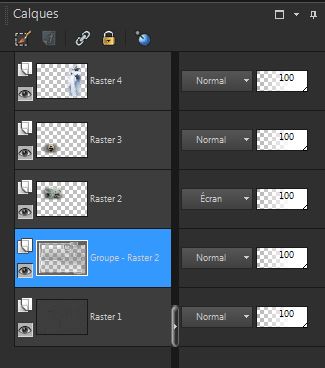
8. Layers- Merge- Merge Group 9. Effects- Edge Effects- Enhance More 10. Selections –load/save selection –load selection from disc and choose my selection: ''renee-reve'' -Layers- New Raster Layer 11. Open the tube « DI-tube1561 »/ Edit/ Copy-Edit - Paste into Selection Selections- Deselect All 12. Layer Palette - Double click on this Layer and set the Blend Mode to "Screen " 13. Layers- New Raster Layer /Selections –load/save selection –load selection from disc and choose my selection:''renee-reve1'' 14. Open the tube « PAY-jll2007-13 »/Activate Group Raster 1 of the tube /Edit/ Copy-Edit - Paste into Selection Selections- Deselect All 15. Open the tube ''womanhask-2011-49 ''- Edit/ Copy-Edit - Paste as new layer on your working image and move 16. Layers- Duplicate 17. Layers- Merge- Merge Down 18. Make in the Layer-Palette-''Group of Raster 2 'active '
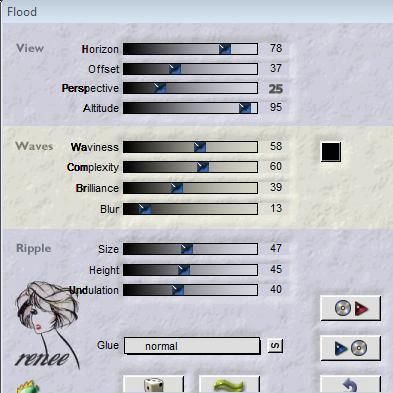
19. Effects- Plugins - Flaming pear /Flood use settings below /Color black
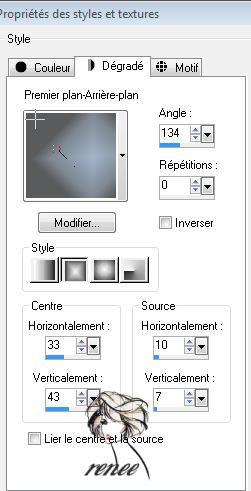
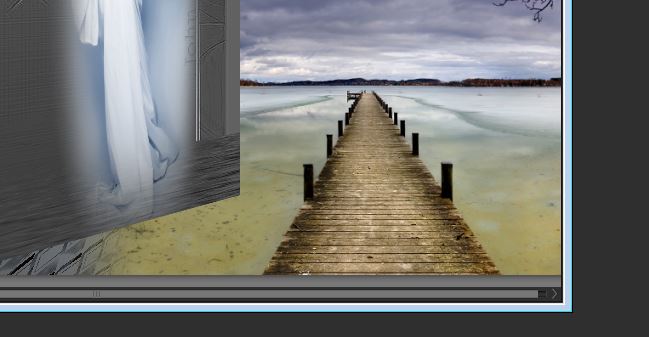
20. Layers- Merge- Merge Visible 21. Effects- Plugins - Andromeda /Perspective /Side Walls /Preset -'' It open close'' 22. Layers- New Raster Layer /Layers- Arrange- Move Down 23. Color-Palette:Set your foreground color to color #a3b4c8 and Set your background color to color #5a5b5c 24. Make a foreground/background gradient- Rectangular -with settings below:
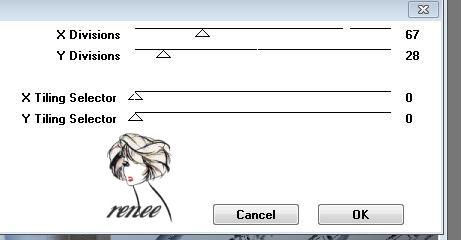
25. Activate Flood Fill Tool and fill the layer with the gradient 26. Layers- Duplicate - Selections- Select All - Open the tube " 3081 "/Edit/ Copy-Edit - Paste into Selection 27. Selections- Deselect All / Layer Palette - Double click on this Layer and set the Blend Mode to "Difference " -Set the layer opacity of this layer to 95% 28. Effects- Plugins-Unlimited 2.0 Filter Gallery Factory D/Diagonal Infini Tiles
29. Set the layer opacity of this layer to 48%- Blendmode "Difference" 30. Open the tube « aimelle-misted-tube-infi « Edit/ Copy-Edit - Paste as new layer on your working image and move as shown in the example below
31. Open the tube « bateaulune251107 » Edit/ Copy-Edit - Paste as new layer on your working image and move 32. Open the tube « Misted By Sorensen-designs -tubes 80-07 » Edit/ Copy-Edit - Paste as new layer on your working image and move 33. Effects –3D Effects- Drop Shadow with these settings : 3/5/65/18 black 34. Open the tube « inwaitinghsk2010 » - Edit/ Copy-Edit - Paste as new layer on your working image- 35. Layers- New Mask layer from Image and choose Mask: « ma3 »/Layers- Merge- Merge Group -Move to the right side as shown in the example below
36. Layers- Merge- Merge Visible 37. Edit-Copy !!!. 38.Open the tube "au_loin_selection sur_canal alpha " we will work on it
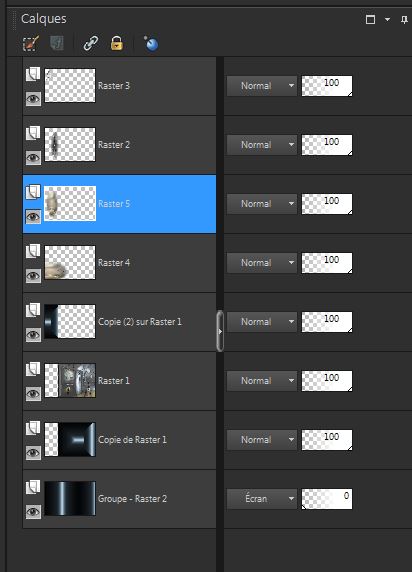
39. Selections - Load/Save Selections - Load Selections from Alpha Channel Selection ''alpha 2 '' 40. Activate -Copy of Raster 1 of the tube/ Layers- New Raster Layer 41. Edit - Paste into Selection (Image is still in your PSP memory)/ Selections- Deselect All 42. Activate -Copy 2 ( of Raster 1)/Layers- New Raster Layer 43. Selections - Load/Save Selections - Load Selections from Alpha Channel Selection alpha 3 - Open the tube ''inwaitinghsk2010''/Edit/ Copy-Edit - Paste into Selection / Selections- Deselect All Activate the top of the layer palette 44. Open the tube « colombe « - Edit/ Copy-Edit - Paste as new layer on your working image and move 45. Make ''Copy(2) of Raster 1 active 46. Layers- New Raster Layer /Selections - Load/Save Selections - Load Selections from Alpha Channel Selection alpha 1 47. Open the tube « beach....Steffy « /Edit/ Copy-Edit - Paste into Selection Selections- Deselect All 48. Open the tube « beach....Steffy « /Edit/ Copy-Edit - Paste as new layer on your working image Layer Palette look like this now:
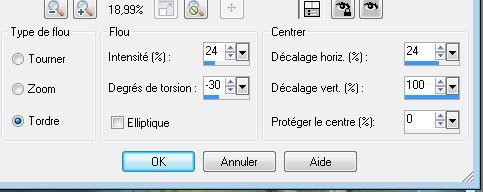
49. Layers- Merge- Merge Visible 50. Image - Add borders-Symmetric checked: 15 pixels color #677d8e 51. Image - Add borders-Symmetric checked: 50 pixels color #dbdbbd 52. Image - Add borders-Symmetric checked: 5 pixels color #677d8e 53. With the Magic Wand -select the border of 50 pixels 54. Selections- Promote Selection to Layer 55. Effects- Plugins - Filter Gallery Factory D /vertigo a 21 56. Adjust- Blur- Radial Blur with these settings
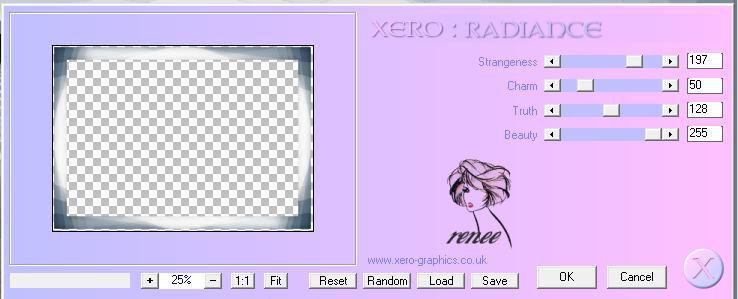
56 Effects- Plugins -Xero /radiance (If your filter Xero does not give the same result -The effect is included with the material)
*
I am part of the Tutorial Writers Inc. My tutorials are registered regularly ReneeGraphisme_All rights reserved
|
 Translations