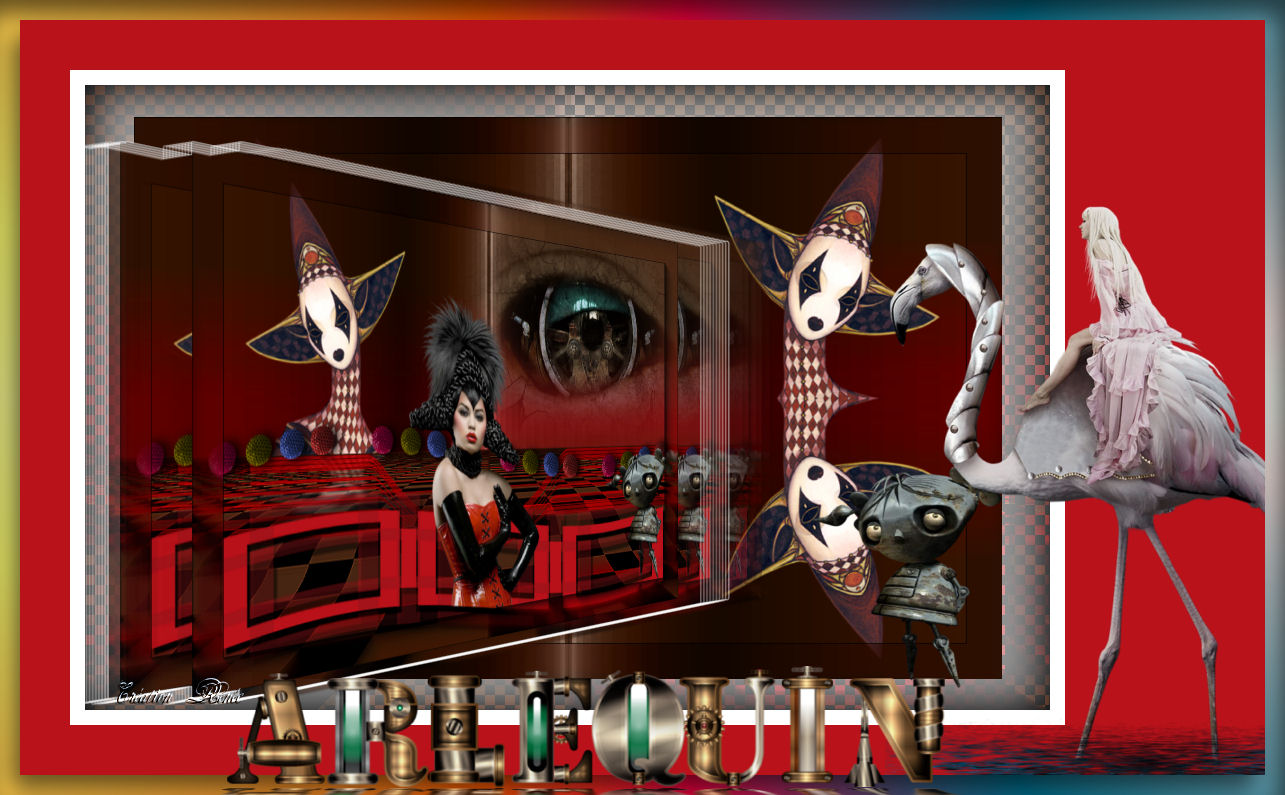
|
New
Translations here
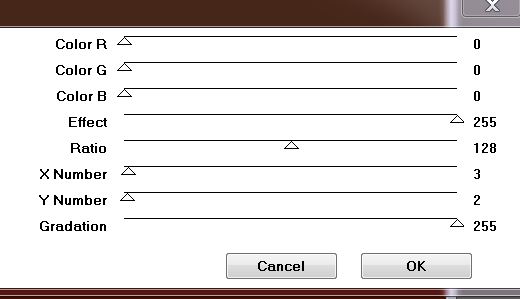
- Let's begin 1. File: Open Image ''renee-arlequin-fond1'' /Promote to background layer Raster 1 2. Layers-Duplicate 3. Effects-Plugins Mura's seamless - Checks with graduation
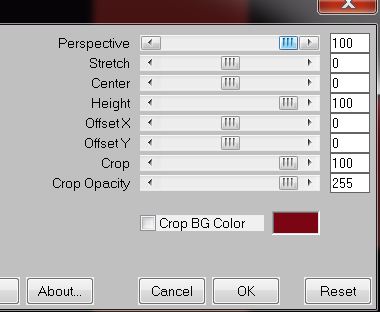
4. Effects-Plugins Mura's Meister - Perspective Tilling color #7E0413
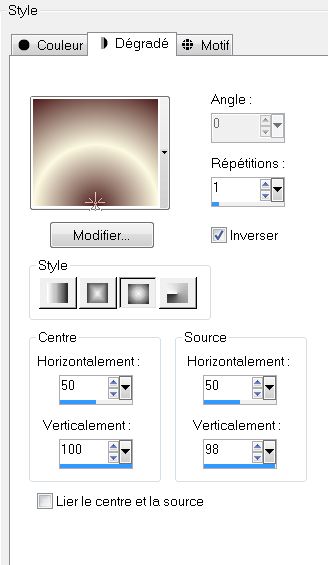
5. Effects- Distortion Effects -Punch/Strength 100 6. Activate your Pick Tool ( K) -mode scale -push from the top down to 350 pixels 7. Effects- Edge Effects- Enhance 8. Activate copie raster 1 : With your magic wand select the empty part 9. Layers-New Raster Layer 10. Material Properties: Foreground color to color: #fcfae1 Backgroundcolor to color : #4c1c1c—Prepare a sunburst gradient configured like this.
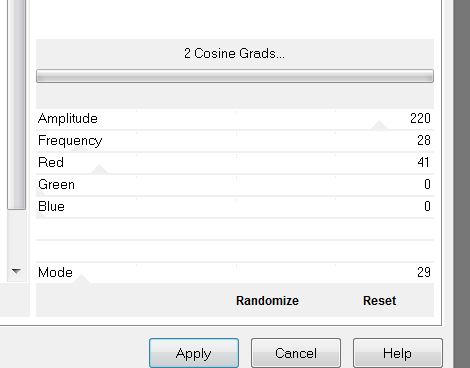
11. Flood Fill Tool: Fill the layer with the gradient - Keep selections 12. Effects -Plugins VM Distorsion /Flipper 32/39/172 - Keep selections 13. Effects -Plugins Alf's Power Sines – 2 Cosine Grads
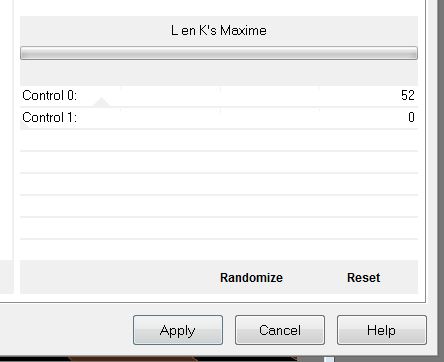
14. Effects-Plugins L and K's - Maxime
- Layer Palette: Set the Blend mode to "Luminance (Legacy)" 15. Selections - Deselect all 16. Open the tube '' SP-Eye-sassyDezines-mist'' /Edit/copy-Edit/paste as a new layer and place 17. Open the tube « « HarlequinAB-Grace's_TLC'' Image Resize 70% Edit/copy-Edit/paste as a new layer and place 18. Effects-Plugins Eyecandy 6 – perspective shadow-preset '' reflect -square section and choose my preset ''_arlequin-renee'' 19. Open the tube ''arlequin-boules '' Edit/copy-Edit/paste as a new layer and place like this
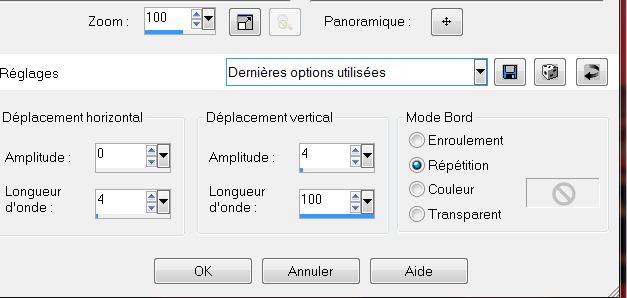
20. Effects - Distortion Effects -Wave
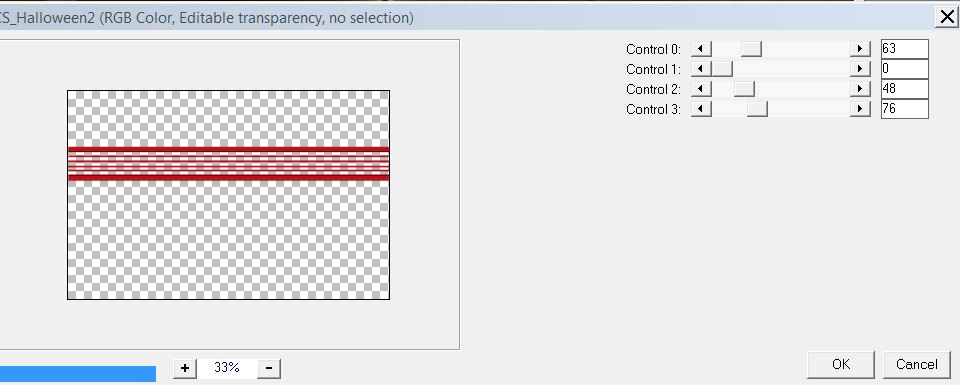
- Aktivate the top of the Layers palette 21. Layers-New Raster Layer 22. Selections - load/save selection - load selection from disk and select '' renee-arlequin-2''Flood Fill Tool: fill the selection with:#b9121a 23. Selections - Deselect all 24. Layers-Duplicate 25. Effects-Plugins Toadies - what are you /20/20 (not take the Toadies in Unlimited) 26. Layers-Merge-Merge Down 27. Effects - 3D Effects - Drop Shadow : 8/5/100/3 black 28. Open the tube ''Grace's_TLC_heart Feelings'' Image Resize 70 % 29. Edit/copy-Edit/paste as a new layer and place 30. Layers-Merge-Merge Down 31. Effects- Distortion Effects- Waves /with the same settings 32. Layers-New Raster Layer 33. Selections - load/save selection - load selection from disk and select ''renee-arlequin-1'' -Flood Fill Tool: fill the selection with: #b9121a 34.Selections - Deselect all 35. Effects -Plugins Unlimited - Carolaine -Cs -Halloween2
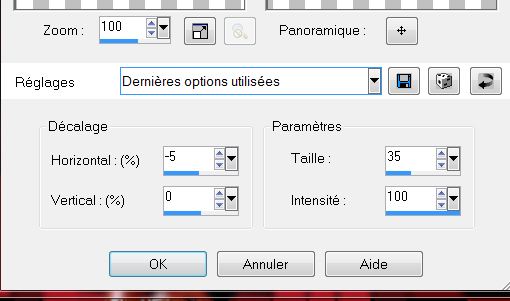
36. Effects-Distortion Effects- Warp
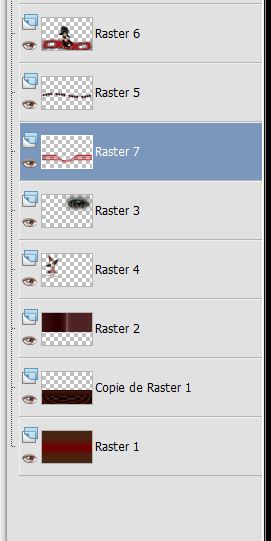
37. Image- Flip - Layer Palette: Set the Blend mode to "Hard Light " 38. -you put it under the layer of raster 5 - Layer Palette look like this now
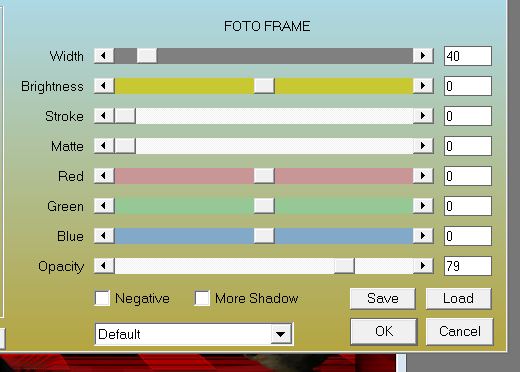
39. Open the tube ''arlequin -fillette metal''. Edit/copy- Edit paste as a new layer and place 40. Effects -Plugins EyeCandy 5 Impact - Perspective shadow- Preset ''cast in front '' 41. Layers- Merge-Merge Visible 42. Effects-Plugins AAA Frame - Foto Frame
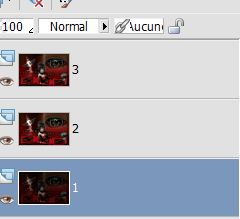
43. Layers - Duplicate 2 x you have 3 layers /rename like this
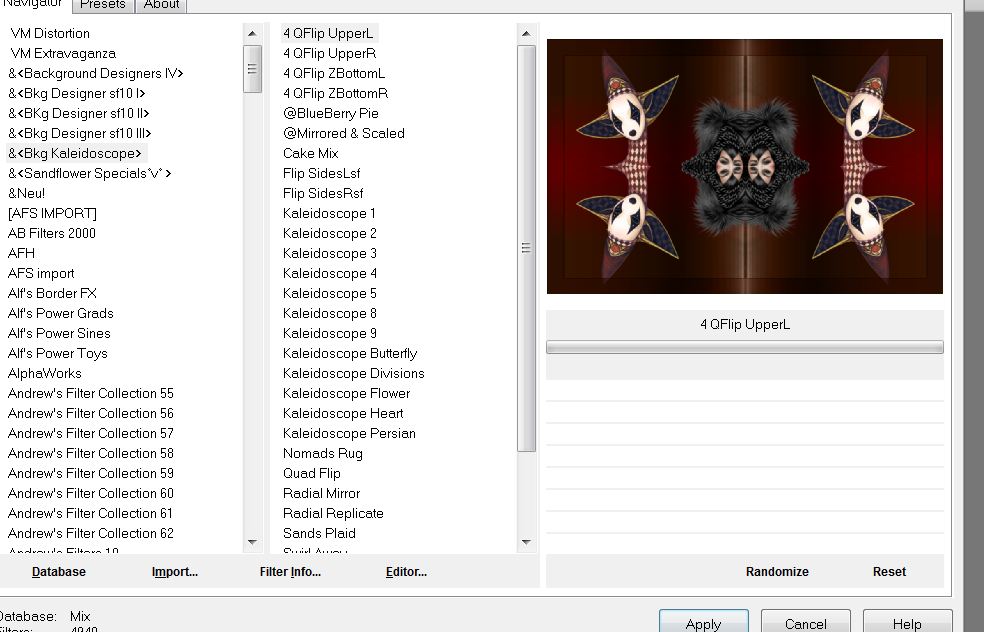
- Activate raster 1 >> 44. Effects -Plugins L and K 's /Pia 10 - Activate raster 2>> 45. Effects-Plugins Unlimited -&>Bkj Designer Kaleidoscope- 4QFlip Upperl
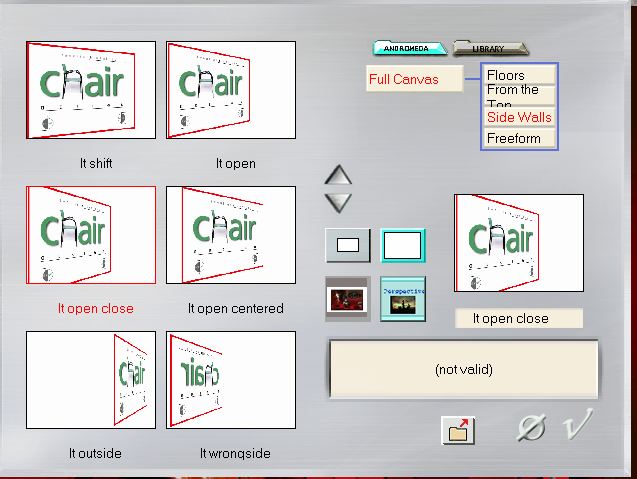
46. Image Resize 90% (All layers not checked) 47. Effects -Plugins EyeCandy5-Perspective shadow and choose my - preset ''renee-arlequin-perspective shadow'' and repeat this filter. **You do not see the effect at this time 48.Activate raster 3 >>Image Resize 80% (All layers not checked) 49. Effects-Plugins - Andromeda – perspective Side walls -It open close
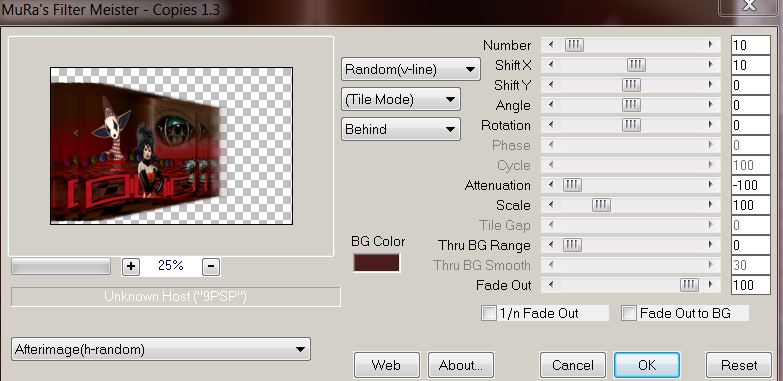
50.- Effects-Plugins Mura's Meister / Copies
-stay on raster 3 51. Effects -Plugins Eye Candy 5 Impact -Black light and choose my -Preset ''renee-arlequin-black light'' 52. Image - Add Borders - Symmetric checked: 15 pixels : #ffffff 53. Image - Add Borders - Asymmetric color: #b9121a
54. Open the tube ''arlequin fillette metal '' .Edit/copy Edit paste as a new layer and place 55. Open the tube ''Treagen2231_28_09_012''Image Resize 80% .Edit/copy Edit paste as a new layer and place 56. Image - Add Borders - Symmetric checked: 20 pixels white 57. With the magic wand select the border with the 20 pixels 58. Effects-Plugins Unlimited Andrew's Filter Collection 56 – A bit left Over Gradient
59. Effects- 3D Effects-Cutout
60. Selections - Deselect all 61. Open the tube " titre" .Edit/copy Edit paste as a new layer and place .Or write your own text : Effects-Plugins Eyecandy 5 Impact perspective shadow - Preset ''in front''
*
I hope you enjoyed this lesson Renée This lesson was written by Renée Created the 9/10/2012 *
Any resemblance with an existing lesson is merely a coincidence * Don't forget to thank the people who work for us and with us. I named the tubeurs - Testers and the translators. Thanks Renée * I am part of Tutorial Writers Inc. My tutorials are regularly recorded
|
 Translations
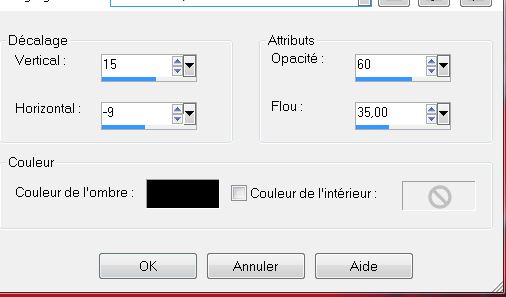