|
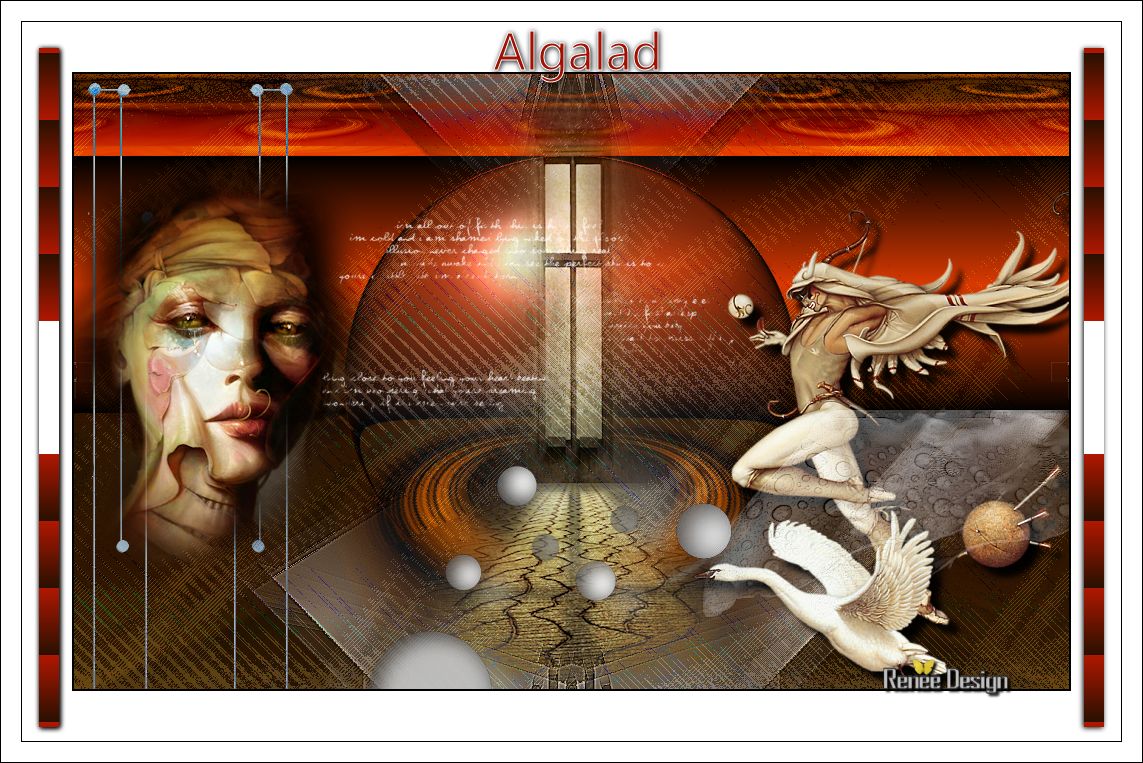
Let's start the lesson.
Material Properties: Foreground color to color white-Background color to color black
- Material of the foreground - select my file
''@nn_101211_GR_HNY_tdstudio''/ with these settings:
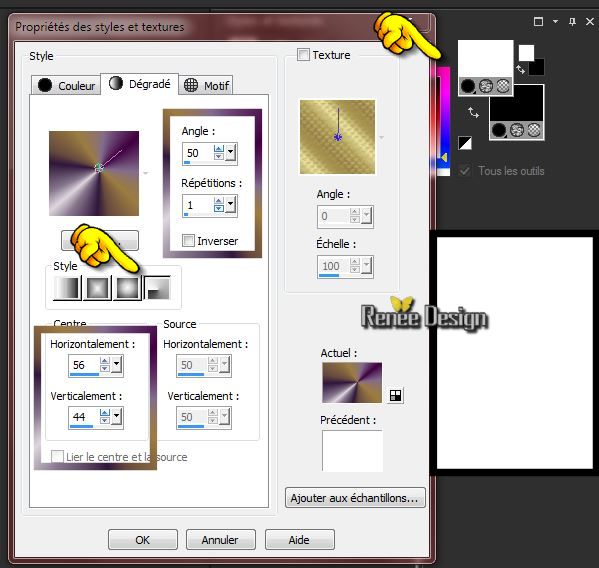 
1. File - New - New Image 995
x 615 pixels transparent/ Activate flood fill tool and fill the layer with the gradient
2. Adjust-Blur- Gaussian Blur :Radius 25
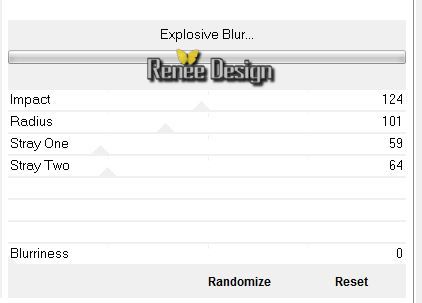
3.Effects-Plugins Unlimited 2.0 -
Deformation- Explosive Blur
4. Effects-Edge Effects- Enhance
5. Effects-Distortion Effects- Twirl 385
6. Selections - load/save selection - load selection from disk and select my file ''algalad_1"
7. Adjust-Blur- Gaussian Blur :Radius 9
8. Selection- Promote selection to layer
Selections- Deselect All
9. Activate the bottom of the layer-Palette (Raster1)
10. Effects- Plugins Unlimited 2.0
- Colorize- Sabers hardilight Pixelize

Activate the top of the layer-Palette (Promoted selection)
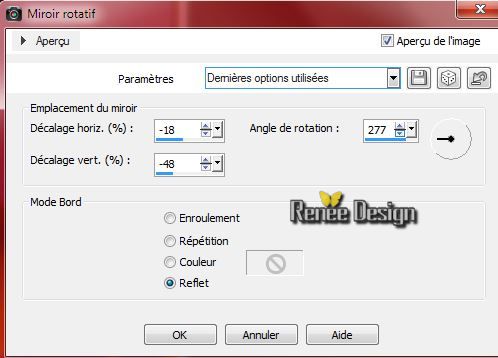
11. Effects-Reflection Effects-Rotating Mirror use settings below
12. Layers- Duplicate-Image Mirror
13. Layers- Merge -Merge Down- Layer Palette -double click on this layer and set the Blendmode to "Luminance"
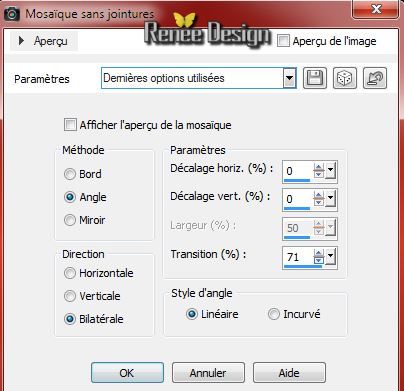
14. Effects-Image Effects-Seamless Tiling / default
-
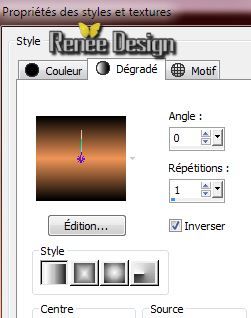
Change the foreground color into color: #f09558
15. Prepare a Linear Gradient as configured
16. Layers- New raster layer/ Activate flood fill tool and fill the layer with the gradient
17.Effects-Image Effects-Seamless Tiling use the settings below
18. Adjust-Blur- Gaussian Blur :Radius 22
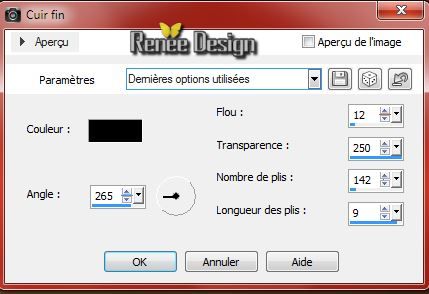
19. Effects-Texture Effects-Fine Leather as below
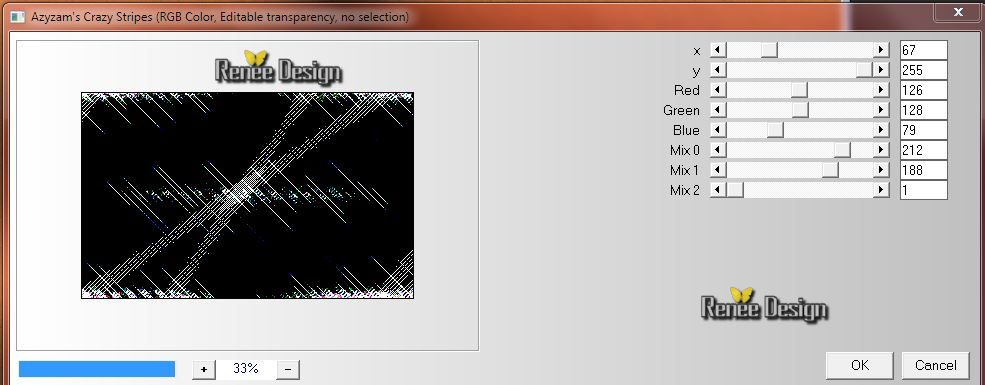
20. Effects- Plugins - Azyzam Design Filters / Azyzam's Crazy
Stripes
21. Effects-Plugins-Transparency -Eliminate Black
22. Layer Palette -double click on this layer and set the Blendmode to "Soft Light " and set the layer opacity of this layer to 85%
Activate the bottom of the layer-Palette (Raster 1)
23. Effects- Plugins - Graphic plus -Horizontal Miror 128/0
24. Effects-Plugins Mura's Meister / Perspective Tilling
/ default
25. Activate the tube ''
nicole-mistfenetre.pspimage''/Edit/copy-Edit paste as a new layer.( do not move )
-Layer-Palette: activate layer (
Promoted selection)
26. Selections - load/save selection - load selection from disk and select my file'' algalad_2"/ Delete
Selections- Deselect All
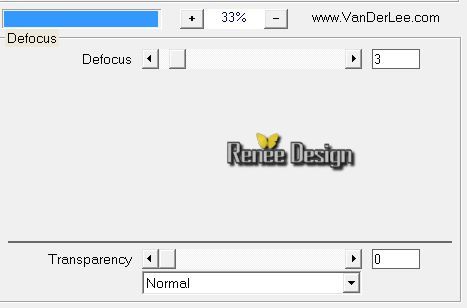
27. Effects-Plugins Vanderlee Unplugged X - Defocus
- Layer Palette -double click on this layer and set the Blendmode to "Luminance Legacy "
28. Effects-Edge Effects-Enhance More
Activate the bottom of the layer-Palette (Raster 1)
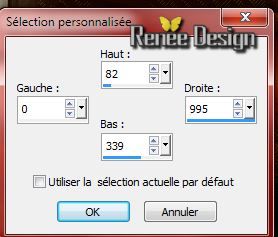
29.Selection Tool ( S ) Custom selection use settings below
30. Layers- New raster layer
-Activate flood fill tool and fill the layer with the gradient /Layer Palette -double click on this layer and set the Blendmode to "Hard Light "
Keep selected
31. Change the foreground color into color:#d93901
- Prepare a Linear Gradient as configured
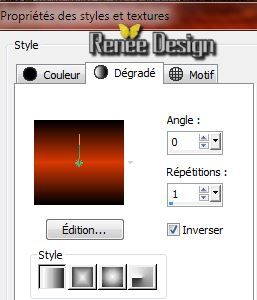
32. Layers- New raster layer/Activate flood fill tool and fill the layer with the gradient
Selections- Deselect All
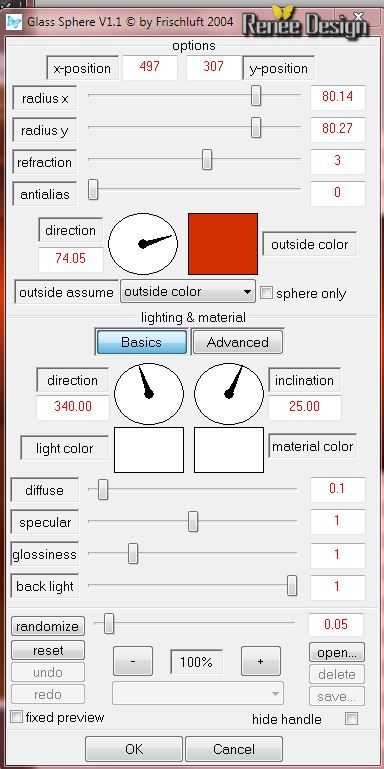
33. Effects- Plugins - Frsichluft - Glass Sphere /color
#d93901
(Attention save your work because risk of closure of the psp)
- Activate the layer underneath(Raster 4)
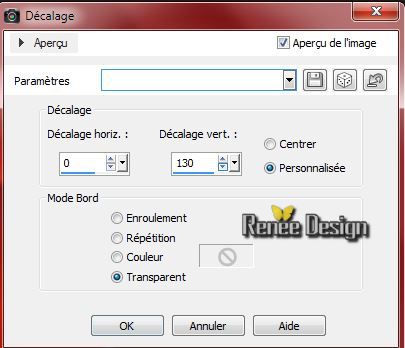
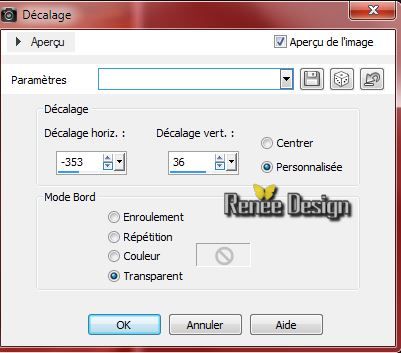
34.
Effects-Image Effects-Offset use settings below
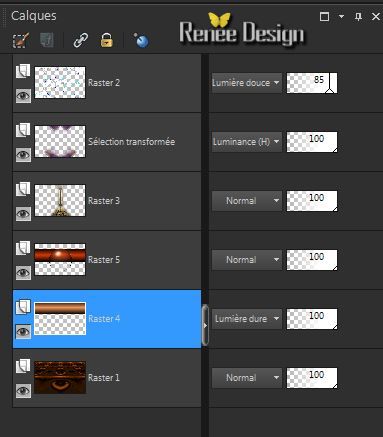
Your Layer Palette look like this now:
35. Activate the tube''
Unique Beauty Algalad-misted tube of A PSP
Devil.pspimage''/Image Mirror -
- Image Resize 65 % / Edit-Copy-Edit Paste as a new layer
36.
Effects-Image Effects-Offset use settings below
37.Layers- New raster layer
38. Selections - load/save selection - load selection from disk and select my file''algalad_3'' /Activate flood fill tool and fill the selection with color white
Selections- Deselect All
39. Layers- Arrange-Move Down
40.
Layer Palette - Double click on this layer and set the Blendmode to "Difference " and set the layer opacity of this layer to : 79%
- Activate the top of the layer-Palette
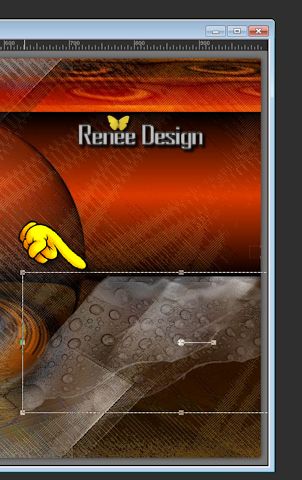
41. Activate the tube
''algalad_feuille '' /Edit-Copy-Edit Paste as a new layer
- Move tool: Place it like below
42. Activate the tube ''
0_9165e_e3315082_L.pspimage'' - Edit-Copy-Edit Paste as a new layer
-With your move tool place it in the right place- Layers- Arrange-Move Down
43. Effects- Plugins - Eye Candy 5 Impact- Perpective shadow- Preset
"Drop shadow hight"
44.
Activate the tube''algalad_cercles'' / Edit-Copy-Edit Paste as a new layer. With your move tool place it in the right place
45.
Layers-Merge-Merge Visible
46.Layers- New raster layer
47.
Activate Brush:'' pinceau texte '' File- Export Custom Brush (Give it a name)
48.
Activate Brush Tool and select my file: pinceau texte with these settings /Size 484

-
Stamp with the foreground color white- Stamp the brush in the right place
49.
Image - add borders-Symmetric checked 2 pixels color black
50. Image - add borders-Symmetric checked 50 pixels color white
51.Selection Tool ( S ) Custom selection use settings below

52.
Effects- 3D Effects-Drop Shadow: 1/1/100/8 color black
Keep selected
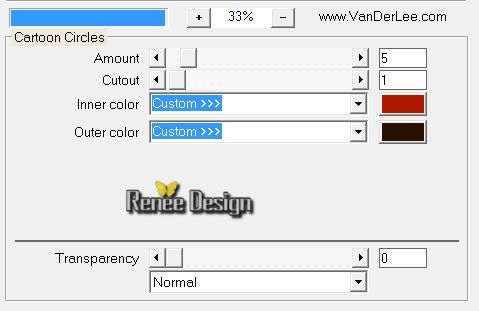
53.
Effects-Plugins Vanderlee /Unpplugged X
Cartoon Circles /colors #b01800 and black
-
Selections-Promote selection to layer
-
Selections-Deselect All
54.
Keep the settings
55.
Layers- Duplicate/Image Mirror
56.
Image - add borders-Symmetric checked 1 pixel color black
57.
Image - add borders-Symmetric checked 20 color white
58.
Image - add borders-Symmetric checked 1 pixel color black
59.
Activate the tube Text : Edit - Copy - Edit - Paste as new layer and move
Layers - Merge - Merge all layers (flatten)
I hope you enjoyed this lesson
Renée
This lesson was written by Renée the 5/07/2014
Created the
07/2014
*
Any resemblance with an existing lesson is merely a coincidence
*
* Don't forget to thank the people who work for us and with us. I named the tubeurs - Testers and the translators.
Thanks Renée. |
 Translations


 All right reserved