|

Translated by
Sally
Translator Here
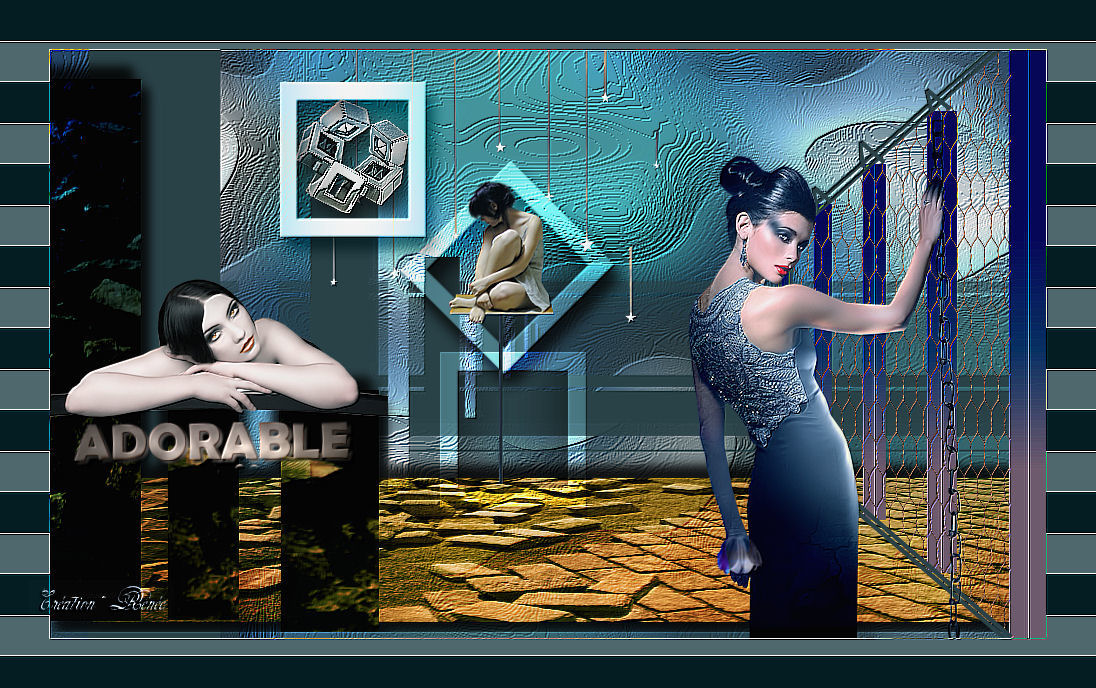
Adorable
Filters
FM Tile Tools/blend emboss
VM Extravanga /transmission
Flaming pear /boss emboss
*-*-*
Filters are here
http://www.reneegraphisme.fr/filtres/Mes filtres.html
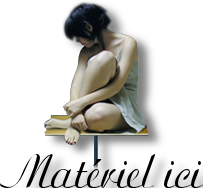
Materials here
TUBES
are Guismo
These tubes were
received from tubeurs sharing groups
Or found by me
searching on the net
I am grateful to have
been given permission these beautiful tubes so
please use any
copyright information as needed
If one of these tubes
is yours,
Contact me
so I can make a link
to your site
or remove it
Thank you Renee
*-*-*
Grab a coffee and let's begin 
1. Open a transparent image - 996 x 588 pixels
2. Create a linear gradient 0/5 / invert unticked
3. Set your foreground color to #2fa1a4 and background to #284349
4. Fill the layer with the gradient
5. Selections / select all
6. Paste the tube "femme 19" in the selection / select none
7. Effects - Image effects - Seamless tiling / default
* Repeat seamless tiling
8. Adjust blur / gaussian blur at 35
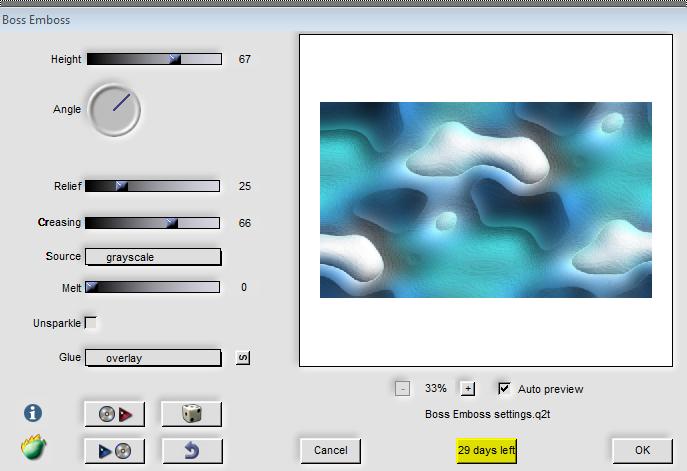
9. Effects - Plugins - Flaming pear / Boss emboss
10. Image - Flip
11. Effects - Plugins - FM Tile tools / blend emboss default / twice
12. Layers - add a new layer / and fill it with the background color
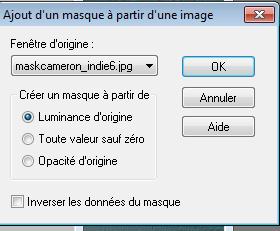
13. Layers - new mask layer from an image "maskcameron-indie6"
14. Layers - duplicate layer / merge group
15. Open the tube "trottoir" - paste as new layer
16. OPen the tube "barriere" - paste as a new layer / move to the
left edge as shown
17. Open the tube "calguissagesse24119" - Image - resize 3 times at
75% and paste as new layer.
Place as shown
18. Open the tube ''guismo calguisluna2019''. On the tube raster
layers, merge raster 2 and 3 then paste as a new layer. Place as
shown
Guismo gave me permission to use this tube for this creation. No
restribution without the permission. Thank you
19. Open the tube "calguisblue15210" - Image mirror then paste as a
new layer / resize 75% all layers unchecked. Move as shown
20. Open the tube "cube bloc" paste as new layer/ place well
21. Open the tube "cadre'' - copy and paste as a new layer. Place it
around the cube "bloc''/ Layer Mode set to luminance legacy
22. Effects - 3D Effects - Drop shadow
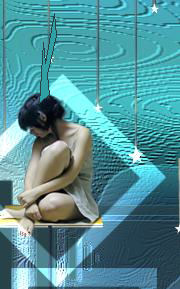
23. Open a new tube "cadre" / image - free rotate 45 ° right
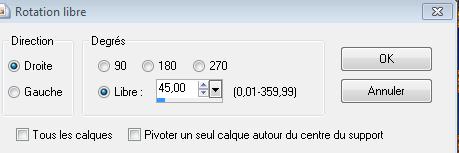
24. Place it around the head of the girl and use overlay mode / make
sure it looks like this
25. Repeat the drop shadow (still in memory)
26. Open the frame tube again/ paste as a new layer / Arrange down
and put in place (see screenshot above) and set the layer mode to
Overlay
27. Paste the text tube and place it well
28. Layers - merge all layers
29. Image - add borders 50 pixels/ white
30. Selections / select all / select - modify contract by 50
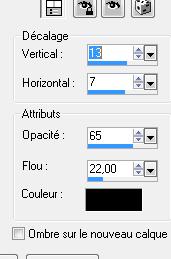
31. Effects - 3D effect / Drop shadow 13/7/65/22 black / Check box
for shadow on new layer
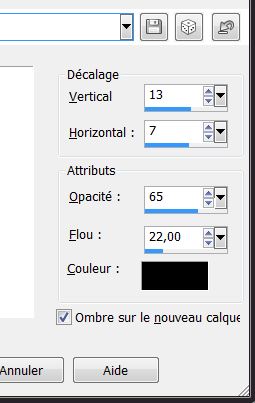
32. Redo - Drop Shadow with negative H-13/V-7/Black. New layer still
checked
33. Invert selection
34. Fill the layer with the Background color #284349
35. Effects - Plugins - VM Extravaganza / Transmission - 30/0/40
36. Effects - Edge effects/ Enhance more
37. Selections / select none
38. Layers - Arrange - Send to the bottom
39. Effect - Plugins - FMTile tools / blend emboss default
40. Layers - merge all
Write or paste your
signature
All finished
Thanks
*
I am part of Tutorial
Writers Inc.
My tutorials are
regularly recorded


|
Your creations here
 |
|