|
Let's start the lesson.
A . Part I
-
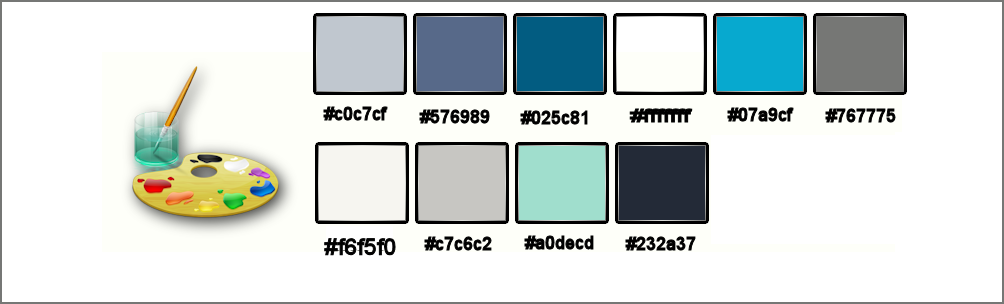
Color-palette:Set your foreground color to color #c0c7cf
- Set your background color to color #576989
1.
File - New - Open a new transparent image 715 x 454 pixels
2.
Effects- Plugins – Medhi - Wavy Lab 1.1
Colors= FG-Color – BG-Color -#025c81 et #87cb2d
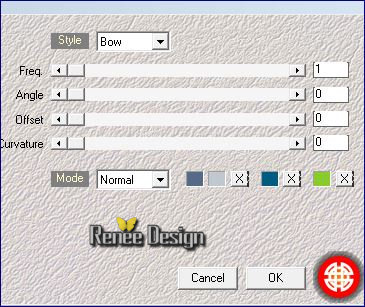
3.
Effects- Plugins – XE Xtras Elemental / Sky >Cloud
Wave
Click >>Customize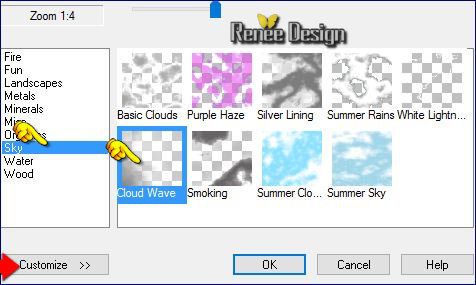
-
Configured as below
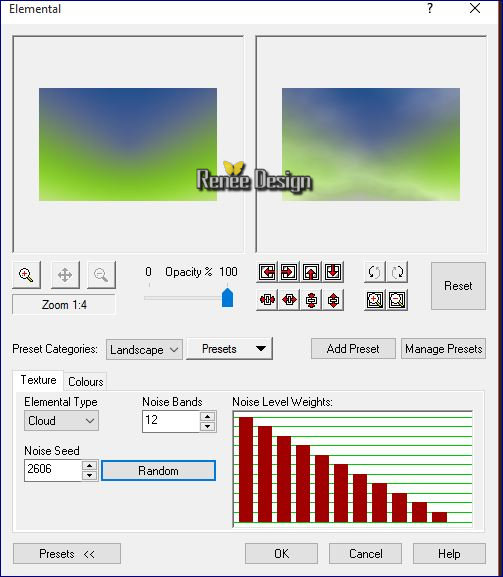
-
Open the tube ‘’vue_sur_mer_Decos’’
Do not close we need it later for the rest of the work (some are hidden layers to lighten the weight of the tube simply open)
4.
Activate the layer ‘’rocher»of the tube
-
Edit/ Copy-Edit - Paste as new layer on your working area
(do not move it is in the right place)
5.
Double click on this Layer and set the Blend Mode to "Hard Light"
-
Activate bottom layer in the Layer palette= Raster 1
6.
Layers- New Raster Layer
7.
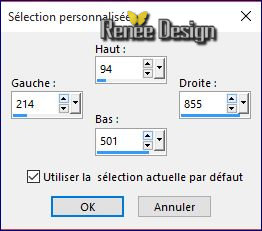
Selection Tool ( S ) Custom selection use settings below
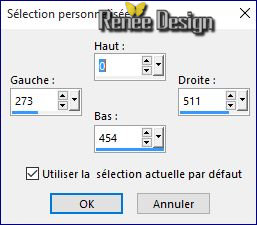
8.
Activate the tube « « DBK BG
MIST-061 »
-
Edit/ Copy-Edit - Paste into selection
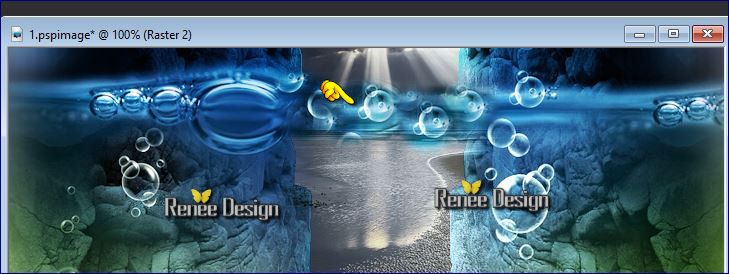
Selections- Deselect All
-Move up to obtain this result ( see screenshot below )
-Move to the top of the layers palette on Raster 2 (rock)
9.
Activate your Clone Tool (S) - Configured like this

- Right-click capture the party reproduce / left click to place it on the job
Take a new layer for cloning , you can move and change
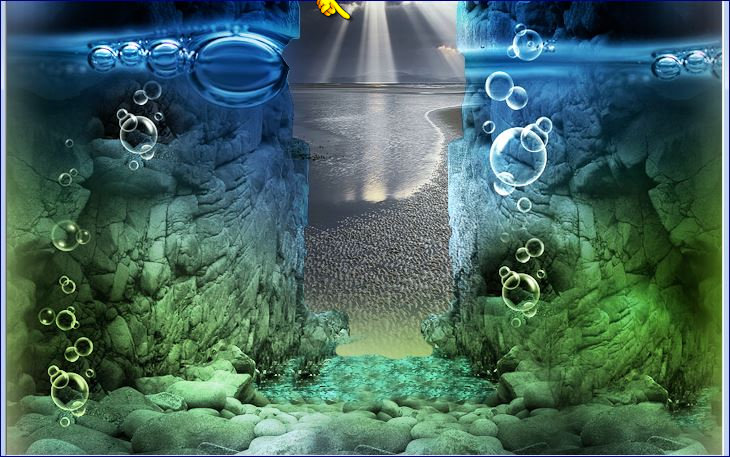
- To obtain this result was almost
-
Back on the tube ‘’_Decos’’
10.
Activate the layers - ‘’Poisson_ 1 and
Poisson_2’’of the tube
-
Edit/ Copy-Edit - Paste as new layer on your working image
-Activate Move Tool (M) move it the right place (see finished image)
11.
Activate the layer ‘’sirene ‘’of the tube
-
Edit/ Copy-Edit - Paste as new layer on your working image and move
12.
Activate the layer ‘’voile’’of the tube
-
Edit/ Copy-Edit - Paste as new layer on your working image
(do not move it is in the right place)
13.
-Set the layer opacity of this layer to 40%
14.
Layers- New Raster Layer
15.
Selections –load/save selection –load selection from disc and select my selection: ‘’vue sur
mer_1’’
-
Color Palette: Change the foregroundcolor to color #ffffff
16.
Activate Flood Fill Tool and fill the selection with the foreground color #ffffff ( 3
clicks)
Selections- Deselect All
17.
Activate the layer ’’poisson_rouge ‘’of the tube
- Edit/ Copy-Edit - Paste as new layer on your working image
(Activate Move Tool (M) move it to the bottom left )
-
Color Palette: Change the foregroundcolor to
color #07a9cf
18.
Layers- New Raster Layer
19.
Selections –load/save selection –load selection from disc and select my selection: ‘’vue sur
mer_2’’
20.
Activate Flood Fill Tool and fill the selection with the foreground color #07a9cf (zoom in if necessary) and duplicate if too dull
Selections- Deselect All
21.
Image - Add borders-Symmetric checked:2 pixels #ffffff
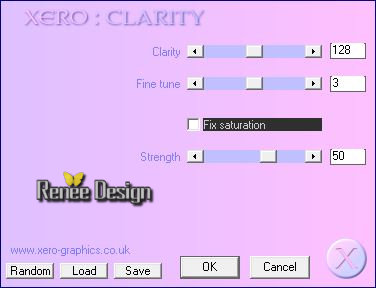
22.
Effects- Plugins – Xero
Clarity use settings below
Name this work = Part A- You may minimize your working area for a moment, but do not close, we will need it again soon
- We start the second part=
B
-Color-palette:Change your foreground color to color #f6f5f0 - Set your background color to color#767775
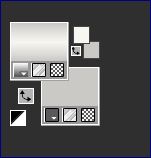
-
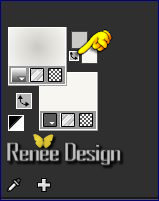
Set your foreground to gradient 'Foreground-background' -Linear -configured like this.
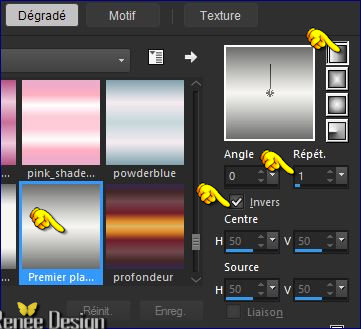
23.
File - New - Open a new transparent image 1000 x 666 pixels
24. Selections –load/save selection –load selection from disc and choose my selection: ‘’
vue sur mer_3 »
25.
Activate Flood Fill Tool and fill the selection with the gradient
Keep Selected !
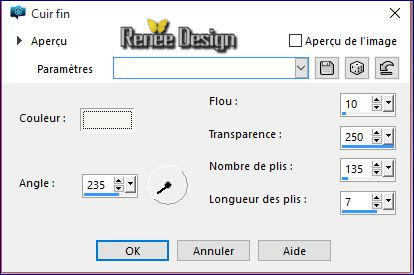
26. Effects- Texture Effects- Fine Leather use settings below
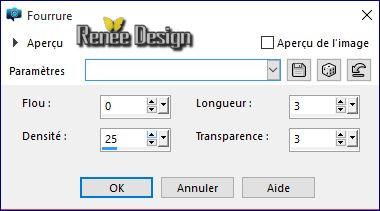
27.Effects
– Texture Effects – Fur use settings below
Selections- Deselect All
28.
Layers- New Raster Layer
29.
Selections –load/save selection –load selection from disc and choose my selection: ‘’vue sur
mer_4’’
30.
Activate Flood Fill Tool and fill the selection with the gradient
Selections- Deselect All
31. Effects- Plugins – L & K’s –
Pia a 32
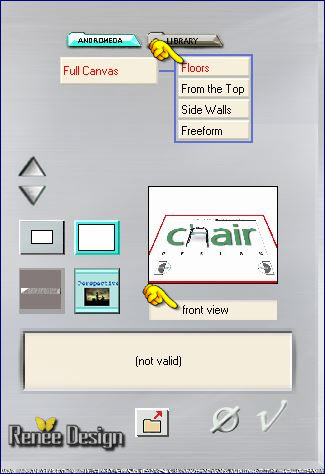
32.
Effects- Plugins – Andromeda - Perspective
/Floors/front view
-
Repeat: 2 x this effect "Andromeda"
33.
Activate the Pick Tool (K) Mode Scale –Pull against the bottom edge
34.
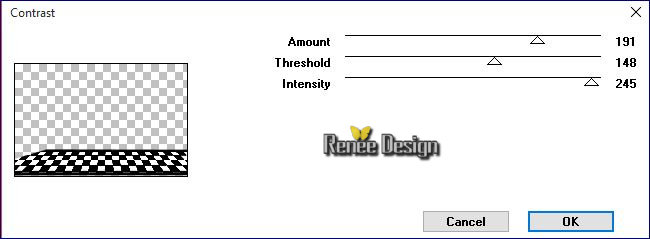
Effects- Plugins Graphic Plus – Contrast use settings below
35.
Layers- Duplicate -Image - Mirror - Mirror Vertical ( Image - Flip in previous PSP Versions) CTRL I
36.
Effects-Distortion Effects- Ripple use settings below
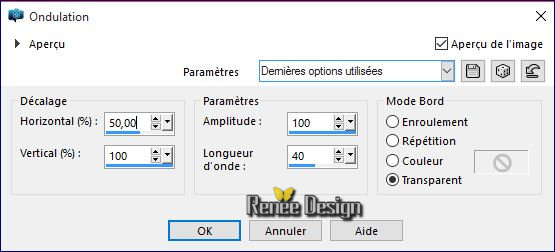
-
Double click on this Layer and set the Blend Mode to "Screen "
37.
Activate the Pick Tool (K) Mode Scale -remonter like this

-
Activate bottom layer in the Layer palette=(Raster 1)
38.
Selection Tool ( S ) Custom selection use settings below
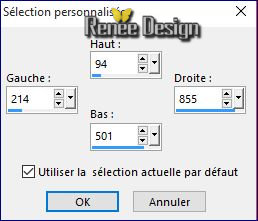
Hit Delete on your Keyboard
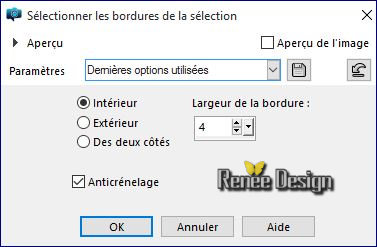
38.
Selections-Modify-Select Selection Borders with these settings-In side
39.
Layers- New Raster Layer
40.
Activate Flood Fill Tool and fill the selection with the gradient
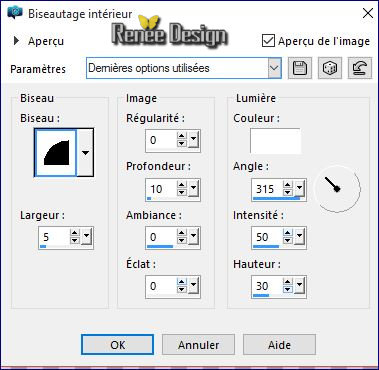
41.
Effects – 3D Effects – Inner Bevel use settings below
42. Effects- 3 D Effects- Drop Shadow with these settings:15/12/35/20 color black
Selections- Deselect All
-
Activate top layer in the Layer palette
-
Back on the tube "decos"
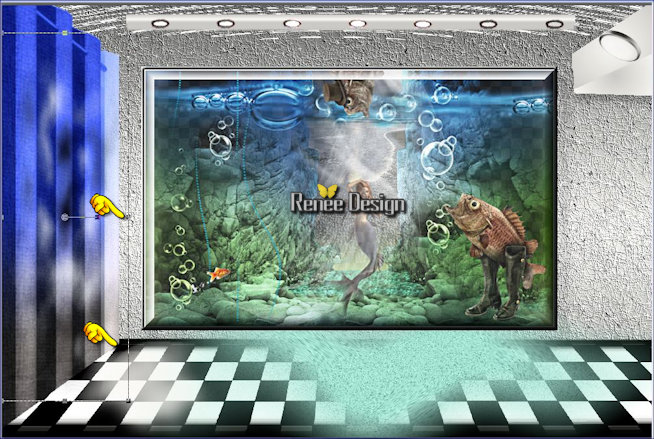
43.
Activate the layer ‘’tentures »of the tube
-
Edit/ Copy-Edit - Paste as new layer on your working image
-
Activate Move Tool (M) move it to the left
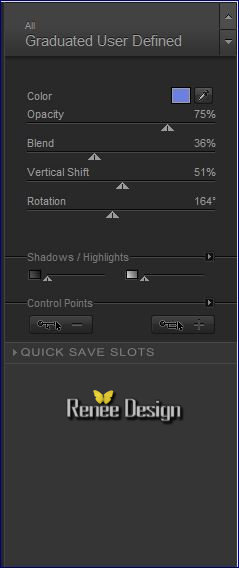
44.
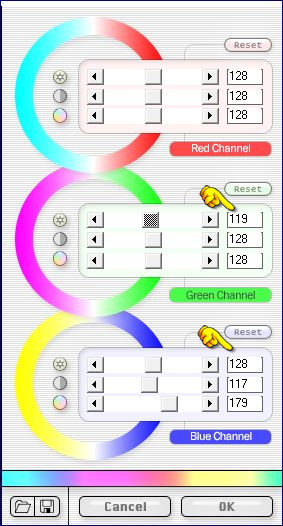
Effects- Plugins – Nick Color Effex – Graduated User
Defined – color #6c80e0
-
Color Palette: Change the Backgroundcolor to color:
#c7c6c2
-
Set your foreground to gradient - Linear with the same settings
45.
Layers- New Raster Layer
46.
Selection Tool ( S ) Custom selection use settings below
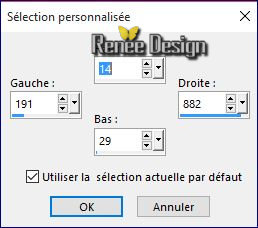
47.
Activate Flood Fill Tool and fill the selection with the gradient
48.
Selections- Modify- Feather a 4
49.
Layers- New Raster Layer
50.
Activate Flood Fill Tool and fill the selection with the background color #c7c6c2
Selections- Deselect All
51. Effects- Image Effects- Offset with these settings

-
Back on the tube ‘’vue sur mer decos’’
52.
Activate the layer ’’spots’’of the tube
- Edit/ Copy-Edit - Paste as new layer on your working image
-
Move Tool (M) move on top of the bar
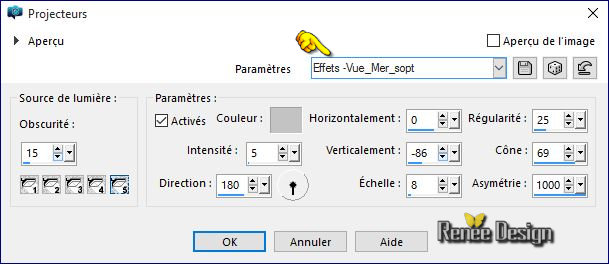
53.
Effects-Illumination Effects-Lights- select my (preset is located in the default settings) ‘’ Preset- Effets
-Vue_Mer_sopt’’
-
Apply (OK ) (the movement will be performed)
-
Color-palette:Set your foreground color to color #f6f5f0- Set your background color to color #c7c6c2
- Make a foreground/background gradient- sunburst -with settings below:

54.
Layers- New Raster Layer
55.
Selections –load/save selection –load selection from disc and select my selection: « vue sur
mer_5 »
56.
Activate Flood Fill Tool and fill the selection with the gradient
Selections- Deselect All
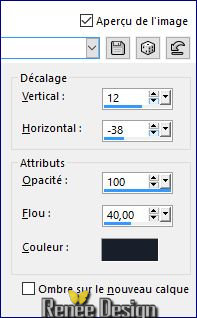
57.Effects- 3 D Effects- Drop Shadow with these settings 9/2/26/18 color black
Color palette - Invert the colors / for that gradient as shown in the example below
58.
Layers- New Raster Layer
59.
Selections –load/save selection –load selection from disc and select my selection: « vue sur
mer_6 »
60.
Selections- Modify-Expand 3 pixels
61.
Activate Flood Fill Tool and fill the selection with the gradient
62.
Effects- 3 D Effects- Drop Shadow with the same settings
Selections- Deselect All
63.
Layers- Merge- Merge Down
-
Back on the tube ‘’decos’’
64.
Activate the layer ‘’spot_2 »of the tube
-
Edit/ Copy-Edit - Paste as new layer on your working image
-
With the Move Tool (M) move it in the upper right corner (see completed)
-
Color-palette:Change your foregroundcolor to color
#a0decd
65.
Layers- New Raster Layer
66.
Selections –load/save selection –load selection from disc and select my selection: ‘’vue sur
mer_7’’
67.
Activate Flood Fill Tool and fill the selection with the foregroundcolor #a0decd
Selections- Deselect All
68. Effects –Plugins -
Unlimited ICNET FILTERS - Paper Textures- Mineral Paper,
Sandstone with these settings 152/96
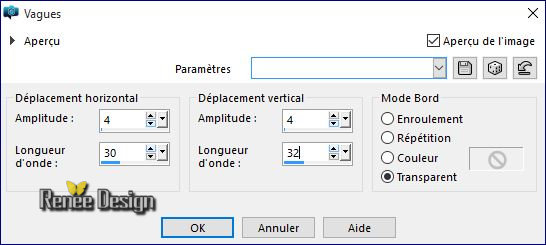
69. Effects- Distortion Effects- Wave use settings below
70. Layers- New Raster Layer
71. Activate Brush Tool and select ‘’ BrushTip_Vue_mer_pinceau-1’’ with these settings

- Stamp with the background color (see example) and repeat it twice on the same place:)
If the brush does not work paste
‘’ pinceau_vue_sur _mer.png’’ as a new layer
72. Layers- New Raster Layer
73.
Selection Tool ( S ) Custom selection use settings below
74. Activate your minimized image of point 22 ‘’Part A ‘
- Edit/ Copy-Edit - Paste into selection
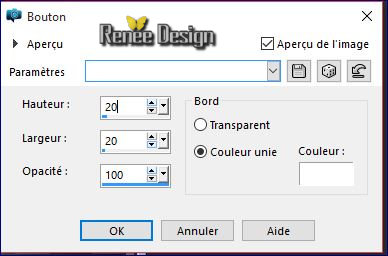
75. Layers- New Raster Layer
76. Effects-3 D Effects- Buttonize use settings below
Selections- Deselect All
77. Double click on this Layer and set the Blend Mode to "Hard Light"
- Back on the tube ‘’Decos’’
78. Activate the layer ‘’Ombre_aqua »of the tube
- Edit/ Copy-Edit - Paste as new layer on your working image
79. Activate Pick Tool (K) move it to the left side as shown in the example below
(Stretching slightly to the right)
- Properties Foreground: Change your foreground color to color
#232a37
We create a furnitur
80. Layers- New Raster Layer
81. Selections –load/save selection –load selection from disc and select my selection: ‘vue sur
mer_8’’
82. Effects- Plugins – Eyecandy 5Textures -tab Settings/User settings choose my Preset
’’vue_mer_textures_wood’’
Selections- Deselect All
83. Layers- New Raster Layer
84. Selections –load/save selection –load selection from disc and select my selection: ‘vue sur mer
_9’’
85. Activate Flood Fill Tool and fill the selection with the foreground color
Selections- Deselect All
86. Layers- New Raster Layer
87. Selections –load/save selection –load selection from disc and select my selection: « vue sur
mer_10 »
- Activate Flood Fill Tool and fill the selection with the foreground color
88. Effects- Plugins –Eyecandy 5Textures -tab Settings/User settings choose my Preset
’’vue_mer_textures_wood’’
Selections- Deselect All
89. Layers- New Raster Layer
90. Selections –load/save selection –load selection from disc and select my selection:’’ vue sur
mer_11
91. Activate Flood Fill Tool and fill the selection with the background color
Selections- Deselect All
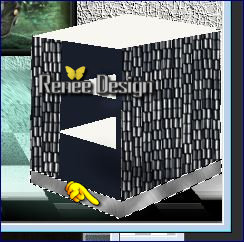
92. Layers- Merge- Merge 4 times down (1 single layer for furnitur )
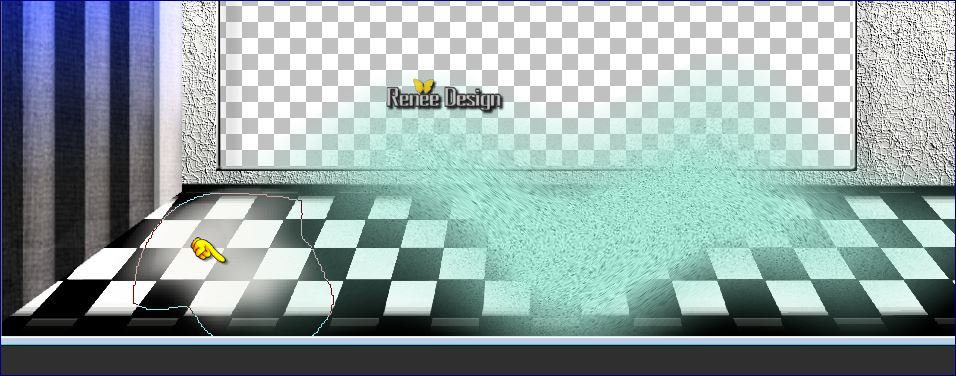
93. Activate Freehand Selection Tool- Point to point
-
Select the white bottom border as shown in the example below
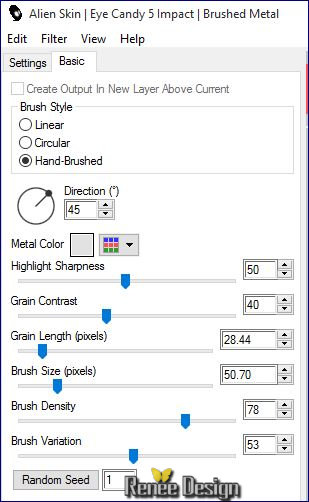
94.
Effects- Plugins – EyeCandy 5 Impact – Brusched
Metal use settings below
Selections- Deselect All
95. Effects- 3 D Effects- Drop Shadow with these settings-color black
96. Layers- New Raster Layer
97. Selections –load/save selection –load selection from disc and select my selection: ‘’ vue sur
mer_12’’
98. Activate Flood Fill Tool and fill the selection with the background color
99.
Effects- Plugins – EyeCandy 5 Impact – Brusched
Metal (with the same settings as above )
Selections- Deselect All
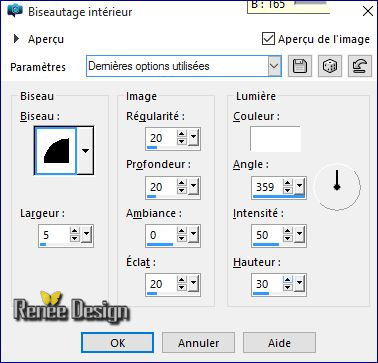
100. Effects – 3D Effects – Inner Bevel use settings below
101. Layers- Arrange- Move Down
- Activate top layer in the Layer palette
- Back on the tube ‘’décos ‘’
102.
Activate the layer ‘’bocal_poissons »of the tube
- Edit/ Copy-Edit - Paste as new layer on your working image
- Place on the furnitur
103.
Activate the layer ’’deco_orange »of the tube
- Edit/ Copy-Edit - Paste as new layer on your working image
- Activate Move Tool (M) Place it in the right side
104 .
Activate the layer ‘’coquillages-
- Edit/ Copy-Edit - Paste as new layer on your working image
- Activate Move Tool (M) move it in the right side (see completed)
105. Effects- Plugins– Final Impact – Vivida use settings below
106.
Open the tube ‘’
tubeclaudiaviza-mujer1033333333344’’
- Image Resize to 65 %
- Edit/ Copy-Edit - Paste as new layer on your working image-With your Move Tool (M) move to the left
107. Effects - 3D Effects - Drop Shadow with these settings
108. Layers- New Raster Layer
109. Selections –load/save selection –load selection from disc and select my selection:’’ vue sur
mer_13’’
110.
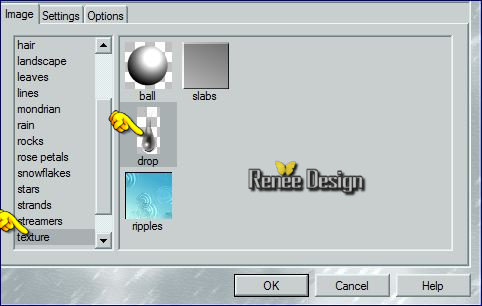
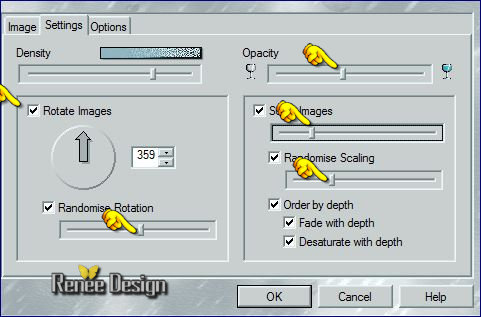
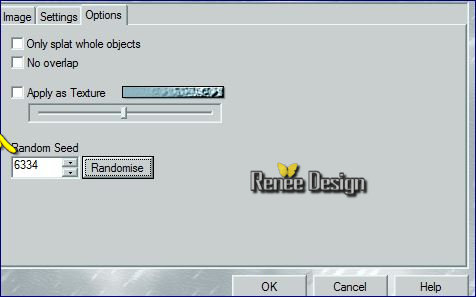
Effects- Plugins – Creativity –Splatter-
Textures/Drop
they will not look exactly like my example,You decide how to looks like your work
Selections- Deselect All
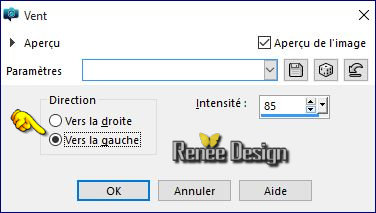
111.Effects - Distortion Effects - Wind - From Left checked - Wind Strength: 85
112. Double click on this Layer and set the Blend Mode to "Screen "
113. Image - Add borders-Symmetric checked:1 Pixel #ffffff
114. Image - Add borders-Symmetric checked: 10 pixels #c0c7cf
115. Image - Add borders-Symmetric checked: 50 pixels #ffffff
116.
Activate the Magic Wand and select the white Border of 50 pixels
117. Effects- Plugins - Filtre Forge
Do you have problems with this- PNG image is into the zipfile and paste as a new layer on your working area
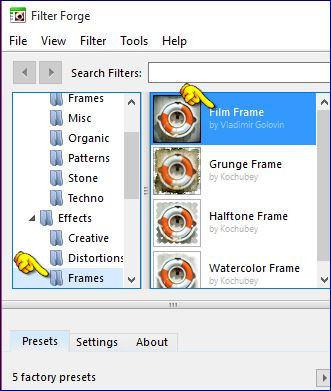
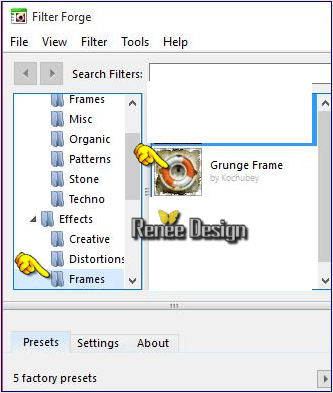
Keep Selected – Repeat Effects- Plugins -Forge - Frame select Grunge Frame
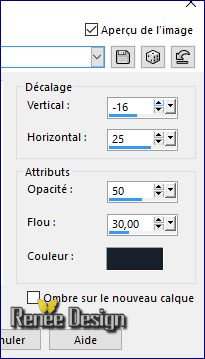
118.
Selections -Invert
119. Effects- 3 D Effects- Drop Shadow with these settings: 5/12/50/14 color black
120.
Repeat : Drop Shadow with these settings -5/-12
Selections- Deselect All
121.
Open the tube ‘’texte_ocean’’ -Edit/ Copy-Edit - Paste as new layer on your working image and move
122.
Layers- Merge- Merge All
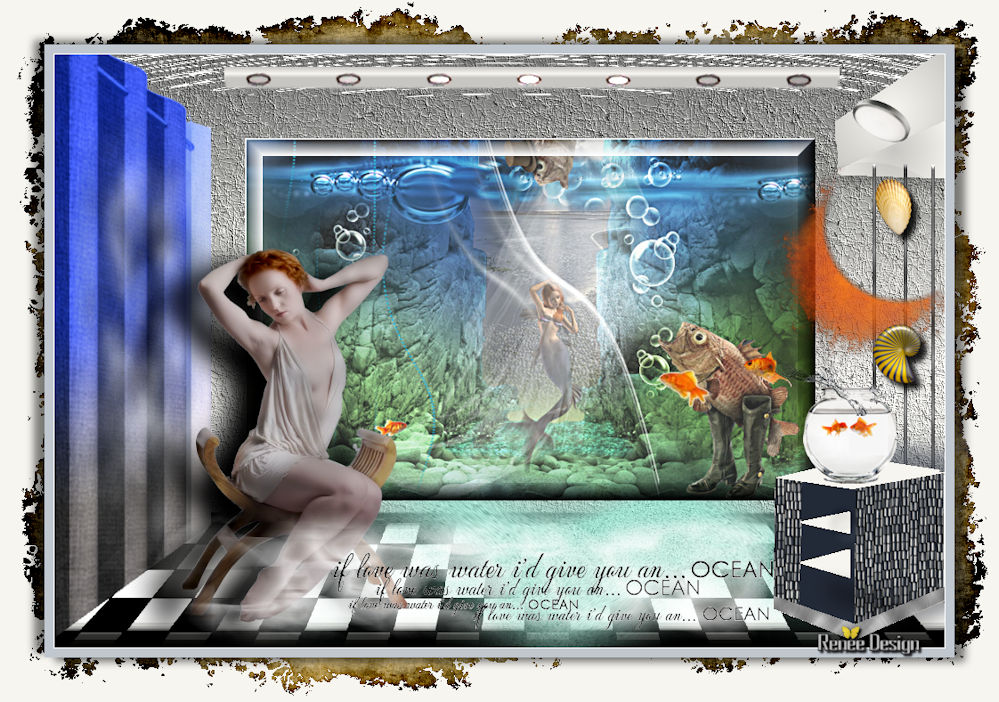
123. Image Resize to 999 pixels width
Save as JPEG
I hope you enjoyed this lesson
Renée
This lesson was written by Renée 14/02/2016
Edited and Update
2016
*
Any resemblance with an existing lesson is a coincidence *
Do not forget to thank the people who work with us and for us I have appointed the tubeurs and translators
Thanks Renée
| 
 Translations


 When you see this logo the filter is imported in Unlimited

 All rights reserved