|
Let's start the lesson.
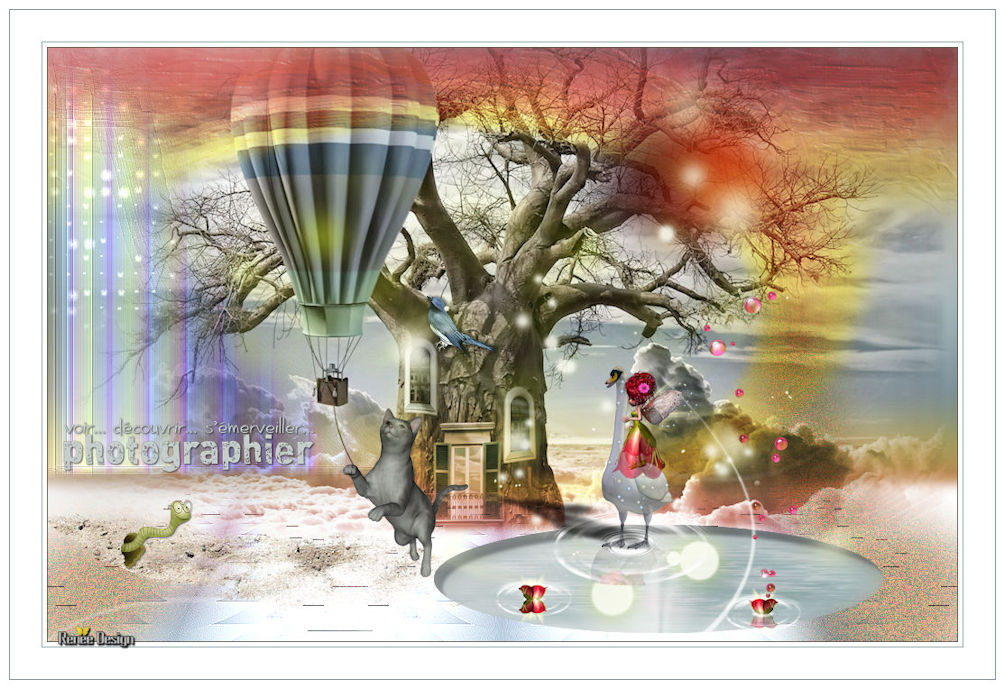
From the sky
-
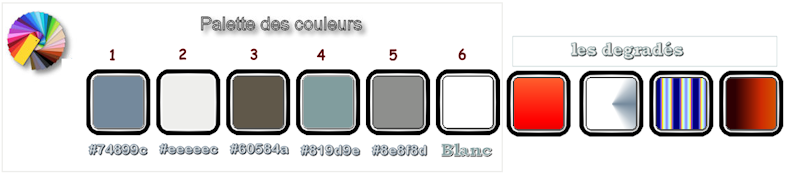
Preparation/ Material Properties: Set your foreground color to #74899c= Nr1 - Set your background color to # eeeeec = Nr 2
1.
File: Open a new transparent Image 1008 x 658
Pixels
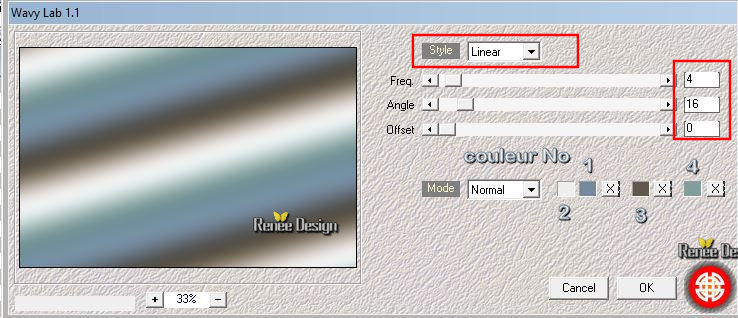
2.
Effects – Plugins – Medhi – Wavy Lab 1 use settings below
3.
Adjust- Blur- Gaussian Blur : Radius 85
4.
Effects –Plugins -Unlimited - [AFS IMPORT] – wave (using the default settings )First click on
 of the
filter of the
filter
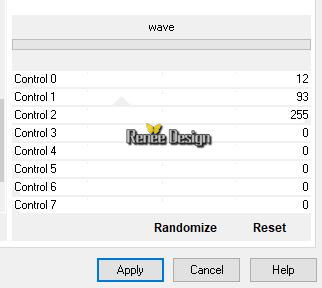
-
Repeat this filter but change " Contrôle 0 to 47"
5.
Effects- Edge Effects- Enhance
-
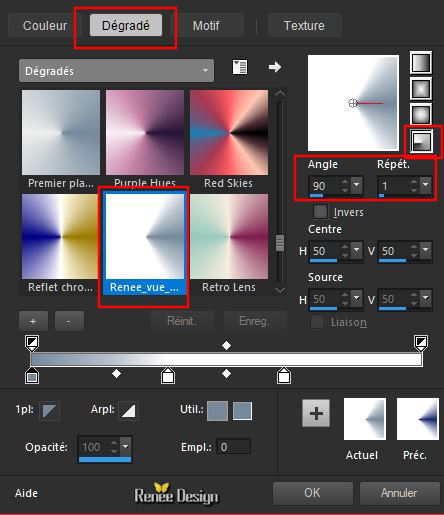
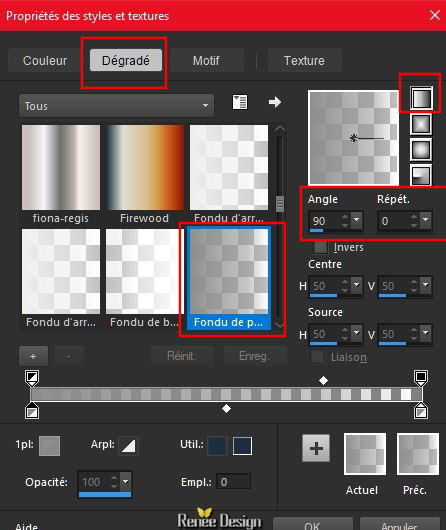
Properties foreground: - Change foreground material into gradient and select ‘’Renee_vue_ciel.PspGradient’’ Prepare a foreground radial gradient use settings below
6.
Layers- New Raster Layer
7.
Activate Flood Fill Tool  –
Flood Fill the Layer with this gradient –
Flood Fill the Layer with this gradient
8.
Effects –Plugins- Unlimited - ICNETFILTERS -Special Effects 1-
shiver -with these settings: 118/0
9.
Effects- Edge Effects- Enhance More
10.
Layers- Duplicate
11.
Effects- Image Effects- Offset with these settings: H = - 225 and V
= 0
12.
Layers-Properties-Set the Blend Mode to " Luminance"
13.
Effects- Edge Effects- Enhance More
14.
Layers- Merge- Merge Down
15.
Effects – Reflection Effects- Feedback use settings below
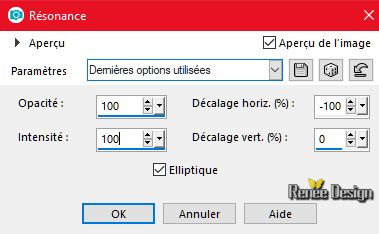
16.
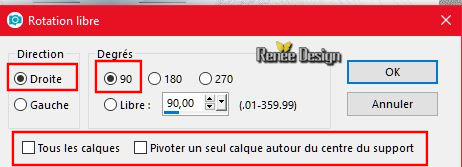
Image -Free Rotate 90° to right
17.
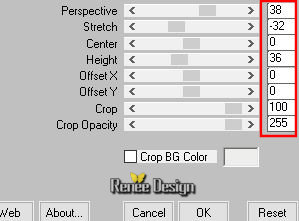
Effects –Plugins – Mura’s Meister – Perspective
Tilling use settings below
18.
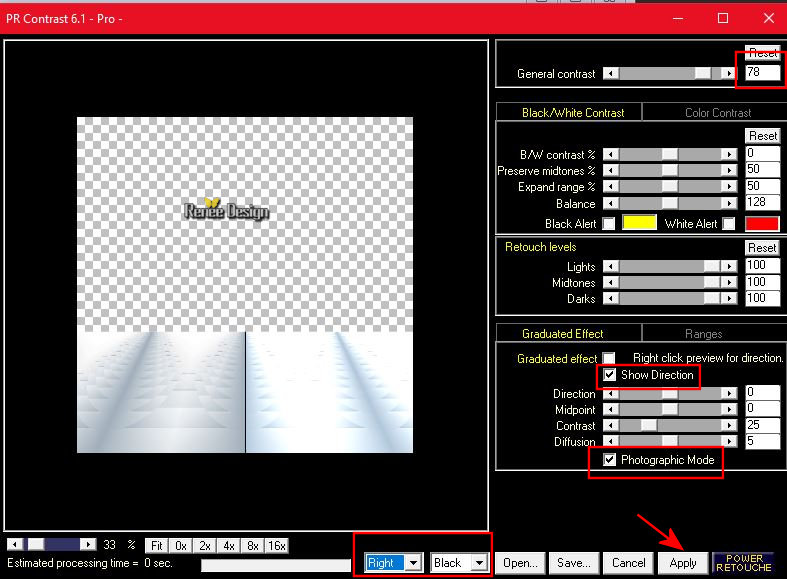
Effects –Plugins – Power retouche – PR
Contrast use settings below
19.
Effects- Edge Effects- Enhance
20.
Selections –load/save selection –load selection from disc and select my selection: ‘’ Vu
du ciel_1’’
DELETE 
Selections- Select None
21.
Layers- New Raster Layer
22.
Activate Selection Tool -Custom Selection (S) -Rectangle with these settings
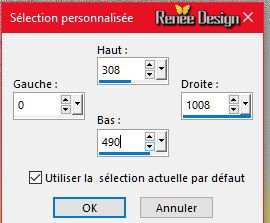
-
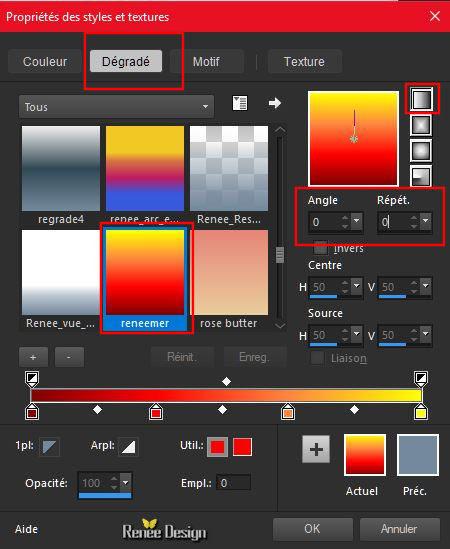
Properties foreground: - Change foreground material into gradient and select ‘’reneemer’’
Prepare a foreground linear gradient use settings below
23.
Activate Flood Fill Tool –
settings of your paint pot to 30%
-
Flood Fill the selection with this gradient
Selections- Select None
24.
Adjust- Blur- Gaussian Blur: Radius : 25
25.
Layers- Duplicate
26.
Image - Mirror - Mirror vertical ( Image - Flip in older versions of PSP)
27.
Effects- Image Effects- Offset with these settings: H = 0 and V = 185
28.
Effects- Distortion Effects- Twirl -Degrees 650
29.
Layers-Properties-Set the Blend Mode to " Hard Light " -Lower the Opacity of the layer to
83%
30.
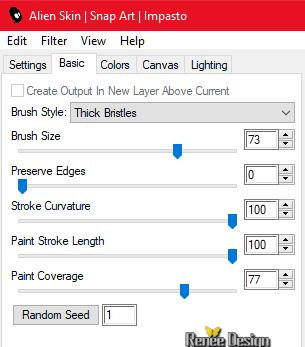
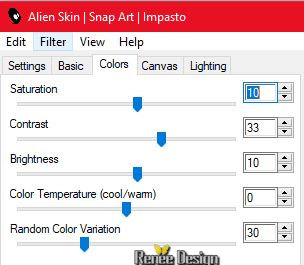
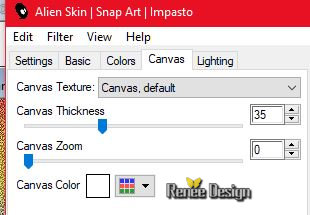
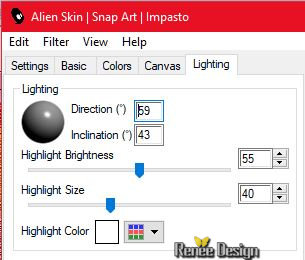
Effects – Plugins- Alien skin Snap art- Impasto
–-Tab- Settings- User Settings and choose my Preset vu_ciel_Impasto.f1s
Or manual settings as shown in the example below
-
In the Layer Palette; Activate the layer underneath =(Raster 3)
31.
Effects- Image Effects- Offset with these settings : H = 0 and V
= -115
32.
Layers-Properties-Set the Blend Mode to " Overlay "
Your work and Layer Palette look like this now-You should have this result
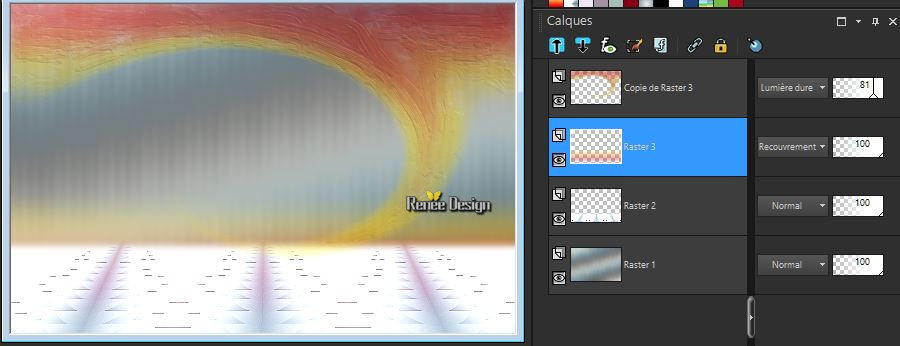
-
To replace the top of the Layer- Palette
-
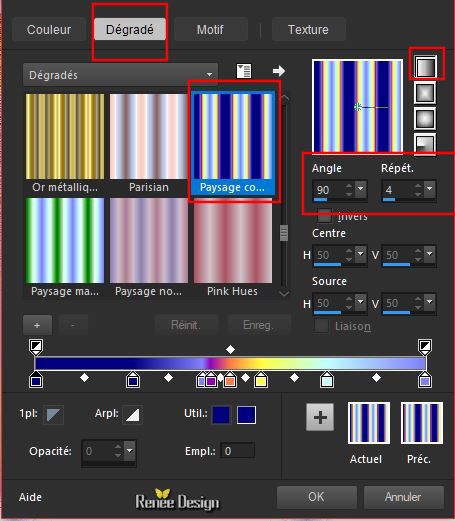
Properties foreground: - Change foreground material into gradient and select ''
Corel_06_014 ''
–
Prepare a foreground linear gradient use settings below
33.
Layers- New Raster Layer
34.
Selections –load/save selection –load selection from disc and select my selection: ‘’ Vu
du ciel_2’’
35.
Activate Flood Fill Tool /
settings of your paint pot to 100% - Flood Fill the selection with this gradient
Selections- Select None
36.
Effects –Plugins- Unlimited – ICNETFILTERS - Special Effects 1-
Shiver with these settings: 40/0
37.
Effects- Edge Effects- Enhance More
38.
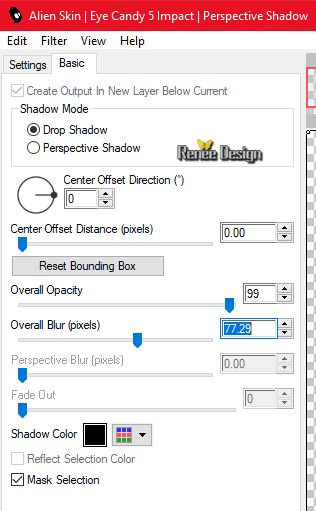
Effects –Plugins – Eyecandy 5 impact –
Perspective Shadow use settings below
39.
Layers- Duplicate
-
Layers-Properties-Set the Blend Mode to " Dodge "
Stay on this Layer
40.
Selections –load/save selection –load selection from disc and select my selection: ‘’ Vu
du ciel_3’’
41.
Effects -Plugins - or-Plugins - Unlimited – VM Natural or
VM Texture – Stardust

Selections- Select None
-
Properties Foreground: Change the foreground color into #8e8f8d=Nr
5
42.
Layers- New Raster Layer
43.
Selections –load/save selection –load selection from disc and select my selection: ‘’ Vu
du ciel_4’’
44.
Activate Air Brush- Tool 
-Use the settings below

-
Spray with the foreground color as shown in the screen below:
Place your airbrush on the right side.
Start spraying very carefully, according to spraying up and
move your airbrush to the top.
Place your airbrush on the left side and spray as below . (spraying very carefully)
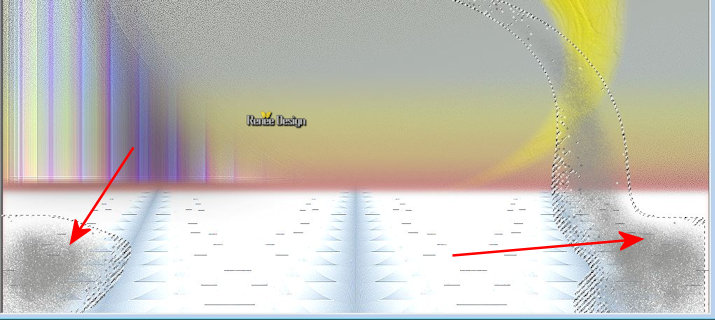
Selections- Select None
45.
Adjust- Blur- Gaussian Blur: Radius : 26
46.
Layers-Properties-Set the Blend Mode to " Multiply "
47.
Effects –Plugins- Unlimited - Sapphire Filters 07 -
SapphirePlugin_0698...using the default settings
48.
Layers- New Raster Layer
49.
Selections –load/save selection –load selection from disc and select my selection: ‘’ Vu
du ciel_5’’
-Properties Foreground : Prepare a linear "Fading foreground" gradient configured like this.
50.
Activate Flood Fill Tool
Flood Fill the selection with this gradient
51.
Adjust- Blur- Gaussian Blur: Radius: 26
52.
Selections- Modify - Contact 18 pixels
-
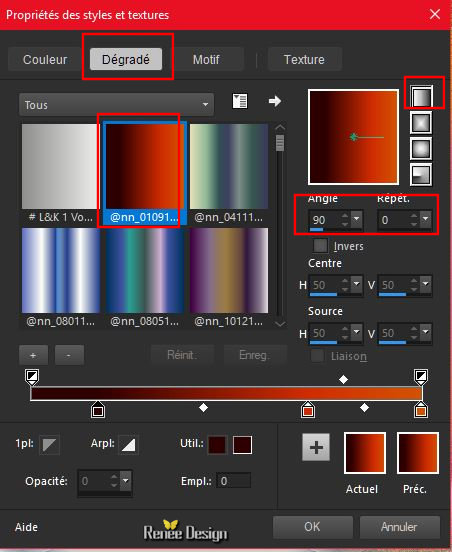
Properties foreground: - Change foreground material into gradient and select ‘’
@nn_010914_GR_Autumn_tdstudio.PspGradient’
Prepare a foreground linear gradient use the settings below
DO NOT ADD A NEW LAYER
53.
Activate Flood Fill Tool
Flood Fill the selection with this gradient
Selections- Select None
54.
Adjust- Blur- Gaussian Blur: Radius: 22
-
Set the Opacity of this layer to 81%
-
Layer Palette -Make Raster 2
55.
Activate the tube’’ Renee_TUBES_Vu_du_Ciel.pspimage’’
-
Edit - Copy- Activate your work -Edit - Paste as a new layer
56.
Objects- Align- Top
-
Your work and Layer Palette look like this now-You should have this result
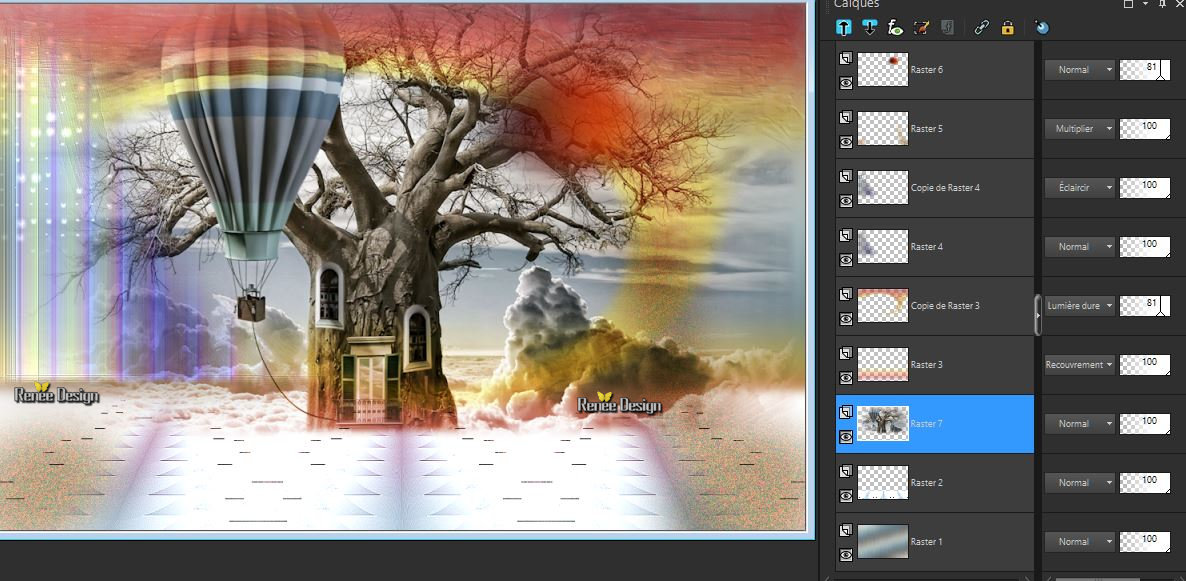
-
To replace the top of the Layer- Palette
57.
Activate the tube ‘’ Renee_TUBES_Vu_du_Ciel_image
1.pspimage’’
-
Edit - Copy- Activate your work -Edit - Paste as a new layer
58.
Effects- Image Effects- Offset with these settings : H = - 246 and V
= - 125
-
Material Properties: Set your foreground color to #eeeeec= Nr2 - Set your background color to # 819d9e = Nr 4
-
Prepare a foreground/background radial gradient configured like this.

59.
Layers- New Raster Layer
60.
Selections –load/save selection –load selection from disc and select my selection: ‘’ Vu
du ciel_6’’
61.
Activate Flood Fill Tool
Flood Fill the selection with this gradient
62.
Adjust- Blur- Gaussian Blur: Radius: 15
Selection remains activated
63.
Effects- Distortions Effects-Polar Coordinates-Polar to Rectangular
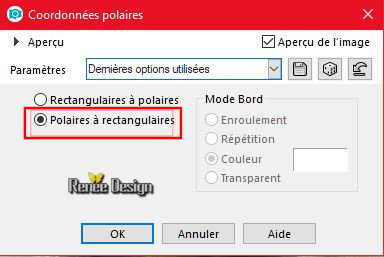
-
Repeat: Effects- Distortions Effects-Polar Coordinates-Polar to Rectangular
64.
Effects –Plugins –Ulead effects- particle **Attention for this filter **
-
First: Click on the Icon = Effects Cloud
-
Click on load >>the second window will open and choose Cloud 1 –>>>OK
-
Control the settings in the first window and click OK
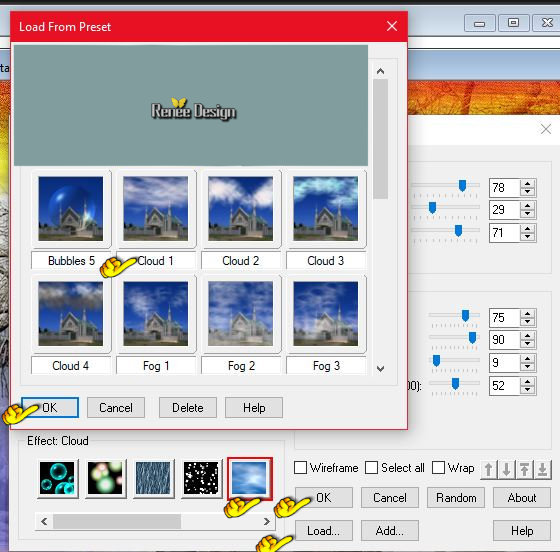
Selections- Select None
65. Layers- Duplicate
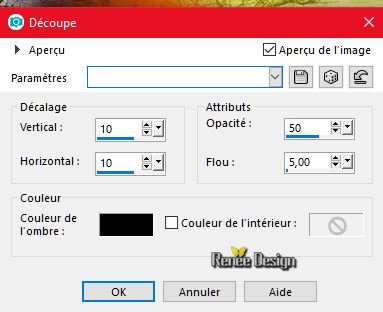
66.
Effects – 3 D Effects- Cutout use settings below -Color Black
67.
Activate the tube ‘’ Renee_TUBES_Vu_du_Ciel_image
2.pspimage’’
-
Edit - Copy- Activate your work -Edit - Paste as a new layer
-
Do not move, it is in the right place
68.
Layers- New Raster Layer
-
Properties Foreground: Change the foreground color into #ffffff. Flood Fill the Layer with #ffffff
69.
Layers- New Maske Layer From Image and choose Mask:
-
Narah_Mask_1232’’
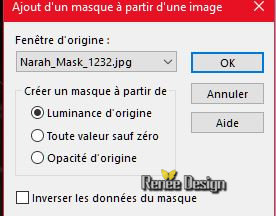
-
Layers- Merge- Merge Group
70.
Activate the tube ‘’ MRD_SeaFairies1_Part1_E85’’
-
Edit - Copy- Activate your work -Edit - Paste as a new layer
-
With the Move Tool (M), move it in the right place
-
View - Toolbars - Script checked !! in your psp

-
Activate toolbar Script, choose my file in the list
''Vu_du_cie.PspScript''
-
click the little blue arrow and let the script run and when it asks click OK

If you receive an error message, please disregard it and >>>Click OK
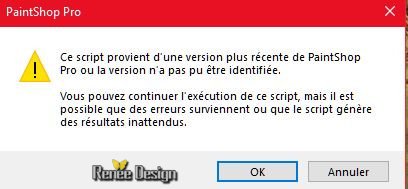
and the script will run
if you do not see the border colors - These are the colors
I used for this lesson and they do it manually as shown below
71.
Image - Add borders-Symmetric checked
- 1 Pixel Color # 60584a=Nr 3
-
5 Pixels #ffffff
-
1 Pixel Color # 819d9e= Nr 4
-
35 Pixels Color #ffffff
-
1 Pixel Color #74899c = Nr 1
- 10 Pixels Color #ffffff
-
Activate the tube "text " ‘’vue du ciel ‘’ Edit/copy-Edit paste as a new layer on your working area and move
-
Image Resize to 1005 pixels Width.
Save as JPG
I hope you enjoyed this lesson
Renée
This lesson was written by Renée 25 April 2018
Edited and Update
2018
*
Any resemblance with an existing lesson is a coincidence
* Do not forget to thank the people who work with us and for us I have appointed the tubeurs and translators
Thanks
*
| 
 Translations


 If a plugin supplied appears with this icon it must necessarily be imported into Unlimited *