|
Let's start the lesson.
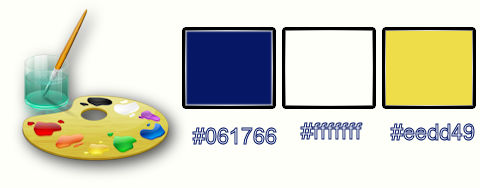
-Below the colour pallet we use in this tutorial-
-Material palette:put the foregroundcolor to this color #061766
-put the background color to this color #ffffff
1. Open the backgroundimage ‘’Fond_ Thor-lindeneg’’- Window - Duplicate (or shift+D) - Close the original and proceed on the copy -Promote Background Layer =Raster 1
2.
Effects-Plugins Unlimited - ICNET FITERS - Distortion Filters- Cracked
Intensity a 23
3. Layers- Duplicate
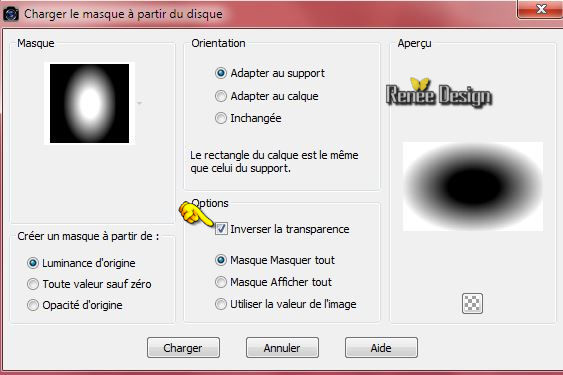
4. Layers-Load/Save Mask-Load mask from Disk and select 20/20
- Layers- Merge-Merge Group
5.
Selections –load/save selection –load selection from disc and choose:‘’Thor-lindeneg_1 »
DELETE
Selections- Deselect All
6.
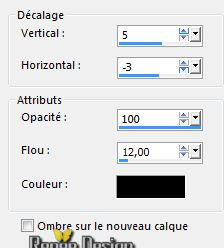
Effects - 3D Effects - Drop shadow with these settings
- Activate the layer underneath =(Raster 1)
7. Adjust-Blur-Gaussian Blur: Radius 40
8. Layers- New Raster layer
9.
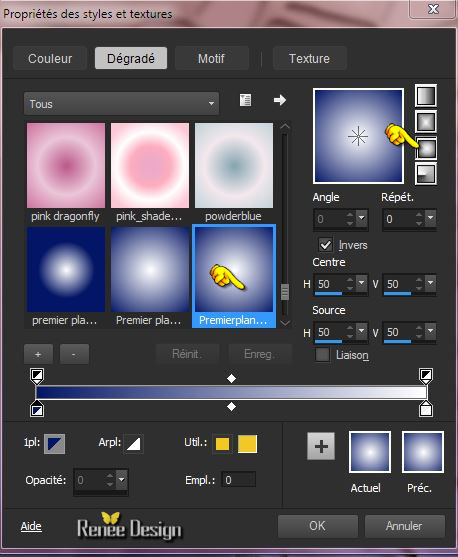
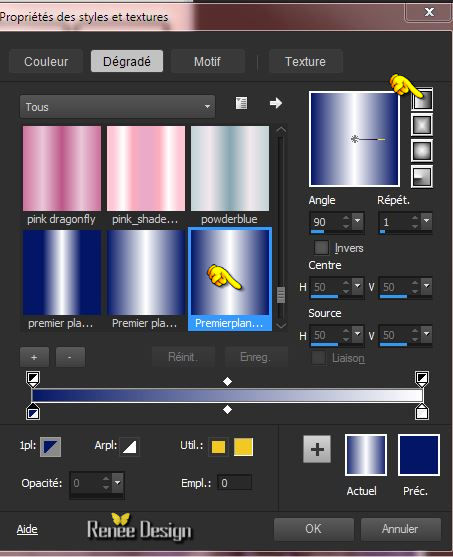
Color Palette: Prepare a foreground/background sunburst gradient with settings below
10.
Selections - load/save selection - load selection from disk and choose my selection:‘’Thor-lindeneg_2 »
11. Flood Fill Tool :fill the selection with the gradient
Selections- Deselect All
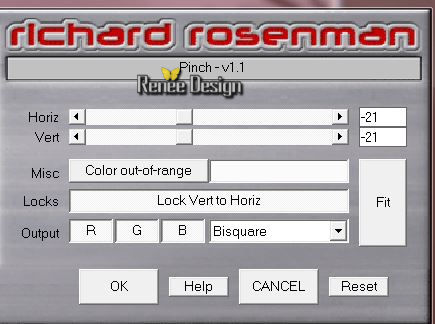
12. Effets –Plugins-
Plugins–Richard Rosenman- Pinch
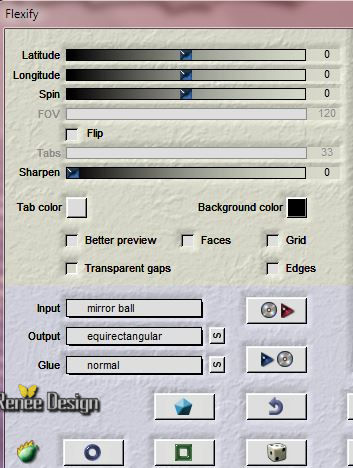
13. Effects
– Plugins– Flaming Pear – Flexify with these settings (not filter Flexify
2 !!!!)
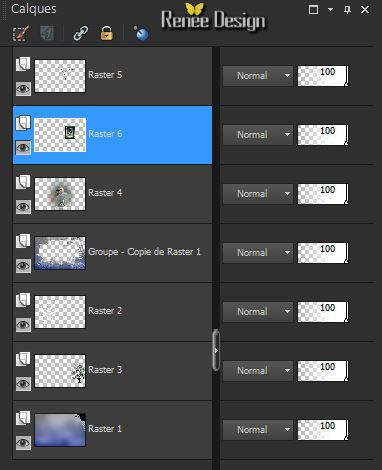
-You are there in your work/ Layer palette look like this now
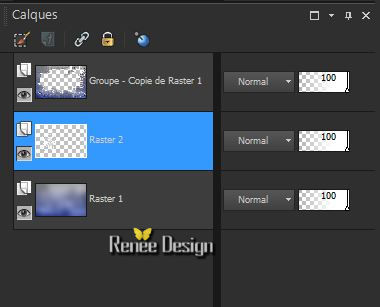
- Activate the bottom layer in the Layer-Palette=Raster 1
14. Activate the tube ‘’ Thor-lindeneg_arbre_10’’
-
Edit/copy- Edit/ paste as new layer on your working image
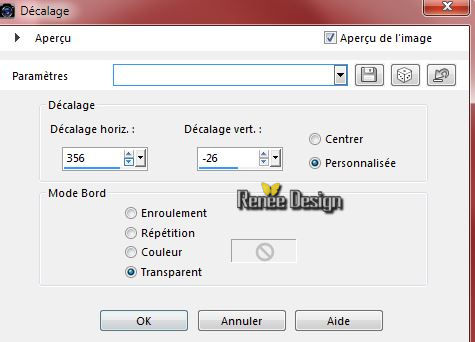
15. Effects- Image Effects- Offset with these settings
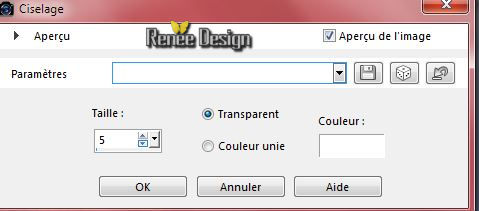
16. Effects- 3 D Effects-Chisel with these settings
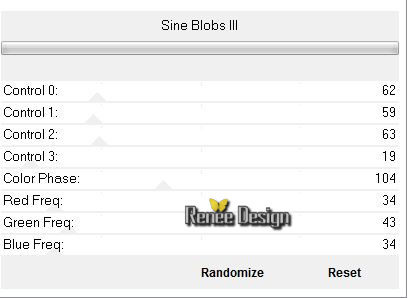
17. Effects –Plugins - Unlimited - Greg's Factory Output Vol.
II- Sine Blobs
III with these settings
18. Effects- Edge Effects- Enhance
- Activate the top of the Layer-Palette( Group- Copy of Raster 1)
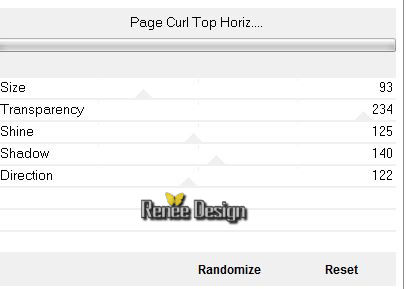
19.
Effects –Plugins- Unlimited - &<Sandflower Specials°v° >-
Page Curl Top Horiz...with these settings.
Activate the bottom of the Layer-Palette=Raster 1
20.
Selections - load/save selection - load selection from disk and choose my selection:‘’Thor-lindeneg_3’’
Do not add new layer
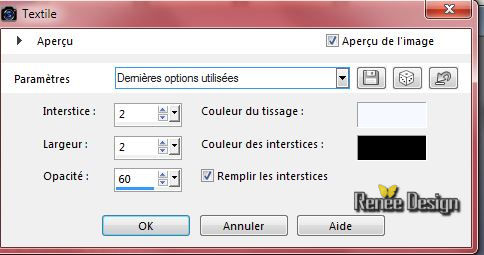
21. Effects- Texture Effects- Weave with these settings-Color #f5f8ff and black
Selections- Deselect All
- Activate the top of the Layer-Palette
22. Activate the tube ‘’ Renee_tube_Thor_poupee’’
- Edit/copy- Edit/ paste as new layer on your working image (do not move it is in the right place)
23. Layers- New raster layer
24.
Selections –load/save selection –load selection from disc and choose:‘’ Thor-lindeneg_4’’
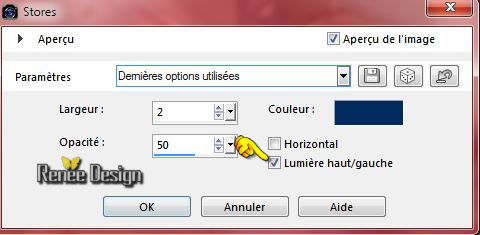
25. Effects - 3D-Effects -Drop shadow with these settings 4/ - 4/ 100 /10 black
Selections- Deselect All
Put the image aside for now, we will need it later..
26. Activate
image « Thor_image_cadre »-Promote Background Layer
27. Activate the tube ‘’matrice_cadre’’
- Edit/copy- Edit/ paste as new layer on your working image (do not move it is in the right place)
28.
Selections- Select All
- Selections-Float
-
Selections- Defloat
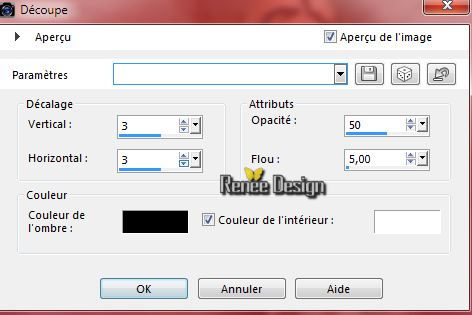
29. Effects- 3D Effects- Cutout with these settings
30. Activate the bottom of the Layer-Palette(Raster 1)
31. Selection Tool -Rectangle – Draw a selection as shown below
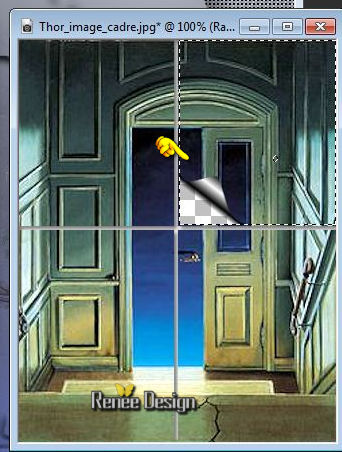
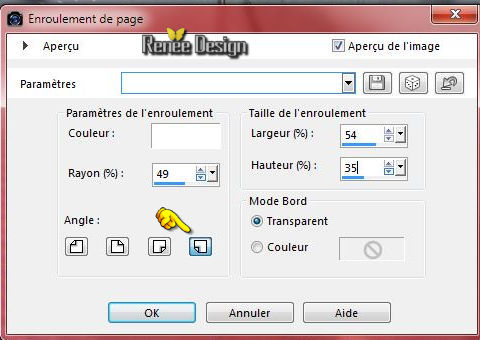
32. Effects- Image Effects Page Curl with these settings
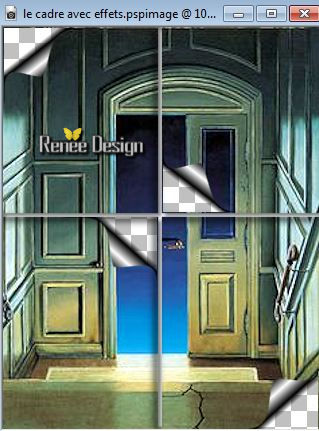
- Repeat point 31 and 32 on the 3 other image parts as shown in the example below
33. Activate the top of the Layer-Palette=Raster 2
34. Effects- 3D Effects- Drop Shadow with the same settings
35. Layers- Merge- Merge- Visible
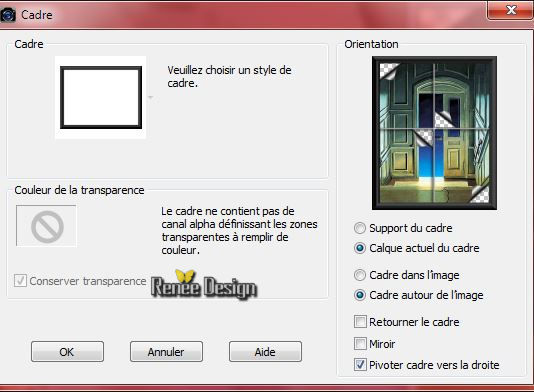
36. Image –Picture frame (Corel_09_017) or take any other of your choice
37. Layers- Merge- Merge- Visible
38. Image
Resize with 55 %
39. Edit-Copy!!!!
- Now activate the image from step 25
- Edit/ paste as new layer on your working image
40. Effects- Image Effects- Offset with these settings H = 200 and V = 60
41.
Layers- Arrange- Move Down
- You are there in your work
- Activate the top of the layer-Palette
- -Material palette:put the foregroundcolor to this color: #061766- put the background color to this color: #ffffff
42. Set your foreground to gradient 'Foreground-background' - Linear -with these settings
43. Layers- New raster layer
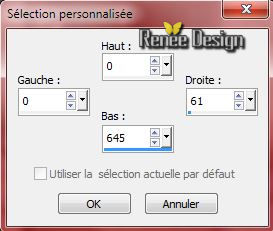
44.
Selection Tool ( S ) Custom selection use settings below
45. Flood Fill Tool :fill the selection with the gradient
Selections- Deselect All
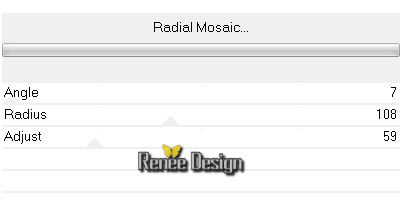
46.
Effects –Plugins- Unlimited - VM Toolbox - Radial
Mosaic..with these settings .
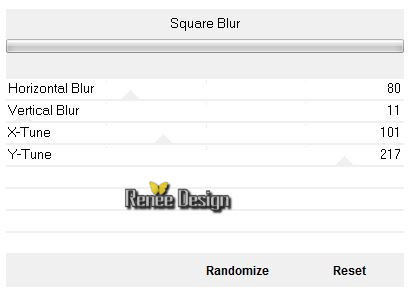
47.
Effects-Plugins- Unlimited - VM Stylize- Square Blur with these settings
48. Layers- Duplicate
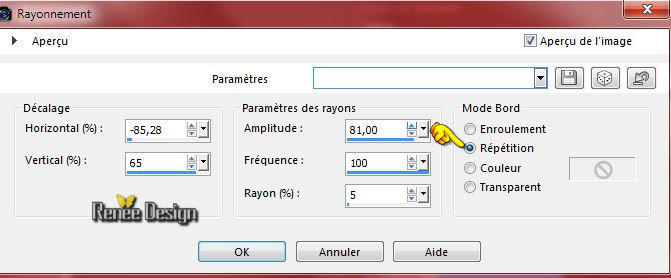
49. Effects- Distortion Effects- Spiky Halo with these settings
- Double click on this Layer and set the Blend Mode to "Screen "Set the layer opacity of this layer to 63
50. Layers- New raster layer
51.
Selections –load/save selection –load selection from disc and choose:‘’ Thor-lindeneg_5’’
-Properties foreground: Set the foregroundcolor to #061766
52. Pot of Paint: Change the opacity of the color at 62%- Activate Flood Fill Tool and fill the selection with the foreground color
#061766 (click 2 times in the selection )
53. Activate Flood Fill Tool and fill the selection with the background color #ffffff
(click 2 times in the selection)
Keep Selected
54. Effects – Plugins– EyeCandy 5 Impact –
Blacklight -Tab Settings/User settings choose my
Preset ‘’
Thor-lindeneg_Blacklight’’
Selections- Deselect All
55. Effects- Edge Effects- Enhance More
56. Effects- Edge Effects- Enhance
57. Double click on this Layer and set the Blend Mode to "Hard Light "
58. Layers- New Raster layer
59.
Selections –load/save selection –load selection from disc and choose: ‘’’ Thor-lindeneg_6’’
60. Pot of Paint: Change the opacity of the color at 100%
- Activate Flood Fill Tool and fill the selection with the background color #ffffff
Selections- Deselect All
61. Activate the tube ‘’ Renee_tube_Thor_20’’
- Edit/copy- Edit/ paste as new layer on your working image
62. Effects- Image Effects- Offset with these settings H = -318 and V =
-26
63. Double click on this Layer and set the Blend Mode to "Hard Light "
- Activer
le tube ‘’ Thor-lindeneg_tubes_deco’’
You may minimize your tube for a moment, but do not close, we will need it again soon
64. Activate layer ‘’oiseau ‘’of the tube
- Edit/copy- Edit/ paste as new layer on your working image
-
With the move tool, move it in the upper right corner
65. Effects
– Plugins– FM Tile Tools – Blend Emboss using the default settings
-On same tube ‘’ Thor-lindeneg_tubes_deco’’
66. Activate layer ‘’gros_oeuf’ ’of the tube
- Edit/copy- Edit/ paste as new layer on your working image
67. Double click on this Layer and set the Blend Mode to " Overlay"
68. Layers- Duplicate- Layers- Merge- Merge Down
- Set the layer opacity of this layer to 75
69.Effects- Texture Effects -Blinds with these settings (color #061766)
70. Activate the layers ‘’robinet ‘’ and « demi-œufs »of the tube
- Edit/copy- Edit/ paste as new layer on your working image
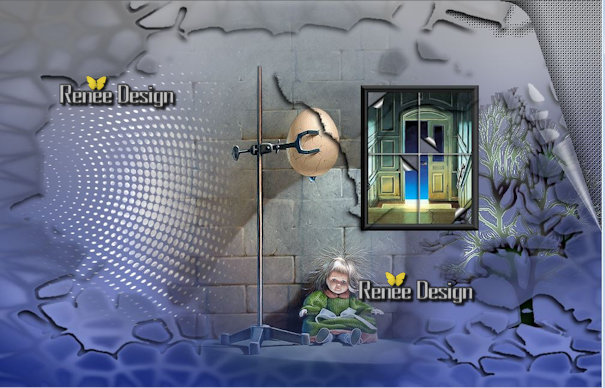
The result for the placement of these tubes
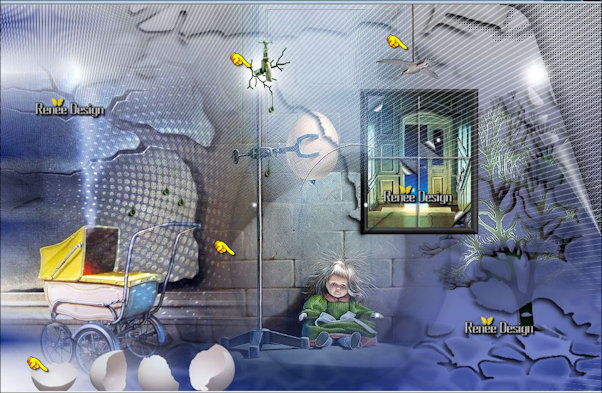
71. Layers- Merge- Merge- Visible
72. Layers- New Raster layer
72.
Selections - load/save selection - load selection from disk and choose my selection:‘’ Thor-lindeneg_7’’
72. Activate Flood Fill Tool and fill the selection with the background color #ffffff
(click 1 x in the selection )
Selections- Deselect All
72. Image - Add borders-Symmetric checked: 1pixel #061766
73. Image - Add borders-Symmetric checked: 10 pixels white
74. Image - Add borders-Symmetric checked: 1 pixel #061766
75. Image - Add borders-Symmetric checked: 50 pixels #eedd49
76. Activate the magic wand and select the border of 50 pixels
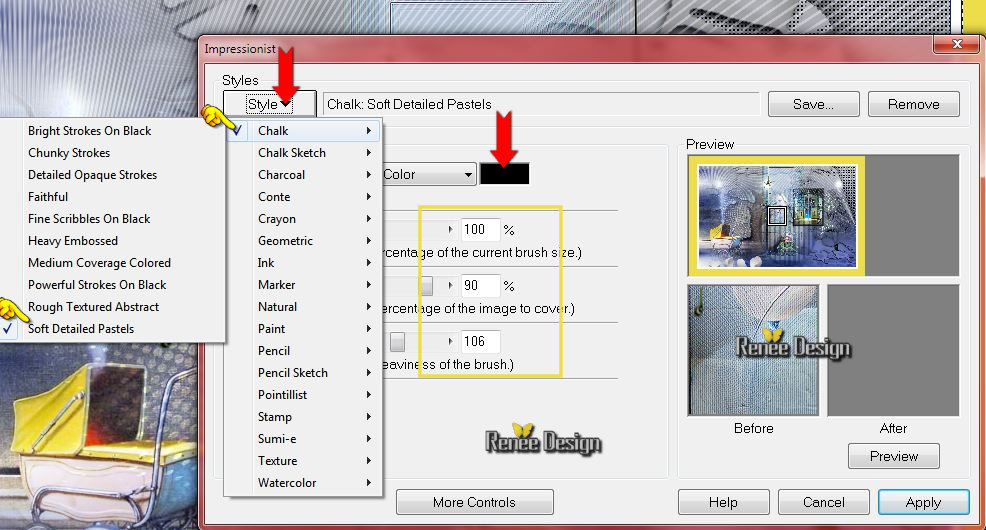
77. Effects
– Plugins– Impressionist /Impresssionist with these settings
78. Effects
– Plugins– Graphic Plus – Cross Shadow using the default settings
79.
Selections- Invert
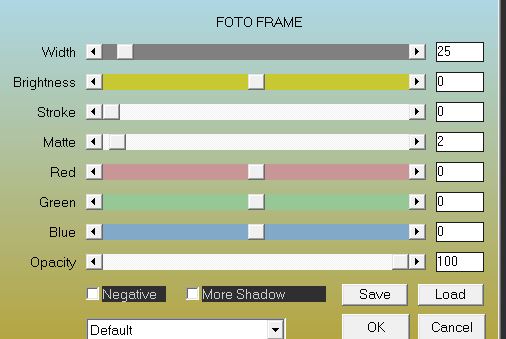
80. Effects
– Plugins– AAA Frame Foto Frame with these settings
Selections- Deselect All
81. Image - Add borders-Symmetric checked:1 pixel white
82. Image
Resize with 995 Pixels width
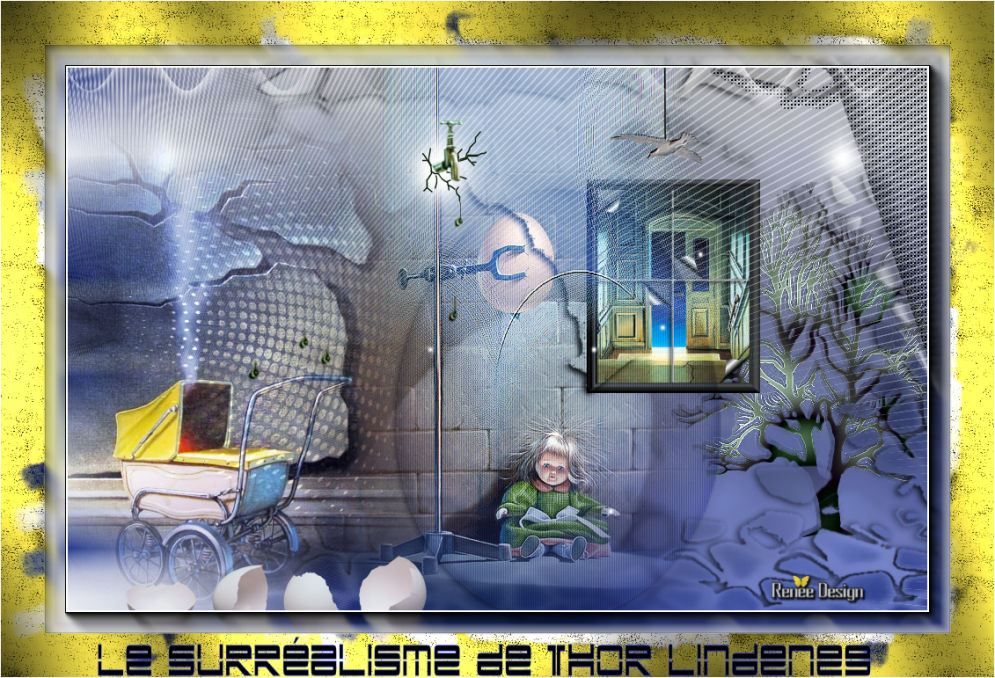
Text Tool - Font -"Yonderre" Size 48 Write the text : ‘’le surrealisme de Thor Lindeneg’’ (Font your choice)
Save as JPG
I hope you enjoyed this tutorial .
Renée
This lesson was written by Renée 13/08/2015
edited and update
2015
*
Any resemblance with an existing lesson is merely a coincidence *
* Don't forget to thank the people who work for us and with us.
I named the tubeurs - Testers and the translators.
Thanks Renée.
| 

 Translations


 When you see this logo the filter is imported in Unlimited

 All rights reserved