|
Let's start the lesson.
-
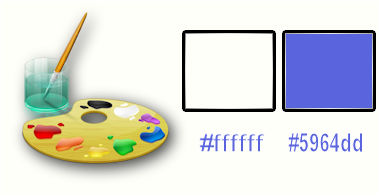
Color-palette:Set your foreground color to color #ffffff -Set your background color to color#5964dd
1.
Open the image ‘’fond_window.jpg- Window - Duplicate (or shift+D) - Close the original and proceed on the copy -Promote Background Layer =Raster 1
2.
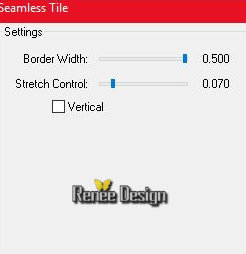
Effects- Plugins- FM Tile Tools –Seamless
Tile
3.
Layers- Duplicate
4.
Images - Resize to 85% resize all Layers not checked
5.
Effects- Edge Effects- Enhance More
-
Layer Palette - Double click on this Layer and set the Blend Mode to "EXCLUSION"
6.
Layers- Duplicate – Image Mirror
7.
Layers- Merge- Merge- Layers Down
8.
Effects –Plugins-Unlimited – VM Natural- Downstairs.use these settings
32/48/64
9.
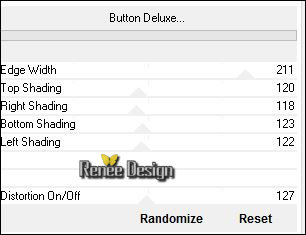
Effects –Plugins-Unlimited - Filter Factory Gallery B – Button Deluxe…Use settings below
10. Effects- 3 D Effects- Drop Shadow with these settings 5/0/65/12 #ffffff
11. Open the tube ‘’ Renee_tube_cadre_window’’
- Image
-Resize to 60 %
12. Edit/ Copy-Edit - Paste as new layer on your working image
13. Effects-Image Effects-Offset with these settings H = 4 and V
= -23 / transparent
14. Layer Palette - Double click on this Layer and set the Blend Mode to "Luminance -Legacy" -Set the layer opacity of this layer to 65%
- Activate the bottom of the layer palette=Raster 1
15.
Selections –load/save selection –load selection from disc and choose my selection: ‘the_windows_1’’
16.
Selections-Promote Selection to Layer
Selections- Deselection All
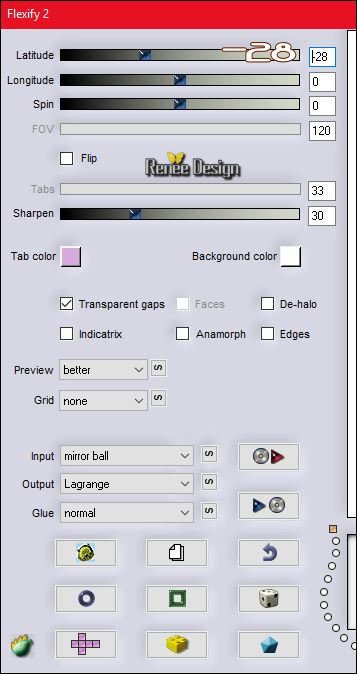
17. Effects
–Plugins – Flaming pear –Flexify 2 use settings below
18. Image
Flip
- Layers-Arrange- Move Up
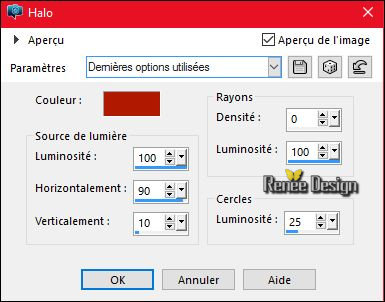
19. Effects- Illumination Effects- Sunburst use settings below-Color #b51a00
- Activate the top of the layer palette
20. Layers- New Raster Layer
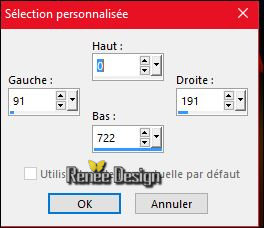
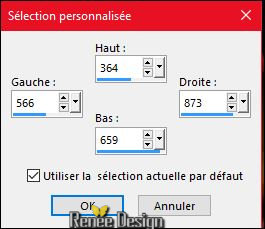
21.Activate Selection Tool -Custom Selection (S) -Rectangle with these settings
22. Activate Flood Fill Tool and fill the selection with the foreground color #ffffff
23.
Selections- Modify-Contract with 1 pixel
DELETE
24. Layers- New Raster Layer
25. Pot of Paint: Change the opacity of the color at 60%- Activate Flood Fill Tool and fill the selection with the background color
Selections- Deselection All
26.
Effects - Distortion Effects - Wind - From Left checked - Wind Strength: 100
27. Layer Palette - Double click on this Layer and set the Blend Mode to "Luminance"- Set the layer opacity of this layer to 65%
-Activate the layer underneath (Raster 3)
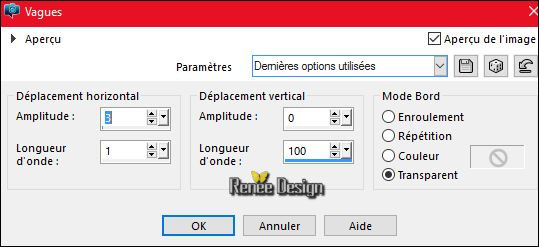
28. Effects- Distortion Effects- Wave use settings below
- Activate the top of the layer palette (Raster 4)
29. Layers- Duplicate – Image Mirror
- Layer Palette - Double click on this Layer and set the Blend Mode to "Normal" -Set the layer opacity of this layer to 100%
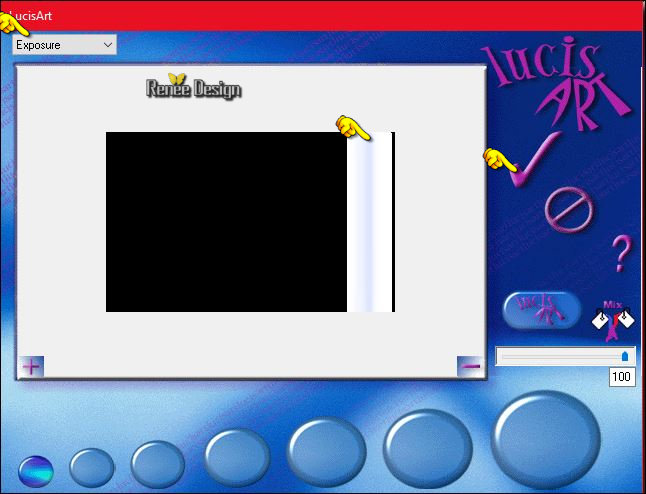
30. Effects-Plugins– Lucis – LucisArt / Exposure
/ok
31.
Effects-Plugins– Transparency – Eliminate
white
32. Layer Palette - Double click on this Layer and set the Blend Mode to "Color-Legacy"
33. Layers- Duplicate
34. Effects- Plugins – Simple – Diamonds
- Layer Palette - Double click on this Layer and set the Blend Mode to "Luminance "-Set the layer opacity of this layer to 42%
35. Activate Selection Tool -Custom Selection (S) -Rectangle with these settings
DELETE

Selections- Deselection All
36. Layers- Duplicate – Image Mirror
37. Layers- Merge- Merge Layers Down
- Set the Blend Mode to "luminance "– Set the layer opacity of this layer to 46%
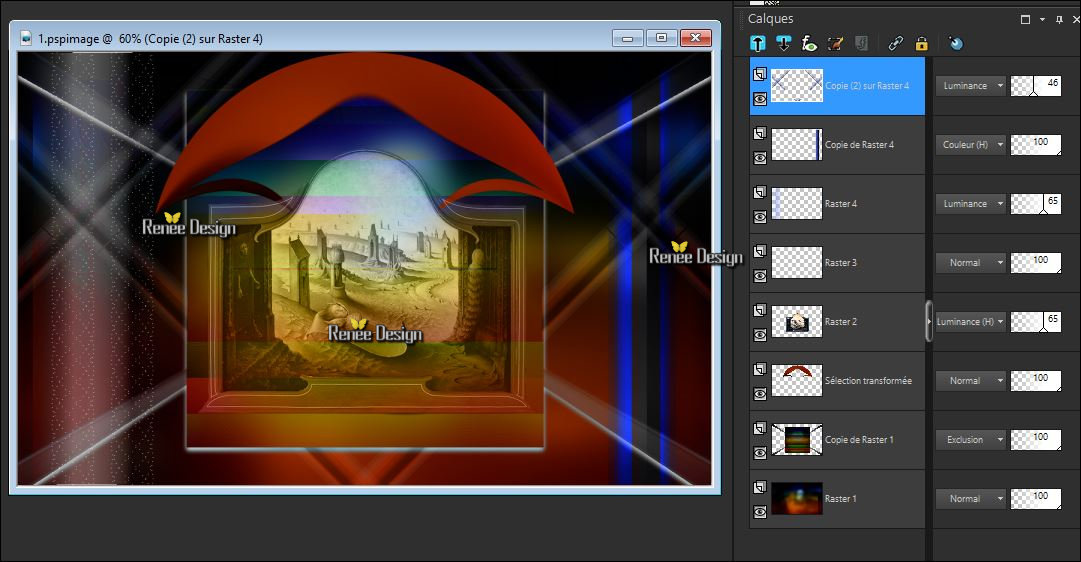
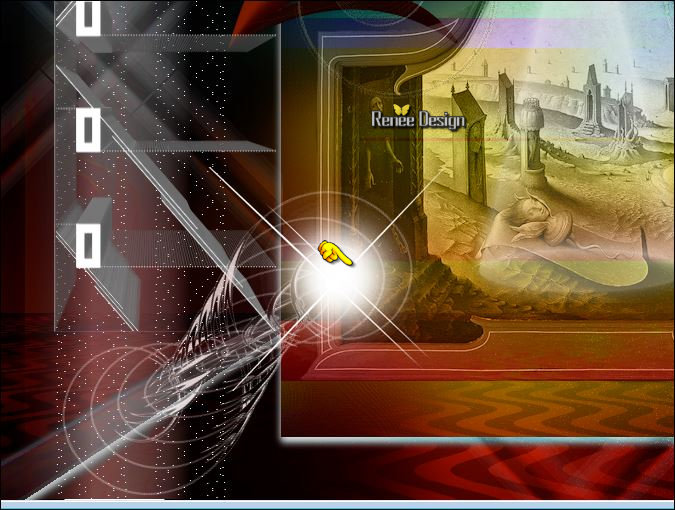
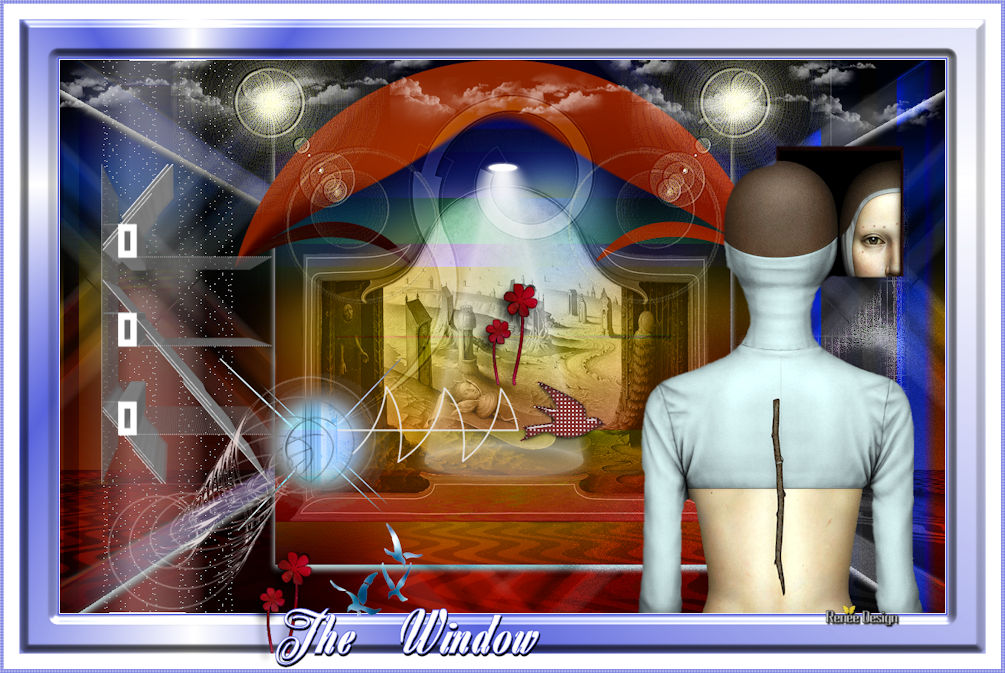
Your work and Layer Palette look like this now-You should have this result
38.
Open the tube ‘’ Renee_the
windows_image1’’
- Edit/ Copy-Edit - Paste as new layer on your working image
39. Effects-Image Effects-Offset with these settings H = 0 and V = 236
40. Layers- New Raster Layer
41.
Selections –load/save selection –load selection from disc and choose my selection: ‘’Sélection
the_windows_2’’
42. Pot of Paint: Change the opacity of the color at 100%
Activate Flood Fill Tool and fill the selection with the foreground color #ffffff
Selections- Deselection All
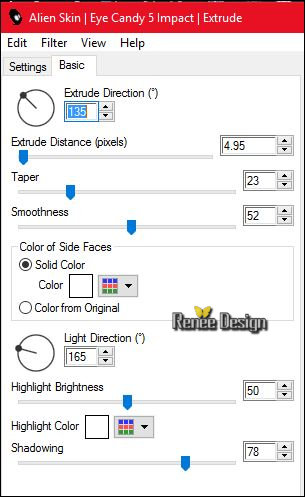
43.Effects-Plugins– EyeCandy 5 – Extrude use settings below
44. Layers- Duplicate
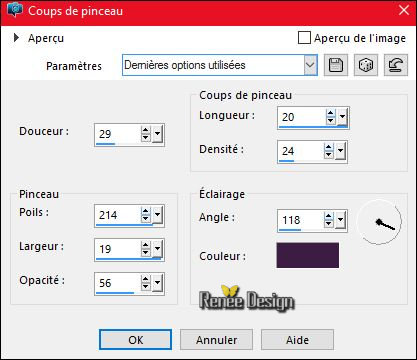
45. Effects- Art Media Effects-Brush Strokes use settings below -Color#47264d
46. Image
Mirror
- Layer Palette - Double click on this Layer and set the Blend Mode to "Hard Light" -Set the layer opacity of this layer to 48%
47. Effects- Edge Effects- Enhance More
48.
Effects –Plugins- unlimited- &<BKg Designer sf10 II>-
Guidelines with these settings: 124/10/240
49. Layers- New Raster Layer
50.
Selections –load/save selection –load selection from disc and choose my selection: « the_windows_3 »
51. Pot of Paint: Change the opacity of the color at 65%- Activate Flood Fill Tool and fill the selection with the foreground color #ffffff
Selections- Deselection All
52. Effects
–Plugins-Unlimited - &<BKg Designer sf10 II>- Dynamic
Diffusion... 153/153
53. Layer Palette - Double click on this Layer and set the Blend Mode to "Overlay"
- Activate the bottom of the layers palette = Raster 1
54. Layers- Duplicate
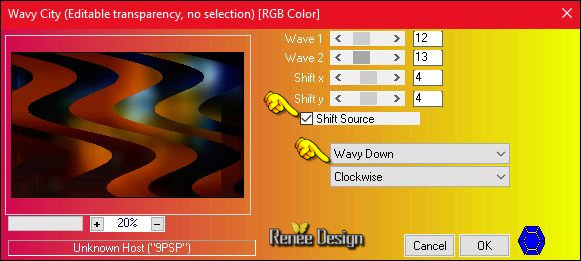
55. Effects- Plugins – Innovations 1.5 – Wave City use settings below
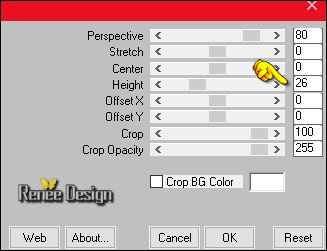
56. Effects- Plugins – Mura’s Meister – Perspective
Tilling use settings below
56. Layer Palette - Double click on this Layer and set the Blend Mode to "Soft Light"
- To replace the top of the layers palette
57.
Open the tube ‘’renee_the_Windows_nuages’’
- Edit/ Copy-Edit - Paste as new layer on your working image
- Activate Move Tool (M) move it the right place at the top of your image
58.
Set the layer Opacity of this layer to 63%
59. Open the tube ‘’ Renee_tube_windows_lumiere’’
- Edit/ Copy-Edit - Paste as new layer on your working image
-
Activate Move Tool (M) move it the right place (see finished image)
60. Layers- New Raster Layer
61.
Selections –load/save selection –load selection from disc and choose my selection: ‘’the_windows_4’’
62. Pot of Paint: Change the opacity of the color at 100%- Activate Flood Fill Tool and fill the selection with the foreground color #ffffff
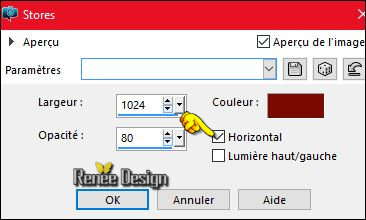
63. Effects-Texture Effects- Blinds use settings below -Color #820c00
Selections- Deselection All
64.
Open the tube ‘’ Renee_the
windows_image2.pspimage’’
- Edit/ Copy-Edit - Paste as new layer on your working image
- With the Move Tool, move it in the right place as shown in the example below
65. Layer Palette - Double click on this Layer and set the Blend Mode to "Exclusion"
66. Layers- New Raster Layer
67.
Selections –load/save selection –load selection from disc and choose my selection:
‘’the_windows_5’’
68.Activate Flood Fill Tool and fill the selection with the foreground color #ffffff
Selections- Deselection All
69. Layer Palette - Double click on this Layer and set the Blend Mode to "Soft Light"
70. Effects- 3 D Effects- Drop Shadow with these settings 1/1/100/19 black
71.
Open the tube ‘’ Renee_the
windows_image3.pspimage’’
(I left the layer "image base" close of the tube, but if you want to use it is ok )
- Activate the Layer ‘’Renee_pour_tuto_the
window_oiseau’ of the tube
- Edit/ Copy-Edit - Paste as new layer on your working image
-
With the Move Tool, move it in the right place (see finished image)
72.
Open the tube ‘’ Renee_tube_the window’’
- Image
Resize to 75 %
- Edit/ Copy-Edit - Paste as new layer on your working image
- Move Tool / place your tube in the bottom right corner
73. Image - Add borders-Symmetric checked:1 pixel #ffffff
74. Image - Add borders-Symmetric checked:2 pixels #5964dd
75. Image - Add borders-Symmetric checked:50 pixels #ffffff
- Properties Foreground:Put your foreground on the radial gradient with settings below
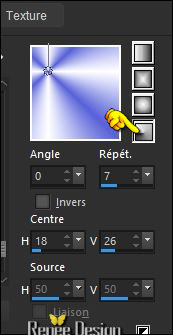
76. Activate the Magic Wand with these settings

-
Activate the Magic Wand and select the border of 50 pixels
77. Activate Flood Fill Tool and fill the selection with the gradient
78.
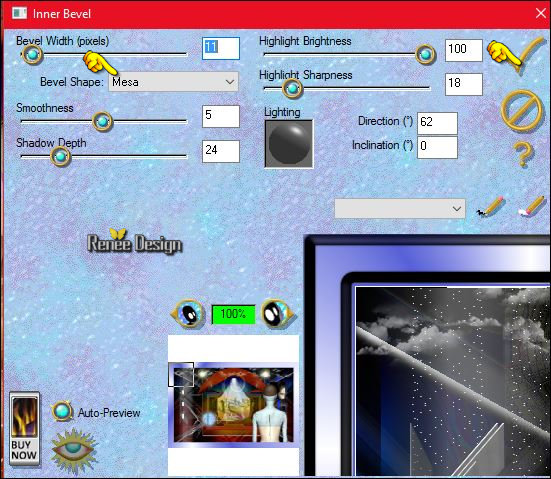
Effects- Plugins – EyeCandy 3.1- Inner
bevel
you get this message >>Click Ok -
and the window opens and you can use the filter with these settings
Selections- Deselection All
79. Image - Add borders-Symmetric checked:20 pixels #ffffff
80. Image - Add borders-Symmetric checked:5 pixels #5964dd
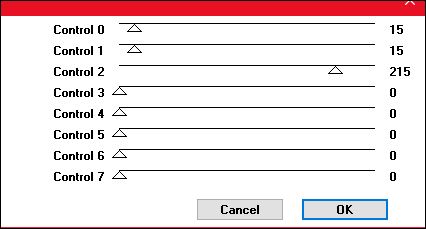
81. Effects
–Plugins– [AFS IMPORT] –sqborder 2 use settings below ( This filter can be used in unlimited )
82. Open the tube ‘’ tubes_titre_renee_the_window’’
- Edit/ Copy-Edit - Paste as new layer on your working image -With the Move Tool, move it in the right place (see finished image)
-Ore write your own text- Font
‘’Zanzibar_DB » ( Included into the zipfile)
83. Layers- Merge- Merge Layers All
84. Image- Resize to 1005 pixels width
Save as JPG
I hope you enjoyed this lesson
Renée
This lesson was written by Renée 15/05/2016
Edited and Update
2016
*
Any resemblance with an existing lesson is a coincidence
* Do not forget to thank the people who work with us and for us I have appointed the tubeurs and translators
Thanks Renée
*
| 
 Translations


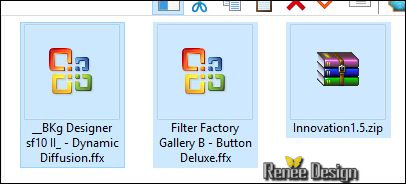


 When you see this logo the filter is imported in Unlimited
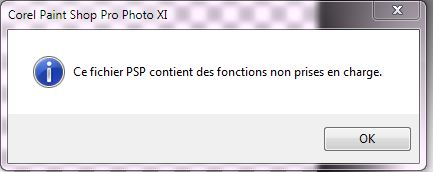

 All rights reserved