|
Let's begin
-
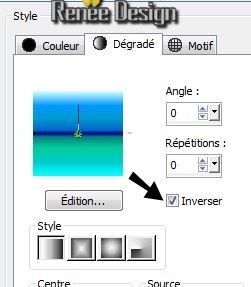
Material Properties: Foreground color to gradient and choose: "Multi Aqua" ( Corel 06-033 )" Background color to color :
#ffffff
1.
File - New - New Image: 1015 x 585 pixels-Transparent
2.
Prepare a linear gradient configured like this. Flood Fill Tool: Fill the layer with the gradient
3.
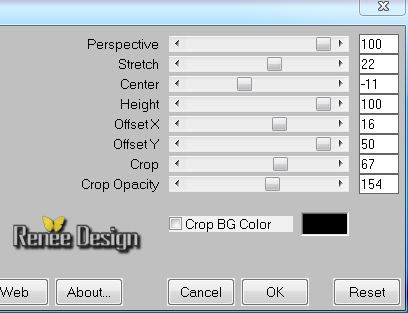
Effects -Plugins - Mura's Meister - Perspective
Tilling
4.
Effects -Plugins -Unlimited - Toadies -Weaver
255/126/255
5.
Layers-Duplicate
6.
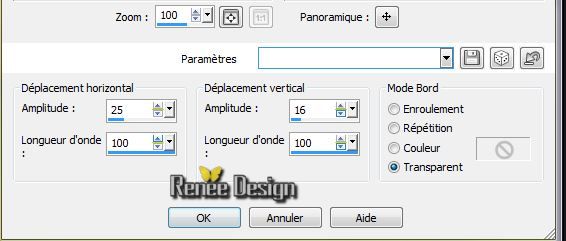
Effects -Distortion Effects- Wave
7.
Effects -Plugins - Eye Candy 5 Impact - Perspective-and choose my preset: '' TVE-persp''
8.
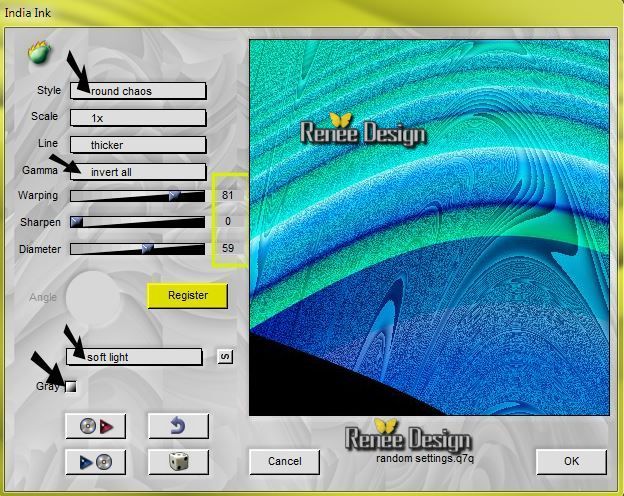
Effects- Plugins -Flaming Pear -India Ink
9.
Effects - Plugins -Flaming Pear -
Flood
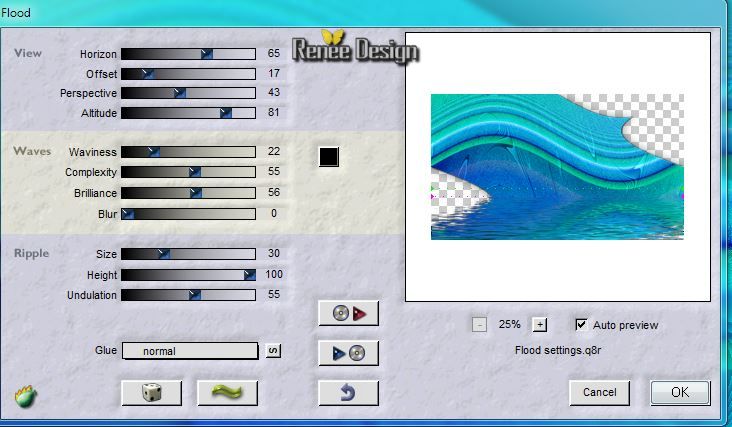
Layer Palette: Set the Blend mode to "Overlay"
10.
Layers-New Raster Layer /Flood Fill Tool: fill the layer with white
11.
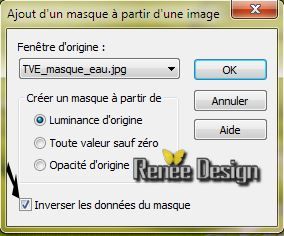
Layers-New Mask Layer From Image and select Mask:
''TVE_masque_eau.jpg"
12.
Effects - Edge Effects - Enhance More
Layers-Merge-Merge Group
13.
Layers-Duplicate
14.
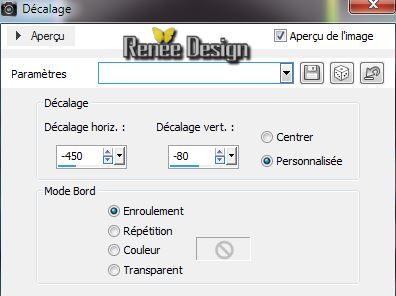
Effects-Image Effects- Offset (Warp)
15.
Layers-New Raster Layer
16.
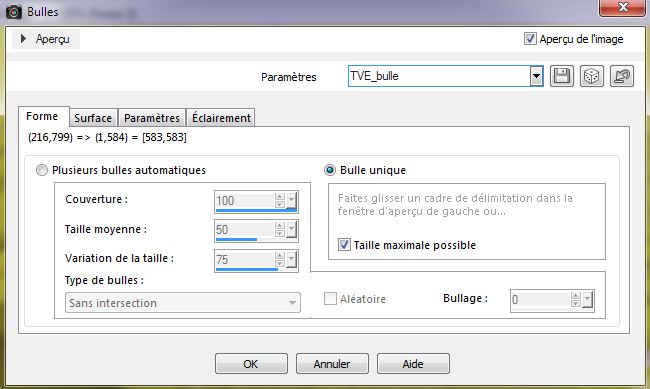
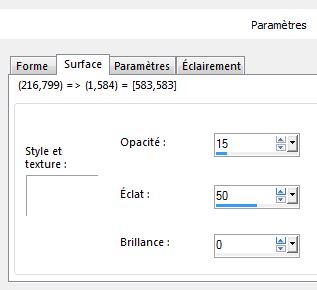
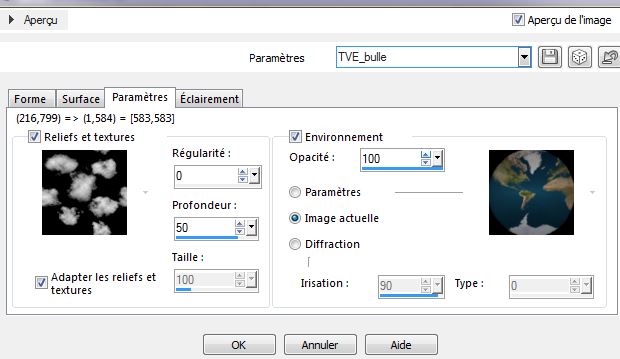
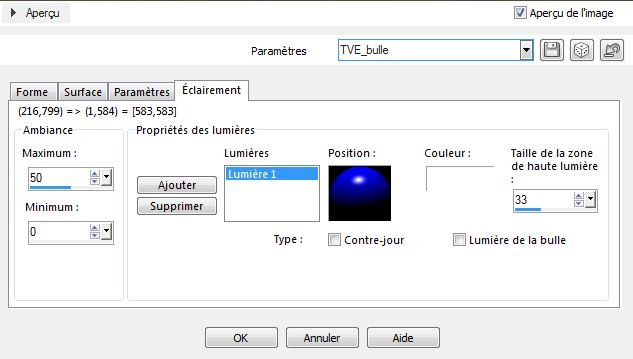
Effects - Artistic Effects-Balls and Bubbles- and choose my preset ''TVE_bulle''
( preset
-- extract into: C:\Users\YourName\Documents\My PSP-files\presets)
(Manual settings see below)
17.
Effects - Image Effects - Offset(Transparent)
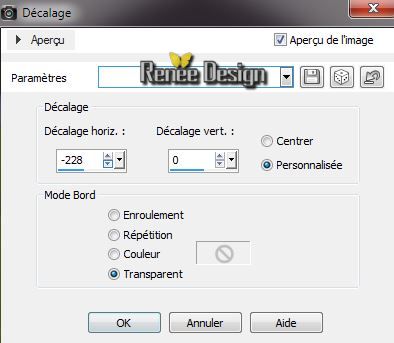
18.
Effects -Plugins - EyeCandy 5 - Impact / Perpspective
shadow-and choose my preset: ''TVO_shadow''
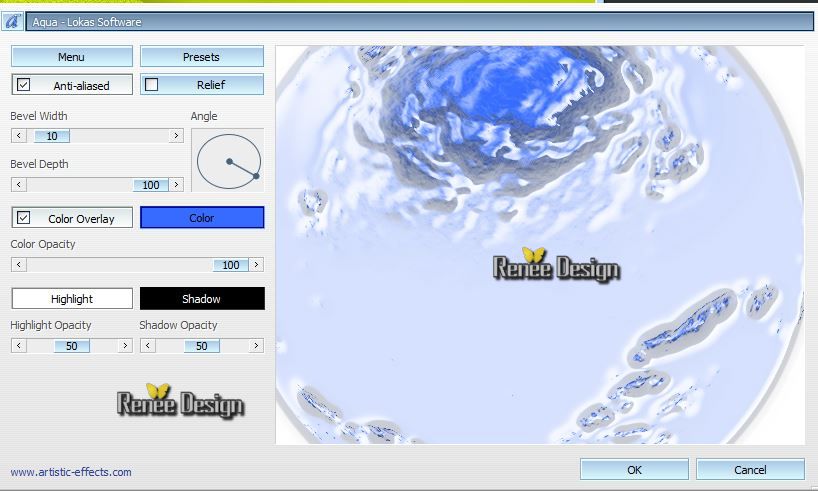
19. Effects
- Plugins Lokas - Aqua / color #356cff
20. Layers-New Raster Layer
21.
Selections - load/save selection - load selection from disk and select ''TVE_selection ''
Pot of Paint: Match mode- ''None'- Flood Fill Tool: fill the selection with:
#ff8605
Keep Selections
22. Layers-New Raster Layer /Flood Fill Tool: fill the selection with:
#0e0c06
23.
Selections - Deselect all
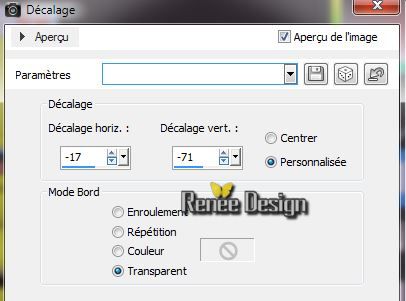
24. Effects
- Image Effects- Offset H=2 and V =2
Transparent
25. Layers-New Raster Layer
26.
Selections - load/save selection - load selection from disk and select ''TVE_selection
1'' /Flood Fill Tool: fill the selection with: white
27.
Selections - Deselect all
28. Effects
- Image Effects- Offset
Layer Palette: Set the Blend mode to: Hard Light "ore " Luminance-Legacy"
29.
Activate the le tube
''mainMarionnette_tuberparmimi4528''/Edit/copy-Edit/paste as a new layer
Pick Tool: (K) place like this (center of glass)
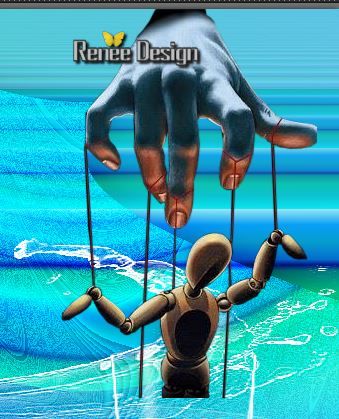
30. Layers-Arrange- Move Down
31. Selection Tool (S) Rounded Rectangle - Select the bottom of the tube like this
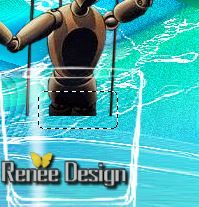
32.
Adjust-Blur-Gaussian Blur: Radius: 8
33.
Selections - Deselect all
Layer Palette look like this now
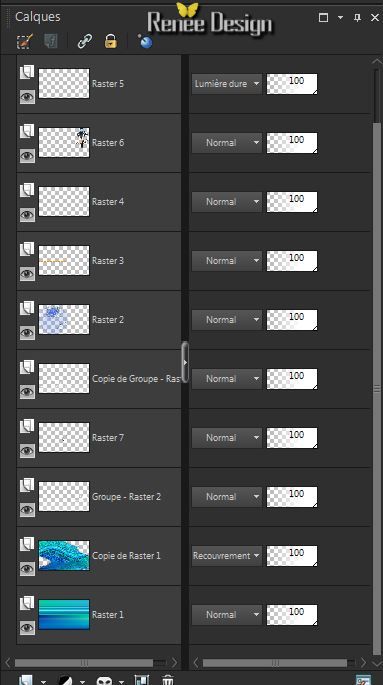
29. Layer Palette: activate the layer- Groupe - Raster 2 / Layers-Arrange- Bring to Top
Activate Brush Tool and select my file: ''pinceau_eau '' -File- Export Custom Brush (Give it a name'' tempete_eau )
Aktivate the top of the Layers palette
30.Layers - New Raster Layer
Material Properties: Foreground color to color:
#3a7afe
31.
Open the Brush- ''tempete_eau'' Size 215

32.
Stamp with your foreground color:#3a7afe the brush as shown in the example below: Erase the two lines of the glass front of the person> arrow / look on the finished
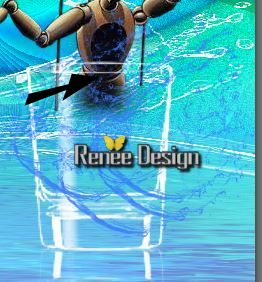
33.
Activate the tube ''TVE_flaque_muticolor '' / Edit/copy -Edit/paste as a new Layer
Arrange under the layer of glass an place
Aktivate the top of the Layers palette
34.
Activate the tube ''TVE_4 verres'' / Edit/copy the three glasses of selected.Edit/paste as a new layer.Image Resize 70% - and place
35. Layers-New Raster Layer
36.
Selections - load/save selection - load selection from disk and select ''TVE_selection 2''
.Pot of Paint: opacity down to 45% .Flood Fill Tool: fill the selection with: #3079d6
37.
Selections - Deselect all
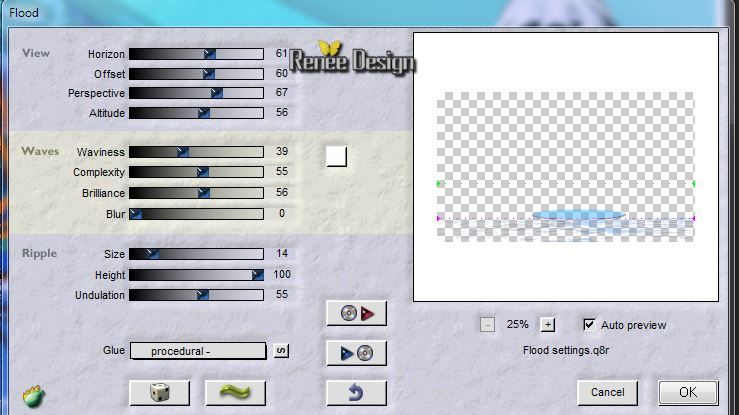
38. Effects
-Plugins - Flaming Pear Flood
40. Effects- Edge Effects- Enhance
41. Effects
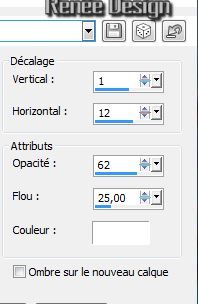
-3D Effects-Drop Shadow: 1/12/62/25 black
42.
Layers-New Raster Layer
43.
Selections - load/save selection - load selection from disk and select
''TVE_selection3''
Pot of Paint: opacity 65% - Match mode RGB Value

- From the left to the right: Fill the first selection > color 2
- Fill the 2nd selection > color 4
- Fill the 3rd selection> color 3
44.
Effects -Plugins- L and K's - Elvida
to 151
45 .
Selections - Deselect all
46.
Effects - Image Effects- Pace Curl
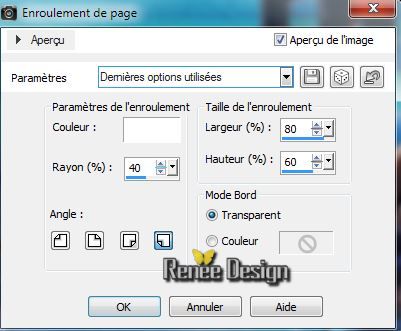
47. Effects -3D Effects-Drop Shadow:
48. Layers- Duplicate- Image Mirror
and place
49.
Layers-Merge-Merge Down
50.
Lower the opacity down to 83%
51. Effects
- Plugins -EyeCandy5_Impact /Perpsective
shadow-choose my preset- ''TVE_Persp_2''
52.
Activate the tube ''titre''- Edit/copy Edit paste as a new layer (do not move)
53. Effects
- Plugins Mura's Meister - Copies
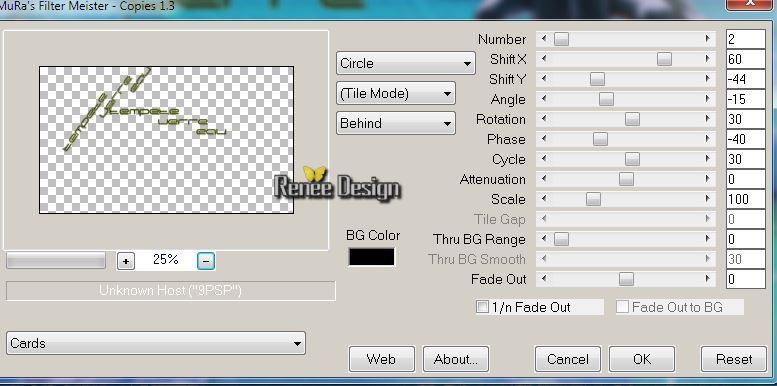
Place like this

54. Effects
- Edge Effects- Enhance. Layer Palette: set the Blend mode to "Screen"
55. Layers-New Raster Layer
56.
Selections - load/save selection - load selection from disk and select ''TVE_selection4'
/Activate the image ''TVE_onde_1'' / Edit/copy-Edit paste into selection
57.
Selections - Deselect all
58. Layers-Duplicate /Image Flip/ Image Mirror and match it with the previous (in oval shape)
59.Layers- Merge-Merge Down
61. Layer Palette: Set the Blend mode to " Luminance"and lower the opacity down to 55%
62.
Activate the tube ''TVE_gouttes'' select choices. Edit/copy Edit paste as a new layer and place
Effects -3D Effects-Drop Shadow to taste
63.
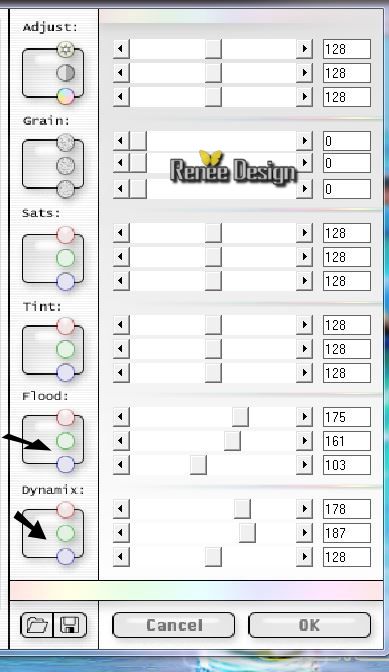
Effects -Plugins -Final Impact - Hot
shot
64.
Activate the tube''AD_Fresh_Day(29)'' / Edit/copy Edit paste as a new layer and move
65.
Layers- Merge- Merge Visible
66. Image - Add Borders - Symmetric checked : 1 pixels black
67.
Selections -Select All
67. Image - Add Borders - Symmetric checked : 70 pixels white
68. Effects
-3D Effects-Drop Shadow: 8/2/38/25 black
69.
Repeat: Effects
-3D Effects-Drop Shadow: -8 /- 2 /38/ 25 black
70.
Selections - Invert
71.
Effects - Plugins - L and K's /
Elvida to 16
72.
Selections - Deselect all
73.
Image - Add Borders - Symmetric checked : 1 pixels black
74. Image - Add Borders - Symmetric checked : 2 pixels white
75. Image - Add Borders - Symmetric checked : 1 pixels black
76.
Activate the tube 'titre'' - Edit/copy-Edit/paste as a new Layer and place

I hope you enjoyed this lesson
Renée
This lesson was written by Renée the 19/03/2014
Created the
April 2014
*
Any resemblance with an existing lesson is merely a coincidence
*
Don't forget to thank the people who work for us and with us. I named the tubeurs - Testers and the translators.
Thanks Renée
| 
 Tranlations