|
Let's start the lesson.
-
Material Properties :Set your foreground color to #000000 -Set your background color to #fffffff
-
Set your foreground to gradient 'Foreground-background' -Prepare a linear gradient configured like this.
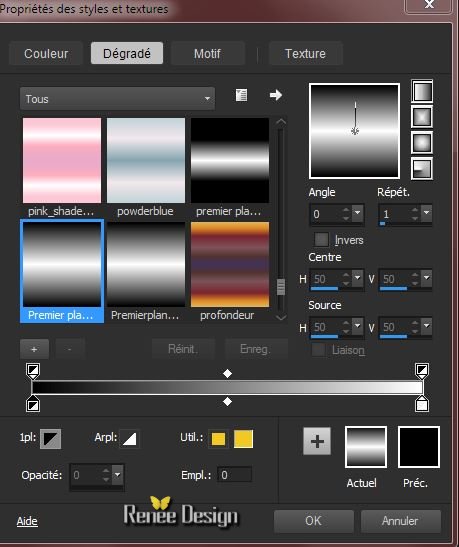
1.
Open a transparent image of 995 x 645 Pixels
-
Activate Flood Fill Tool and fill the layer with the gradient
2.
Effects-Plugins – VM Extravanga – Transmission

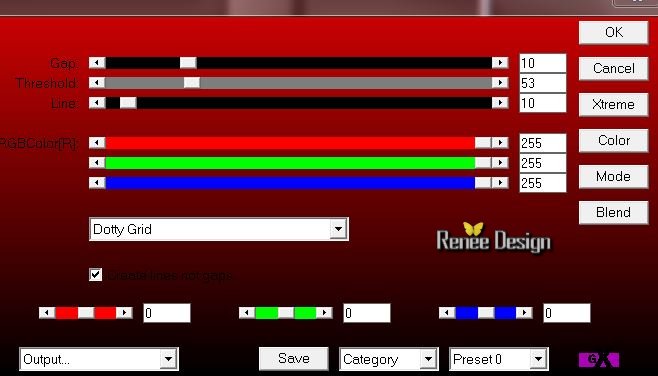
3. Effects-Plugins –
Unlimited 2.0 - Penta.com- Color dot using the default settings 90/2/255/255/255
4. Layers-Duplicate
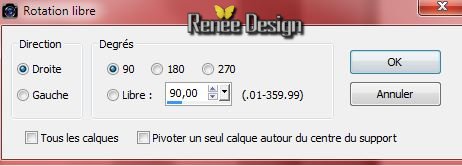
5. Image-Free Rotate - 90 right
6. Layers-Merge-Merge-Down
7. Effects-Plugins – Simple-Pizza Slice Mirror
8.
Selections –load/save selection –load selection from disc and choose: ‘’ tattoo_1’’
9.
Selections-Promote selection to layer
Selections-Deselect All
10. Effects-Plugins –AP01 –Lines Silverling with these settings
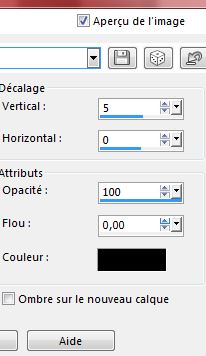
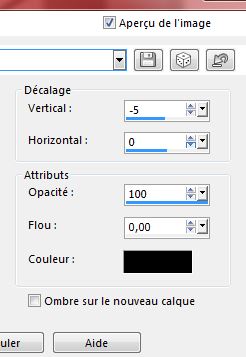
11. Effects - 3D-Effects- Drop shadow with these settings and Drop shadow negative
12.
Effects-Plugins – Eye Candy 5 Impact – Blacklight –
tab Settings/User settings choose my preset: – “ tattoo_blacklight “
13.
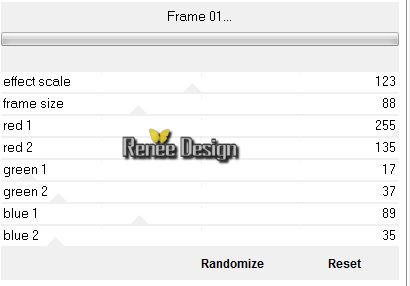
Effects-Plugins – Unlimited 2.0 - Filter Factory Gallery P-Frame
01 with these settings …
14.
Selections –load/save selection –load selection from disc and choose:‘’
tattoo_2’’
15.
Selections-Promote selection to layer
16. *Pot of Paint: Change the opacity of the color at 30%
Activate Flood Fill Tool and fill the selection with the background color white
Selections-Deselect All
17.
Effects-Plugins –Unlimited 2.0 - &<Bkg Designer sf10 I>-
Cruncher 255/20
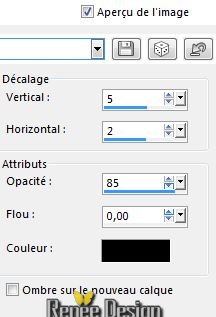
18. Effects - 3D-Effects- Drop shadow with these settings
-Layer-Palette: activate layer underneath (promoted selection)
19. Effects-Plugins – Mura’s Meister - Perspective Tilling using the default settings
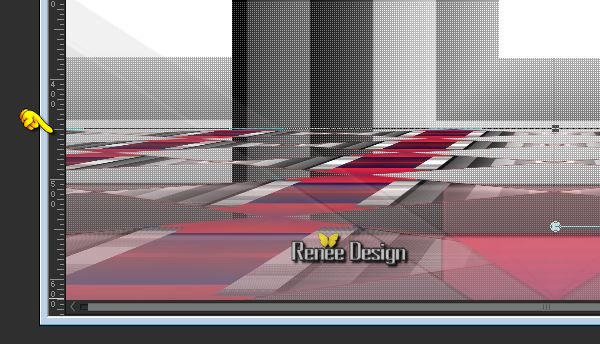
20.
Activate the Pick Tool/Deformation tool (K)Mode Scale- Pull the Top Node down to 450px
high as shown in the example below
Hit the M key of your Keyboard to remove the Nodes
- Activate the top of the layer- palette
21. Layers-New raster layer
22.
Selections –load/save selection –load selection from disc and choose:‘’
tattoo_3’’
23. *Pot of Paint: Change the opacity of the color at 100%
- Activate Flood Fill Tool and fill the selections with the gradient ( click 2 times in the selection)
Selections-Deselect All
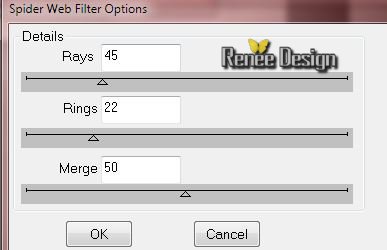
24. Effects-Plugins - dsb Flux- Spider Web Filter
Options with these settings
25. Effects-Edge Effects-Enhance
26. Layers-Duplicate
27. Image
Mirror
28. Layers-Merge-Merge-Down
29. Layers-New raster layer
30.
Selections –load/save selection –load selection from disc and choose:‘’
tattoo_4’’
31. Activate Flood Fill Tool and fill the selections with the gradient
Selections-Deselect All
32. Effects - 3D-Effects- Drop shadow with these settings 1/1/100/0 black
33.
Effects- Distortions Effects-Polar Coordinates-"Polar to Rectangular"
34. Double click on this layer and set the Blendmode to Soft Light
35.
Selections –load/save selection –load selection from disc and choose:‘’
tattoo_5’’
- Hit the Delete Key of your Keyboard
- Selections-Deselect All
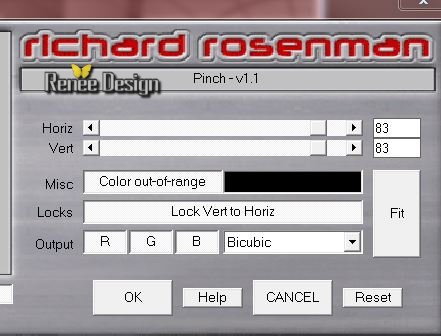
36.
Effects-Plugins –Richard Rosenman
–Pinch with these settings
37. Layers-New raster layer
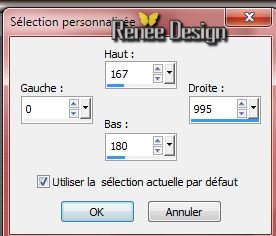
38.
Selection Tool ( S ) Custom selection use settings below
39. Activate Flood Fill Tool and fill the selection with the gradient
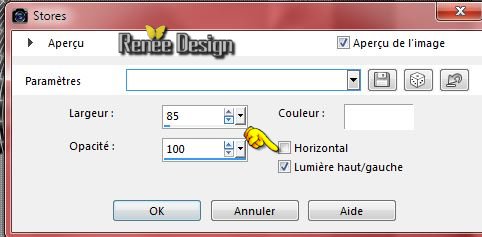
40. Effects-Texture Effects-Blinds with these settings
Selections-Deselect All
41. Double click on this layer and set the Blendmode to Soft Light
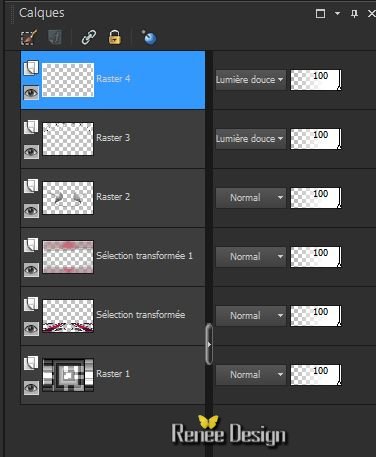
- Layer palette look like this now
42. Activate the tube ‘’cadre_tattoo’’
Edit/copy- Edit/ paste as new layer on your working image (do not move it is in the right place)
43. Effects-Edge Effects-Enhance
44. Set the layer opacity of this layer to 48%
45. Activate the tube ‘’Renee_design_tattoo’’
- Edit/copy- Edit/ paste as new layer on your working image (do not move it is in the right place)
46. Double click on this layer and set the Blendmode to Overlay
47. Activate the tube ‘’ texte-elfique’’
- Edit/copy- Edit/ paste as new layer on your working image
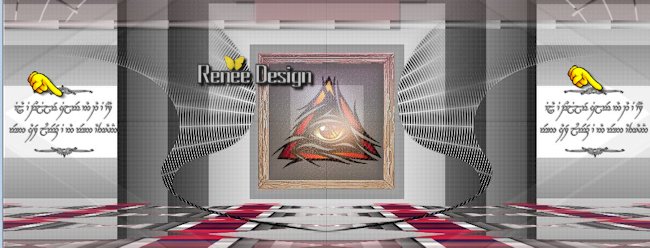
- Move tool / place your tube on the left side of your image
48. Layers-Duplicate
– Move tool / place your tube on the right side of your image as shown below
49. Layers-Merge-Merge-Down
50. Effects - 3D-Effects- Drop shadow with the same settings
51. Activate the tube ‘’ Renee_tube_taatoo.pspimage’’
- Image
resize with 650 pixels Height
- Edit/ Copy-Edit - Paste as new layer on your working image
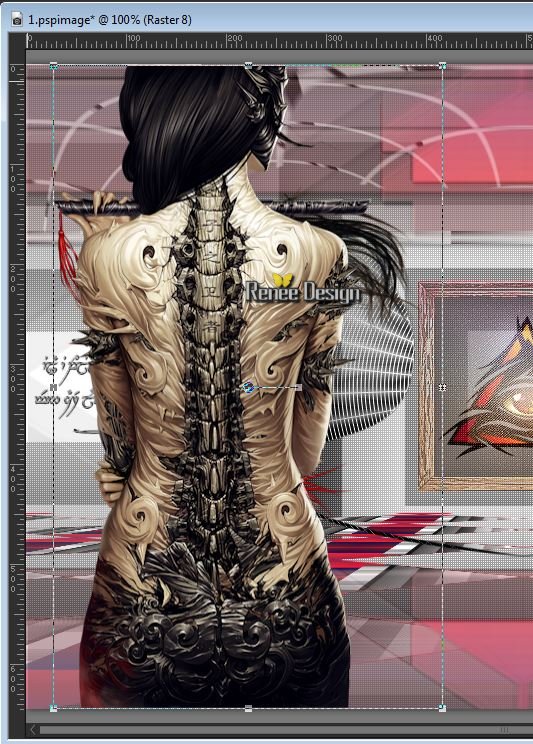
52. Activate your Pick Tool (K) Mode Scale -Stretch up and down
- place your tube on the left side of your image as shown below
53. Activate the tube ‘Renee_tube_Tattoed_girl.pspimage’’
- Image
resize with 66 %
- Edit/ Copy-Edit - Paste as new layer on your working image
- Move tool / place your tube on the right side of your image
54. Activate the tube ‘’Renee_tattoo_logo’’
Edit/ Copy-Edit - Paste as new layer on your working image
54. Effects - 3D-Effects- Drop shadow with the same settings
55. Activate the tube’’TATTOO2’’
- Edit/ Copy-Edit - Paste as new layer on your working image
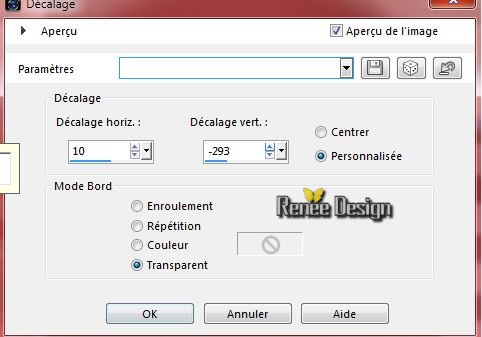
56. Effects-Image Effects-Offset with these settings
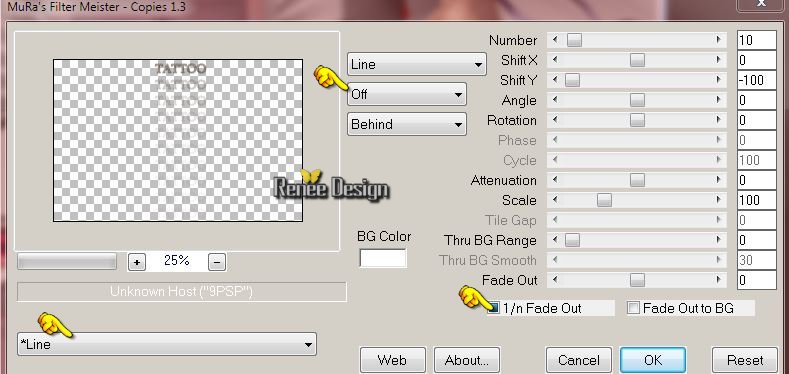
57.Effects-Plugins - Mura’s Meister – Copies with these settings
58.
Selection Tool ( S ) Custom selection use settings below
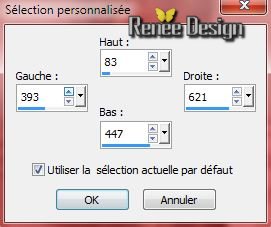
Hit the Delete Key of your Keyboard
Selections-Deselect All
59. Effects-Edge Effects-Enhance
60. Activate the tube ‘’fleurs’’
– Activate layer ‘’fleur1’’ of the tube- Edit/ Copy-Edit - Paste as new layer on your working image and move
-Double click on this layer and set the Blendmode to Multiply-Set the layer opacity of this layer to 65%
61. Activate again the tube ‘’fleurs’’
– Activate ‘’fleurs2’’ of the tube- Edit/ Copy-Edit - Paste as new layer on your working image and move
62. Image - Add borders-Symmetric checked: 2 pixels black
63. Image - Add borders-Symmetric checked: 85 pixels white
64. Activate the tube ‘’tattoo_decos’’ choose 2 deco,s what you like -Edit/ Copy-Edit - Paste as new layer on your working image and move
65. Activate the tube ‘’titre’’
-Image
resize with 66%
- Edit/ Copy-Edit - Paste as new layer on your working image and move
66. Image - Add borders-Symmetric checked: 1 pixel black
67. Image - Add borders-Symmetric checked: 10 pixels white
68. Image
Resize with 995 pixels Width
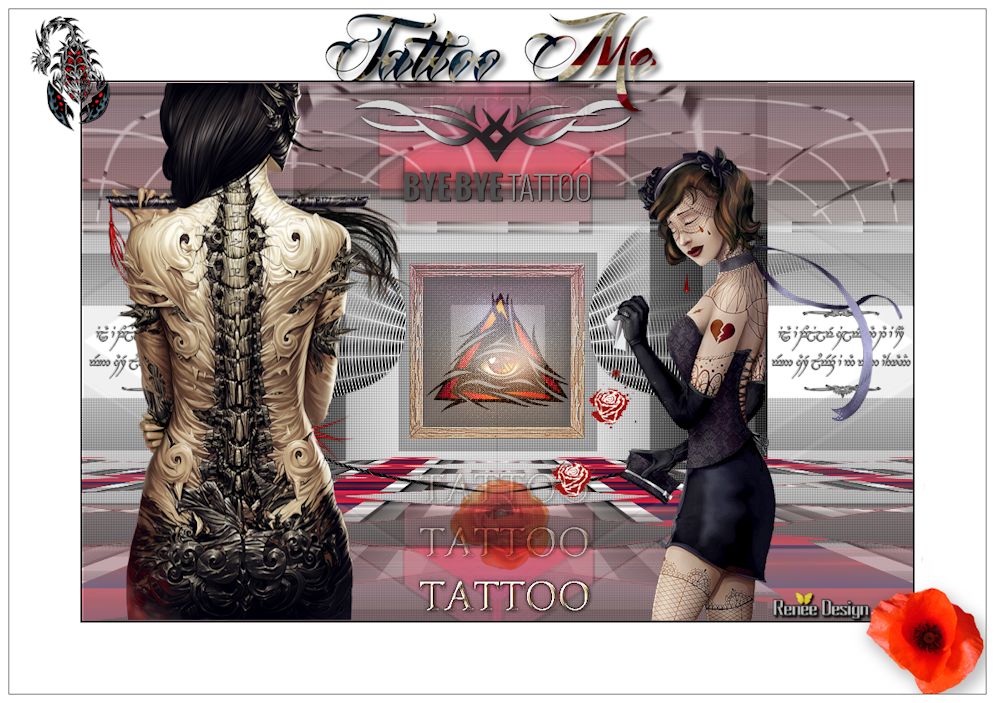
Save as JPG
I hope you enjoyed this tutorial .
This lesson was written by Renée 04/04/2015
edited and update
on 2015
*
Any resemblance with an existing lesson is merely a coincidence *
* Don't forget to thank the people who work for us and with us. I named the tubeurs - Testers and the translators.
Thanks Renée.
*
| 
 Translations


 When you see this logo the filter is imported in Unlimited


 All rights reserved