|
Let's start the lesson.
Used Colors
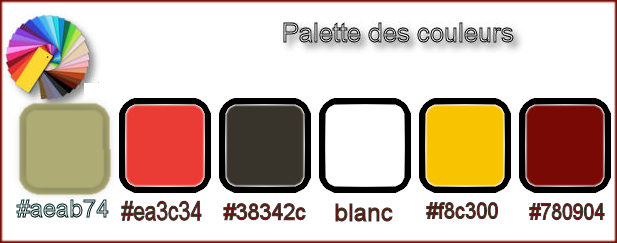
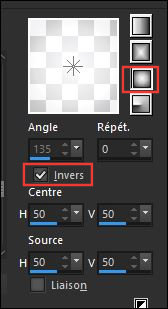
- Preparation - Color Palette: Set your foreground color to #aeab74 -Set your background color to gradient ‘’Fading White ‘’ Prepare a background sunburst gradient configured like this
1.
File: Open a new transparent image 1005 x 685 Pixels
2.
Selections- Select All
3.
Open the image ‘’ Steampunk_42_Papier.jpg’’
-Edit -Copy- Activate your work-Edit Paste into selection
Selections- Deselect All
4.
Effects- Distortion Effects- Wind 100° from Left
-
Repeat: Effects- Distortion Effects- Wind 100° from Left
5.
Layers- Duplicate
6.
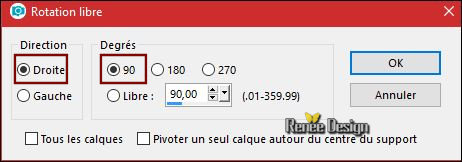
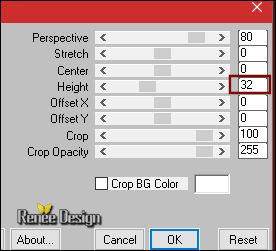
Image - Rotation libre 90° use the settings below
7.
Effects – Plugins – Vanderlee Unplugged X – Tan
Deform
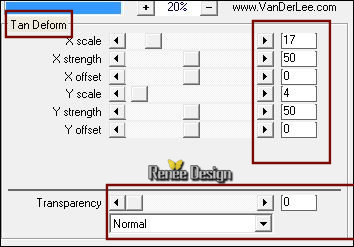
8.
Layers- Merge- Merge Down
9.
Effects – Plugins – Vanderlee – Unplugged X –
Spotlight
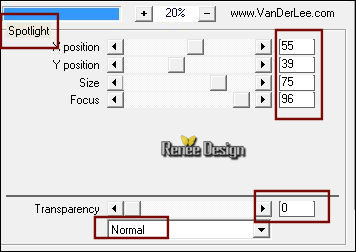
10.
Layers- Duplicate
11.
Adjust- Blur- Gaussian Blur : Radius 65
12.
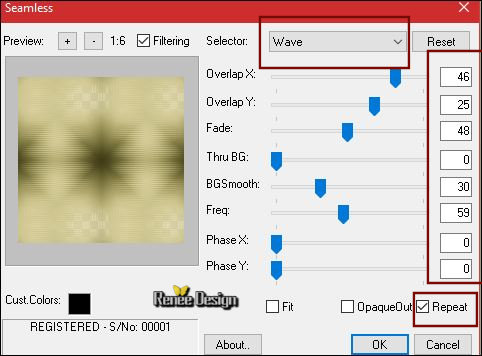
Effects- Image Effects- Seamless Tiling use the settings below
-
Repeat: Effects- Image Effects- Seamless Tiling with the same settings
13.
Effects -Plugins – Neology –
Turnaround
14.
Effects –Plugins -Unlimited ICNET FILTERS - Tile & Mirror-
Kaleidoscope 2 with these settings 107/192
15.
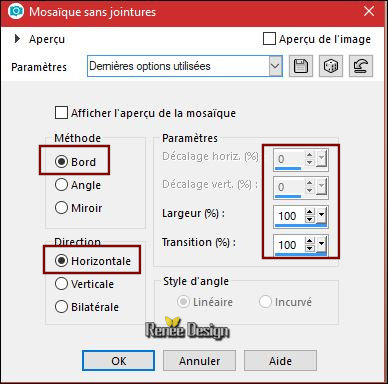
Effects – Plugins – Mura Pro -
Seamless use the settings below
16. Effects
–Plugins - Mura’s Meister – Perspective
Tilling
17. Set the Opacity of this layer to 55%
18.
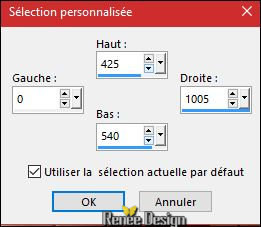
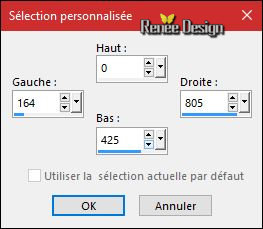
Activate Selection Tool -Custom Selection (S) -Rectangle with these settings
- In the Layer-Palette-Make Raster 1 active
19.
Selections- Promote selection to Layer
20. Layers- Arrange- Bring to Top
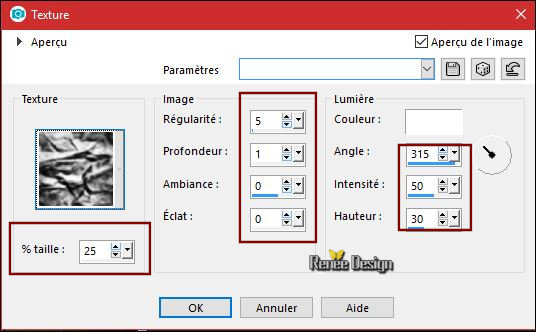
21. Effects
– Texture Effects – Texture – and select Texture
‘‘steampun42Texture.bmp’’
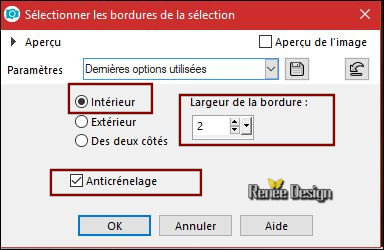
22.
Selections- Modify-Select Selection Borders use the settings below
23. Activate the Flood Fill Tool and fill the selection with the background gradient
Selections- Deselect All
24.
Effects – Plugins – Flaming Pear -(find it into the freebees zip of Flamingpear)
TransTone
25.
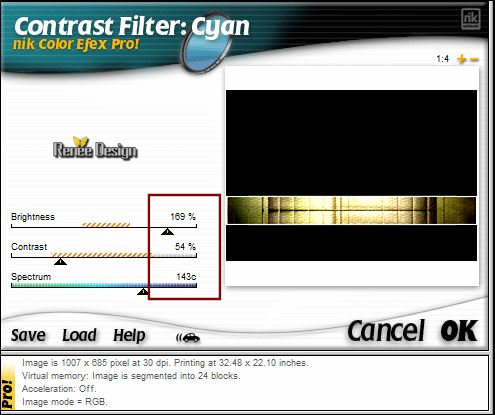
Effects – Plugins – Nick Color effect Pro 1/ Contrast
Fiter Cyan use the settings below
26.
Layers-Properties-Set the Blend Mode to" Hard Light "
- In the Layer-Palette-Make Raster 1 active
27. Effects
– Plugins – Adjust variation – More red ( 2
clicks)
-Activate the top of the layer palette
28. Layers- New Raster Layer
29.
Activate Selection Tool -Custom Selection (S) -Rectangle with these settings
30. Open the tube ‘’image_quantum’’
-Edit -Copy-Activate your work- Edit Paste into selection
Selections- Deselect All
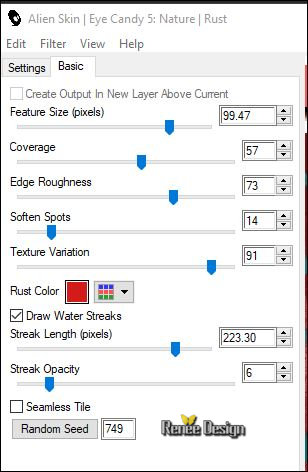
31. Effects
– Plugins – Eyecandy5 – Nature - Rust use the settings below
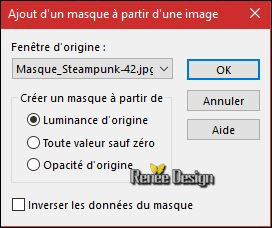
32. Layers- Load/Save Mask-Load Mask From Disk and select
‘’Masque_Steampunk_42’’
- Effects-Edge Effects- Enhance
- Layers- Merge- Merge Group
33. Effects-Edge Effects- Enhance
34. Open the tube ‘’ Renee_steampunk_42_sphere.png’’
- Edit - Copy- Activate your work -Edit - Paste as a new layer
- Move tool / place your tube on the left side of your image
35. Open the tube ‘’Renee_Tubes_Pollution’’
36. Image
Resize to 80%
- Edit - Copy- Activate your work -Edit - Paste as a new layer
- Activate Move Tool (M) move it the right place ( see finished image )
(
I give you the model/shape , you can customize it if you wish, I've accomplished this work by selecting parts of images found on the net
)
37. Open the tube ‘’Renee_Tubes_Sreampunk_42_carnet’’
- Edit - Copy- Activate your work -Edit - Paste as a new layer
- Move tool / place your tube on the top right side of your image
38. Layers- Duplicate
39. Adjust- Blur- Gaussian Blur: Radius 45
- Move the tube slightly up and to the right
- Layers- Arrange- Move Down
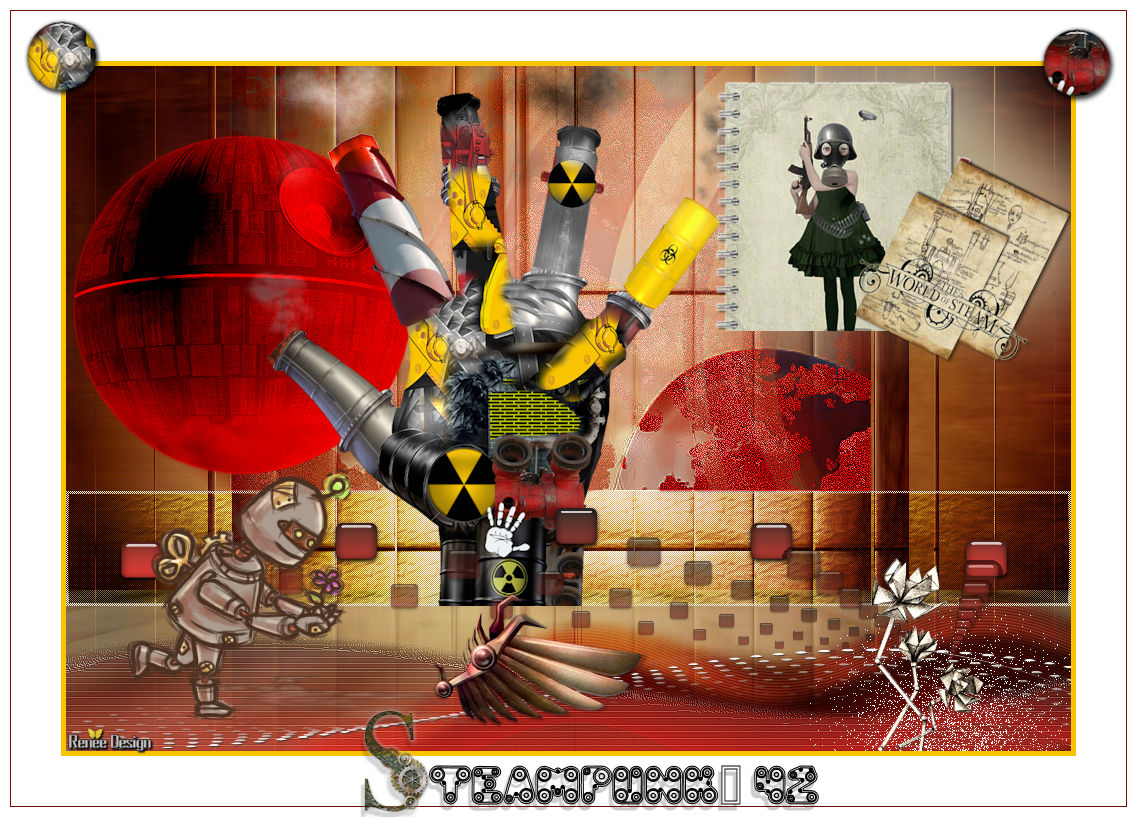
Your work and Layer Palette look like this now-You should have this result
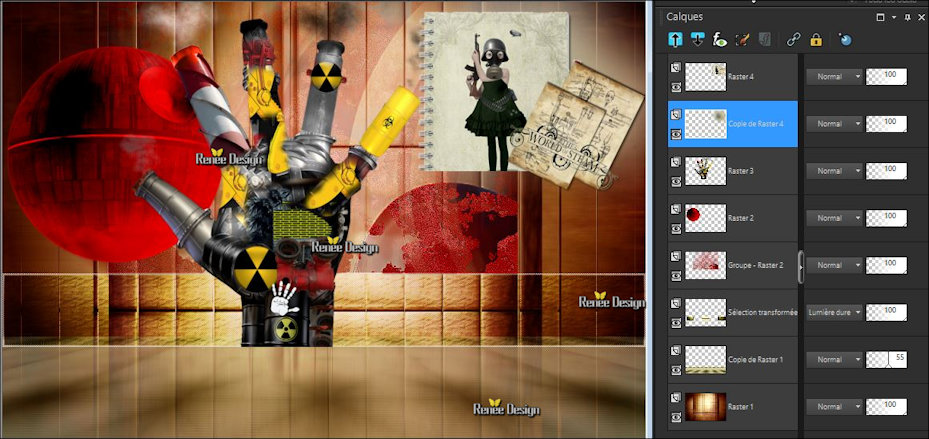
40. To replace the top of the layers palette
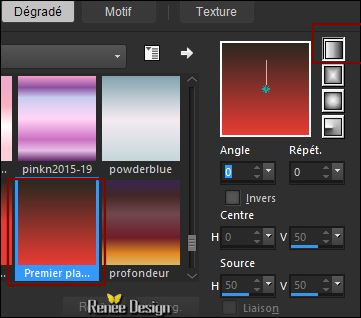
- Preparation - Color Palette: Set your foreground color to #ea3c34 -Set your background color to #38342c
- Prepare a foreground/background linear gradient configured like this
41. Layers- New Raster Layer
42.
Selections –load/save selection –load selection from disc and select my selection: ‘’Steampunk_42-1’’
43. Activate the Flood Fill Tool and fill the selection with the gradient
Selections- Deselect All
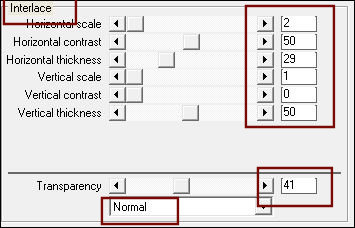
44. Effects
- Plugins– Vanderlee Unplugged X –
Interlace
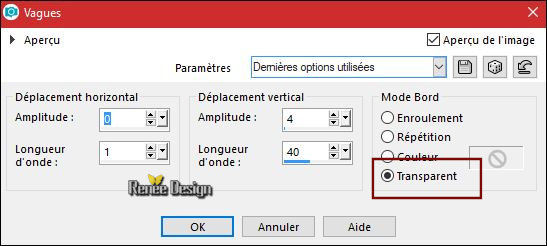
45. Effects
– Distortion Effects -Wave use the settings below
46.
Layers-Properties-Set the Blend Mode to" Overlay "
47. Layers- Duplicate
-
Layers- Arrange- Move Down
48.
Layers-Properties-Set the Blend Mode to" Multiply "
49. Layers- New Raster Layer
50.
Selections –load/save selection –load selection from disc and select my selection: ‘’Steampunk_42-2’’
51. Activate the Flood Fill Tool / Change the opacity of the color to 60%- and fill the selection with the gradient
Selections- Deselect All
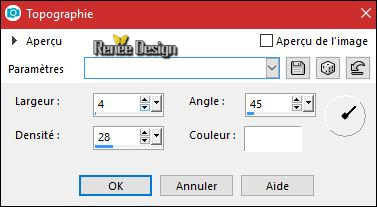
52. Effects
-Artistic Effects - Topography use the settings below
53. Effects- Edge Effects- Enhance
54. Layers- New Raster Layer
55.
Selections –load/save selection –load selection from disc and select my selection: ‘’Steampunk_42-3’’
56. Activate the Flood Fill Tool / Change the opacity of the color to 100%- and fill the selection with the gradient
Selections- Deselect All
57.
Effects – Plugins – EyeCandy 5 impact – Glass
/Preset : Clear
58. Layers- Duplicate
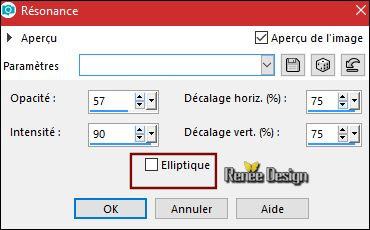
59. Effects
– Reflection Effects- Feedback use the settings below
60. Layers- New Raster Layer
61.
Selections –load/save selection –load selection from disc and select my selection: ‘’Steampunk_42-4’’
- Color Palette: Set your foreground color to #ffffff
62. Activate the Flood Fill Tool and fill the selection with the foreground color #ffffff
Selections- Deselect All
63. Effects
3 D Effects –Drop Shadow with these settings : 1/1/100/1 black
64. Layers- New Raster Layer
65.
Selections –load/save selection –load selection from disc and select my selection: ‘’Steampunk_42-5’’
66. Activate Flood Fill Tool /Opacity 100% and fill the selection with the foreground color #ffffff
Selections- Deselect All
67.Adjust- Blur- Gaussian Blur: Radius 32
68.
Layers-Properties-Set the Blend Mode to" Dissolve "-Set the Opacity of this layer to 28 %
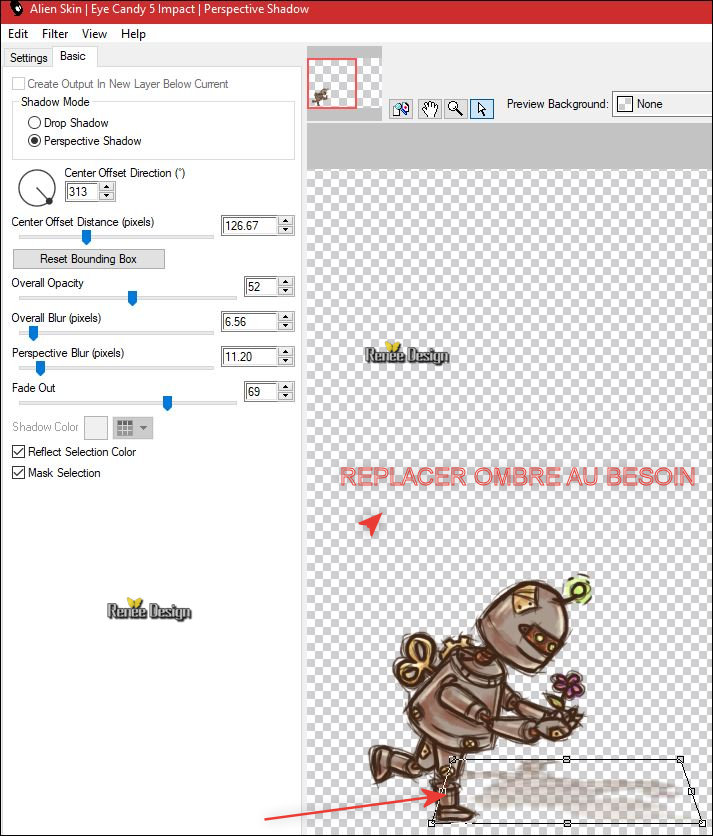
69. Open the tube ‘’ Steampunk42-Robot.png’’
- Edit - Copy- Activate your work -Edit - Paste as a new layer
- Move Tool / place your tube to the bottom left side of your image
70. Effects
– Plugins – EyeCandy 5 Impact Perspective shadow with these settings-(Settings-Reflect in Front-Basic-
Overall Opacity 60,and shaping it as shown in the example below
71. Open the tube ‘Steampunk42_fleur’’ and open the tube
‘’
Steampunk42_oiseau ‘’
72. Edit - Copy- Activate your work -Edit - Paste as a new layer - Move it in the right place ( see finished image )
73. Layers- Merge- Merge Visible
74. Image - Add borders-Symmetric checked with 5 pixels #f8c300
75. Image - Add borders-Symmetric checked with 50 Pixels #ffffff
76. Image - Add borders-Symmetric checked with 1 Pixel #780904
77. Image - Add borders-Symmetric checked with 10 Pixels #ffffff
78. Selection Tool (S)- Selection Type Circle
- Activate the Merged Layer
79. Select a small circle from a part of your work, choose the part that interests you ( if needed you can resize later )
80.
Selections- Promote selection to Layer
81.
Effects – Plugins - EyeCandy 5 Glass – Clear
Selections- Deselect All
82. Repeat : Select 1 small circle from another part of your work (same as above)
83. Place the circles on the top left and right
84. Layers- Merge- Merge Down ( the circles)
85. Effects
– 3 D Effects -Drop Shadow with these settings: 1/1/100/6 black
86. Open the tube with the "text" -Edit - Copy- Activate your work -Edit - paste as a new layer and move
- Layers- Merge- Merge All ( Flatten)
Save as JPG
I hope you enjoyed this lesson
Renée
This lesson was written by Renée 15/10/2017
Edited and Update
2017
*
Any resemblance with an existing lesson is a coincidence
* Do not forget to thank the people who work with us and for us I have appointed the tubeurs and translators
Thanks
*
| 
 Translations


 If a plugin supplied appears with this icon it must necessarily be imported into Unlimited *