|
Let's start the lesson. Open the Color-Palette
-Material Properties:
Set your Foregroundcolor to#ead8c2 and your Backgroundcolor to #555555
1.
File - New - Transparent - New Image: 1125 x 705 pixels
2.
Flood Fill Tool: Fill with the backgroundcolor
3.
Layers - New Raster Layer
–Flood Fill Tool: Fill with the foregroundcolor
4.
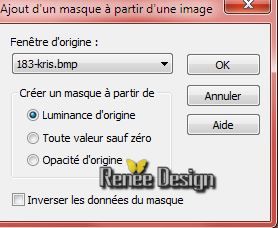
Layers- New Mask Layer from Image and select:
« 183-kris »
-
Layers- Merge- Merge Group
5.
Effects- Plugins- Unlimited 2.0 - &<Sandflower Specials°v° >
-Color White Out with these settings:91 and
69
6.
Selections - load/save selection - load selection from disk and select my file: “steampunk27_1”
7.
Effects- Plugins – Unmimited2.0 - VM Experimental-Every Picture
Tells A Story using the default settings 29
8.
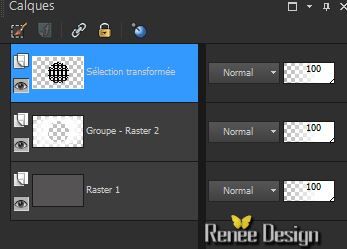
Selections- Promote selection to layer
9. Layer Palette:activate the layer underneath (Group-Raster2) –Press the Delete button on your key board
- Activate the top of the layer-Palette(Promoted Selection)
10.
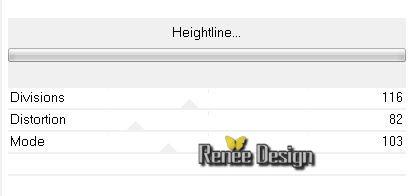
Effects-Plugins – Unlimited 2.0 - VM Extravanga –
Heightline…
Selections- Deselect All
11. Activate the tube ‘’ Steampunk27-Bouche’’
– Edit -Copy -Edit - Paste as new layer on your working area. Do not move it is in the right place
12. Layers- Arrange- Move Down
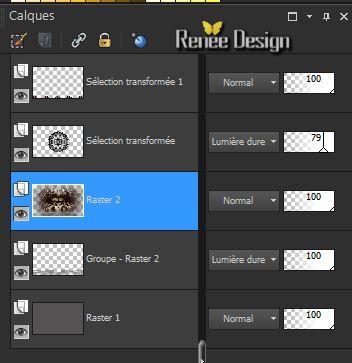
Selection tranformée= Set the Blendmode to Hard Light -Opacity
79%
Groupe -
Raster 2 = Set the Blendmode to Hard Light
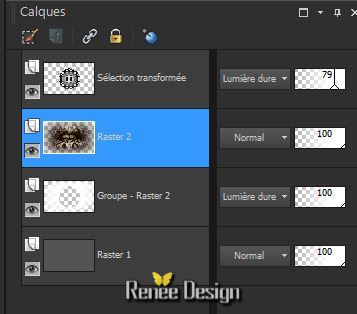
-Layer Palette, activate the Second Layer from the bottom= Groupe – Raster 2
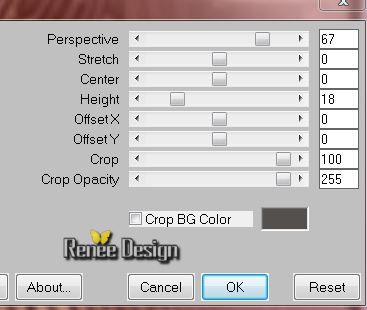
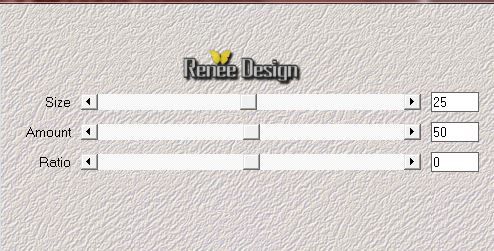
13. Effects- Plugins – Mura’s Meister –Perspective
Tilling with these settings
14. Effects- Plugins –L and K’s –Palmyre using the default settings
255/7
15. Effects- Edge Effects- Enhance More
16.
Selections - load/save selection - load selection from disk and select my file: ‘’steampunk27-2’’
- Set your Foregroundcolor to
#1d0b08
17.
Selections-Promote selection to Layer
- Activate Flood Fill Tool and fill the selection with the foregroundcolor #1d0b08
18. Effects- Texture Effects-Blinds with these settings
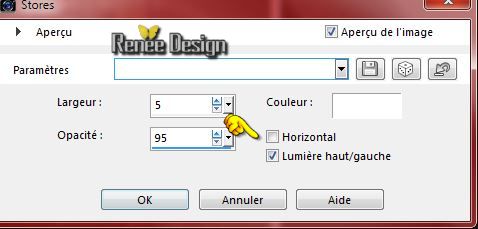
Selections- Deselect All
19. Layers- Arrange- Bring to Top
- Layer Palette: activate Raster 2
20.
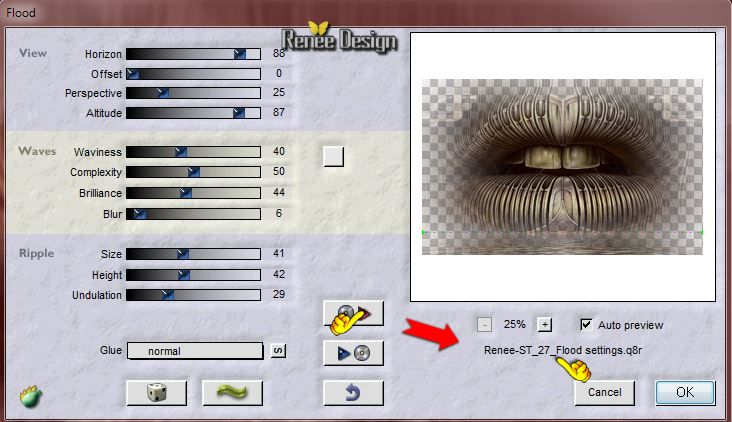
Effects- Plugins –Flaming Pear – Flood-
click on the red arrow and select: Preset”
Renee-ST_27_Flood settings”
Or manual settings below
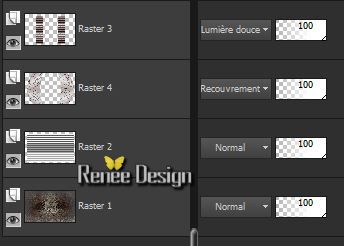
Layer Palette look like this now-You should have this result
21. Window-Duplicate-You may minimize your working area for a moment, but do not close, we will need it again soon(do not merge)
- We work on the copy
22. Layers- Merge- Merge- Visible /Rename Raster 1
23. Effects- Plugins –Medhi- Melt 1.1
24. Repeat: Effects- Plugins-Medhi with the same settings
25. Layers - New Raster Layer
26.
Selections- Select All-Selections Modify-Contract with 45 pixels
27. Pot of Paint: Change the opacity of the color to 85%
- Activate Flood Fill Tool and fill the selection with the backgroundcolor #555555
28. Effects- Texture Effects-Blinds with these settings

Selections- Deselect All
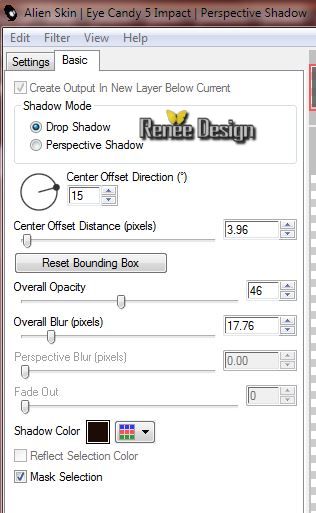
29. Effects- Plugins –EyeCandy5 –Impact –Perspective
shadow with these settings
30. Layers- Duplicate
31. Layers- Merge- Merge Down
32. Activate the tube ‘’ stp-27_image_1’’
- Edit -Copy -Edit - Paste as new layer on your working area. Do not move it is in the right place
33. Layer Palette - Double click on this Layer and set the Blend Mode to "Soft Light"
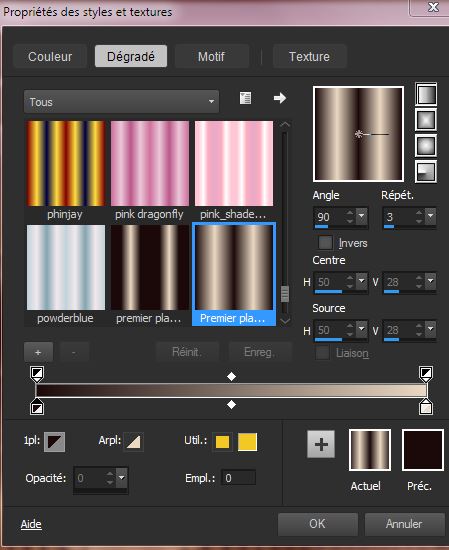
- Set your Foregroundcolor to#1d0b08 and the backgroundcolor to #555555
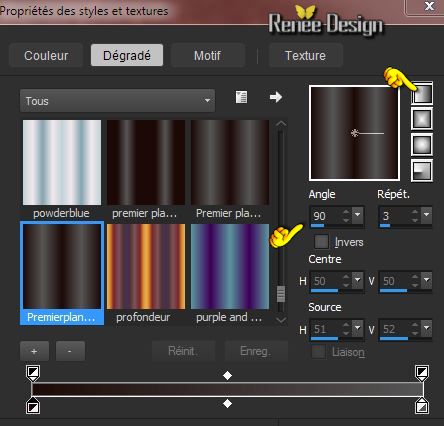
34.
Prepare a linear gradient configured like this.
35. Layers - New Raster Layer
36.
Selections Select All
37.
Selections Modify-Contract with 45 pixels
38. Settings of your paint pot to 85%
–Activate Flood Fill Tool and fill the selection with the gradient
39. Effects- Plugins - L and k’s - Frederiek with these settings :
156/12
Selections- Deselect All
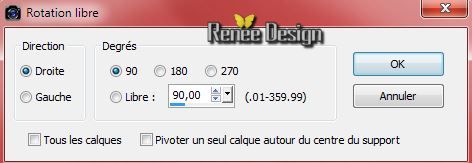
40. Image
Free Rotate 90° Right
41. Effects- Plugins- Simple - Left Right Wrap
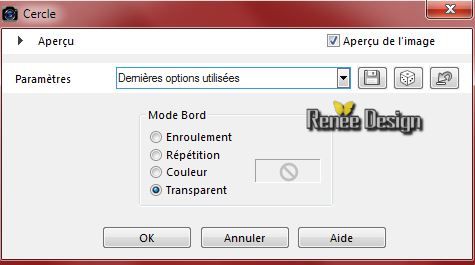
42. Effects- Geometric Effects- Circle-Transparent
43. Layers- Arrange- Move Down
- Layer Palette - Double click on this Layer and set the Blend Mode to "Overlay
44. Effects- Plugins- Eye Candy 5 Impact - Perspective
shadow with the same settings
- Layer Palette look like this now-You should have this result
-Layer Palette, activate the Second Layer from the bottom= Raster 2
45. Layers - New Raster Layer
46.
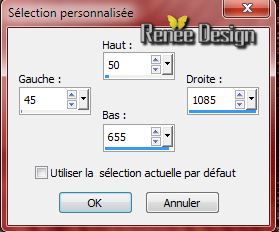
Selections Tool (S) Custom Selection with these settings
47. Activate your minimized image /Layer Palette: Close the bottom layer by clicking on the little eye = raster
1
- Be placed on another layer
48. Edit - Copy Special - Copy Merged
49. On your work image: Edit - Paste into selection
50.
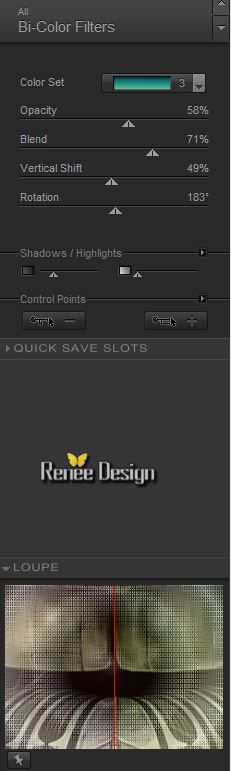
Effects-Plugins - Nick color Effex Pro3.0 -
Bi-Color Filters/ Set Moss /Color set 3
Selections- Deselect All
51. Layers- Merge- Merge Visible
52. Layers- Duplicate
53. Image
Resize with 85% (Resize all the layers not checked)
54. Activate the tube ‘’stp-27_image_2’’
- Edit -/Copy -Edit - Paste as new layer on your working area.
55.
Activate your Pick Tool (K) Mode Scale place it in the right place as shown in the example below
600 pixels
56. Effects- Plugins- – Alien Skin Bohek -tab -Settings/User settings choose my preset:‘’Vignette
Only__Renee_Steampunk_27_Natural – Lomo’’
57. Activate the tube ‘’ Steampunk_Gothic_Markofthedead-tubed by A PSP
Devil.pspimage’’ and activate: tube 2 pour steampunk
27-
- Edit - Copy -Edit - Paste as new layer on your working aera
58. Move Tool:move tot the left side (see complete image )
59. Effects- Plugins- – Alien Skin Bohek -tab Settings/User settings choose my preset:‘’Vignette
Only__Renee_Steampunk_27_Natural – Lomo’’
60. Activate the tube ‘’ st_27_coeur_globe’’
- Edit -Copy -Edit - Paste as new layer on your working area
-Move Tool: place in the center of the bottom (see complete image)
61. Activate the tube ‘’
MarieL_2008_04Avril_Awakeningt.pspimage’’
- Edit -Copy -Edit - Paste as new layer on your working area - Mover Tool: move to the right side (see complete image)
62. Layer Palette - Double click on this Layer and set the Blend Mode to "Luminance Legacy"
63. Layers - New Raster Layer
64.
Selections - load/save selection - load selection from disk and select my file: ‘’ Steampunk27_3’’
65. Settings of your paint pot to 100% -Activate Flood Fill Tool and fill the selection with color White (click 2 times into selection )
Selections- Deselect All
- Set your Foregroundcolor to#1d0b08 and your Backgroundcolor to #ead8c2
66.
Prepare a linear gradient configured like this.
If problems with the brush /and you can not export it
there is a-pspimage into the zipfile ''Effet
-Brush-ron_flourishes-102 and paste as a new layer on your working area and move
and then continue with point 70
67.Layers - New Raster Layer
68. Activate the Brush tool and select my file
‘’BrushTip_rons__flourishes_202’’
With these settings

69. Apply with the gradient:–put the tip of the brush tool as shown by the red arrow as shown below
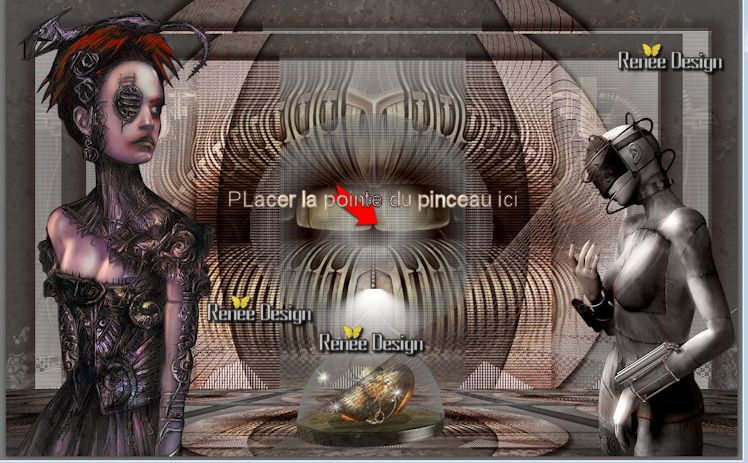
-
With your move tool place it to the right place
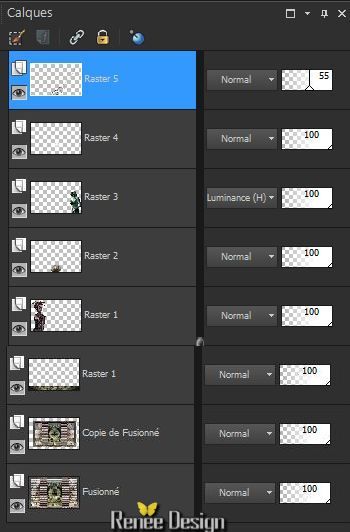
70.
Set the layer opacity of this layer to 55 %
- Layer Palette look like this now-You should have this result
71. Image - Add borders-Symmetric checked: 2 pixels #1d0b08
72. Image - Add borders-Symmetric checked:50 Pixels #ead8c2
73. With the magic wand -select the border of 50
pixels
74. Settings of your paint pot to 100%- Activate Flood Fill Tool and fill the selection with the gradient
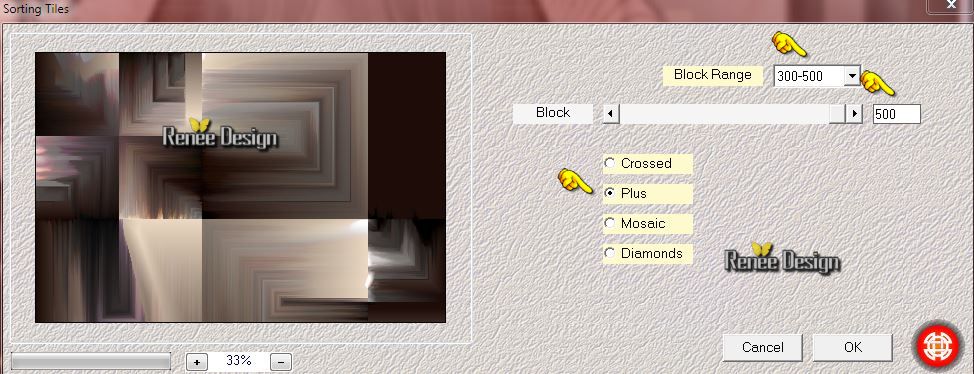
75. Effects- Plugins – Medhi Sorting Tiles with these settings
76. Effects- Edge Effects- Enhance
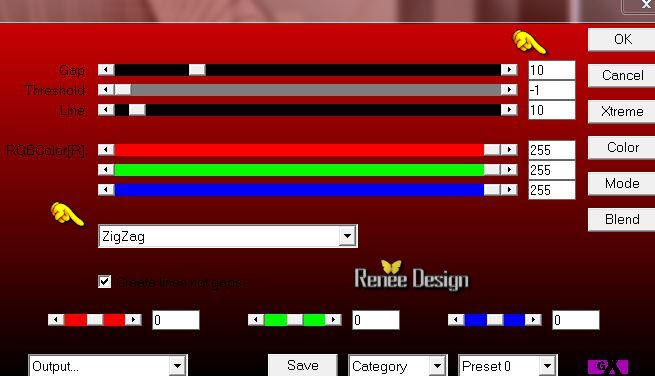
77. Effects- Plugins – AP01 [Innovation]- Lines
Silverling with these settings
78.
Selection Invert
79. Effects- 3 D Effects-Drop Shadow with these settings 10/10/50/42 black
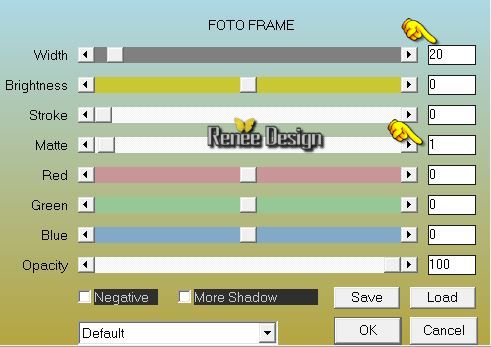
80. Effects- Plugins – Effet AAA Frame - Foto
Frame with these settings
Selections- Deselect All
81. Image - Add borders-Symmetric checked: 2 pixels #1d0b08
82. Effects- Plugins –AAA Frame Foto Frame-with the same settings
83. Activate the tube ‘’ st_27_texte1.png’’-Edit -Copy -Edit - Paste as new layer on your working area. With your move tool move to the top
84. Layer Palette - Double click on this Layer and set the Blend Mode to Luminance Legacy
85. Activate the tube ‘’ st_27_texte2.png’’-Edit -Copy -Edit - Paste as new layer on your working area
- With your move tool move to the bottom of your work
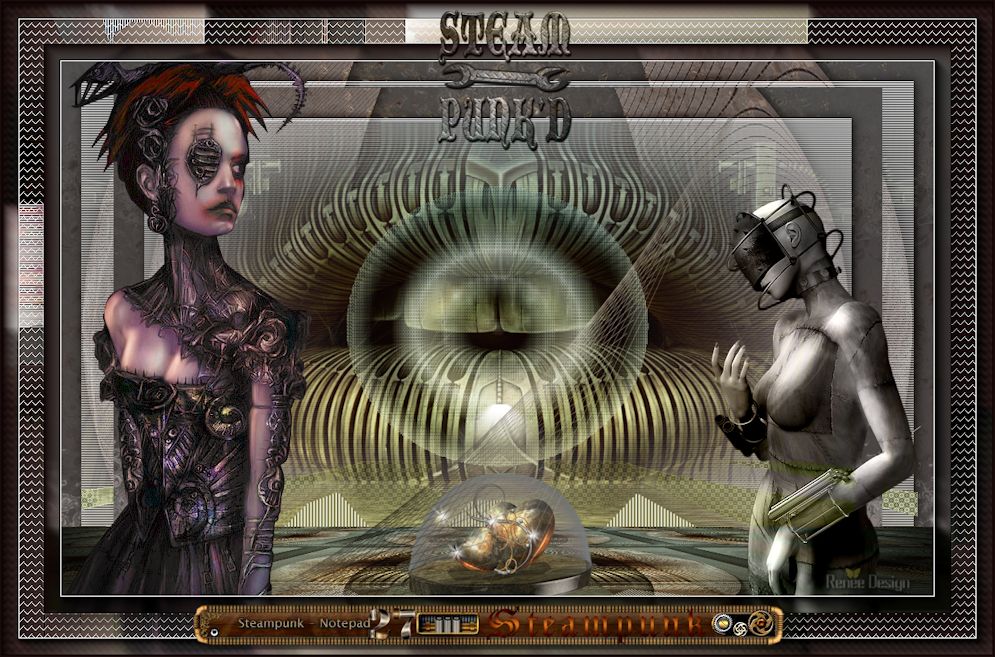
86.Layers- Merge- Merge All
87. Image - Add borders-Symmetric checked: 2 pixels #1d0b08
88. Image
Resize with 995 pixels Width
Save as JPG
4/02/2015
| 
 Translations


 When you see this logo the filter is imported in Unlimited *

 All rights reserved