|
Let's start the lesson .
- Color-Palette
Material Properties: Foreground color to this color: #3b4443 /Background color to this color : #f0e6b3
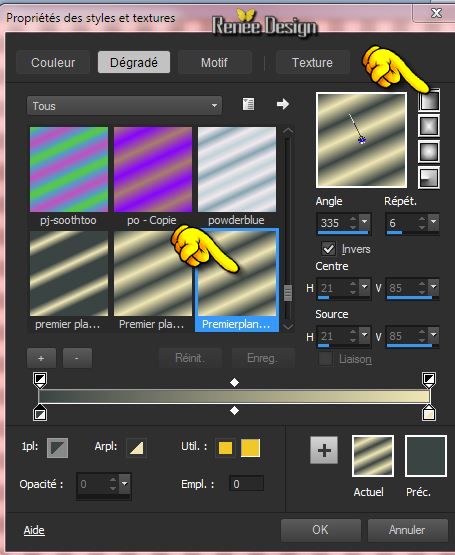
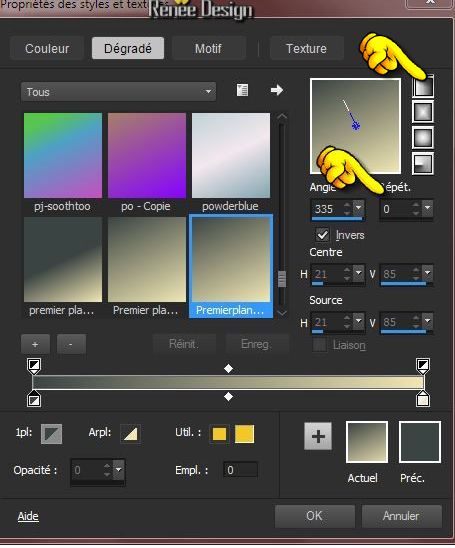
1.Prepare a Linear Gradient as configured like this.
2. Open a new transparent image of e
1015 x 615 pixels
3. Activate Flood Fill Tool and fill the layer with the gradient
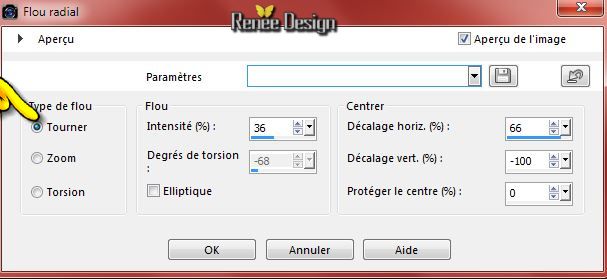
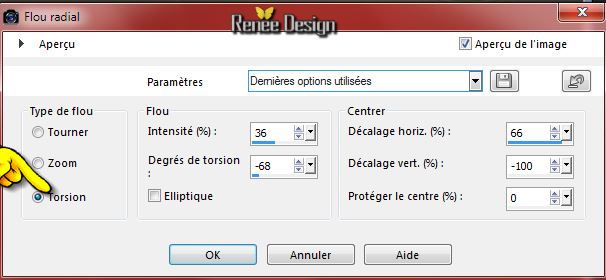
4. Adjust- Blur-Radial Blur with these settings
5. Layers- Duplicate -Image
Mirror - In the Layerpalette-Opacity to 50%
6. Layers- Merge- Merge Down
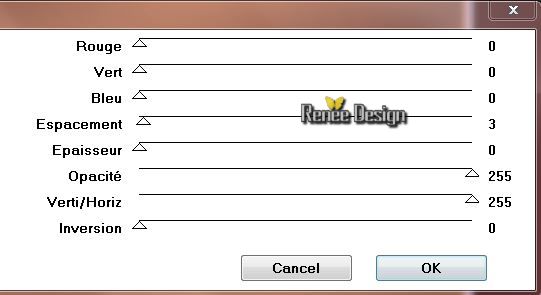
7. Effects- Plugins - Jeux de Lignes - Entrelacement
8. Adjust- Blur-Radial Blur with these settings
9. Effects- Edge Effects- Enhance More
10. Layers- Duplicate
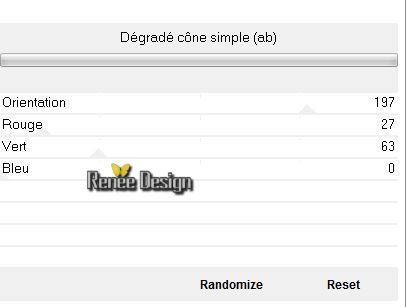
11. Effects- Plugins - Unlimited 2.0
- Dégradé -Cône Simple
12. Effects- Plugins -Transparency - Eliminate Black
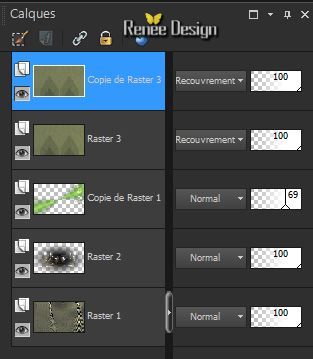
13. In the Layerpalette-Opacity to 69%
- Activate the bottom of the Layer-Palette
14. Activate the tube
''secret_laboratory_steampunk_24'' -Edit/copy-Edit paste as a new layer on your working area
Do not move !!
15. Material of the foreground:Change the settings of the gradient >Repeats 0
16. Layers - New raster layer
-Activate Flood Fill Tool and fill the layer with the gradient
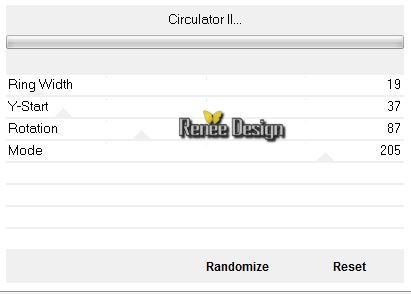
17. Effects- Plugins -VM Distorsion -Circulator II
18. Layers- Duplicate -Image Mirror
19. In the Layerpalette, set Blend Mode to Overlay
20. Layers- Merge- Merge- Down
-In the Layerpalette, set Blend Mode to Overlay
21. Selections - load/save selection - load selection from disk and choose my selection: ''steampunk_24_1''
Keep Selected
22. Effects- Plugins - Unlimited 2.0 -
Tile & Mirror - XY Offset 50% (negative)
-Selections- Deselect All
23. Effects- Plugins- Unlimited 2.0
-Toadies -What are you - Overdose / 101
24.
Layers- Duplicate
Your layer palette and your work looks like this:
25.
Layers - New raster layer
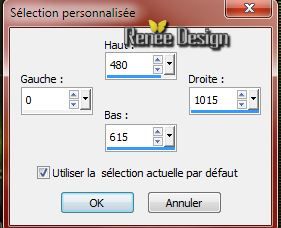
26.
Selection Tool ( S ) Custom selection use settings below
27.
Activate Flood fill tool and fill the selection with the gradient
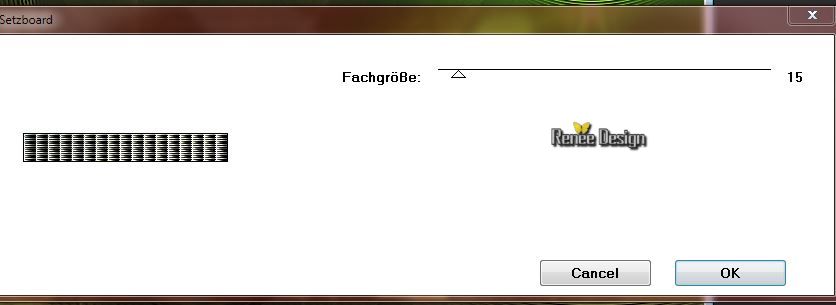
28.
Effects- Plugins - Unlimited2.0 - *V* Kiwi's Oelifilter - Setzboard
29.
Effects- Plugins - Mura's Meister - Perpsective
Tilling using the default settings
Selections- Deselect All
30.
Layers - New raster layer
31.
Selections - load/save selection - load selection from disk and choose my selection: ''steampunk_24_2''
32.
Activate Flood fill tool and fill the selection with the backgroundcolor (click 4 a 5 times in the selection)
Selections- Deselect All
33.Layers- Duplicate
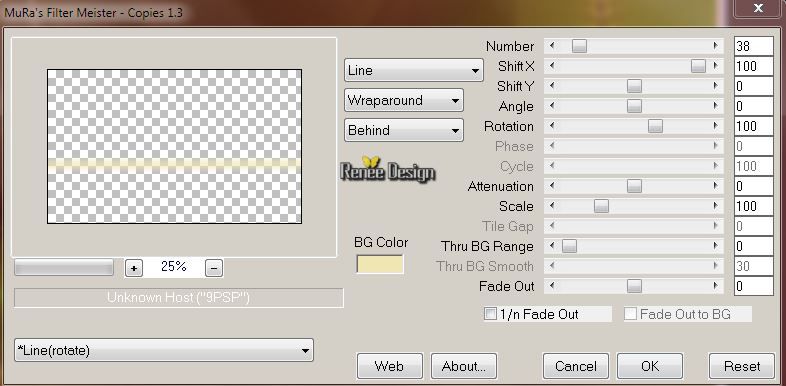
34.
Effects- Plugins - Mura's Meister - Copies with these settings
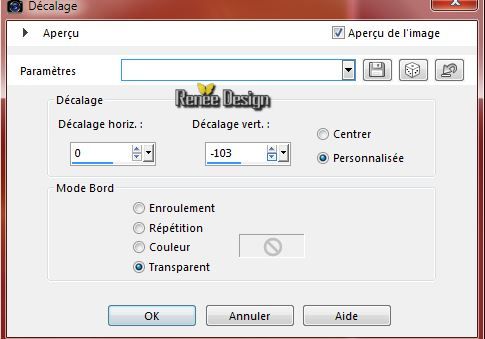
35.
Effects - Images Effects - Offset with these settings
36.
In the layerpalette-Opacity to 89%
37.Layers- Merge- Merge Visible
38.
Activate the tube''steampunk_24_livres.pspimage''- Image
Resize 60%
39.
-Edit/Copy -Edit - Paste as new layer on your working area and move
40.
Activate the tube ''steampunk_24_panmur.pspimage''
41.
-Edit/Copy -Edit - Paste as new layer on your working area and move
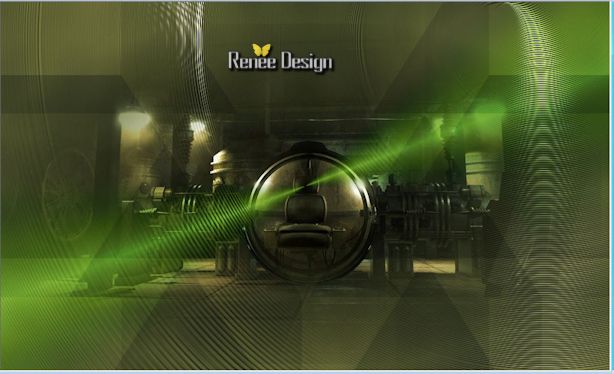
42. Effects- Plugins -Color effex Pro3.0 - Bi Color Filters - Color
set = Moss =1
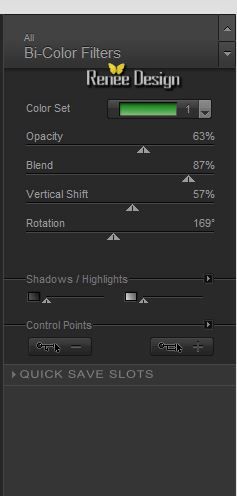
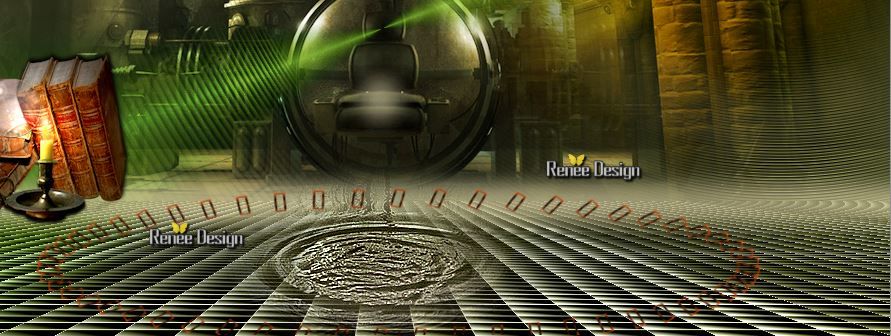
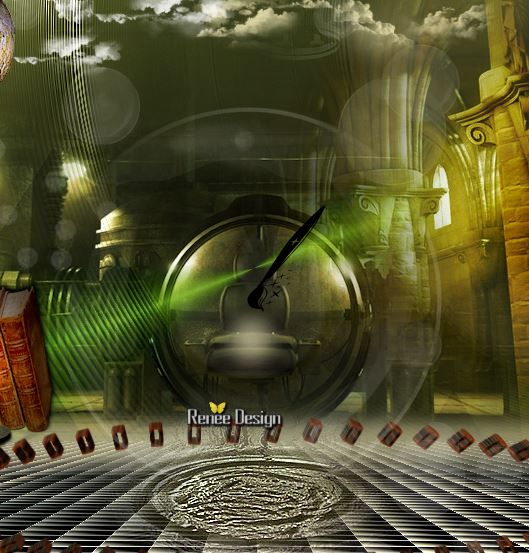
-The result
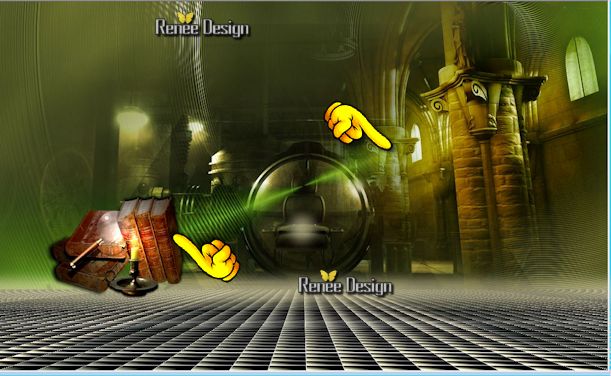
43.
Layers- New raster layer
44.
Selections - load/save selection - load selection from disk and choose my selection: ''steampunk_24_3''-
45.
Activate Flood fill tool and fill the selection with the backgroundcolor (click 3 a 4 times in the selection )
Selections- Deselect All
46.
Activate the tube'' steampunk_24_nuages''
47.
Edit/copy-Edit paste as a new layer on your working area
With the move tool, move it like this
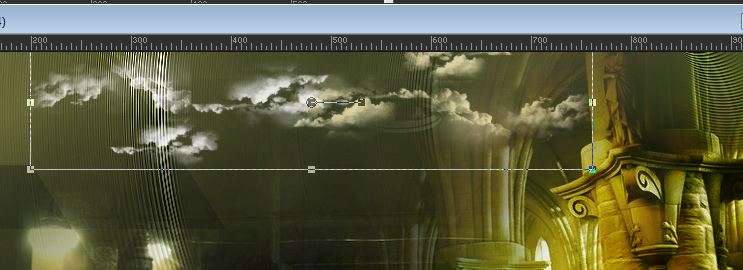
48.
Activate the tube ''steamupunk_24_terre''-Image Mirror
- Edit/copy-Edit paste as a new layer on your working area and move
49.
Effects- Plugins -Graphic Plus - Cross shadow using the default settings
50.
Activate the tube''steampunk_24_craquelures.pspimage''
-
Edit/copy-Edit paste as a new layer on your working area and move
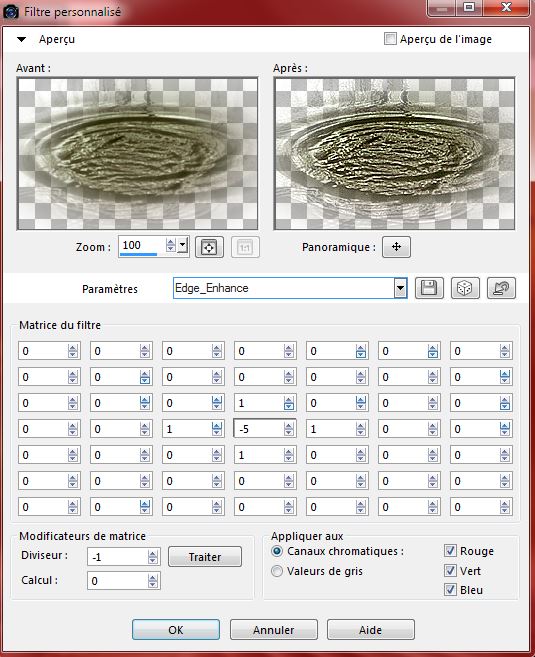
51.
Effects- Plugins -Effects- User Defined filter--Edge Enchance using the default settings (C:\Users\YourName\Documents\Corel PaintShop Pro\16.0\in the presets folder)
52.
Activate the tube ''steampunk_24_cercle''
-
Edit/copy-Edit paste as a new layer on your working area and move
Place like this
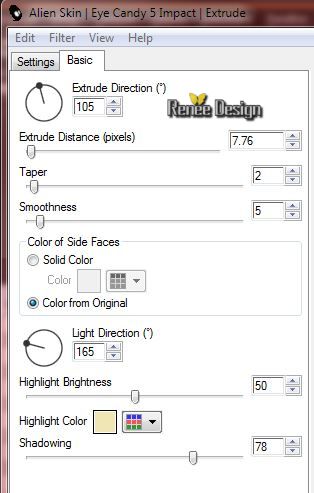
53.
Effects- Plugins - EyeCandy 5 - Extrude with these settings
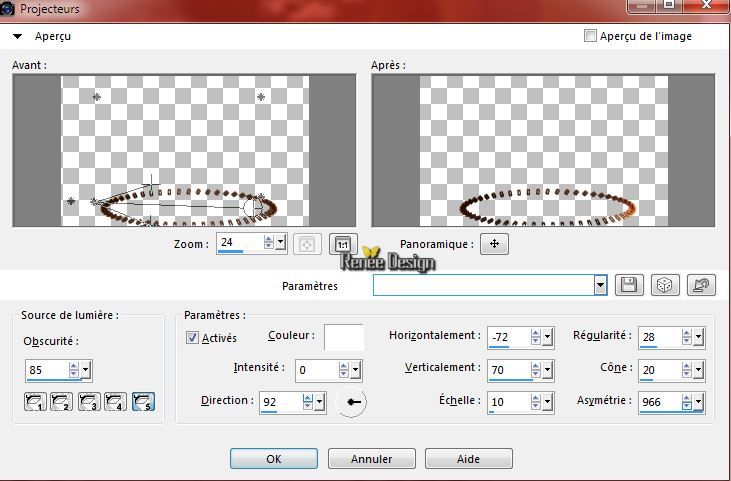
54.
Effects- Illumination Effects- Light with these settings
55. Open the Brush-
''steampunk_24_bulles_pinceau.pspimage''in your psp
-File- Export Custom Brush (Give it a name)
56.
Properties Foreground: foreground color to color white/
Activate the brush tool and choose the brush:steampunk_24_bulles

57.Layers - New raster layer
-
Stamp with the foreground color white in the middle of your work
58.
Activate the tube '' KRYSSTEAMPUNK-15-O5-14-058.jpg''-
Image Resize 75%
--Edit/Copy -Edit - Paste as new layer on your working area and move
59.
Activate the tube ''DBV_Steampunked_element (10).pspimage''
activate raster 2 of the tube
-Edit/Copy -Edit - Paste as new layer on your working area and move
60.
Activate the tube"ecrou_steampunk_24''
-
-Edit/Copy -Edit - Paste as new layer on your working area and move (put down on the chain)
61.
Layers- Merge- Merge- Visible
62.
Image - Add borders-Symmetric checked: 1 pixels color black
63.
Image - Add borders-Symmetric checked: 10 pixels backgroundcolor #f0e6b3
64.
Image - Add borders-Symmetric checked: 60 pixels foregroundcolor #3b4443
65.
Magic Wand / click with your magic wand in the border of
60 pixels
66.
Selections- Promote selection to layer
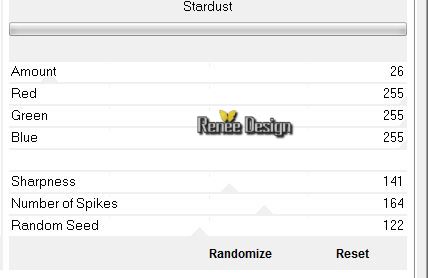
67.
Effects- Plugins -Unlimited 2.0 -VM Texture - Stardust
68.
Selections -Invert
69.
Effects-3D effects-Drop Shadow with these settings /color white
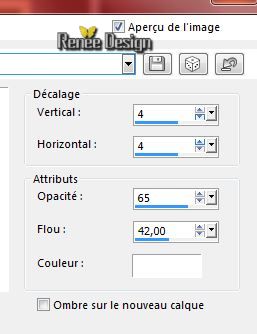
Selections- Deselect All
70. Effects- Plugins - Nick color effex
Pro 3- Color set -Cool warm 4
71.
Activate Text Tool-Write your text ore take mine
72.
Image - Add borders-Symmetric checked: 2 pixels color black
-
Image Resize 995 pixels Width
I hope you enjoyed this lesson
Renée
This lesson was written by Renée 22/10/2014
Placing
11/2014
*
Any resemblance with an existing lesson is merely a coincidence *
* Don't forget to thank the people who work for us and with us. I named the tubeurs - Testers and the translators.
Thanks Renée.
*
|

 Translations


 _All rights reserved