|
Let's start the lesson.
1. Open the BG-Image ‘’Fond Steampunk 50 ‘’- Promote Background Layer =Raster 1
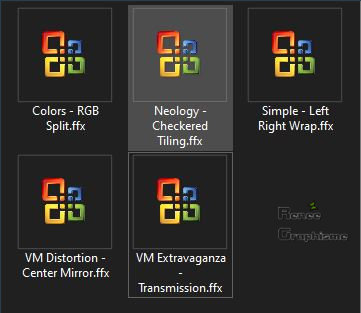
2. Effects –Plugins- Unlimited 2.0- Simple - Left Right Wrap
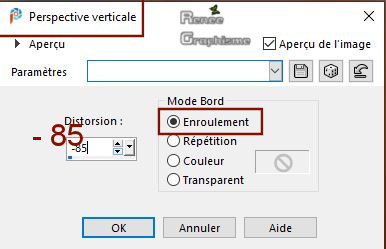
3. Effects- Geometric Effects-Perspective Vertical use the settings below
4. Layers- New Raster Layer
-
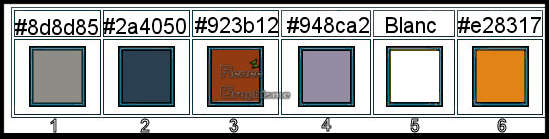
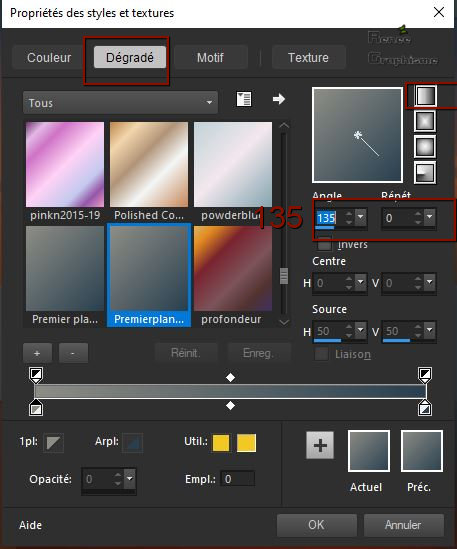
Material Properties: Set your foreground color to color #8d8d85 = 1 – Set your background color to color #2a4050=2
-
Prepare a foreground/background linear gradient configured like this
5. Flood Fill Tool
 –
Fill the Layer with the gradient –
Fill the Layer with the gradient
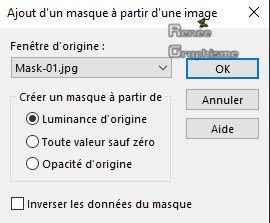
6. Layers- New Mask Layer- From Image and select Mask ‘’Mask-01’’
-
Layers- Duplicate
-
Layers- Merge- Merge Group
7. Effects – 3D Effects –Drop Shadow with these settings : 1 / 3 / 82 /5
Color Black
8. Effects –Plugins- Unlimited 2.0 – Neology - Checkered Tiling
124/ 255
9. Effects- Edge Effects- Enhance
10. Effects – Plugins– Mura’s Meister-
Perspective Tiling - using the default settings
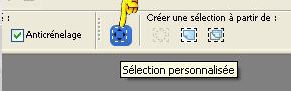
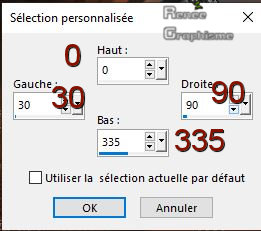
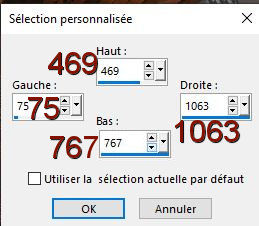
11.Activate Selection Tool -Custom Selection (S) -Rectangle with these settings


12. Edit - Cut !!!!! - Edit- Paste as New Layer
Selections- Deselect All
-
Activate Copy of Raster 2 in the Layer-Palette
13. Pick Tool: (K) on your keyboard -Enter these parameters for the X: 0,00 and Y: 556,00 positions on the Toolbar
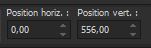 0 / 556
-Press ( M ) to close the Pick Tool
-
Activate Raster 2 in the Layer-Palette
14. Pick Tool: (K) on your keyboard -Enter these parameters for the X: 0,00 and Y: -85,00 positions on the Toolbar
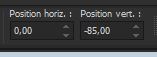 0
/ -85 0
/ -85
-Press ( M ) to close the Pick Tool
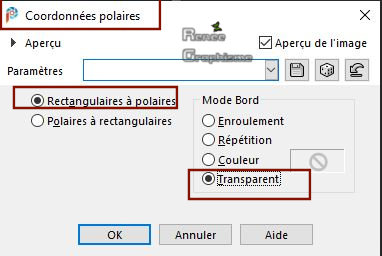
15.
Effects- Distortions Effects-Polar Coordinates-Rectangular to Polar-Transparent
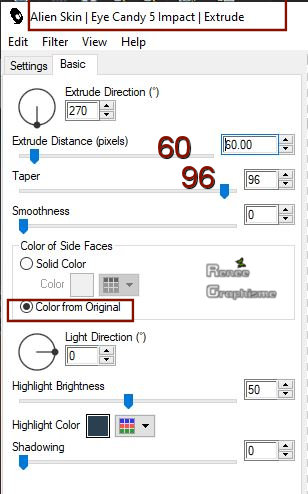
16. Effects – Plugins – Alien skin EyeCandy 5
Impact – Extrude use the settings below / Color #2a4050=2 (BG-Color )
17. Layers-Properties-Set the Blend Mode to " Hard Light " – Reduce the Opacity of this layer to 89%
18. Layers- New Raster Layer
19. Selections –load/save selection –load selection from disc and select my selection: ‘’Steampunk-50 –
1’’
20. Replace the foreground gradient with solid color white #ffffff=5
Flood Fill Tool –
Opacity at 20% - Fill the selection with the foreground color #ffffff
Selections- Deselect All
21. Effects – Plugins (Or in Unlimited) – RCS Filter Pak 1. 0 –
RCS Triple Exposure 192
-
Repeat: Effects – Plugins (or in Unlimited) – RCS Filter Pak 1. 0 – RCS Triple Exposure 142
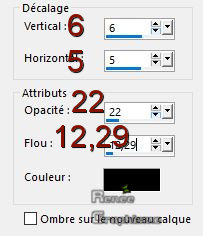
22. Effects – 3D Effects –Drop Shadow with these settings :
23. Layers- New Raster Layer
24. Activate Selection Tool -Custom Selection (S) -Rectangle with these settings
-Set your foreground color to color #923b12=3
24. Flood Fill Tool
-
Opacity at 100% – Fill the selection with the foreground color=3
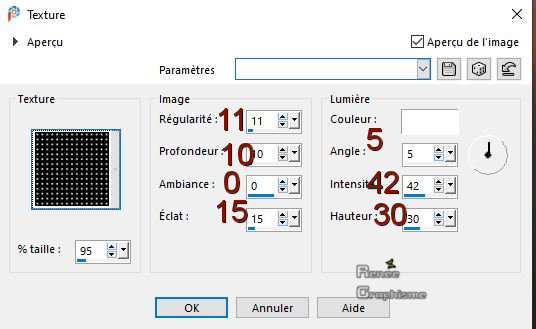
25. Effects - Texture Effects -Texture Corel_15_006 use the settings below ( the name is Grid )
26. Selections –load/save selection –load selection from disc and select my selection: ‘’Steampunk-50 –
2’’ (she will cancel the previous one)
DELETE

Selections- Deselect All
27. Effects – 3D Effects –Drop Shadow with these settings: 0/0/45/31,69
Color Black
28. Open the tube ‘’3D Steampunk Babe 20-1 -5- tubed by A PSP Devil’’ -Edit - Copy- Activate your work -Edit - Paste as a new layer
29. Pick Tool: (K) on your keyboard -Enter these parameters for the X: 772,00 and Y: 65,00 positions on the Toolbar
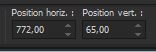 772
/ 65 772
/ 65
-Press ( M ) to close the Pick Tool
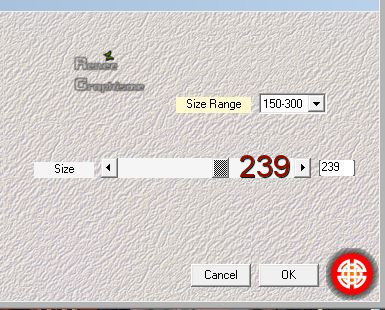
30. Effects – Plugins – Medhi – Weaver use the settings below
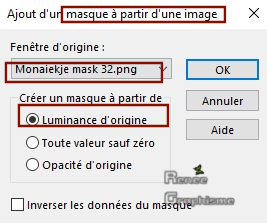
31. Layers- New Mask Layer- From Image and select Mask ‘’Monaiekje mask 32’’
-
Layers- Duplicate
-
Layers- Merge-Merge Group
32. Effects – 3D Effects –Drop Shadow with these settings : 1/1/100/9 Color Black
33. Effects –Plugins- Unlimited 2.0 – Colors - RGB Split
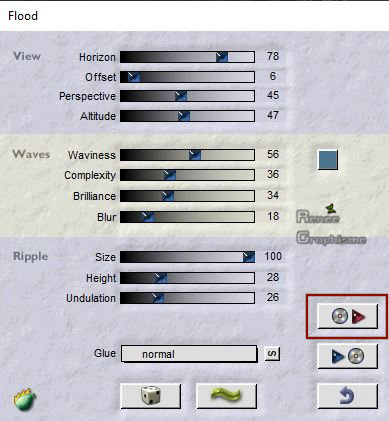
34. Effects – Plugins – Flaming Pear - Flood
- Click on the red arrow
 select my file- Preset ‘’ST_50-Flood’’ can be used in any folder of your choice .Click on the preset and effect will apply -Color#4b748f- (Important - Check if the settings are correct)
-Or manual settings as shown in the example below
35. Reduce the Opacity of this layer to 79%
-
Activate the tube ‘’ Tubes-Reneee_steampunk-50’’ in your Psp (do not close)
36. Open the tube ‘’Grille and Horloge’’ -Edit - Copy- Activate your work -Edit - Paste as a New Layer
Activate your Move Tool (M) place it in the right place (see finished image )
-
Set your Foreground color to color #ffffff
37. Layers- New Raster Layer
38.Activate the Paint Brush Tool and select my Brush ‘’ BrushTip_ST50-3 bases" with these settings-Opacity 50 % -Blendmode-Paint Behind

-
Apply the brush with the white foreground color on your image
39. Pick Tool: (K) on your keyboard -Enter these parameters for the X: 624,00 and Y: 470,00 positions on the Toolbar
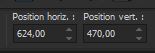 624 / 470
-Press ( M ) to close the Pick Tool
-Activate the tube ‘’ Tubes-Reneee_steampunk-50’’
40. Activate the layer ‘’Boules ‘’ of the tube -Edit - Copy- Activate your work -Edit - Paste as a new layer .
Move Tool (M) place it in the right place (see finished image )
41. Layers- New Raster Layer
42. Selections –load/save selection –load selection from disc and select my selection: ‘’Steampunk-50 –
3’’
43. Set your Foreground color to color #923b12=3
Flood Fill Tool -
Opacity at 50% – Fill the selection with the foreground color =3
Selections- Deselect All
44. Effects – 3D Effects –Drop Shadow with these settings: 5 / 4 /100 / 9 Color Black
45. Effects –Plugins- Unlimited 2.0 - VM Distortion - Center
Mirror... 8/128
46. Activate Selection Tool -Custom Selection (S) -Rectangle with these settings
DELETE
Selections- Deselect All
47. Effects –Plugins- Unlimited 2.0 - VM Extravaganza -
Transmission... 6/0/40
48. Layers-Properties-Set the Blend Mode to " Screen "
49. Layers- New Raster Layer
50. Selections –load/save selection –load selection from disc and select my selection: ‘’Steampunk-50 –
4’’
51. Set your Foreground color to color # e28317=6
Flood Fill Tool -Opacity at 100% – Fill the selection with the foreground color =6
Selections- Deselect All
52. Layers-Properties-Set the Blend Mode to " Screen "
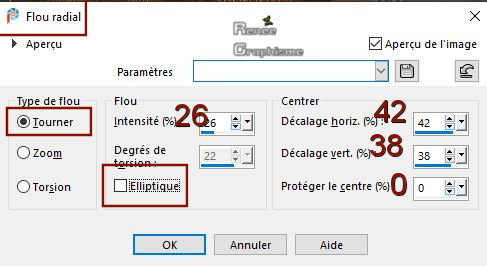
53. Adjust- Blur- Radial Blur use the settings below
54. Layers- Duplicate
55. Layers-Properties-Set the Blend Mode to " Hard Light "
56. Open the tube ‘’Tube- 1 png’’ -Edit - Copy- Activate your work -Edit - Paste as a New Layer ( Thank you Thafs for the beautiful tube )
-
Activate your Move Tool (M) place it in the right place (see finished image )
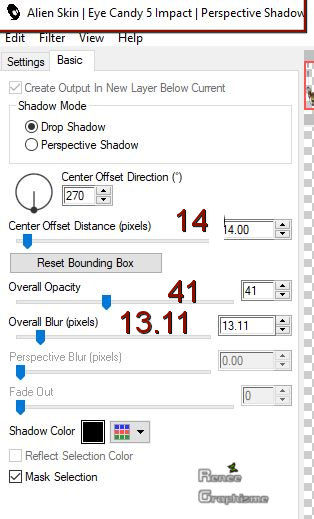
57. Effects – Plugins – Alien Skin EyeCandy 5 –
Impact – Perspective Shadow use the settings below
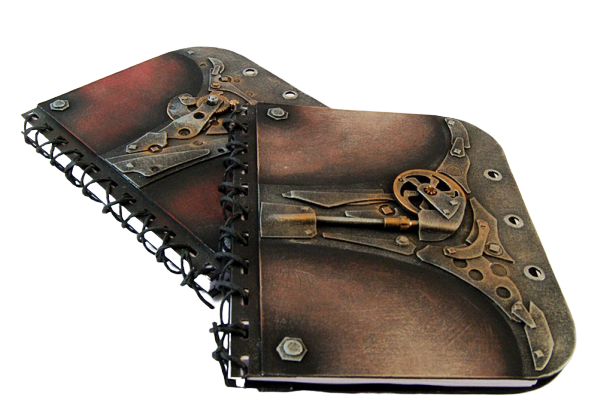
58. Open the tube ‘’Renee-ST-50_ Livre’’- -Edit - Copy- Activate your work -Edit - Paste as a New Layer
-Move Tool (M) place it in the right place (see finished image )
59. Image - Add borders-Symmetric checked: 1 Pixels Color #948ca2=4
EDIT - COPY!!!!
-
Open the tube "cadre" in you Psp
60. Activate the Magic Wand - select the inside of the frame
61. Selections - Modify -Expand by 5 pixels
62. Layers- New Raster Layer
63. Edit- Paste -Into Selection (Image is still in your PSP memory)
64. Layers- Arrange- Move Down
Selections- Deselect All
65. Layers- Merge-Merge Visible
- Activate your Text Tool -For Renée Font WG Griffin (Included into the zipfile) Write your text
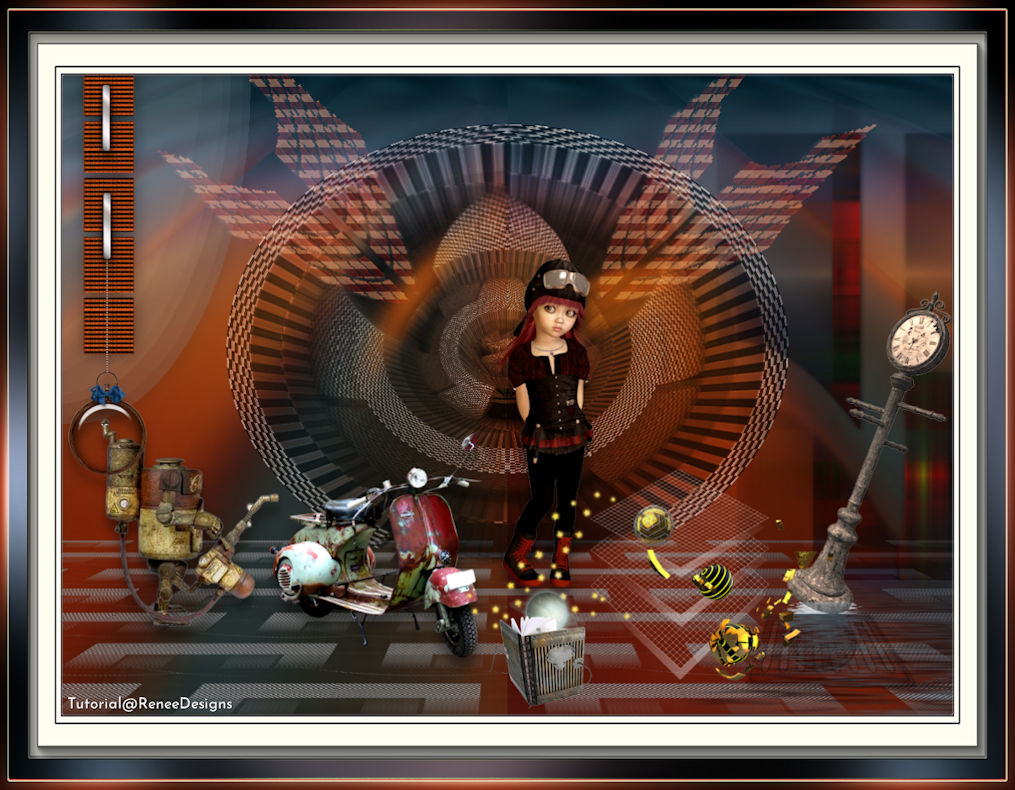
66. Image - Resize to 1015 Pixels Width
Save as JPG
I hope you enjoyed this lesson
Renée
This lesson was written by Renée 20-02- 2020
Edited and Update
26 -02 - 2020
*
Any resemblance with an existing lesson is a coincidence *
Do not forget to thank the people who work with us and for us
I have appointed the tubeurs and translators
Thanks
*
|
 Translations