|
Let's start the lesson./Open the Color-Palette
-Material Properties:Put the foreground color on #77989f
-and the background color on #395351
1.Open the backgroundimage‘’ Fond_sans_elle_sans_ailes’’/ Window - Duplicate (or shift+D) - Close the original and proceed on the copy -Promote Background Layer =Raster 1
2.
Effects-Edge Effects-Enhance More
3.
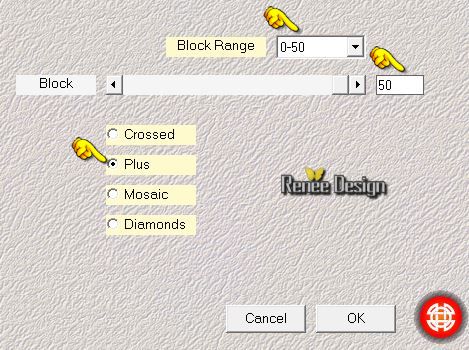
Effects-Plugins - Medhi –Sorting Tiles
4.
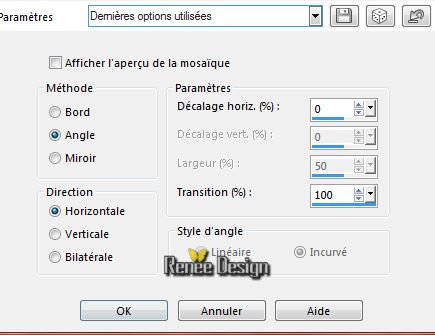
Effects- Image Effects- Seamless Tiling with these settings
5.
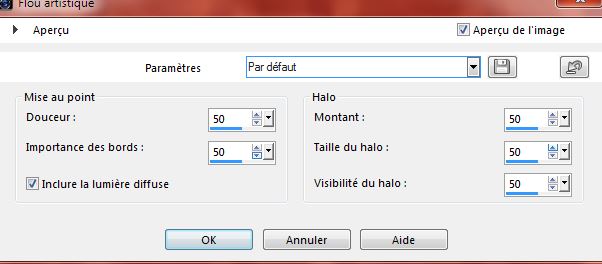
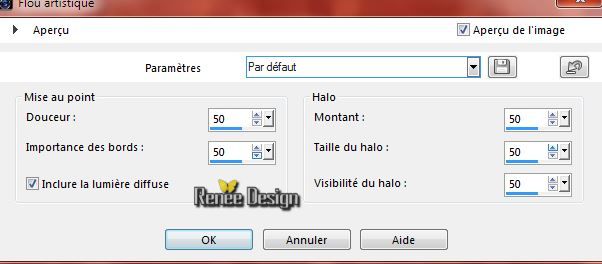
Adjust-Softness-Soft Focus with these settings
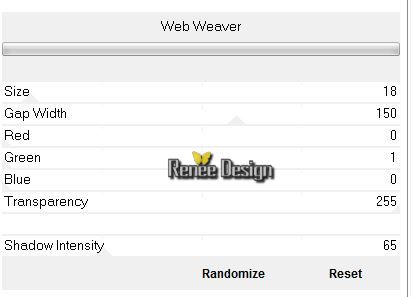
6.
Effects- Plugins- Unlimited 2.0 - VM1 – Web weaver
7.
Layers- Duplicate
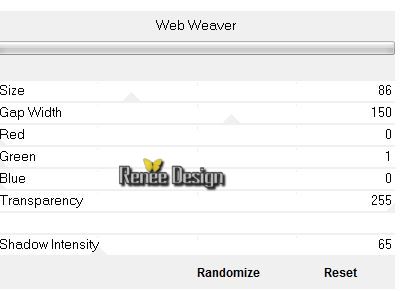
8.
Effects- Plugins- Unlimited 2.0 - VM1 – Web weaver
9 Effects-Plugins- - Transparency - Eliminate
Black
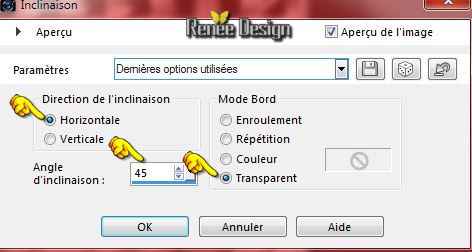
10.
Effects- Geometric Effects-Skew with these settings
-
Activate the bottom of the layer-Palette =Raster 1
11.
Effects- Plugins–Unlimited 2.0 - Toadies – Ommadawn use the default setting 17/16/234/17
-
Activate the top of the layer-Palette
12.
Layers- New raster layer
13.
Selections - load/save selection- load selection from disk and select my file ‘’ sans
elle_1’’
-
-Activate Flood Fill Tool and fill the selection with the foregroundcolor
#77989f
Selections- Deselect All
14.
Adjust-Blur-Gaussian Blur : Radius 100%
- Double click on this layer and set the Blendmode to Hard Light
15.
Effects- Plugins –Toadies What are you with these settings: 145 /213
16. Layers- Duplicate
- Image
Mirror –Image Flip
17. Layers- Merge- Merge Down
18. Layers- New raster layer
19.
Selections - load/save selection- load selection from disk and select my file « sans
elle_2 »
-Activate Flood Fill Tool and fill the selection with the backgroundcolor
Selections- Deselect All
20. Effects- Plugins
–Unlimited 2.0 - &<BkgDesigner sf10.I –Design Clouds
use the default setting 69/169
21. Effects- Plugins –Unlimited 2.0 -&<BkgDesigner sf10.I – Cruncher use the default setting 20/20
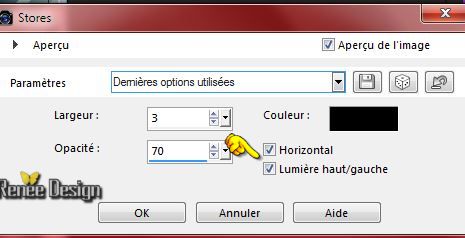
22. Effects- Texture Effects- Blinds with these settings
23. Layers- New raster layer
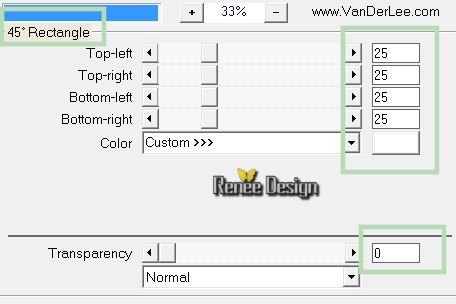
24. Effects-Plugins - Vanderlee /45 °Rectangle with these settings
25. Layers- Duplicate–Image Mirror
26. Layers- Merge-Merge Down
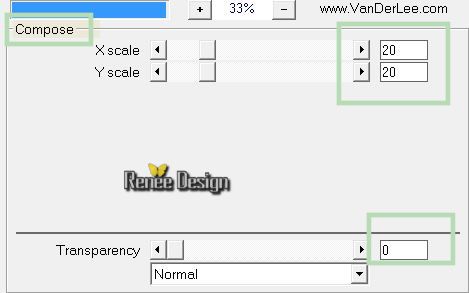
27. Effects-Plugins-- Vanderlee –Unplugged X- Compose
28. Effects-Plugins-- Transparency –Eliminate black
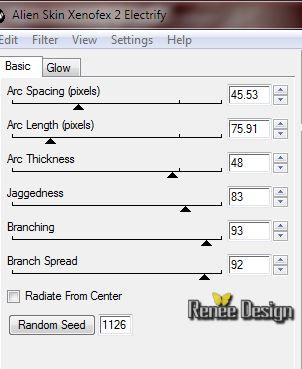
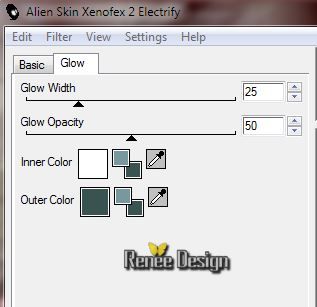
29.
Effects-Plugins – Alien Skin Xenofex2. -
Electrify with these settings as shown in the example below
30. Double click on this layer and set the Blendmode to Overlay
31. Activate the tube ’’escalier_59010-9 »
- Edit - Copy -Edit - Paste as new layer on your working area.
-
Activate your Pick Tool (K) Mode Scale -With arrow keys on the keyboard to move the layer down 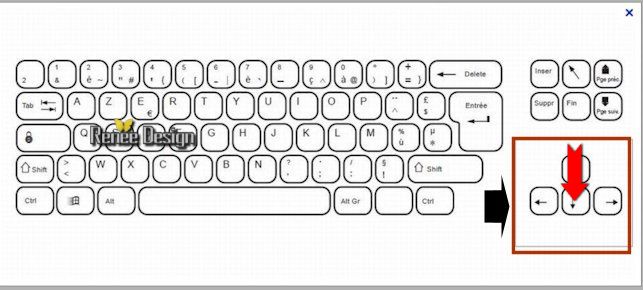
32. Double click on this layer and set the Blendmode to Luminance Legacy
33. Layers- New raster layer
34.
Selections - load/save selection- load selection from disk and select my file ‘’ sans elle_3’’
-Material Properties:Put the foreground color on #001610
-Activate Flood Fill Tool and fill the layer with the foregroundcolor
(only the top of the selection is with this color-This is normal)
35.Effects- Texture Effects-Weave with these settings (white and black )
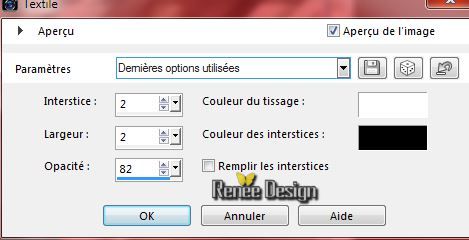
Selections- Deselect All
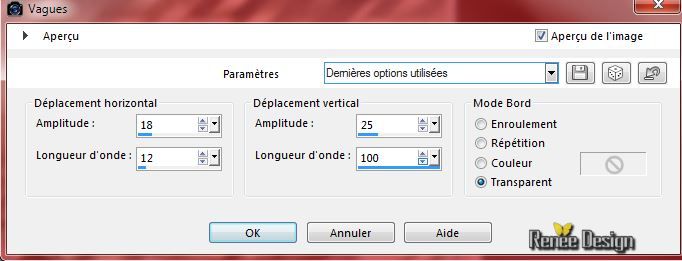
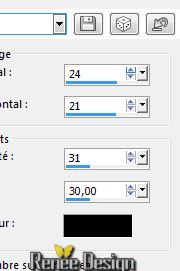
36. Effects- Distortion Effects- Wave with these settings
37. Effects- 3 D Effects- Drop Shadow with these settings

38.Layers- Merge- Merge Visible
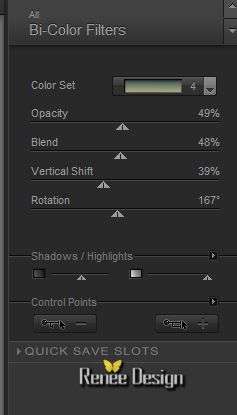
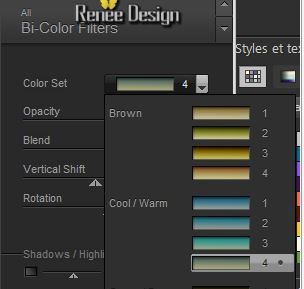
39.
Effects- Plugins -Nick Color Effex Pro3.0- Bi - Color
Filters /Cool Warm Color Set = 4
40. Layers- New raster layer
-Material Properties:Put the foreground color on
#b7dbb4
- Activate Flood Fill Tool and fill the layer with the foregroundcolor
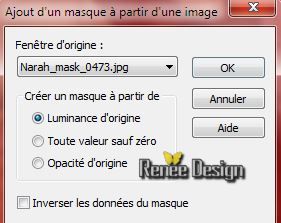
41.Layers- New Mask layer from Image and select Mask:
‘’Nara_mask_0473.jpg
42. Layers- Merge- Merge- Group
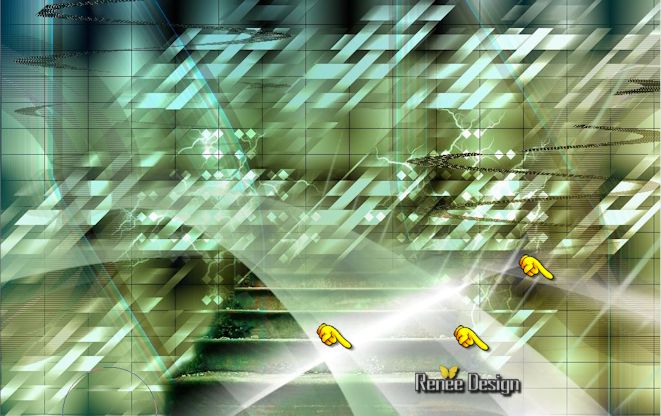
43. Activate the Tool Lighten/Darken brush (push L on your keyboard)
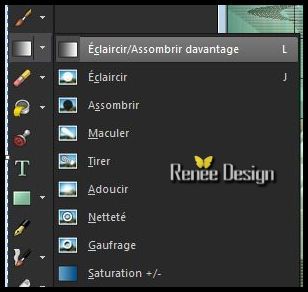
–
use settings as shown in the example below

-Hold the right mouse button pressed, make little traces in this area. Start high and than go down in order to obtain this effect as shown in
the example below
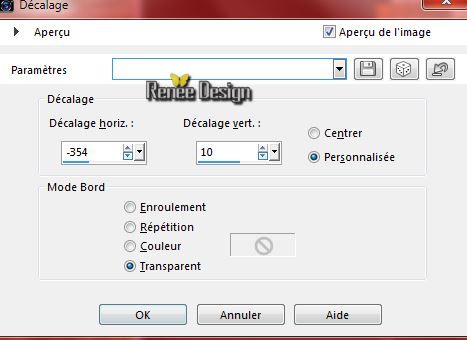
44. Activate the tube ‘’ sans elle_sans ailes_image1’’
- Editer
copier –Edit - Copy -Edit - Paste as new layer on your working area.
- Effects- Image Effects-Offset with these settings
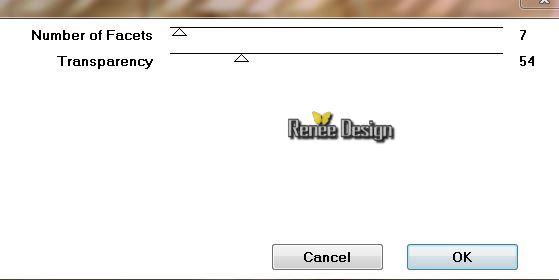
45. Effects-Plugins - Graphic Plus - Cut Glass
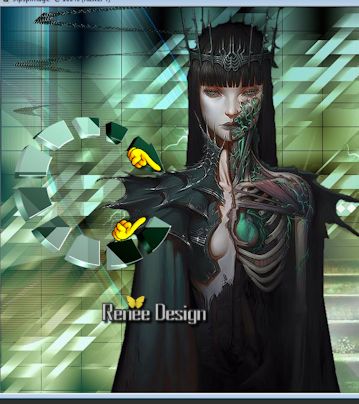
46. Activate the tube ‘’ Renee_tube-strange_gothique’’
-Edit - Copy -Edit - Paste as new layer on your working area.
47. Layers- Arrange- Move Down
With your move tool move to the left side as shown in the example below
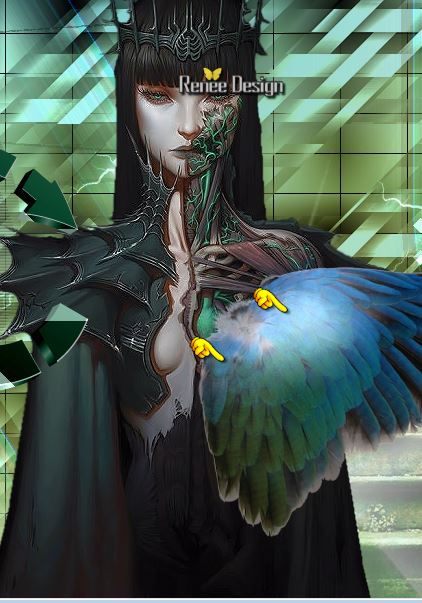
48. Activate the tube '' Renee_tube_wing"
- Image
Resize with 45 %
- Edit - Copy -Edit - Paste as new layer on your working area.
- Place as shown in the example below
49. Activate Brush Lighten/Darker with the same settings (push L on your keyboard)
Repeat the same mouvements (carefully) on this part of the tube in order to clarify the area
-Activate the top of the layer-Palette
50. Activate the tube ‘’ homme_hibou_byvalra’’/ Image Resize with 68%
- Edit - Copy -Edit - Paste as new layer on your working area.
-Activate your Move Tool (M) place it in the top right corner
51. Effects- 3 D Effects- Drop Shadow with these settings
52. Activate the tube ‘’nuage’’
Edit - Copy -Edit - Paste as new layer on your working area.
Activate your Move Tool (M) place on top – Double click on this layer and set the Blendmode to Overlay
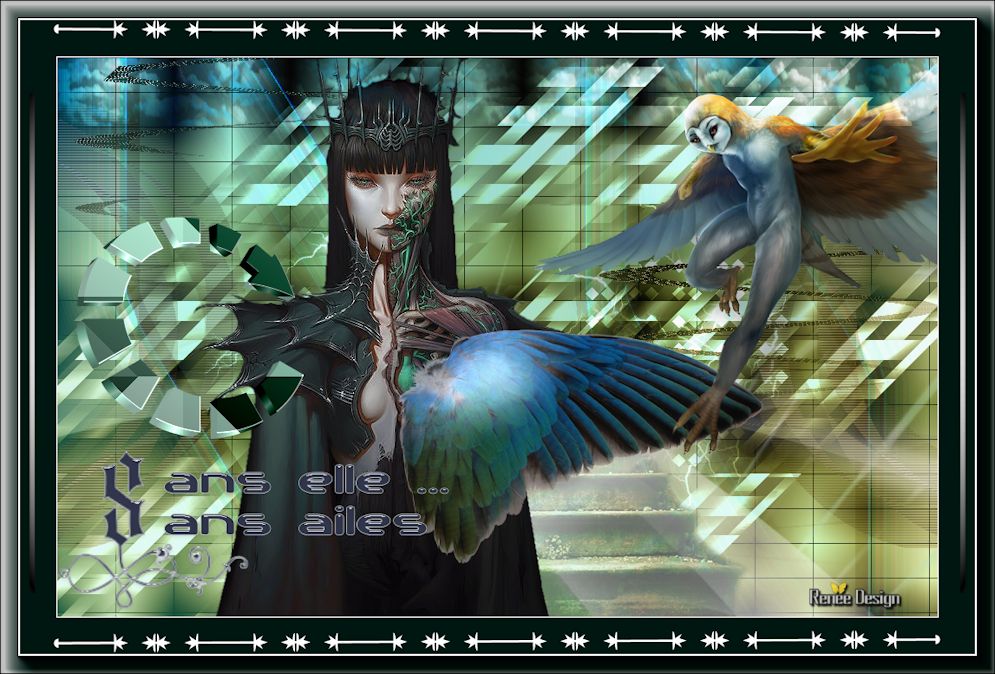
53. Activate the tube ‘’ renee_titre_sans elle sans ailes’’
Edit - Copy -Edit - Paste as new layer on your working area.
(To write the title- I used the font« Ardenwood Demo’’ for the letter "S" Size 145 and the rest of the text a font of your own choice )
-I have applied an effect-Effects- Plugins -Eye Candy 5-Glass -Tab- Settings -Glass Clear
54. Layers- Merge-Merge Visible
55. Image - Add borders-Symmetric checked: 1 pixel white
56. Image - Add borders-Symmetric checked: 60 pixels #001610
57. Activate Pen Tool (V) Line Style’’ winni.styledlines’’(The effect is included with the material" pspimage'' Paste it as a new layer on your working area )
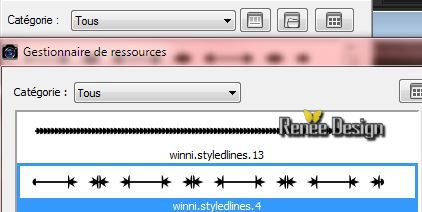

-Properties Foreground: FG-Color on white- Draw a straight line on top and bottom of your work
51.
Convert to raster layer
52.Layers- New raster layer
53.
Selections - load/save selection - load selection from disk and select my file : ‘’ sans elle_4’’
Activate Flood Fill Tool and fill the selection with the white
Selections- Deselect All
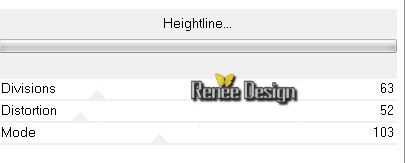
54. Effects- Plugins –
Unlimited 2.0 – VM Extravanga -Heightline...
55. Image - Add borders-Symmetric checked: 5 pixels white
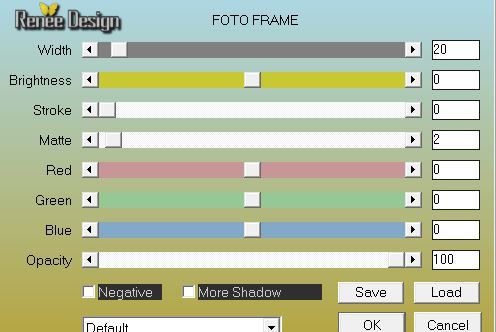
56. Effects- Plugins -AAA Frame Foto Frame with these settings
57. Image
Resize with 995 pixels Width
Save as JPG
I hope you enjoyed this lesson
Renée
This lesson was written by Renée 21/01/2015
Placing
*
Any resemblance with an existing lesson is merely a coincidence *
* Don't forget to thank the people who work for us and with us. I named the tubeurs - Testers and the translators.
Thanks Renée.
*
| 
 Translations


 * When you see this logo the filter is imported in Unlimited *

 All rights reserved