|
New
Translations here
*
Let's begin .
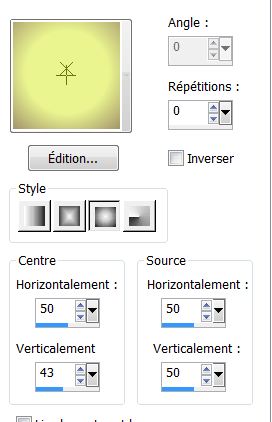
- Material Properties: Foreground color to color : #eaf58f Background color to color: #a1926b - Material Properties: Change material from the foreground into foreground/background sunburst gradient with these settings
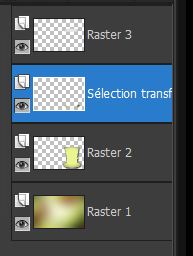
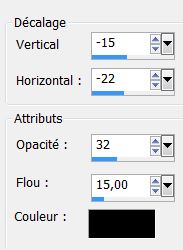
- Layers - New raster Layer -Selections - load/save selection - load selection from disk and choose ''renee_St_Patrick'' Flood Fill Tool :Fill the selection with the gradient - Selections - Deselect all - Effects-Plugins EyeCandy5 / perspective shadow- Preset /drop shadow blury - Layers - New raster Layer - Selections - load/save selection - load selection from disk and choose ''renee_St_Patrick_1'' - Material Properties: Foreground color to color : #e5e5e5 - Material Properties: Change material from the foreground into foreground/background sunburst gradient with the same settings /Flood Fill Tool :Fill the selection with the gradient - Selections - Deselect all - Layer-Palette: Activate the bottom layer= raster 1 - Selections - load/save selection - load selection from disk and choose ''renee_St_Patrick_2'' - Selections-Promote Selections To Layer - Keep Selection - Layers-Arrange-Move Up (above raster 2) - Effects -Plugins Unlimited-Special Effects1/Binoculars 213/49 - Selections - Deselect all - Your Layer Palette looks like this now
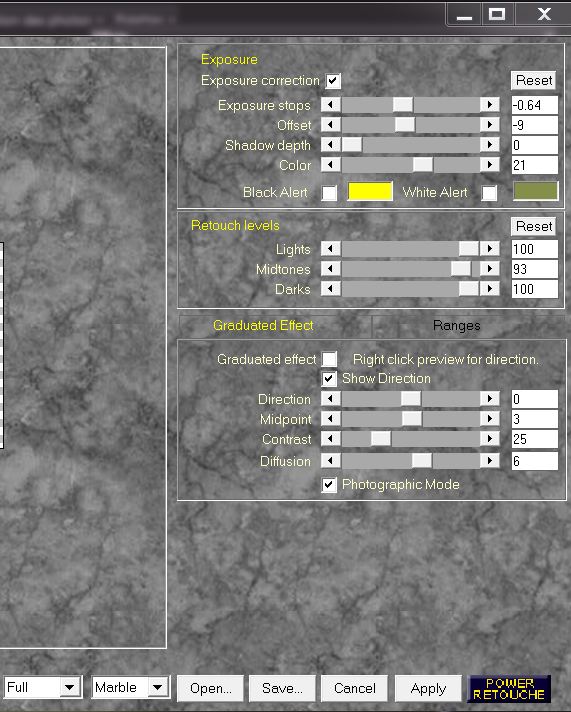
- Layers-Merge-Merge Down - Effects -Plugins Power retouche- PR Exposure
- Aktivate the tube ''StPatrick_ruban ''' Edit/copy Edit - Paste as new layer on your working area and move - Effects -Plugins Eyecandy6-perspective shadow-Drop-Height 0 - Aktivate the tube ''StPatrick_pinceau '' Edit/copy Edit - Paste as new layer - Effects- Image Effects - Offset H=0 and V= 150 - Layer Palette: Blend Mode "Dissolve" and lower the opacity down to 42% - Effects-Edge Effects -Enhance More - Aktivate the tube ''Stpatrick_fruits'' Edit/copy Edit - Paste as new layer on your working area and move - Effects- 3D Effects - Drop Shadow
- Aktivate the tube ''cookies_orangeBloosom'' Edit/copy Edit - Paste as new layer on your working area - Image-Resize 85% (Resize all the layers NOT checked). - Layer-Palette: Activate the bottom layer=raster 1 - Layers - New raster Layer -Selections-Custom Selection with these settings
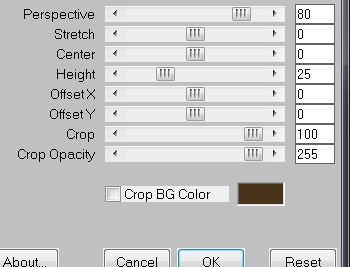
- Material Properties: Foreground color: #e5e5e5 Background color#4a331b - Material Properties: Change material from the foreground into foreground/background linear gradient with these settings Angle =0 Repeats =3 does not check invert - Flood Fill Tool :Fill the selection with the gradient - Selections - Deselect all - Effects -Plugins Unlimited-Special effect1- Binoculars 163/154 - Effects-Plugins Mura's Meister - Perspective Tilling
- Effects-Plugins Eye Candy5_Impact - Perspective shadow''preset renee_stpatrick'' - Effects -Plugins EyeCandy 5 _Impact -Extrude -preset ''renee_extrude_stpatrick'' - Aktivate the tube ''stpatrick_barre_sol'' Edit/copy Edit - Paste as new layer on your working area - Effects- Image Effects Offset H=0 and V= - 105 - Aktivate the top of the Layers palette - Aktivate the tube ''titre happySt Patrick _days'' Edit/copy Edit-Paste as new layer on your working area /Layer Palette: Blend Mode to "Hard Light "Lower the opacity down to 87% - Aktivate the tube ''earth-stpatrick'' Edit/copy Edit - Paste as new layer on your working area and move/ Layers-Arrange-Move Down (under the layer title) - Aktivate the top of the Layers palette - Aktivate the tube ''renee_stpatrick_echelle'' Edit/copy Edit - Paste as new layer on your working area and move -Aktivate the tube ''Alies546-fantasy-26062011''Edit/copy Edit - Paste as new layer on your working area and move - Effects -Plugins EyeCandy 5_Impact - perspective shadow/Preset - drop shadow lowest for those who prefer eycandy6 Alien Candy 6 – perspective shadow- drop (fixed scaling) – Angled 4 pixels » - Material Properties: Foreground color to color : #a1926b - Layers-New raster layer - Aktivate your Airbrush with these settings
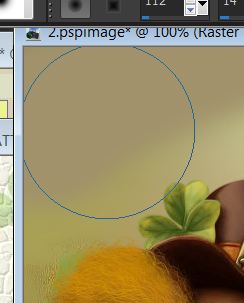
- And sweep the top-left corner
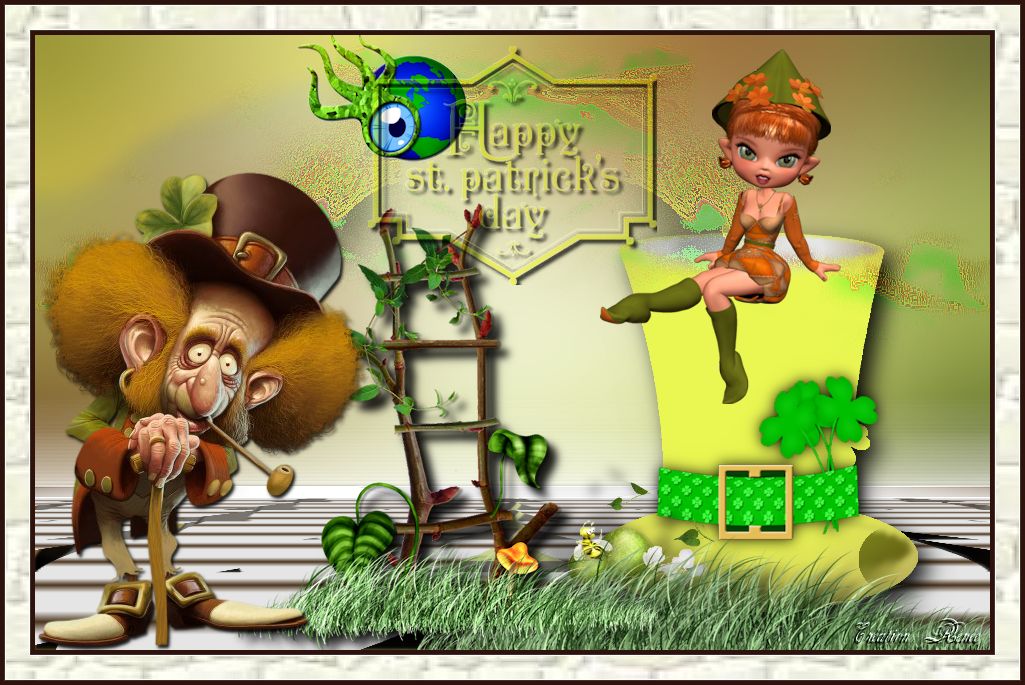
- Layer Palette: Blend Mode to "Hard Light " - Layers - Merge - Merge all layers (flatten) - Image - Add Borders - Symmetric 5 pixels- #2e130c - Image - Add Borders - Symmetric 25 pixels- #a0a674 - Image - Add Borders - Symmetric 5 pixels- #2e130c - With your magic wand select the border of 25 pixels Aktivate texture''811'' Edit/copy-Edit Paste into selection - Selections-Select none - I hope you enjoyed this lesson Renée at 23/02/2013
|
 Translations