|
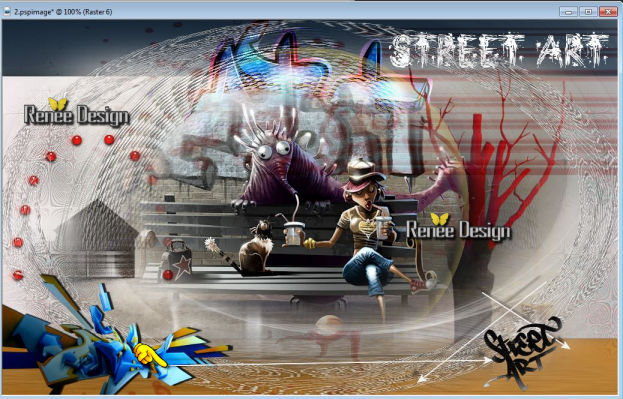
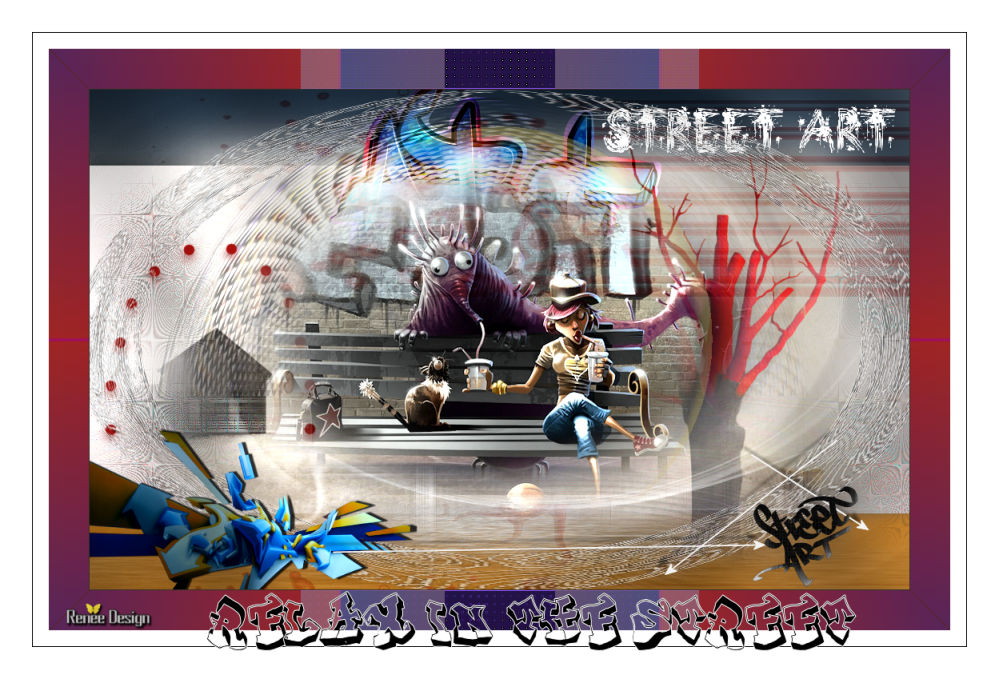
Let's start the lesson.
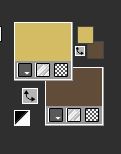
- Material Properties:Set your foreground color to:#ccc8c9 - Set your background color to: #614c3b
1.
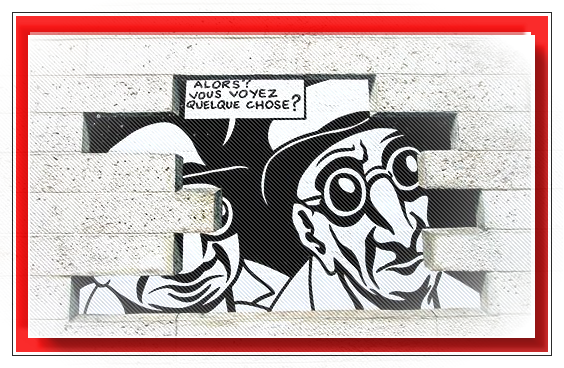
Open the background image ‘’ fond_relax_in_street’’/ Window - Duplicate (or shift+D) - Close the original and proceed on the copy -Promote Background Layer =Raster 1
2.
Adjust-Blur-Gaussian Blur: Radius:30
3. Effects –Plugins-
Unlimited – Sapphire Filters 03 – Sapphire Plugin _0284 using the default settings
4. Effects –Plugins -Unlimited – Sapphire Filters 03 -
SapphirePlugin_0290.../ Divider
79
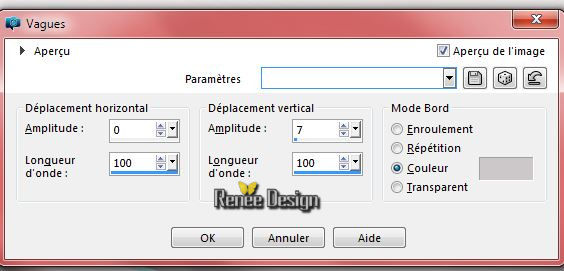
5. Effects- Distortion Effects- Wave with these settings
6.
Effects –Plugins - Unlimited - &<Bkg Kaleidoscope>- 4 QFlip
ZBottomR
7.
Effects –Plugins- Unlimited – Funhouse - Moire Mirror... 78
8.
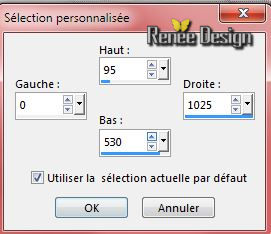
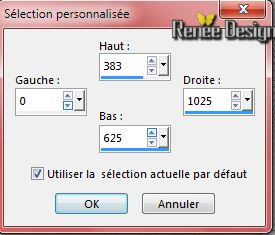
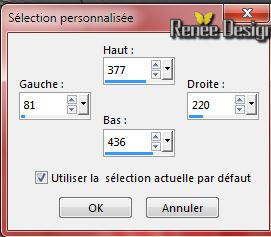
Selection Tool ( S ) Custom selection use settings below
9.
Selections- Promote selection to Layer
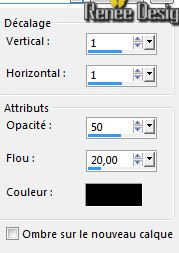
10. Effects - 3D Effects - Drop shadow with these settings
Selections- Deselect All
11. Activate the tube ‘’ relax_street_image1 »
- Edit/copy- Edit/ paste as new layer on your working image
12.
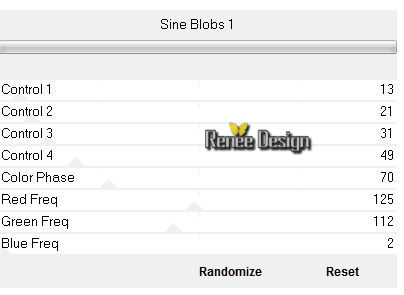
Effects –Plugins- Unlimited - Filter Factory Gallery U- Sine Blobs
1
13. Effects
–Plugins - Unlimited – Toadies – Weaver 59/48/222
14. Effects- Edge Effects- Enhance
15. Double click on this Layer and set the Blend Mode to "Hard Light "
16. Layers- Duplicate
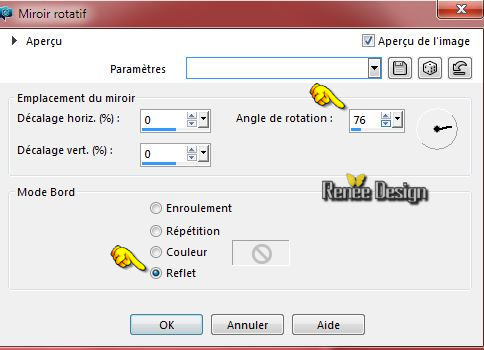
17. Effects- Reflexion Effects -Miroir Rotatif with these settings
18. Layers- Merge- Merge Down
19.
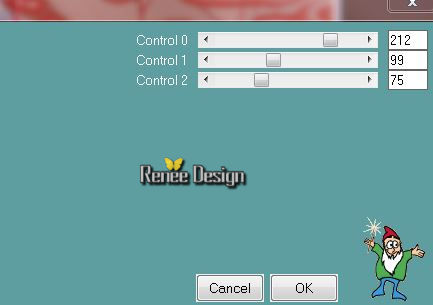
Effects –Plugins- Unlimited - &<Bkg Designer sf10 I>- Cut
Glass 01 - 212/255
20.
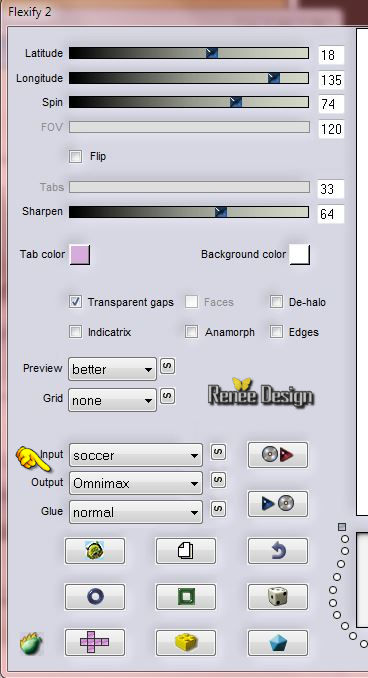
Effects – Plugins –Flaming Pear
Flexify2 with these settings
21.
Selection Tool ( S ) Custom selection use settings below
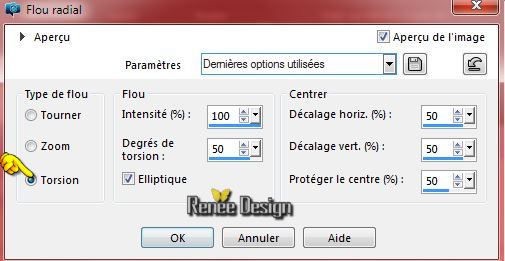
22.
Adjust- Blur- Radial Blur use settings below
23.Effects- Edge Effects Enhance More
Selections- Deselect All
24. Layers- New Raster Layer
-
Selections- Select All
25. Activate the tube ‘’Renee_tube_paysage_5_original’’
– Edit/Copy !!
– Edit -Paste into selection
Selections- Deselect All
26. Image
Mirror
27. Layers- Arrange- Move Down
28. Activate the bottom of the layer-Palette=Raster 1
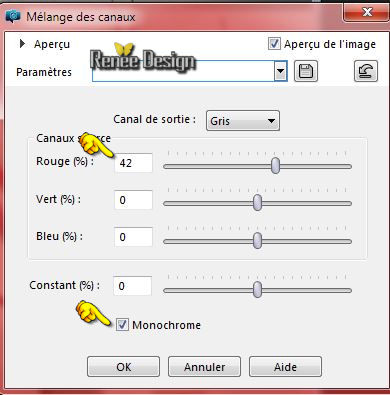
29 .
Adjust- Color-Channel Mixer with these settings
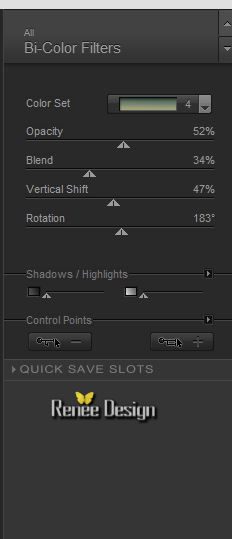
30.
Effects –Plugins – Nick Color Effex Pro 3.0/ Bi Color
filters/Cool warm 4
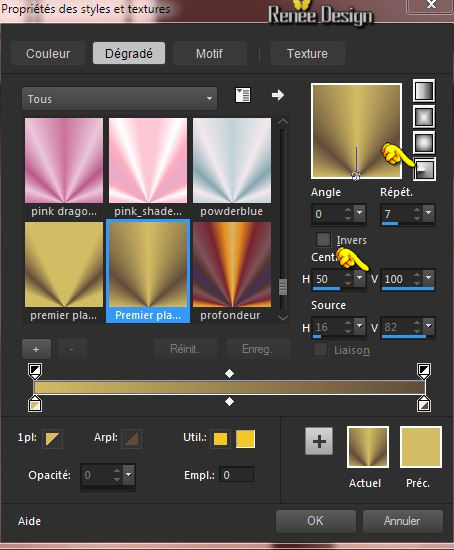
- Material Properties:Set your foreground color to:#d4bc64
 Prepare a radial gradient configured like this. Prepare a radial gradient configured like this.
-
-Activate the top of the layer palette
31. Layers- New Raster Layer
32. Activate Flood Fill Tool and fill the layer with the gradient
33. Effects
– Plugins - VM Toolbox -Trimosaic
255/ 134
34.
Effects – Plugins -Toadies – What are you
60/24
35.
Effects –Plugins-Unlimited – Toadies – Weaver using the default settings
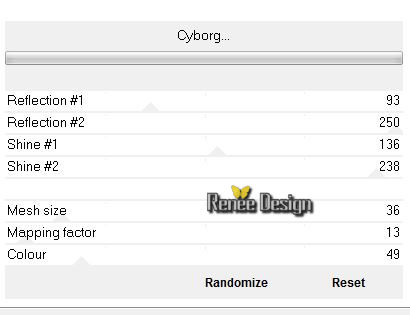
36.
Effects –Plugins-Unlimited – Toadies - Cyborg with these settings
37.
Selections - load/save selection - load selection from disk and select my file: ‘’
relax_street_1 ‘’
-DELETE 
- Selections- Deselect All
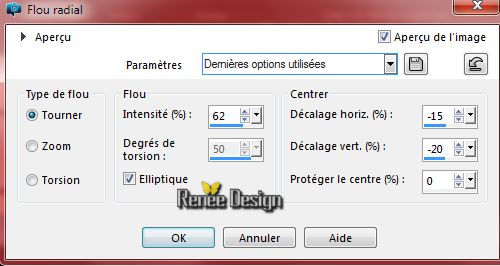
38. Adjust- Blur- Radial Blur with these settings
39. Double click on this Layer and set the Blend Mode to "Luminance -Legacy " -Set the layer opacity of this layer to 59%
40. Effects- 3 D Effects- Drop Shadow with these settings 0/0/62/31 black
- Properties Foreground: foreground color to color: #ffffff
41. Layers- New Raster Layer
42.
Selections - load/save selection - load selection from disk and select my file:
« relax_street_2 »
43. Activate Flood Fill Tool and fill the selection with the foreground color ( 2 clic in the selection)
Selections- Deselect All
44. Layers- Duplicate
45. Effects
–Plugins – Medhi – Weaver with these settings
46. Image
Mirror
47.
Effects- Edge Effects- Enhance More
Stay on this Layer
48.
Selection Tool ( S ) Custom selection use settings below
49. Effects
– Plugins – AP 01- Lines silverling with these settings
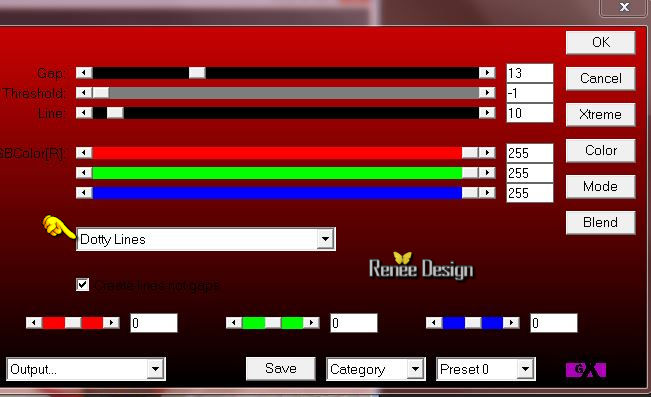
50. Effects- Edge Effects Enhance More
Selections- Deselect All
-
Material Properties:Set your foreground color to:#c71a15
51. Layers- New Raster Layer
52.
Selections - load/save selection - load selection from disk and select my file:« relax_street_3 »
53. Activate Flood Fill Tool and fill the selection with the foreground color #c71a15
54.
Effects – Plugins –Eyecandy 5 Impact – Glass –tab Settings/User settings choose my preset: ‘’relax_street_glass ” Or manual settings as shown in the example below
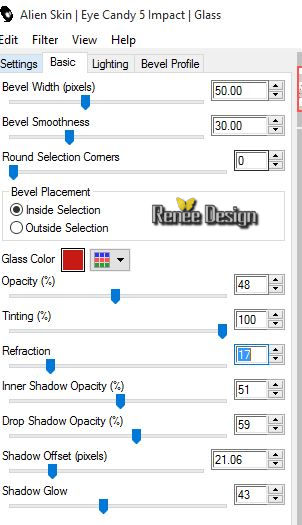
Selections- Deselect All
- Layer palette – Make Raster 5 active
55. Effects- Distortion Effects- Twirl with these settings
-
Activate the top of the layer palette
56. Activate the tube ‘’Tag_art.png’’
- Edit/copy- Edit/ paste as new layer on your working image/Activate Move Tool (M) place in the middle
against the top edge
57. Layer Palette -Double click on this layer and set the Blendmode to "Overlay"
58. Activate the tube ‘’ Renee_tube_monster_cat_drink’’
- Edit/copy- Edit/ paste as new layer on your working image
- (do not move it is in the right place)
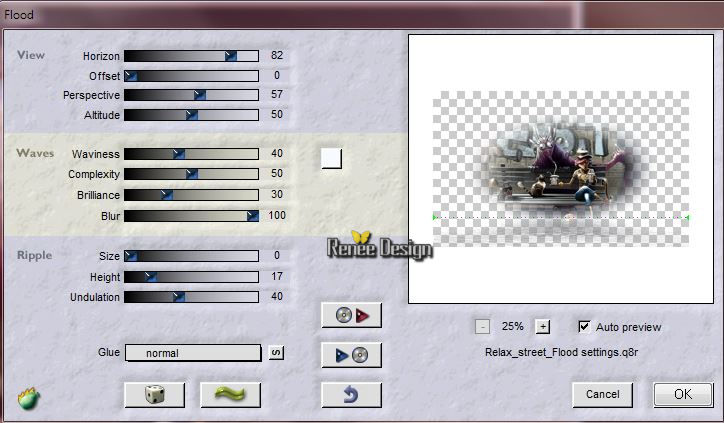
59.
Effects – Plugins – Flaming Pear Flood -click on the red arrow>> and select my file- ‘’Relax_street_Flood settings’
Or manual settings as shown in the example below
60. Layers- Merge- Merge Visible
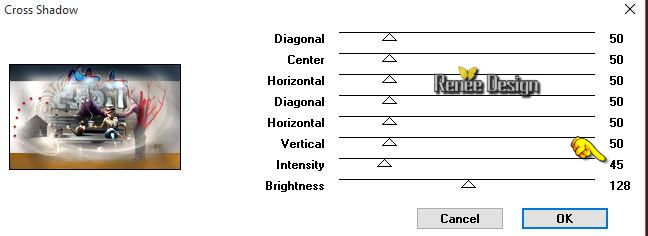
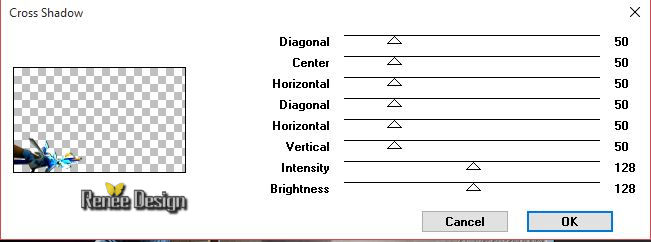
61. Effects
– Plugins – Graphic plus - Cross shadow with these settings
61. Layers- New Raster Layer
62.
Selections - Load/save selections - Load selection from disk and select my file:‘relax_street_4’’
63. Pot of Paint: Change the opacity of the color to 45% -Activate Flood Fill Tool and fill the selection with the foreground color #c71a15
Selections- Deselect All
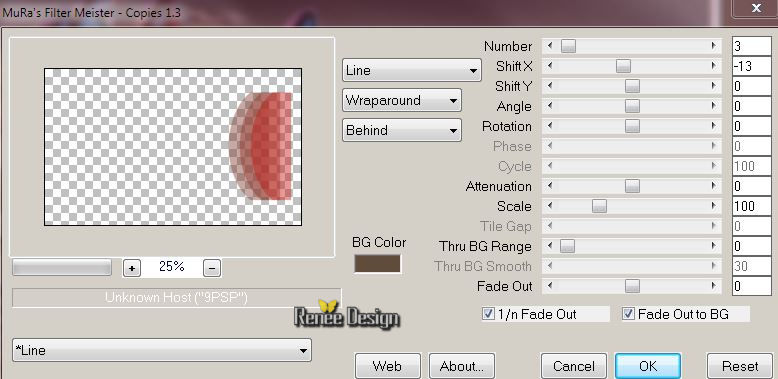
64. Effects
– Plugins – Mura’sMeister –Copies with these settings
65.
Effects –Plugins - Unlimited - Distortion Filters- Ink Blots 167
66. Effects
–Plugins – Carolaine et Sensibility -
CS-HLines
67. Double click on this Layer and set the Blend Mode to "Soft Light " -Set the layer opacity of this layer to 77%
68. Open the Brush image ‘’pinceau_Relax_Street-Art.jpg’ in your PSP
- File- Export Custom Brush
- Give it a name ‘’pinceau_Relax_Street-Art.jpg’ ‘’ Relax_Street-Art’’
- Properties Foreground: foreground color to color:#ffffff
69. Layers- New Raster Layer
70. Activate the brush tool and choose the brush: ‘’pinceau_Relax_Street-Art.jpg’’ with these settings 
- Place the brush with the foregroundcolor in the top right corner
71. Activate the
tube’’ relax_street_image2.pspimage’’
- Edit/copy- Edit/ paste as new layer on your working image
-With the move tool, move to the bottom
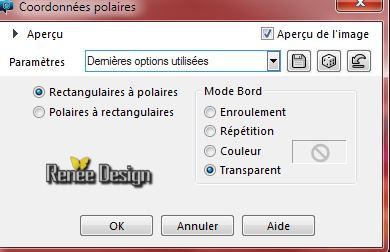
72.
Effects- Distortions Effects-Polar Coordinates-Rectangular to Polar
73. Activate the tube’’ relax_street_image3.png’’
- Edit/copy- Edit/ paste as new layer on your working image
- With the move tool, move in the bottom left
74. Effects
– Plugins – Graphic plus – Cross shadow using the default settings
75. Layers- New Raster Layer
76.
Selections - load/save selection - load selection from disk and select my file:« relax_street_5 »
77.Effects- 3 D Effects- Cutout with these settings- Color-#d4bc64
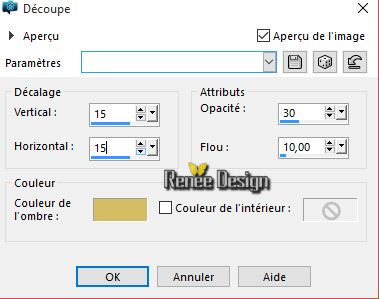
Selections- Deselect All
77.
Image Mirror
78. Activate the tube ‘’ relax_street_image4.png’’
- Edit/copy- Edit/ paste as new layer on your working image
- Activate your Pick Tool (K) place it in the right place as shown in the example below
79. Layers- Merge - Merge Visible
80. Image - Add borders-Symmetric checked: 1 pixel #000000
81. Image - Add borders-Symmetric checked: 50 pixels #c71a15
82. Activate your Magic wand - select the border of 50
pixels
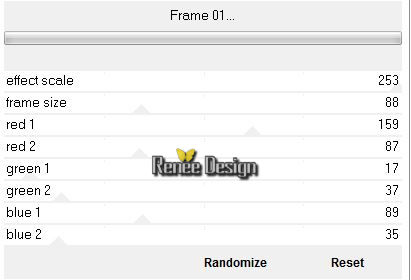
83.
Effects –Plugins -Unlimited - Filter Factory Gallery P- Frame
01..with these settings .
84.
Selections- Promote selection to Layer
Selections- Deselect All
85.
Selections - load/save selection - load selection from disk and select my file: ‘’
relax_street_6’’
86 .
Selections- Promote selection to Layer
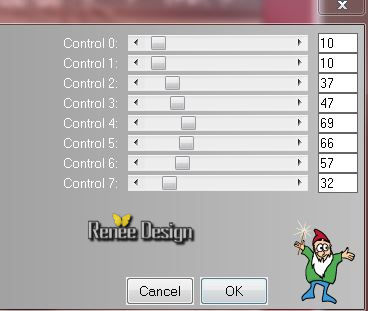
87. Effects
–Plugins – L en K’ s – Zitah with these settings
88. Effects- Edge Effects- Enhance More
Selections- Deselect All
- Palette
des couleurs mettre le blanc en arrière plan
89.
Effets – Plugins – Toadies What are you 41/ 0
90. Image - Add borders-Symmetric checked: 20 pixels #ffffff
91. Image - Add borders-Symmetric checked: 1 pixel #000000
92. Image - Add borders-Symmetric checked: 40 pixels #ffffff
93. Material Properties:Set your foreground color to:#ffffff-Set your Backgound color to #000000
94.
Click on your Text Tool /Font ‘’From street art’’ Size 72 Type your text « Relax in the street »
95. Layers- Merge- Merge All
96. Image
Resize to 999 pixels width
Save as JPG
I hope you enjoyed this lesson
Renée
This lesson was written by Renée 14/09/2015
edited and update
2015
*
Any resemblance with an existing lesson is merely a coincidence *
* Don't forget to thank the people who work for us and with us. I named the tubeurs - Testers and the translators.
Thanks Renée.
*
| 
 Translations


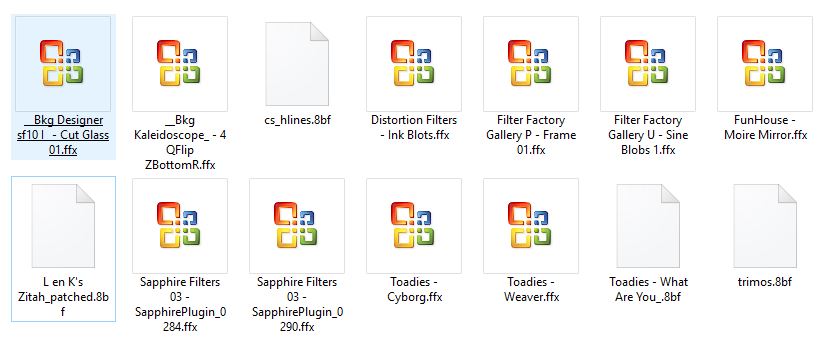

 When you see this logo the filter is imported in Unlimited

 All rights reserved