|
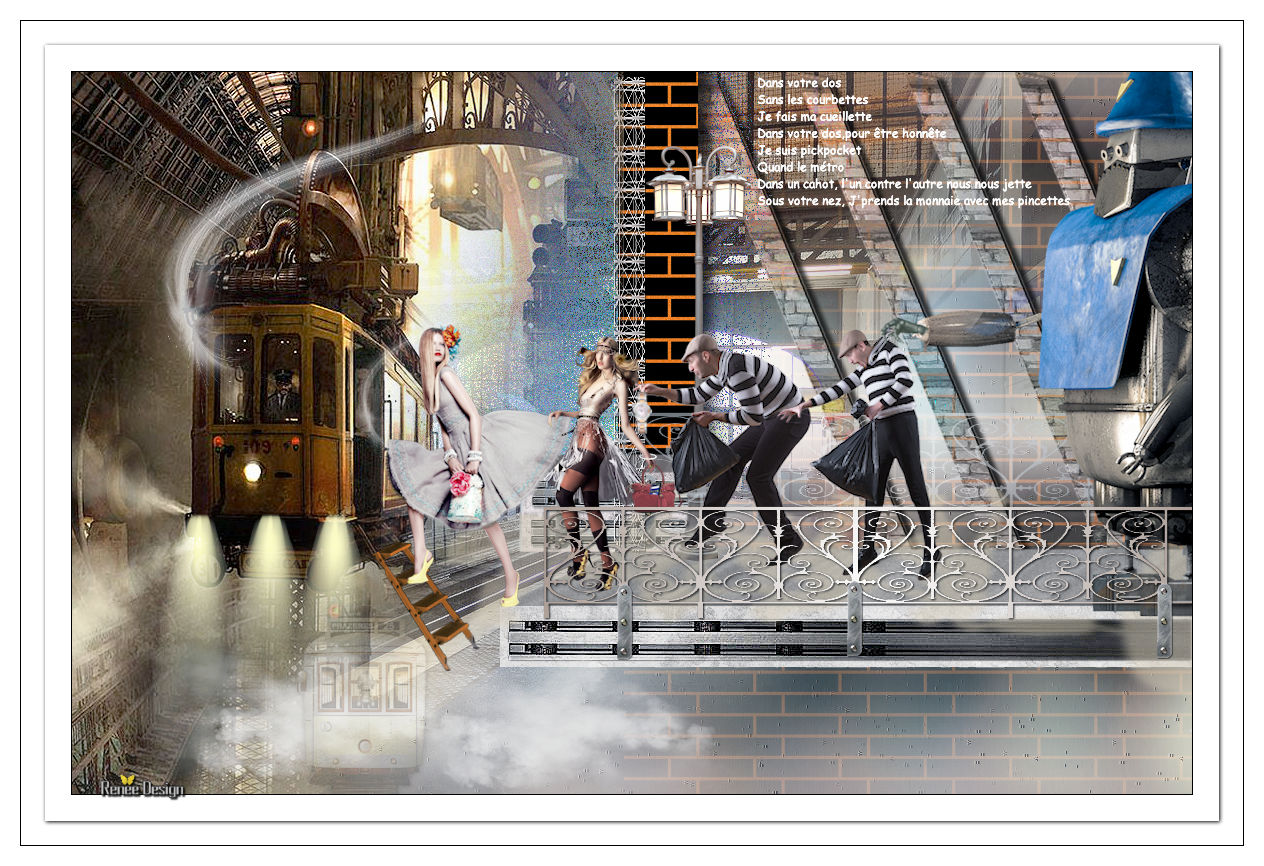
Pickpocket
Let's start the lesson. 
-
Let's start the lesson.
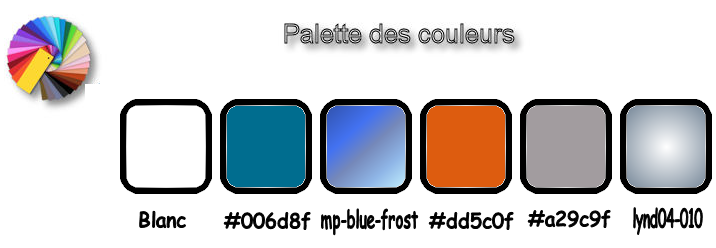
Used Colors
- Preparation - Color Palette: Set your Foreground color to #ffffff -Set your Background color to #006d8f
1.
Open the Image ‘’ Fond_PickPocket’’- Window - Duplicate (or shift+D) - Close the original and proceed on the copy -Promote Background Layer = Raster 1
2.
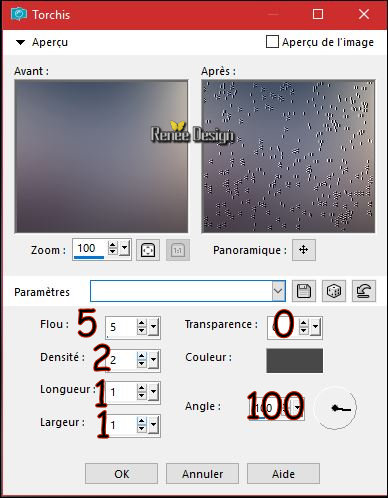
Effects – Texture Effects – Straw Wall / color
#555555
3.
Layers- Duplicate
4.
In your PSP >>> Click ( Shift + F2)
A Window Opens "Instant- Effects "
-
Click "All" -Choose in the menu = Retro - Retro Process2
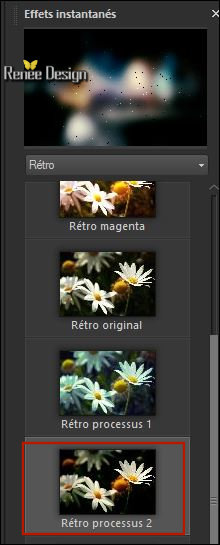
Double click and click on Close immediately
- Close Instant Effects
5.
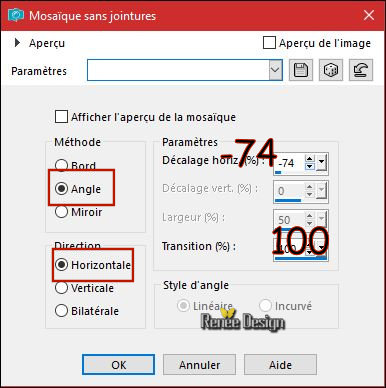
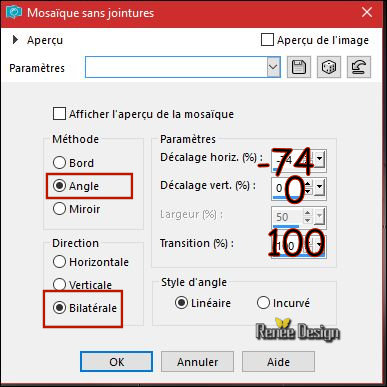
Effects- Image Effects- Seamless tiling use the settings below
6.
Effects –Plugins– Transparency –Eliminate
black
7. Effects- Image Effects- Seamless tiling use the settings below
8.Layers-Properties-Set the Blend Mode to " Screen " -Set the Opacity of this layer to 93%
9. Layers- Merge- Merge- Down
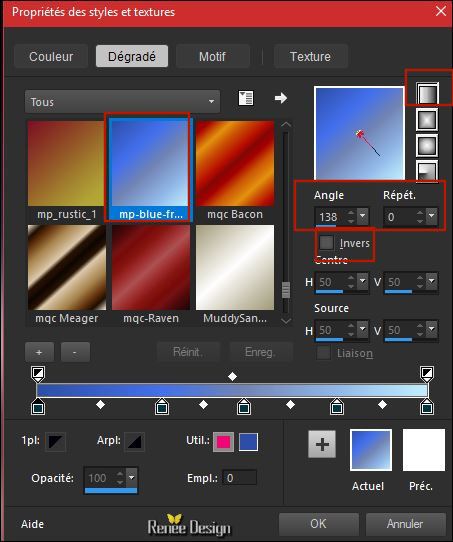
- Properties Foreground - Set your foreground material into gradient and select ‘’
mp-blue-frost’’ Prepare a linear gradient configured like this.
10. Layers- New Raster Layer
11.
Selections –load/save selection –load selection from disc and select my selection: ‘’ PickPocket_1’’
12. Activate Flood Fill Tool -fill the selection with the gradient
Selections- Deselect All
13.
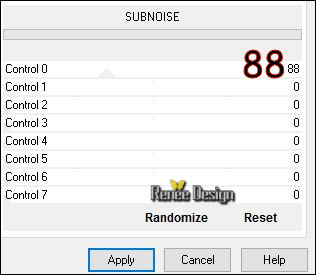
Effects –Plugins- Unlimited - [AFS IMPORT] – SUBNOISE
14.
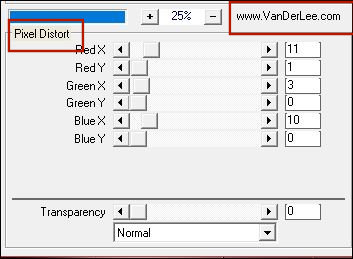
Effects -Plugins – Vanderlee – Unplugged X-
Pixel Distort
- Change the foreground color into #dd5c0f
15. Layers- New Raster Layer
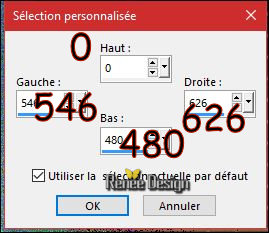
16.
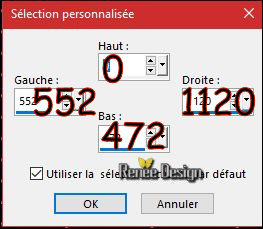
Activate Selection Tool -Custom Selection (S) -Rectangle with these settings
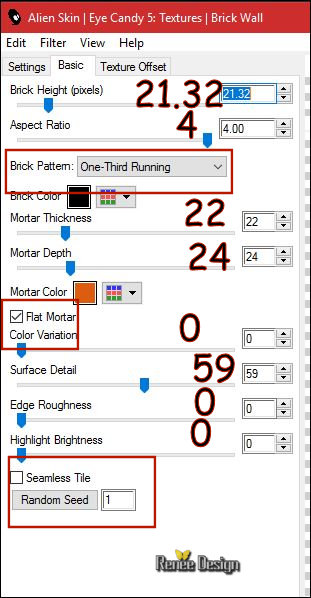
17. Effects
– Plugins– Eyecandy 5 textures – Brick Wall Use the settings below -Color
#010101 and #dd5c0f
18.
Layers-Properties-Set the Blend Mode to " Normal " -Set the Opacity of this layer to 46%
Selections- Deselect All
19. Layers- Arrange- Move Down
20. Layers- Duplicate
21. Image Flip- Flip Vertical (Image Flip in older versions of PSP)
22. Effects- Image Effects- Offset with these settings: H = 0 and V = -202
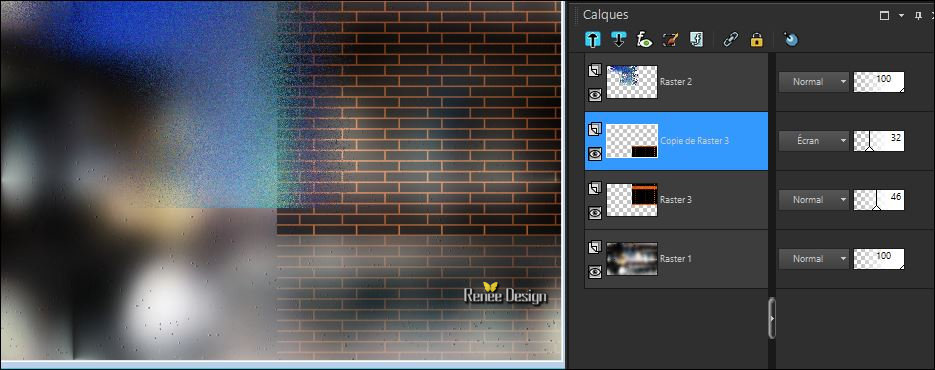
23.
Layers-Properties-Set the Blend Mode to " Screen " -Set the Opacity of this layer to 32%
Your work and Layer Palette look like this now-You should have this result
- Change the foreground color into #a29c9f
24. Layers- New Raster Layer
25.
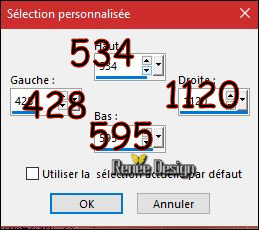
Activate Selection Tool -Custom Selection (S) -Rectangle with these settings
26. Activate Flood Fill Tool  and fill the selection with the foreground color and fill the selection with the foreground color
27. Effects
–Plugins– EyeCandy 5 –Nature – Rust use the settings below / Color
#a29c9f

Selections- Deselect All
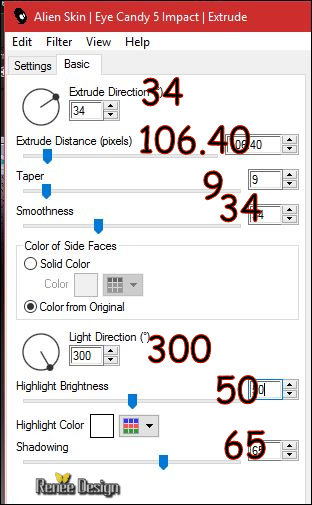
28. Effects
–Plugins-– EyeCandy 5 Impact – Extrude use the settings below
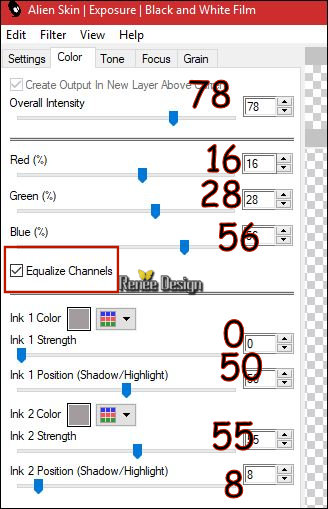
29.
Effects –Plugins –Alien skin Exposure
/Black-White-Film-Settings/User settings and choose my-Preset
‘’Pick_Pocket_exposure.f1s’’
30. Open your tube ‘’ Renee_PickPocket_Image 1’’
- Edit - Copy- Activate your work -Edit - Paste as a new layer.
31. Effects- Image Effects- Offset with these settings: H = 218 and V = - 207
32.
Layers-Properties-Set the Blend Mode to " Hard Light "
- Color Palette: Set your Foreground color to #dd5c0f -Set your Background color to #a29c9f
- To replace the top of the layer- palette
33. Layers- New Raster Layer
34.
Activate Selection Tool -Custom Selection (S) -Rectangle with these settings
35. Effects
–Plugins – Eyecandy 5 textures – Brick
Wall with the same settings
Selections- Deselect All
36. Effects – 3D Effects –Drop Shadow with these settings -5/14/85/18 black
- Activate in the layer palette Raster 3
37. Layers-Properties-Set the Blend Mode to " Screen " -Set the Opacity of this layer to 32%
- To replace the top of the layer- palette
38. Open the tube ‘’ Renee_PickPocket_Image 2.pspimage’’
- Edit - Copy- Activate your work -Edit - Paste as a new layer.
39. Effects- Image Effects- Offset with these settings: H = -21 and V =
-70
40. Layers- New Raster Layer
41.
Selections –load/save selection –load selection from disc and select my selection: ‘’ PickPocket_2’’
42. Activate Flood Fill Tool and fill the selection with the the background color
Selections- Deselect All
43. Effects- Edge Effects- Enhance
44. Effects – 3D Effects –Drop Shadow with these settings 1/1/100/1 black
45. Open the tube ‘’ Renee_tube_reverbere.png’’
- Edit - Copy- Activate your work -Edit - Paste as a new layer.
46. Effects- Image Effects- Offset with these settings: H = 68 and V = 79
47. Effects
– Illumination Effects - Lights /Color #fafafa /
Spot 3

- Activate in the layer palette Raster 3
48. Open the tube ‘Renee_PickPocket_gare.pspimage ‘’
(
Mask of Nikita is into the zip.
I've used it on the pictures. You can apply this mask to your own images if you want to have the same effect. )
- Edit - Copy- Activate your work -Edit - Paste as a new layer.
- Move Tool (M) move the tube on the top left corner
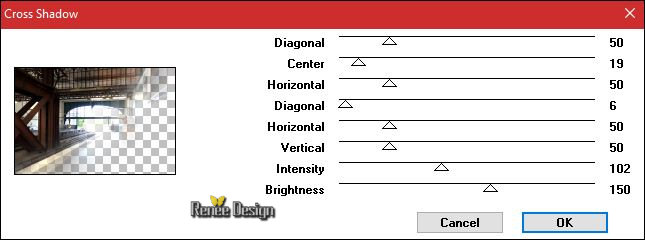
49. Effects
– Plugins – Graphic plus – Cross Shadow use the settings below
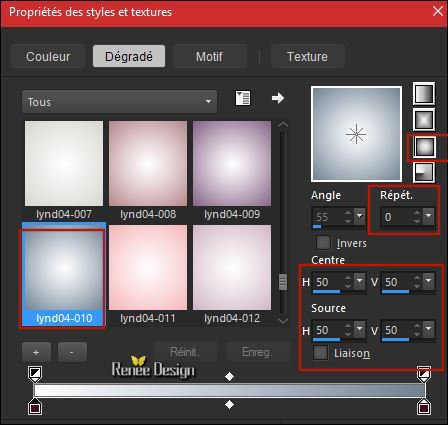
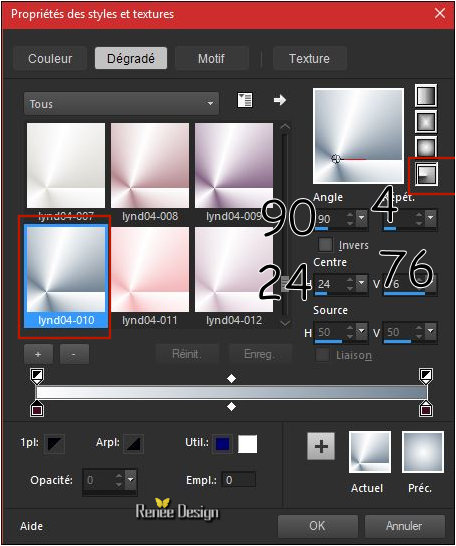
- Properties Foreground - Set your foreground material into gradient and select ‘’ lynd04-010’’
Prepare a sunburst gradient configured like this.
50. Layers- New Raster Layer
51.
Selections –load/save selection –load selection from disc and select my selection: ‘’ PickPocket_3’’
52. Activate Flood Fill Tool and fill the selection with the gradient
53. Effects-Texture Effects
- Sculpture – motif ‘’mauera’’ (Place it in your pattern folder of Pspfiles)

Selections- Deselect All
54. Effects – 3D Effects –Drop Shadow with these settings 1/6/65/6 black
55. Layers- Duplicate
56. Effects- Image Effects- Offset with these settings:
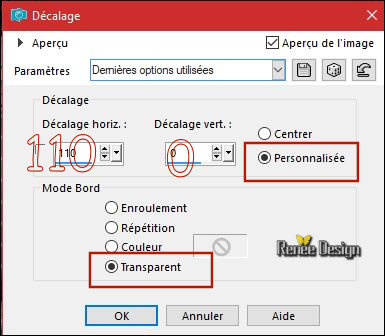
- Repeat :
Layers- Duplicate Effects- Image Effects- Offset with the same settings
- Repeat :
Layers- Duplicate Effects- Image Effects- Offset with the same settings
- You have four support beams
57. Layers-Merge- Merge Down (3 times)
- One layer for 4 support beams
58.
Layers-Properties-Set the Blend Mode to " Luminance "
Your work and Layer Palette look like this now-You should have this result
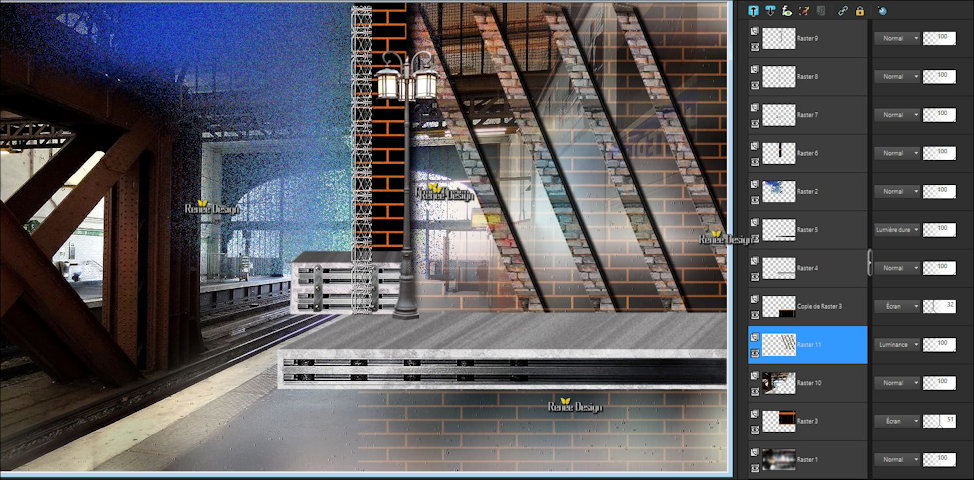
- To replace the top of the layer- palette
59. Open your tube ‘’ renee_ PickPocket
_train.pspimage’’
- Edit - Copy- Activate your work -Edit - Paste as a new layer.
60. Effects- Image Effects- Offset with these settings: H = - 290 and V =
50
61. Open the tube ‘’ Renee_PickPocket_marches’’
- Edit - Copy- Activate your work -Edit - Paste as a new layer.
62. Effects- Image Effects- Offset with these settings: H = -206 and V = -
174
63. Layers- New Raster Layer
64.
Selections –load/save selection –load selection from disc and select my selection: ‘’ PickPocket_4’’
65. Activate Flood Fill Tool and fill the selection with the gradient
Selections- Deselect All
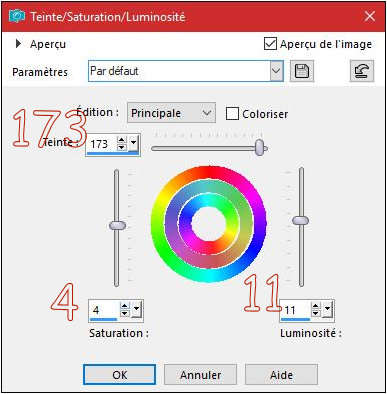
66. Hue and Saturation-Hue/Saturation/Lightness
67. Effects – 3D Effects –Drop Shadow with these settings 1/1/100/3 black
68. Layers- New Raster Layer
69.
Selections –load/save selection –load selection from disc and select my selection: ‘’ PickPocket_5’’
70. Activate Flood Fill Tool and fill the selection with the gradient
Selections- Deselect All
71.
Set the Opacity of this layer to 51%
- Layers- Arrange- Move Down
Stay on this Layer
72. Open the tube ‘’ Renee_tubes_Pickpoket_personnages .pspimage’’
- activate the layer "pickpocket "of the tube -Edit - Copy- Activate your work -Edit - Paste as a new layer.
(
The other layers are the people tube I've used in this lesson ..
To change the order of people. Respect the already adjusted size of the tube, which is very important.)
-
Place the foot of the first woman exactly on the stairs of the train.
73. Effects
– Plugins – EyeCandy 5 Impact –Perspective shadow use the settings below
/Color #cec2a6/Preset''Pickpocket_shadows''
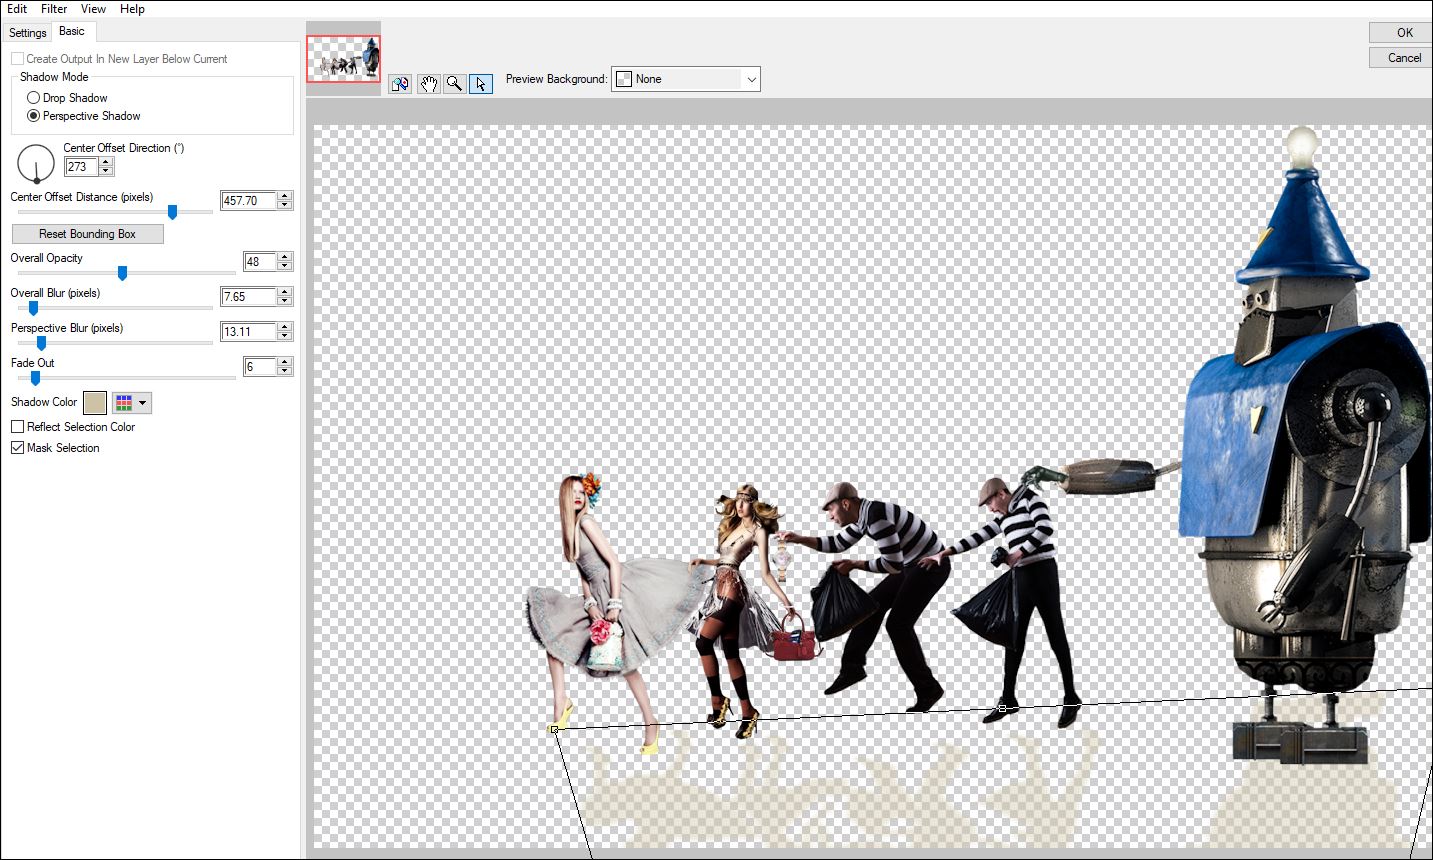
- To replace the top of the layer- palette
74. Open the tube ‘’Renee_PickPocket_barres’’
- Edit - Copy- Activate your work -Edit - Paste as a new layer.
- Place on the edge to secure the fence //(you can see why we had to place the image on this exact location)
75. Layers- New Raster Layer
76.
Selections –load/save selection –load selection from disc and select my selection: ‘’ PickPocket_6’’
-Change the foreground color into #ffffff
77. Activate Flood Fill Tool and fill the selection with the foreground color
78. Layers-Properties-Set the Blend Mode to " Screen " -Set the Opacity of this layer to 67%
79. Layers- New Raster Layer
80.
Selections –load/save selection –load selection from disc and select my selection: ‘’ PickPocket_7’’
81. Activate Flood Fill Tool and fill the selection with the foreground color #ffffff
Selections- Deselect All
82. Open the tube ‘’ Renee_PickPoket_lumières’’
- Edit - Copy- Activate your work -Edit - Paste as a new layer. / Place in front of the train (see the screen underneath)
83. Open the tube ‘’ Renee_PickPocket_fumee’’
- Edit - Copy- Activate your work -Edit - Paste as a new layer.
- Move the tube as shown in the example below
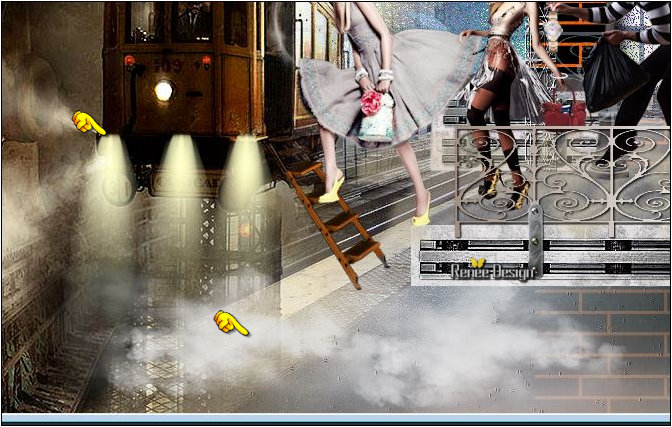
84. Open the tube ‘’ Renee_PickPocket_tram.pspimage’’
- Image
Resize to 30%
- Edit - Copy- Activate your work -Edit - Paste as a new layer.
- Move on the bottom in front of the train
85.
Set the Opacity of this layer to 28%
86. Layers- Merge- Merge Visible
- Properties Foreground - Set your foreground material into gradient and select ‘’ lynd04-010’’ Prepare a radial gradient configured like this.
87. Layers- New Raster Layer
88. Activate Flood Fill Tool fill the layer with the gradient
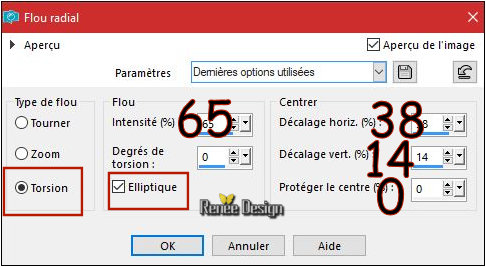
89. Adjust-Blur-Radial Blur use the settings below
90. Image - Mirror - Mirror Horizontal (Image - Mirror in older versions of PSP)
91.
Layers-Properties-Set the Blend Mode to " Soft Light " -Set the Opacity of this layer to
65%
92. Image - Add borders-Symmetric checked 1 pixel black
93. Image - Add borders-Symmetric checked 50 pixels #ffffff
94. Image - Add borders-Symmetric checked 1 pixel black
95. Image - Add borders-Symmetric checked 20 pixels #ffffff
96. Selections-Select All
97.
Selections- Modify - Contract 55 pixels
98. Effects
– 3D Effects –Drop Shadow with these settings 1/1/100/6 black
Selections- Deselect All
Save as JPG
I hope you enjoyed this lesson
Renée
This lesson was written by Renée 08/07/2017
Edited and Update
2017
*
Any resemblance with an existing lesson is a coincidence
* Do not forget to thank the people who work with us and for us I have appointed the tubeurs and translators
Thanks Renée
*
| 
 Translations


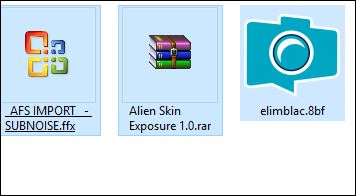


 If a plugin supplied appears with this icon it must necessarily be imported into Unlimited *

 All rights reserved