|
Let's start the lesson
Pâques 2022

- Preparation
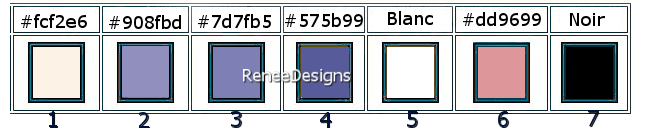
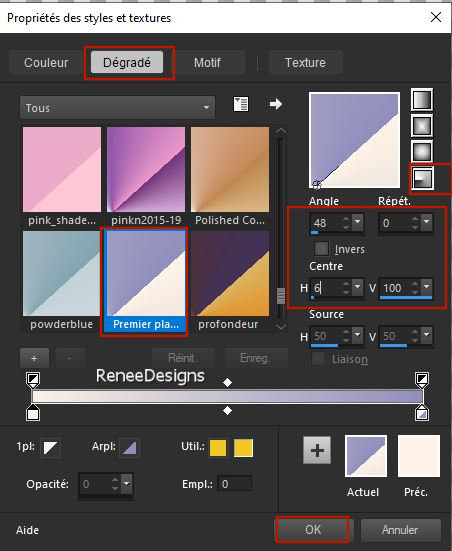
-Material Properties: Set your Foreground color to color #fcf2e6= 1- Set your Background color to color # 908fbd= 2
- Prepare a Foreground/Background-Radial Gradient configured like this
1. File: Open a new transparent image in this size: 1100 x 700 Pixels
2. Activate Flood Fill Tool
 –
Fill the layer with the gradient –
Fill the layer with the gradient
3. Effects – Distortion Effects– Pinch -Strength % 100
4. Effects -Plugins –
Unlimited 2.0 – Toadies – Weaver using the default settings
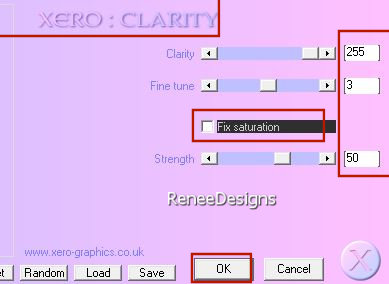
5. Effects- Plugins – Xero – Clarity use the settings below
6. Effects – Edge Effects – Enhance
7. Effects –Plugins-
Unlimited 2.0 – ICNET-Filters - Tile & Mirror - Mirror
(vertical)
8. Layers- Duplicate
9. Image - Mirror - Mirror Horizontal (Image - Mirror in older versions of PSP)
10. Layers-Properties- Lower the Opacity to 48%
11. Layers- Merge- Merge Down
12. Effects – Edge Effects – Enhance
13. Layers- New Raster Layer
14.
Selections –load/save selection –load selection from disc and select my selection: ‘’Paques-2022-1’’
15. Foreground Properties > close the gradient > we now have the color again
Activate Flood Fill Tool
– Fill the selection with the Foreground color #fcf2e6=1 (Click twice into the selection)

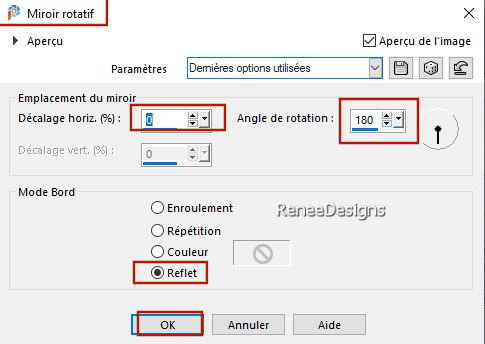
16. Effects – Reflection Effects – Rotating Mirror use the settings below
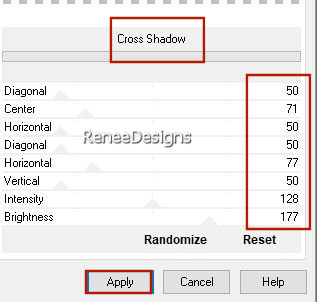
17. Effects –Plugins-
Unlimited 2.0 – Graphic Plus – Cross Shadow use the settings below
18. Layers- Duplicate
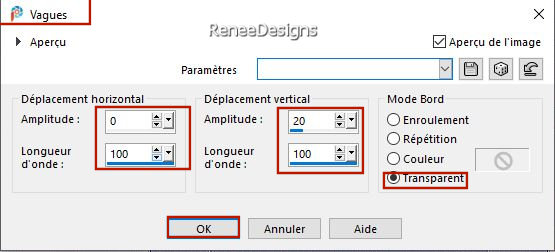
19. Effects- Distortion Effects- Wave use the settings below
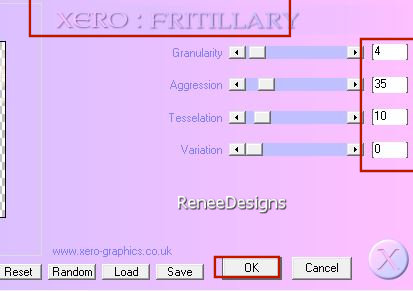
20. Effects – Plugins – Xero – Fritillary use the settings below
In the Layer-Palette- Activate the layer underneath ( Raster 2)
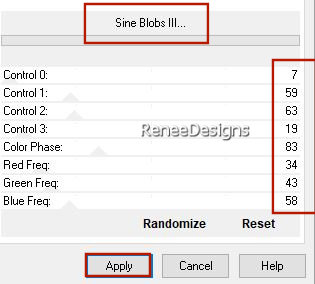
21. Effects -Plugins-
Unlimited 2.0- Liquid Silk Filtersut Vol. II – Sine Blobs III use the settings below
- Activate the top of the layer palette
22. Layers- New Raster Layer
23. Selections –load/save selection –load selection from disc and select my selection: ‘’Paques-2022-2’’
24. Material Properties: Set your Foreground color to color #7d7fb5=3
Activate Flood Fill Tool
–
Fill the selection with the Foreground color=3
25. Effects –Plugins-
Unlimited 2.0- Graphic Plus – Cross Shadow using the default settings
26.
Layers- New Raster Layer
27. Selections –load/save selection –load selection from disc and select my selection: ‘’Paques-2022-3’’
28.
Activate Flood Fill Tool
–
Fill the selection with the Foreground color=3
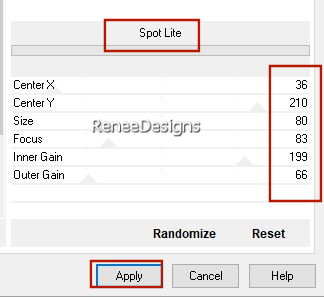
29. Effects –Plugins-
Unlimited 2.0 - Graphic Plus- Spot Lite use the settings below
30. Layers- Arrange- Move Down
- Activate the top of the Layer Palette
31. Layers- New Raster Layer
32. Selections –load/save selection –load selection from disc and select my selection: ‘’Paques-2022-4’’
33. Material Properties: Set your Foreground color to color # fcf2e6=1
Activate Flood Fill Tool
- Fill the selection with the Foreground color =1
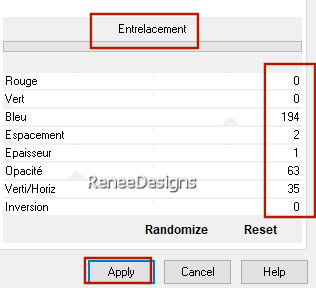
34. Effects –Plugins-
Unlimited 2. 0 - Jeux de lignes – Entrelacement use the settings below
-Layers- Arrange- Move Down
35. Layers- New Raster Layer
36. Selections –load/save selection –load selection from disc and select my selection: ‘’Paques-2022-5’’
37. Material Properties: Set your Foreground color to color # 575b99=4
Activate Flood Fill Tool
–
Fill the selection with the Foreground color =4
38. Effects –Plugins-
Unlimited 2.0 - Filter Factory Gallery A-Marble Madness
One with these settings: 123/0/0/0
- Activate the top of the Layer Palette
39. Layers- New Raster Layer
40. Selections –load/save selection –load selection from disc and select my selection: ‘’Paques-2022-6’’
41. Activate Flood Fill Tool
–
Fill the selection with the Background color =2
42. Effects – 3D-Effects–Drop Shadow with these settings: -4/ 20 /80/44 Color Black
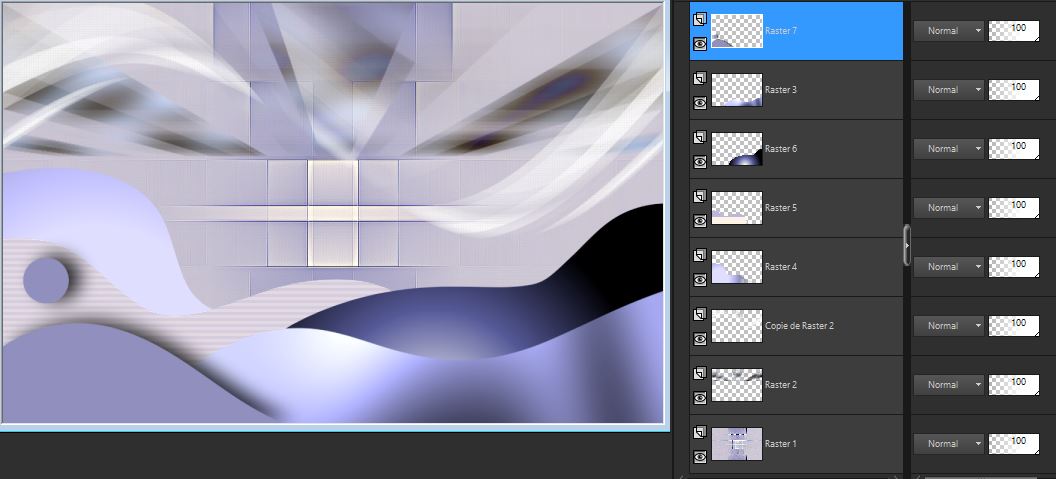
Your work and Layer Palette look like this now-You should have this result
43. Open the Tube‘’ Renee-Tubes-Paques-2022-
Image 1’’ - Edit - Copy- Activate your work -Edit - Paste as a new layer
44. Pick Tool: (K) on your keyboard -Enter these parameters on the toolbar
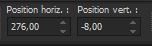 276 / - 8
Press ( M ) to close the Pick Tool
45. Open the Tube ‘’ Renee-Tubes-Paques-2022-
Image 2’’ -Edit - Copy- Activate your work -Edit - Paste as a new layer
46. Layers - Arrange - Move Down and repeat one more time
47. Pick Tool: (K) on your keyboard -Enter these parameters on the toolbar
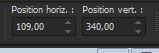 109
/ 340 109
/ 340
Press ( M ) to close the Pick Tool
- Activate the top of the Layer Palette
Put the image aside for now, we will need it later
48. File: Open a new transparent image in this size: 301 pixels by 303 Pixels
49. Selections –load/save selection –load selection from disc and select my selection: ‘’Paques-2022-lapin 1’’
50.Material Properties: Set your Foreground color to color #ffffff=5
Activate Flood Fill Tool
-Fill the selection with the Foreground color =5
Do not add a new layer for the following selections
This selection will cancel the previous one
51. Selections –load/save selection –load selection from disc and select my selection: ‘’Paques-2022-lapin 2’’
52. Activate Flood Fill Tool-
Fill the selection with the Foreground color =5
53. Selections –load/save selection –load selection from disc and select my selection: ‘’Paques-2022-lapin 3’’
54. Material Properties: Set your Foreground color to color #dd9699=6
Activate Flood Fill Tool
–
Fill the selection with the Foreground color =6
55. Selections –load/save selection –load selection from disc and select my selection: ‘’Paques-2022-lapin 4’’
56. Activate Flood Fill Tool
–
Fill the selection with the Foreground color =6
57. Selections –load/save selection –load selection from disc and select my selection: ‘’Paques-2022-lapin 5’’
58. Material Properties: Set your Foreground color to color #000000=7
Activate Flood Fill Tool
–
Fill the selection with the Foreground color =7
59. Layers- New Raster Layer
60. Layers- Arrange- Move Down
61. Selections –load/save selection –load selection from disc and select my selection: ‘’Paques-2022-lapin 6’’
62. Activate Flood Fill Tool
-choose a light color to match your work
Renée chose this color #bdb1bb- Fill the selection with the color of your choice (click three times in the selection)
63. Layers- Merge- Merge- Visible
EDIT- COPY
-Activate the Image you minimized at step 47
64. Edit - Paste as a new layer (Image is still in your PSP memory)
65. Layers- Arrange- Move down -the layer comes under raster 7 and place the tube to your liking
66. Now for the embellishment of our work.Renée has a separate folder with tubes that you can use.
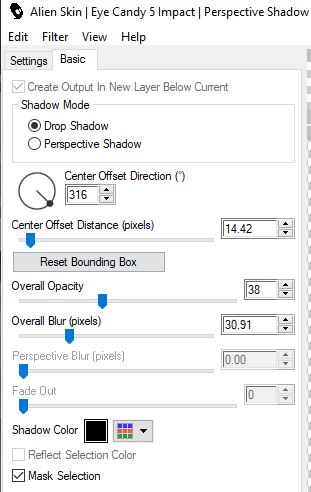
67. On the tubes - Drop shadow of your choice
Renée took this shadow:
Effects-Plugins-Alien Skin EyeCandy
5 - Impact -Perspective Shadow use the settings below
68. Layers- Merge- Merge- Visible
EDIT- COPY
69. Open the tube ‘’Cadre’’ in your Psp
70.
Select the inside with the Magic Wand
71. Selections –
Modify– Expand with 1 Pixel
72. Layers- New Raster Layer
73. Layers- Arrange- Move Down
74. Edit - Paste Into Selection (Image is still in your PSP memory)
75.Paste the author's watermark on your work and your own watermark
Layers- Merge- Merge All (flatten)
76. Image Resize to 999 Pixels Width
- Save as JPG

That's it - Thank you / I hope you enjoyed this lesson
Renée
This lesson was written by Renée 15/03/2022
Edited and Update
in 2022
*
*
Any resemblance with an existing lesson is a coincidence
* Do not forget to thank the people who work with us and for us -I have appointed the tubeurs and translators
Thanks
|


 Translations